Lamb...on the Loom
  • Home
  • SHOP
    • Scarves
    • Shawls & Wraps
    • Wool Scarves & Shawls
    • Blazing Shuttles
    • Throws & Baby Blankets
    • For the Home
    • Odds & Ends
    • Shop All Handwovens
    • Schacht Equipment
    • Gift Cards
  • Blog
  • Events
  • Gallery
    • Scarves & Shawls
    • Baby
    • For the Home
    • The Wedding
    • Komen
  • About
    • Storyboard

​A Visit to John C Campbell Folk School

8/27/2016

0 Comments

 
Picture

​Earlier this month, my friends Jackie, Sue and I ventured to John C Campbell for our first ever adventure there.  We had signed up months ago for a class on Deflected Doubleweave (“Masters of Deflection” with Elisabeth Hill).  And a wonderful adventure it was!
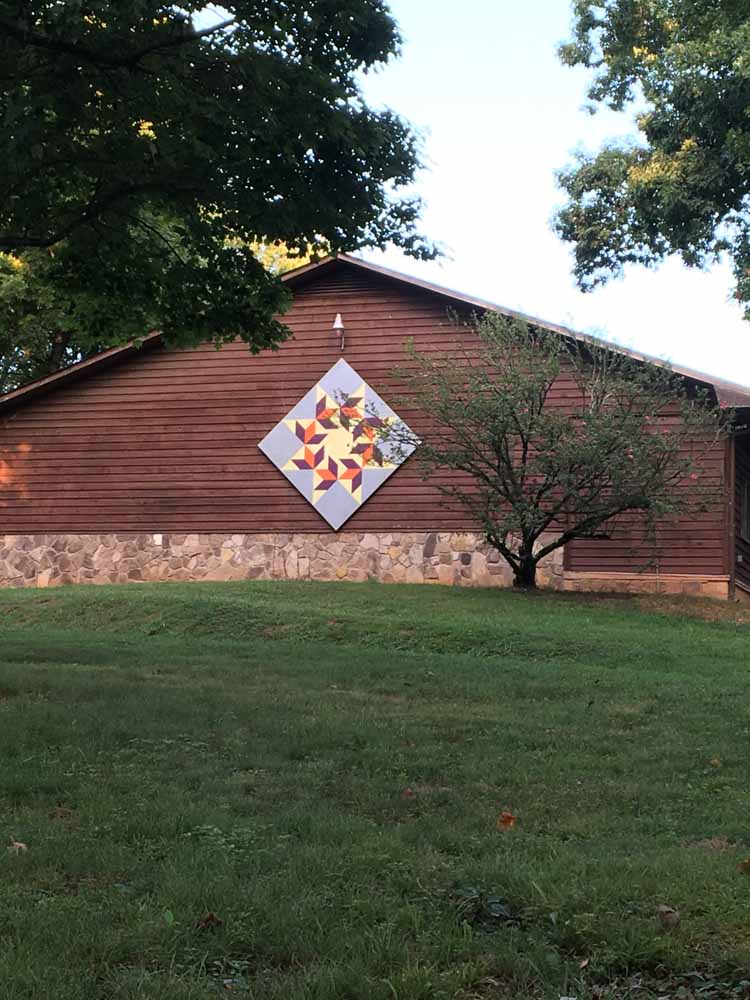
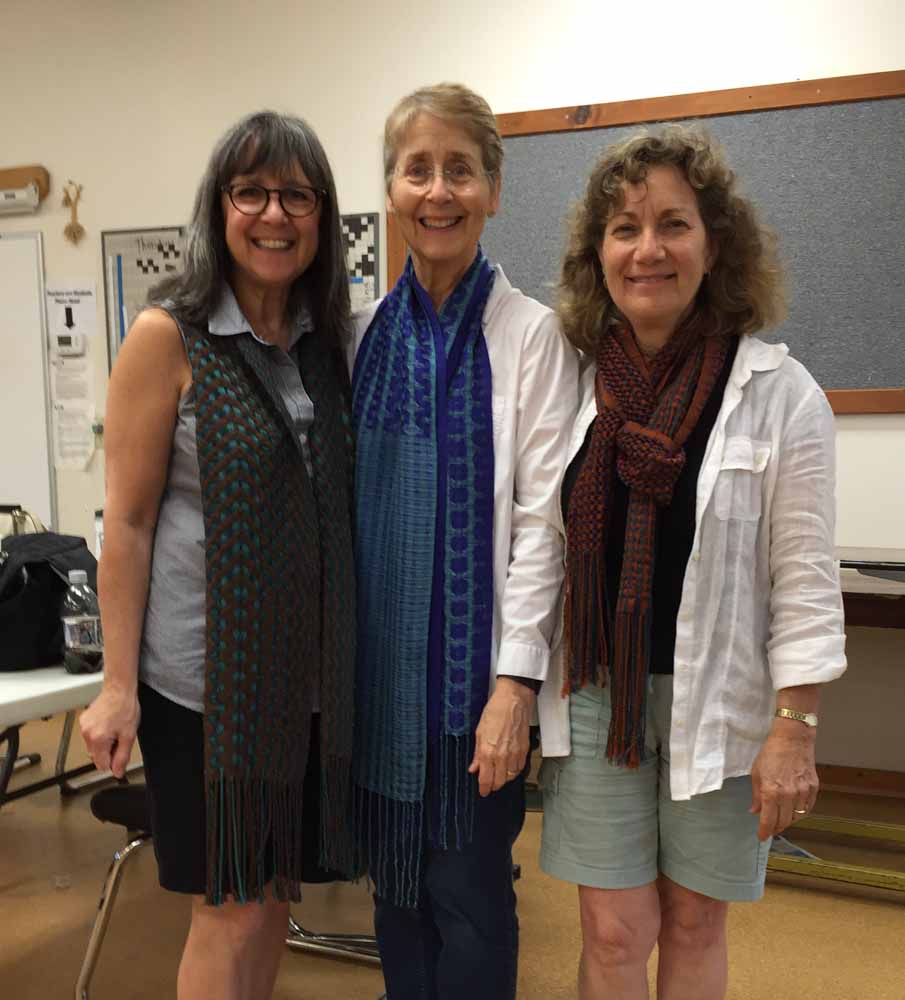
We met in Cary so we could drive to the mountains together.  Sue came in from Connecticut (she had planned to fly, but had to drive because her flight was cancelled) and Jackie came up from Pinehurst).  We packed up the car and headed out on our road trip with no real idea of what to expect.
​
The drive took us about 6 hours, and the ride up the mountains was beautiful.  Finally we arrived in Brasstown, NC (population 46) which is situated in the far west corner of the state right around the corner from Clay’s Corner, home of the infamous New Year’s Eve Possum Drop (you have heard of the Possum Drop, right?)
Picture

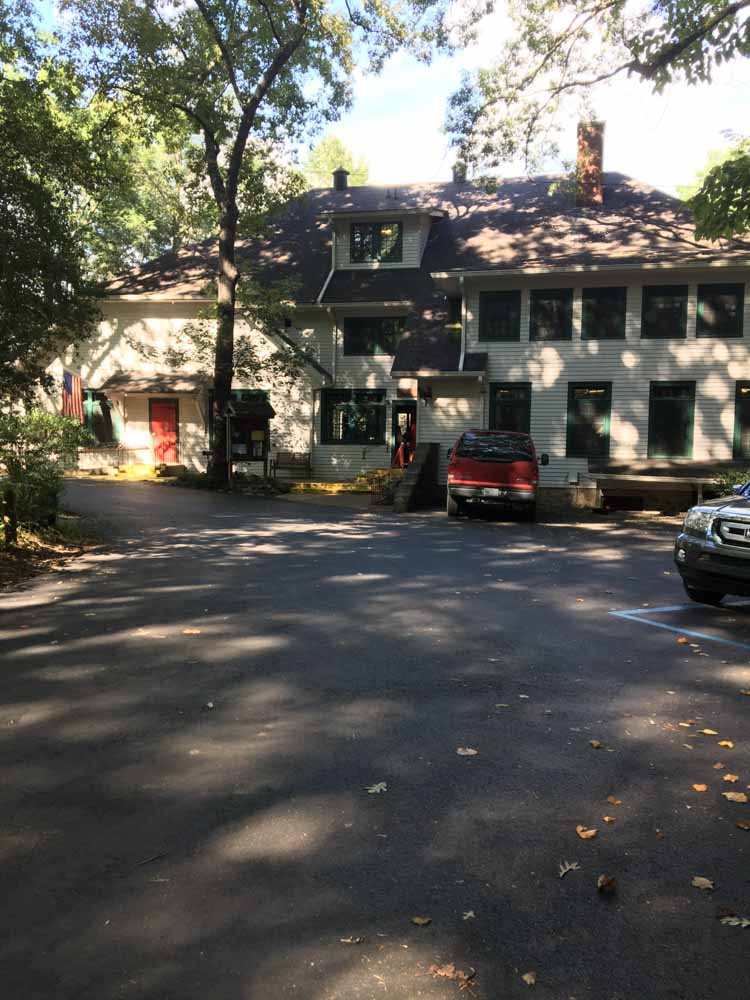
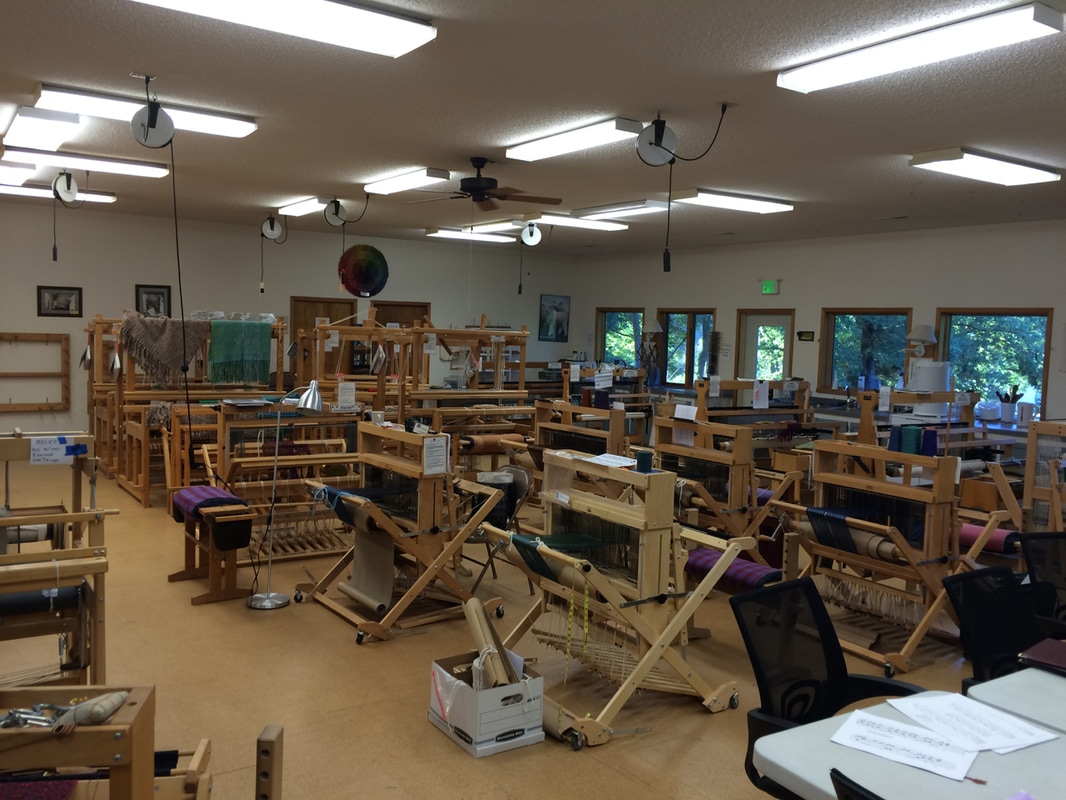
​The Folk School was founded in 1925.  It offers year-round 5-day and weekend classes on a large variety of topics including music, arts, crafts, and some unexpected subjects.  During the week that we were there, 140 people attended classes in weaving, nuno felting, enameling, jewelry making, Italian cooking, writing, mandolin playing, wood turning, wooden mantle carving, blacksmithing, watercolors, chair caning, woodworking, and book arts.
Picture
Keith House, the administrative building
Picture
View off the back porch of Keith House
Picture
No explanation needed
Classes actually began on Friday evening after registration and dinner in the dining room.  After that we had daily class for four days each morning and afternoon with optional sessions in the evening after dinner. We were treated to stories and music at Morning Song each day before breakfast.  All meals were served in the dining room.  There were many optional activities at all times of the day including morning walks, tours of the campus and studios, chair massages, clogging demonstrations, contra dances, and the list goes on. ​​


​The classes were held in separate buildings scattered around the campus.  The weaving building was very large and very well equipped.  We had a class of 12, all weaving on 8 harness looms, and there were many looms that were not used.  The yarn “closet” was the size of a small apartment and their weaving library is quite enviable.  I don’t think anyone wanted for a piece of equipment that they did not have, and I did not hear any complaints about the looms – Baby Wolfs, Mighty Wolfs, Glimakras, Louets, all in good condition.
Picture
The Weaving Building
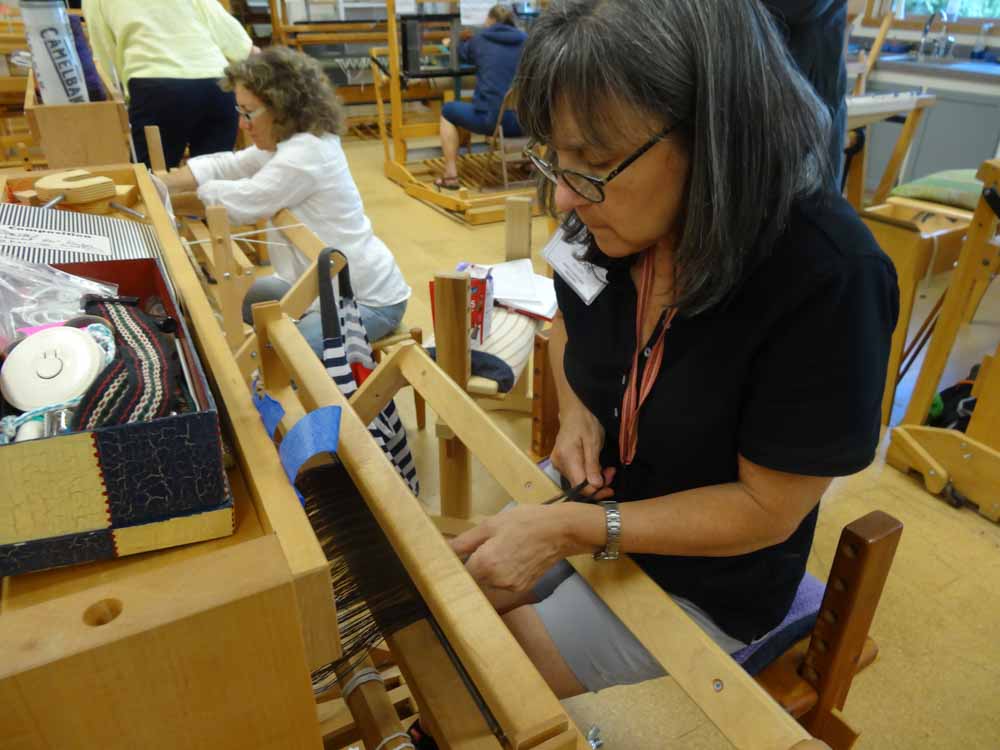
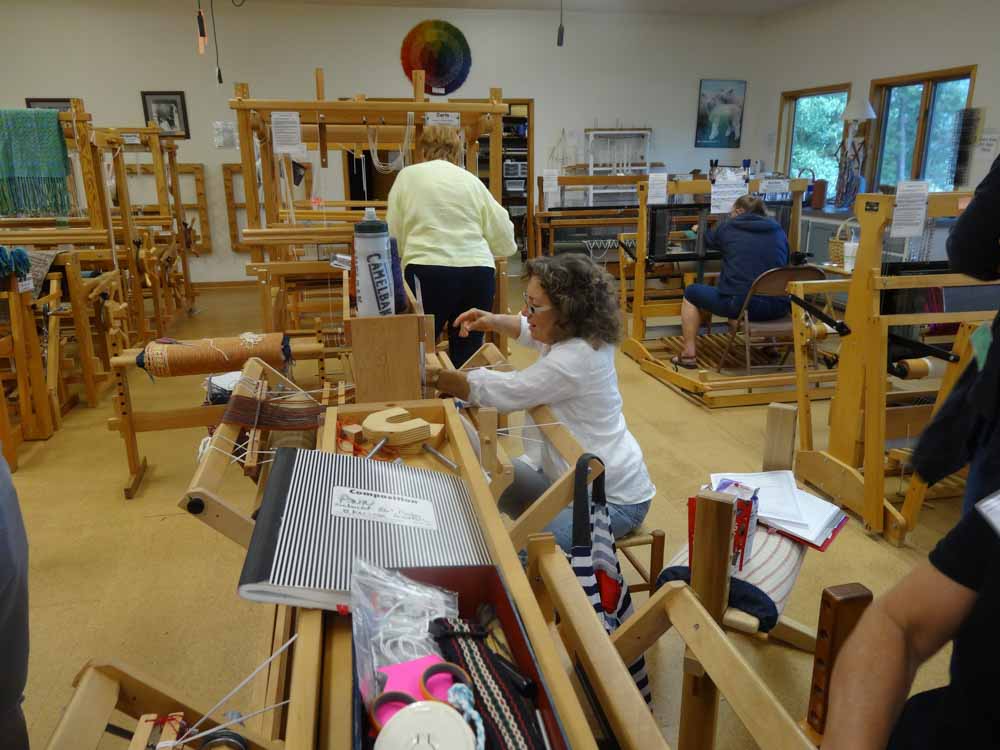
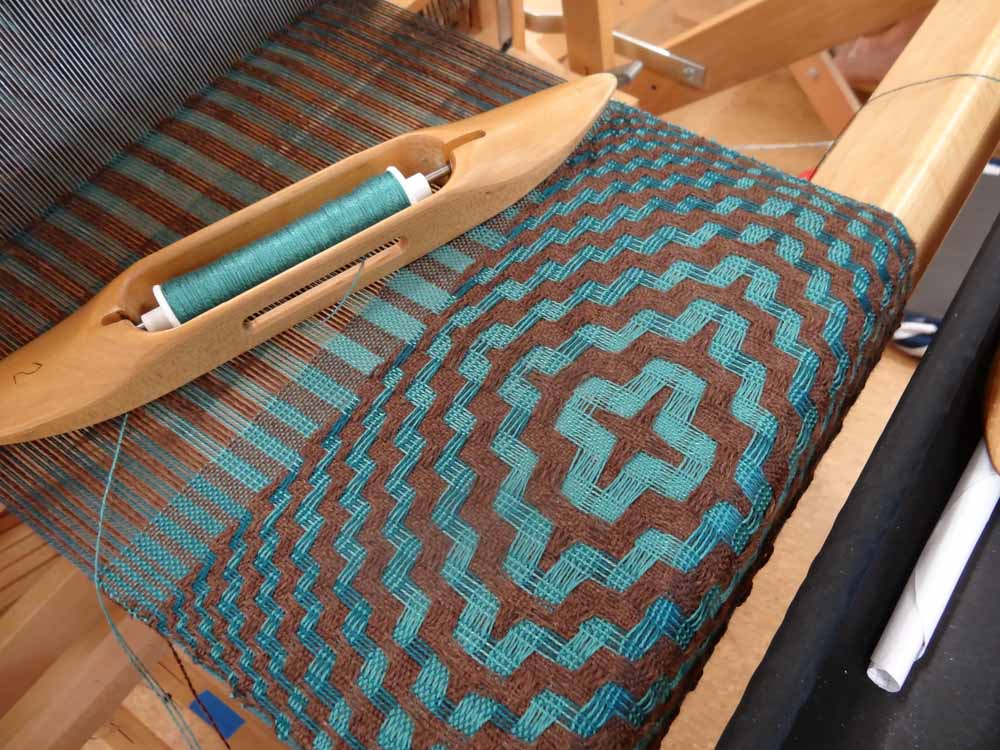
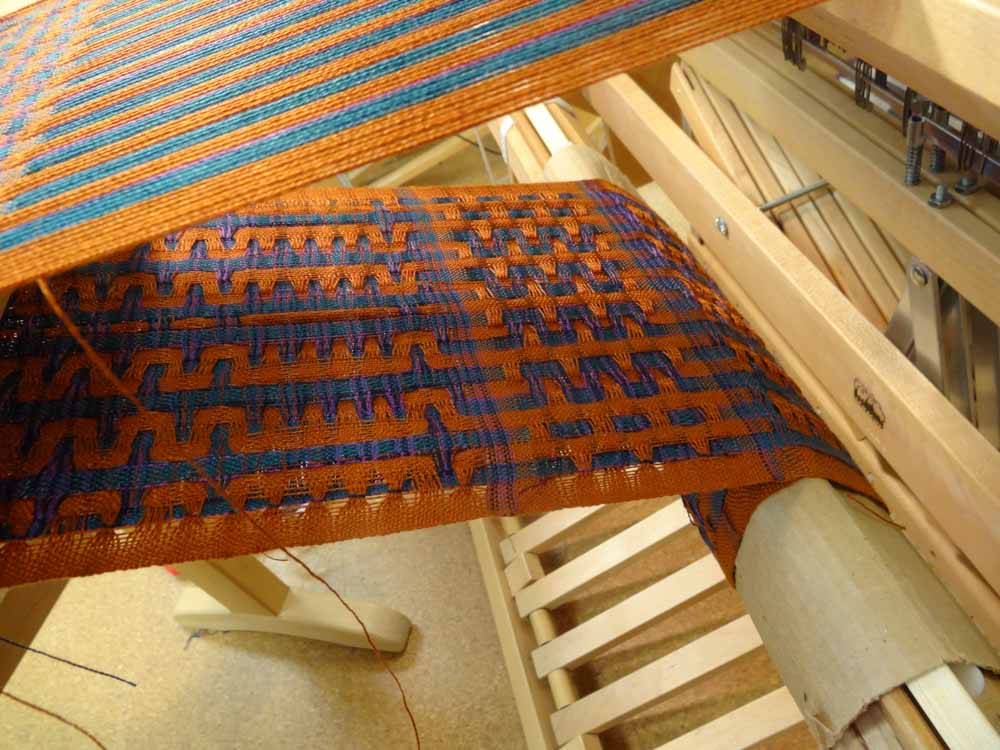
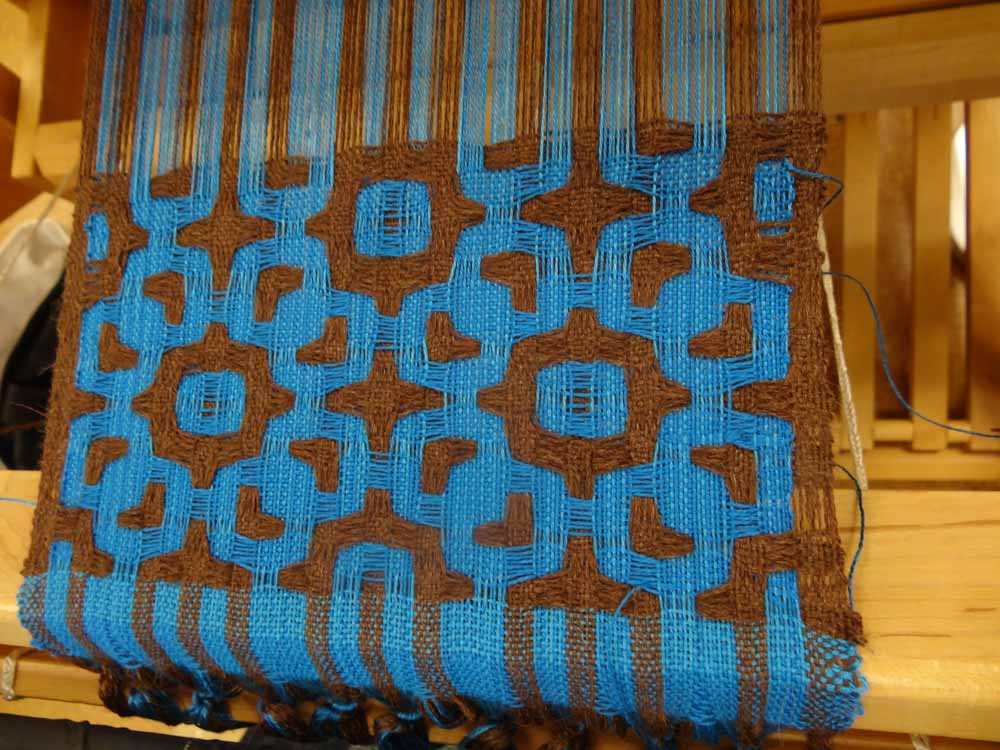
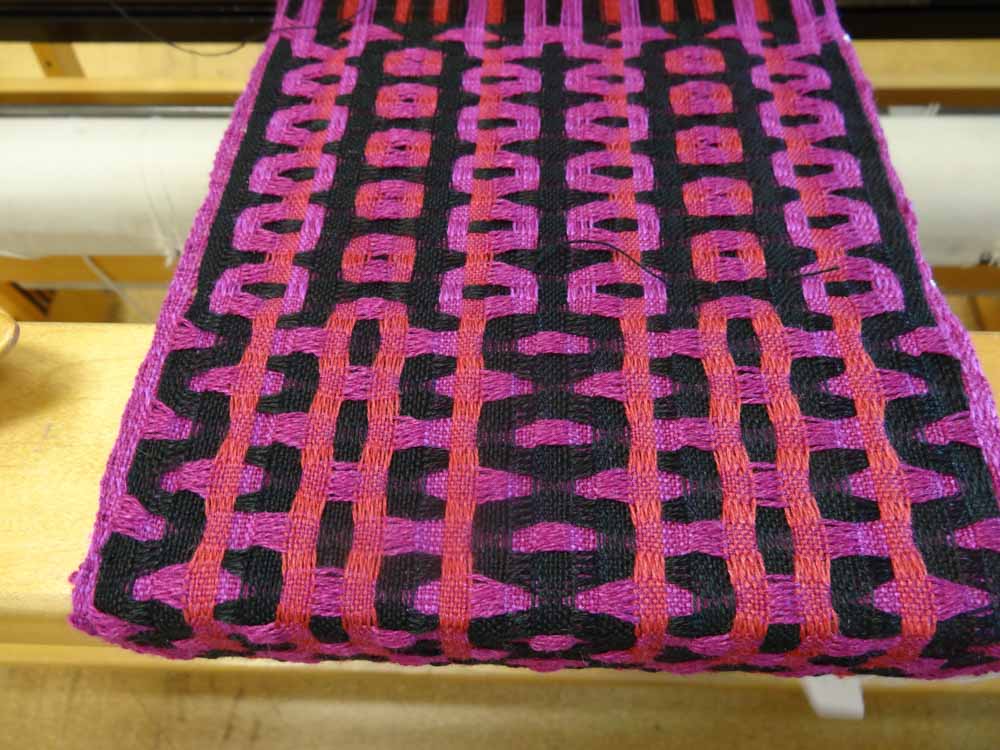
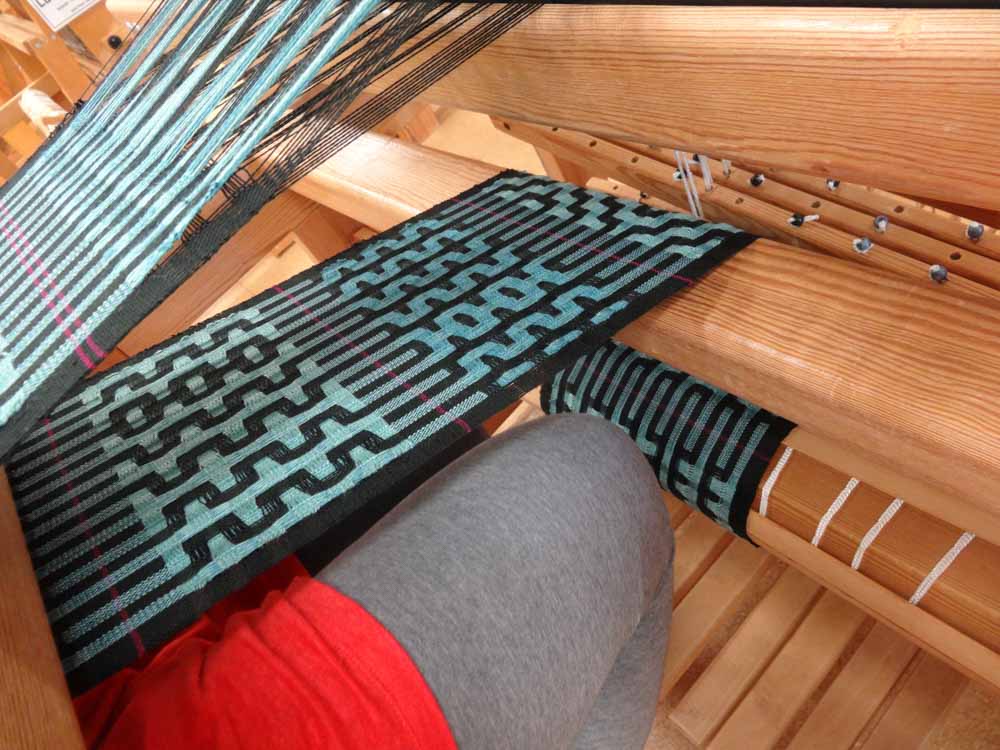
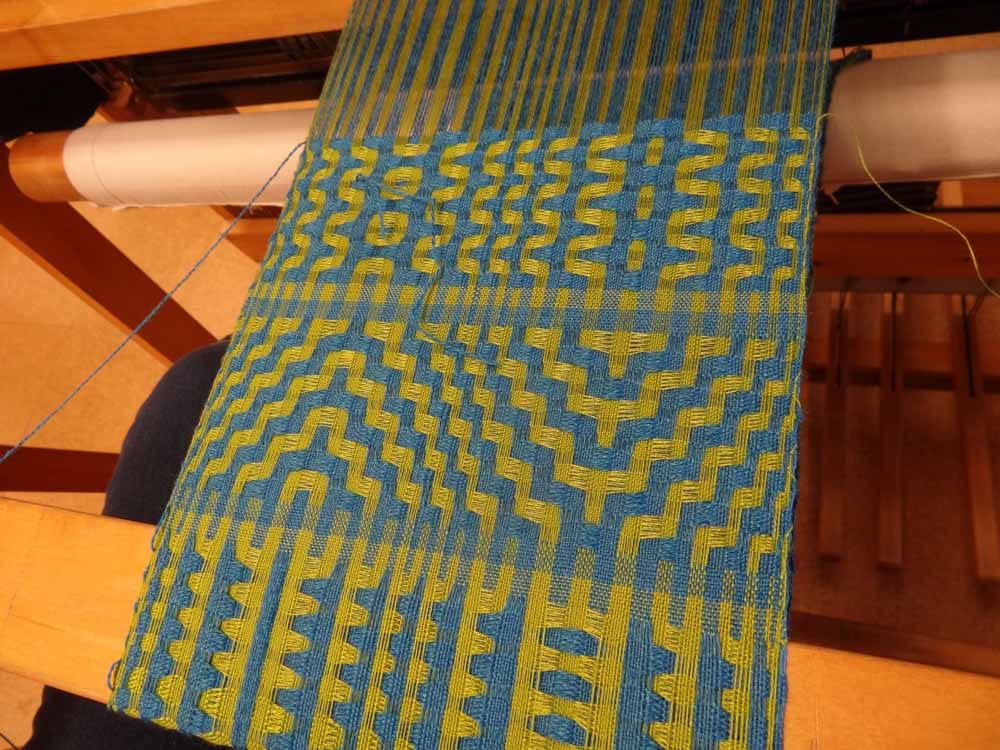
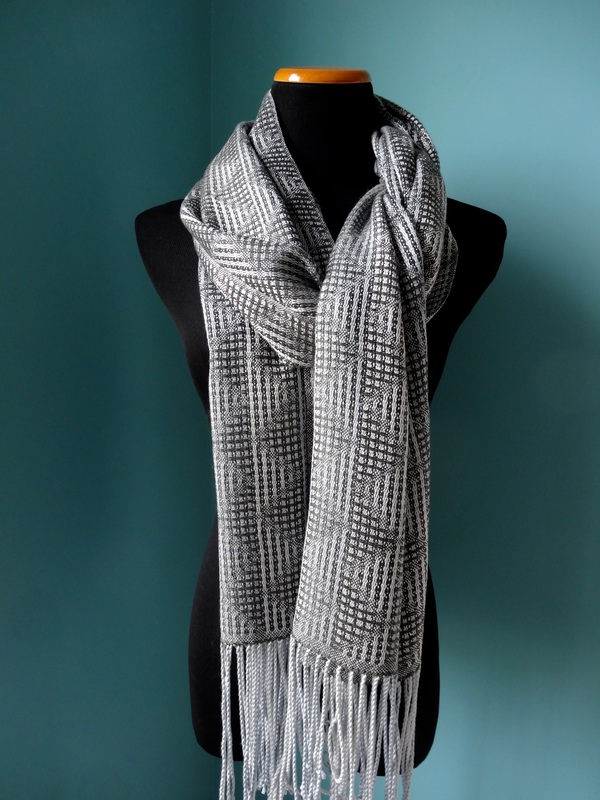
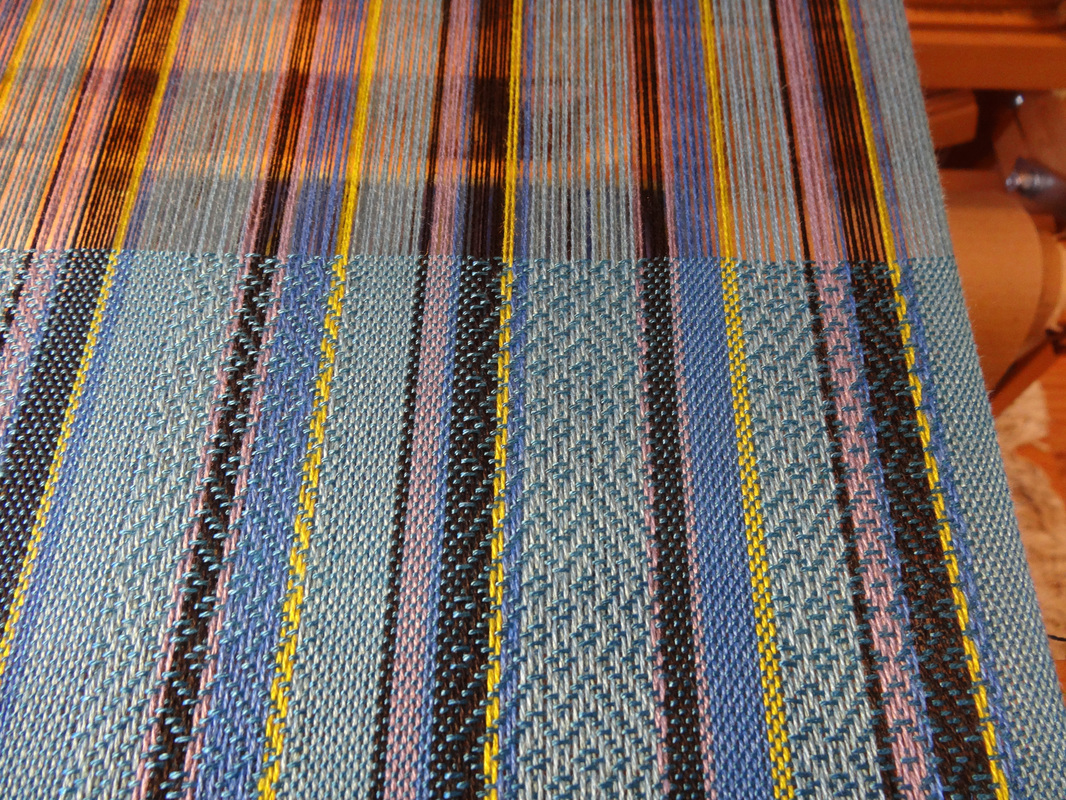
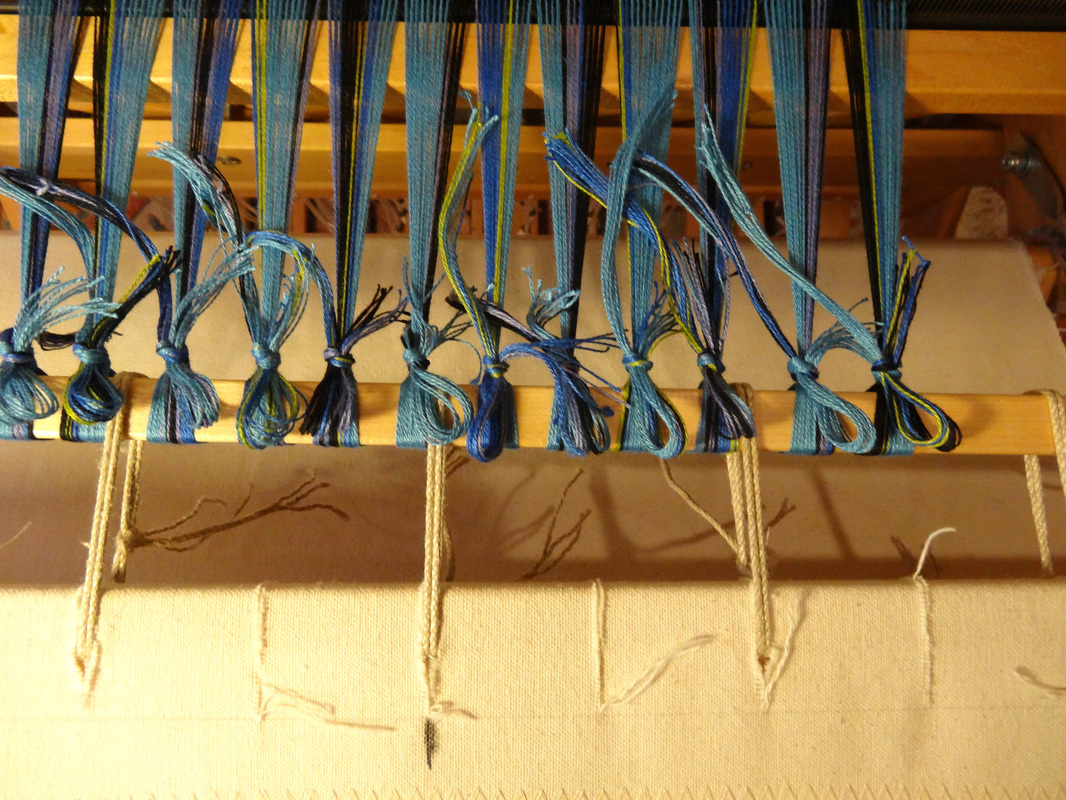
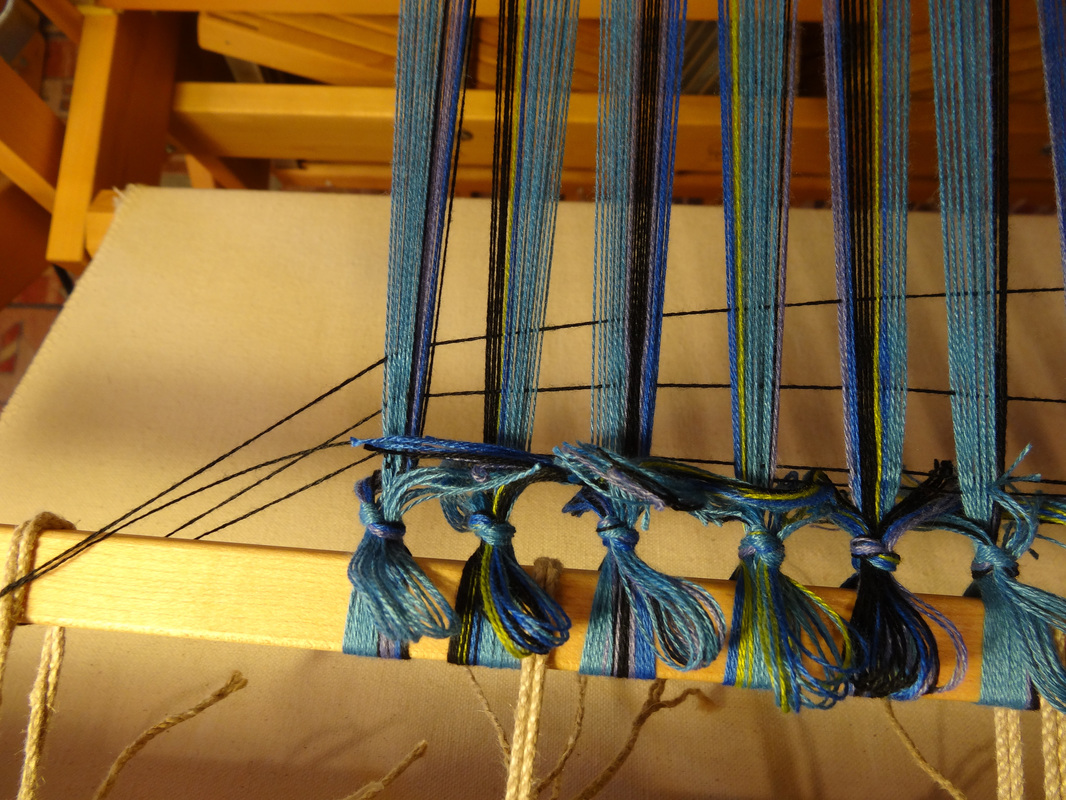
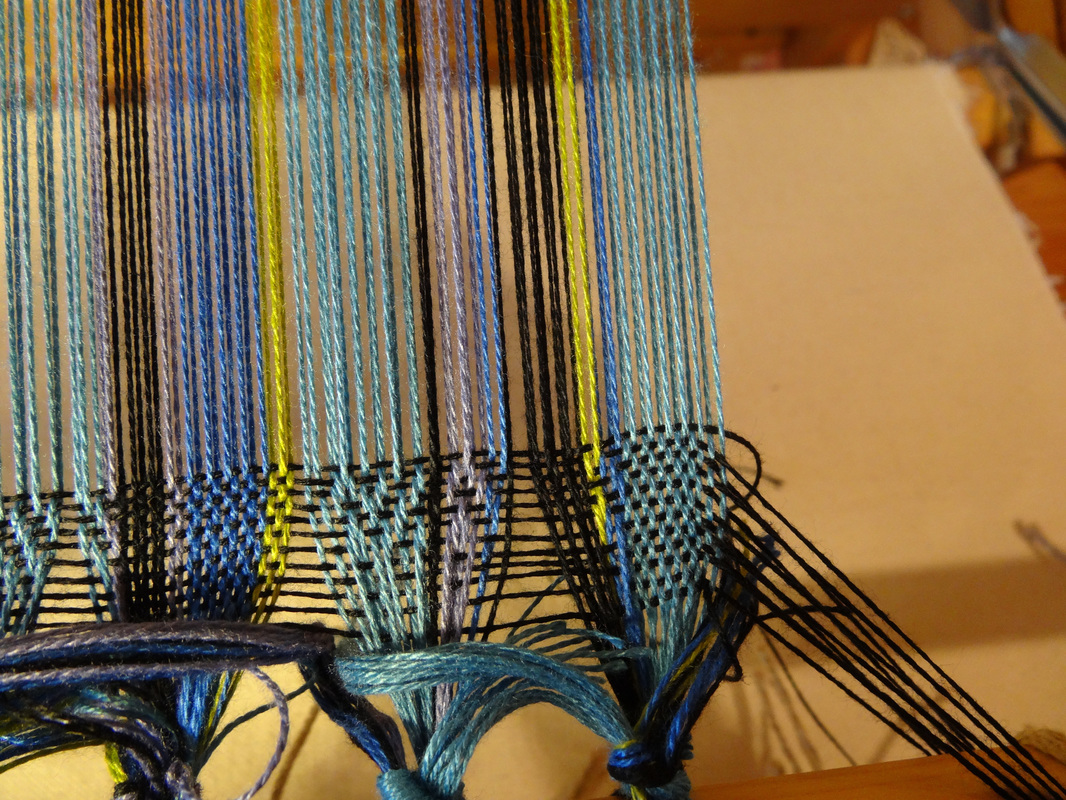
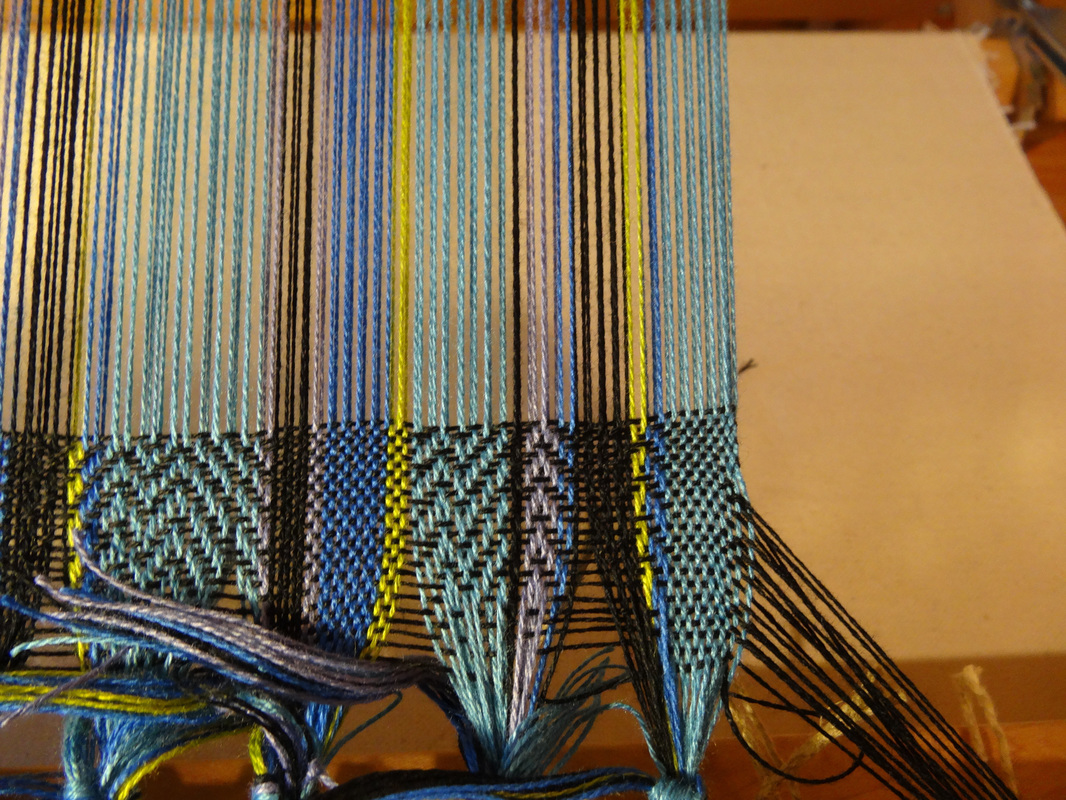
The best part, however, was the class itself.  None of us knew anything about deflected doubleweave.  Lisa (Elisabeth) Hill was a wonderful, generous instructor.  She came with 2 tables full of yarn for us to use, pre-wound warps for anyone that chose to use them.  We used gorgeous tencel, silk and wool, alpaca and silk, and merino yarns to warp our looms with beautiful 6-yard long warps that were 10” wide. ​​
Picture
The classroom
Picture
Jackie, hard at work
Picture
Sue, warping her loom
We had a 2 part mission: weave a sampler and weave a scarf! Our first assignment was to weave a nice long sampler using 2 different treadlings and a total of about 16 different treadlings.  We cut the samplers from the loom and washed and dried them so we could which decide which treadlings to use for a scarf.  ​
Picture
Picture
Picture
Picture
Picture
Picture
Picture
Picture
Picture

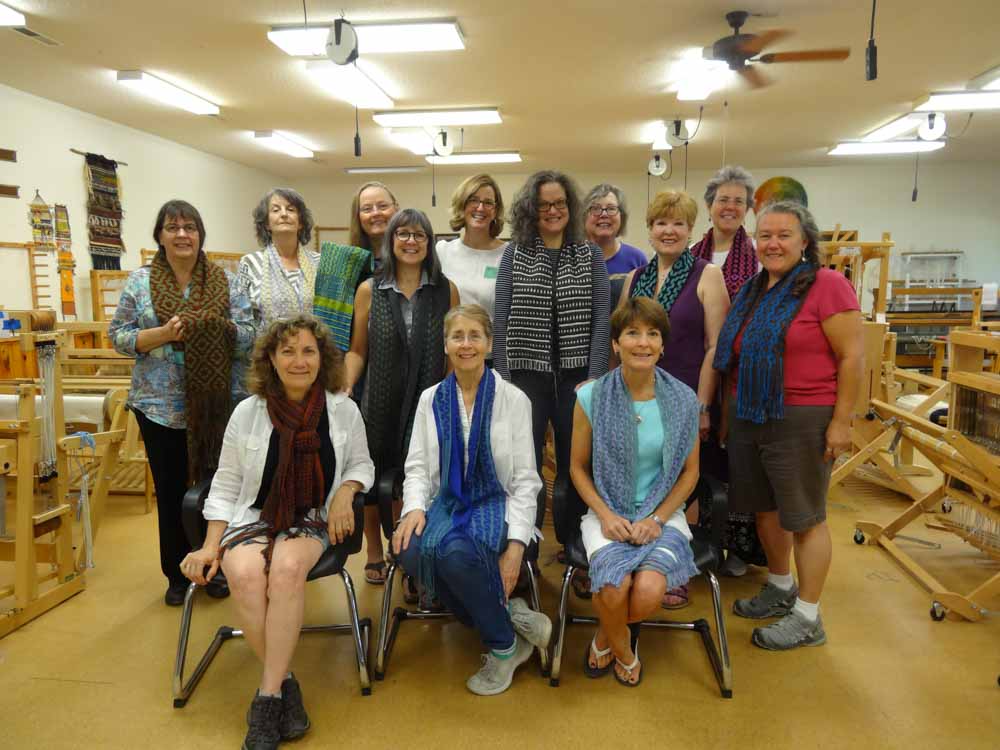
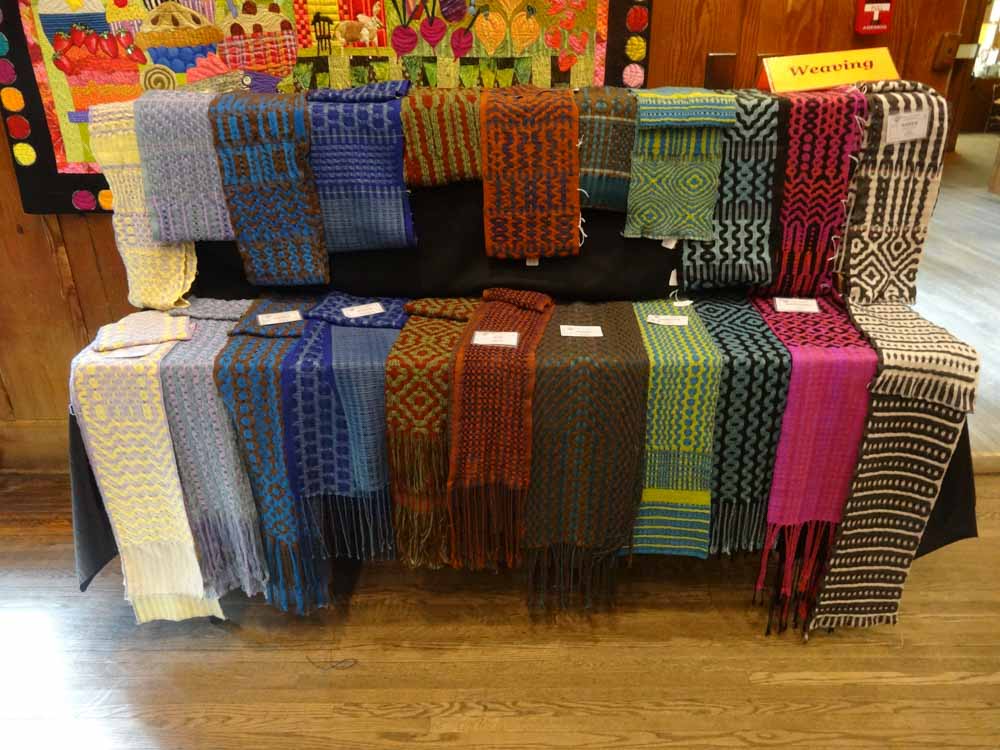
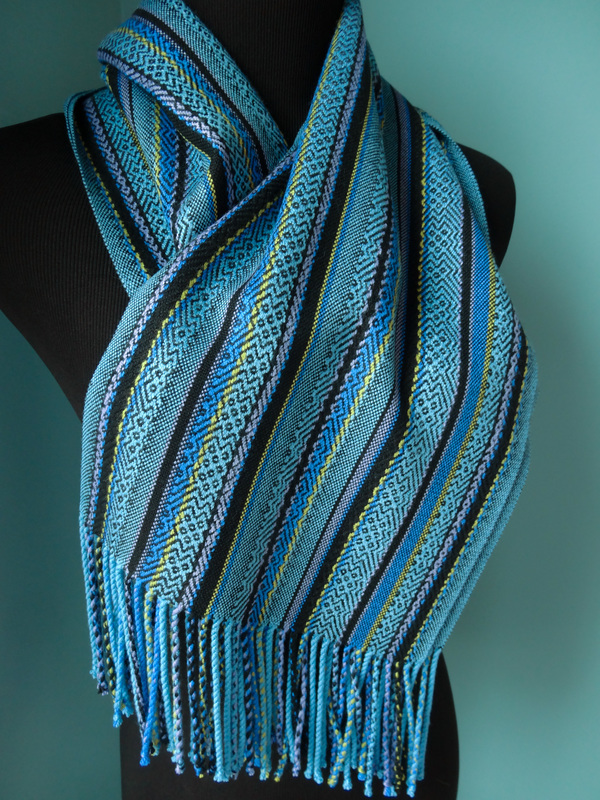
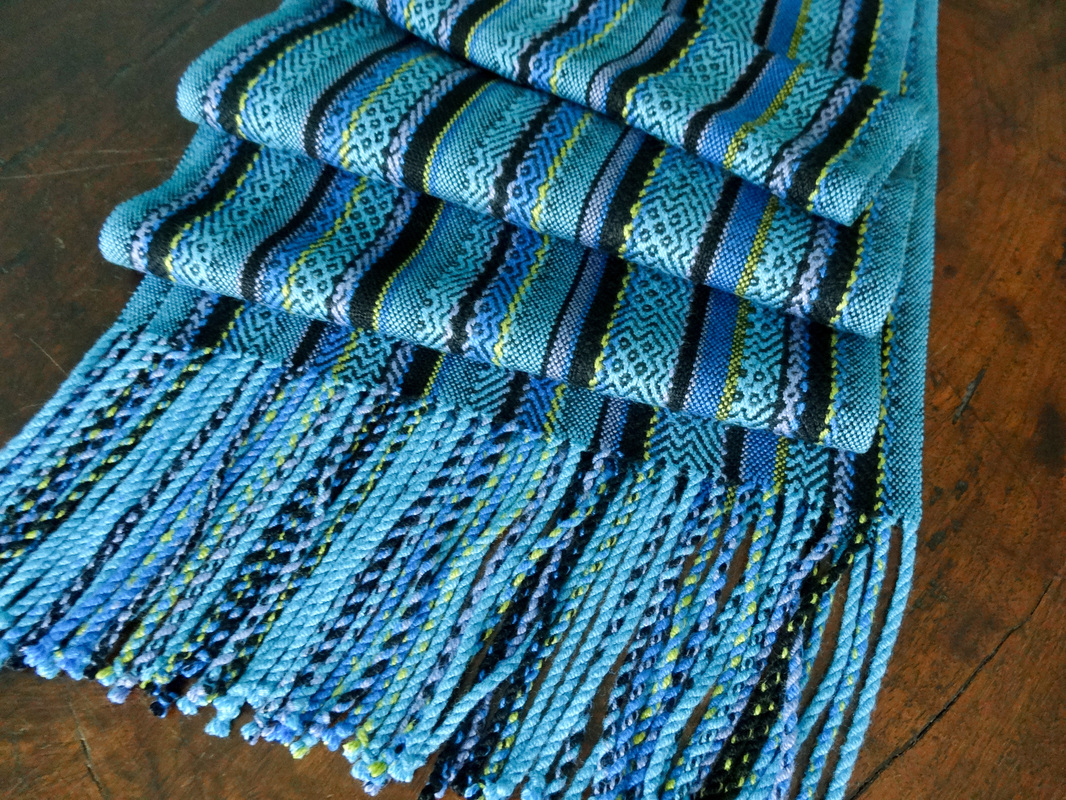
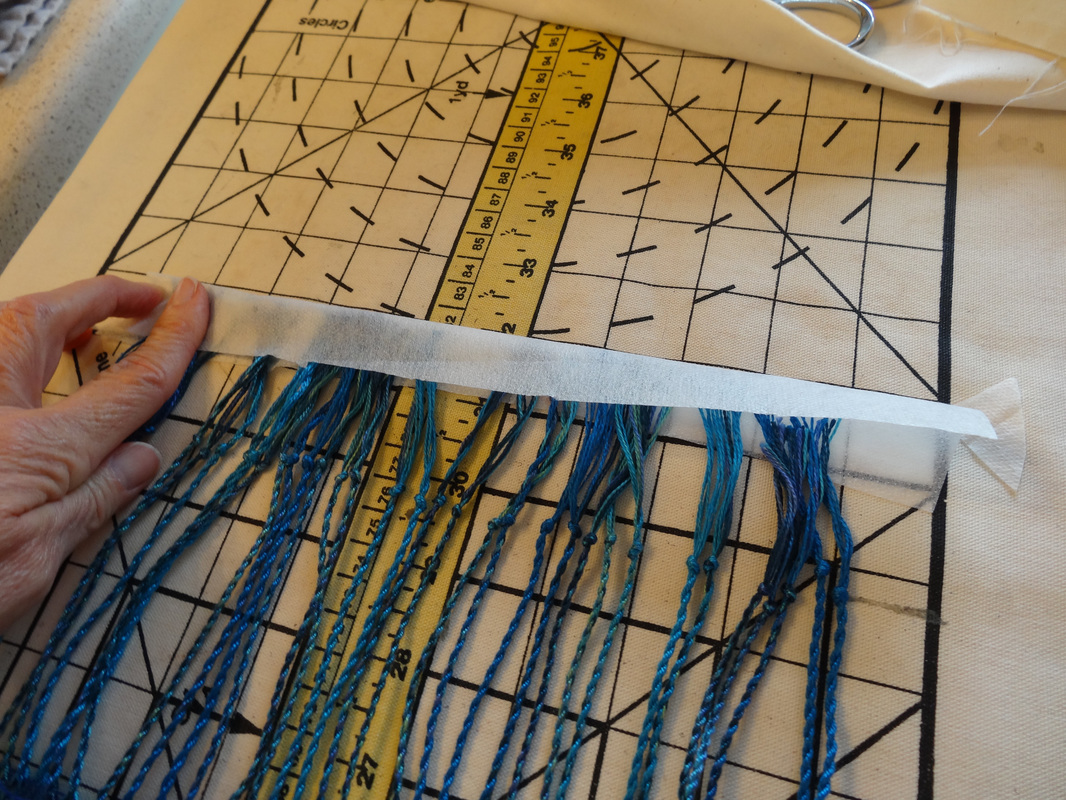
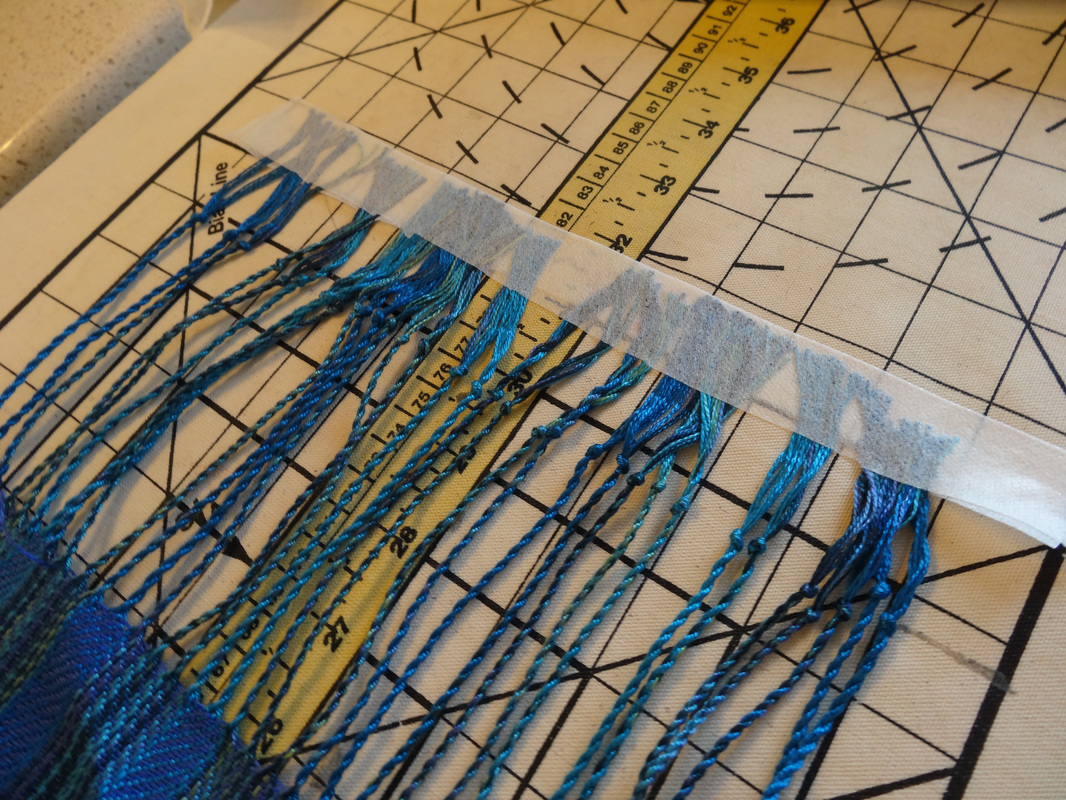
​​Decisions made, we tied back on and wove our scarves.  We had time to twist our fringe, wash and dry (or almost dry) our scarves so they would be ready for the big presentation on Friday before everyone went home.  Thirteen scarves, thirteen completely different threadings and colorways. (Number thirteen was woven by Lisa’s pretty wonderful assistant, Lillian).  Pretty amazing results!
Picture
Picture

That is not the end of the story. We spent a lot of time pouring over the many, many examples of deflected doubleweave Lisa brought with her, which included her beautiful shawls, scarves, runners, placemats, towels, clothing, bags, and samples.  They showed us so many ways to finish our pieces and how many different fibers would look woven in this technique.  She scattered short lectures throughout the weaving days so it gave us a break from the weaving without overwhelming us with technicalities. For those of us who finished our scarves early, Lisa helped us plan additional warps, and we spent the time measuring warps for those projects.  

​
​Meanwhile, Lisa's trusty assistant, Lillian was at our beck and call, helping us with any problems we had and keeping us all on schedule.
Picture
Lisa (on the left) and her assistant Lillian

Picture
Jackie, Pattie and Sue


​In a few short days, Lisa showed us just how magical this structure can be, and all three of us came away itching to try more.
​


​For more information on John C Campbell or to see their online catalog, go to their website,  
www.folkschool.org
 
To visit Elisabeth Hill’s website, 
​click here -->  www.plainweave.net

​

0 Comments

Treadling for Dummies: Walking the Treadles

8/8/2016

13 Comments

 
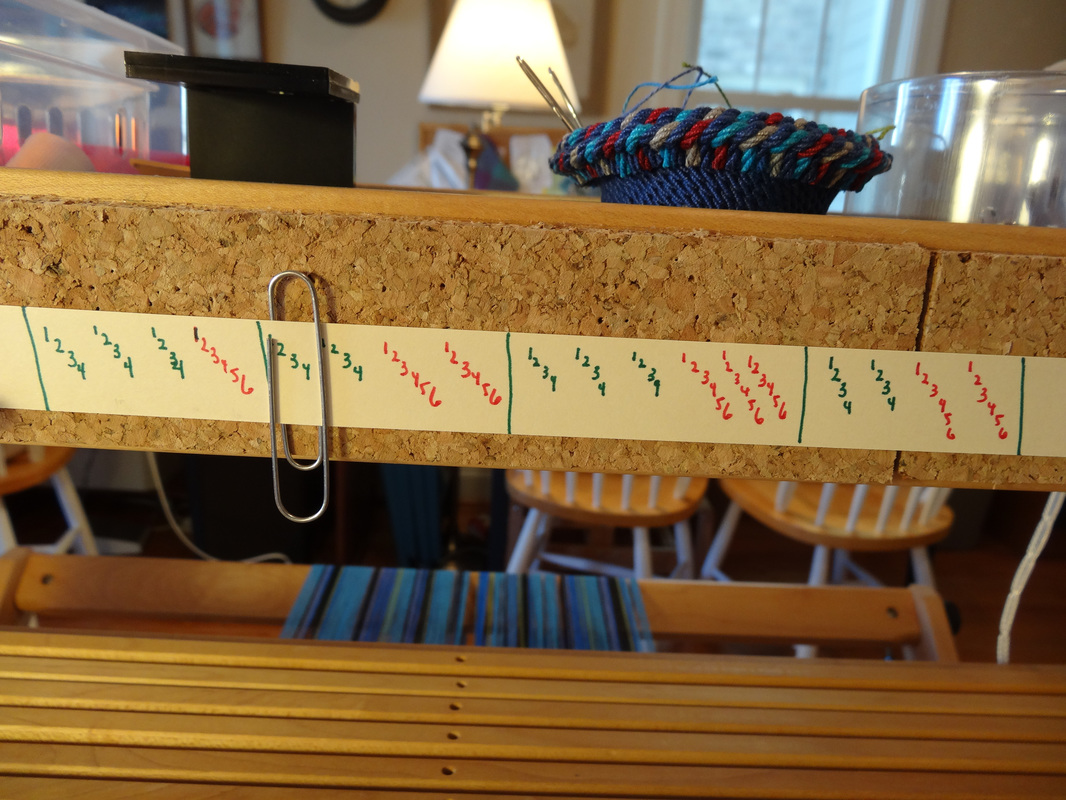
When we first learn to weave we usually are taught to tie up our treadles from left to right just as they are written in a typical draft.
Picture
​

​​In a simple example, to weave straight twill you would need to set up 4 treadles as indicated below:
  • Treadle 1 lifts harnesses 1 & 2
  • Treadle 2 lifts harnesses 2 & 3
  • Treadle 3 lifts harnesses 3 & 4
  • Treadle 4 lifts harnesses 4 & 1
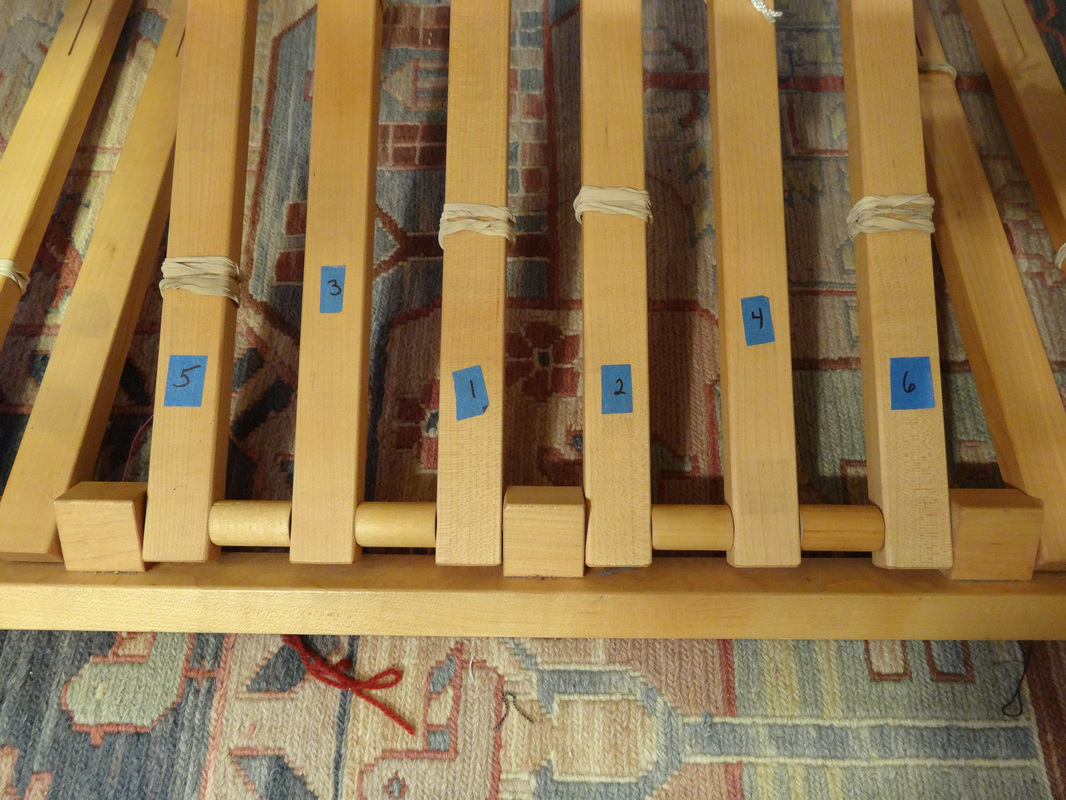
Traditionally, you would set up the treadles from left to right as they are written in the tieup:
 
           Treadle           1        2     Center      3       4
            Lifting           12      23                34     41
            Foot                --Left--                   --Right--              
 
To weave this pattern, you would use your left foot to weave treadle 1 followed by treadle 2, then switch to your right foot to weave treadles 3 followed by treadle 4.

Walking the treadles is a much more comfortable, ergonomic alternative to this.  The treadles still lift the same harnesses in the same order in order to get the same pattern.  The difference is that the treadles under the loom are not tied up from left to right.  They are tied up so that you can “walk” the treadles left-right-left-right from the center out.  Your odd numbered treadles will be on the left, even on the right.  ​
For the straight twill shown above the treadles would be tied up as indicated in the draft above, but they would be in a different order under the loom as follows:
 
           Treadle           3        1     Center     2       4
            Lifting           34      12               23     41
            Foot                --Left--                   --Right--               
 
This allows you to comfortably rock from left to right as you throw the shuttle from left to right. ​​
Picture
Note the rubber bands on the center treadles.
My personal preference is to throw the shuttle towards the foot that is treadling, so I treadle 1(left foot is down) and throw to the left, treadle 2 (right foot is down) and throw to the right, treadle 3 and throw to the left, treadle 4 and throw to the right.  Then I move both feet back to the center (where I have rubber bands to help me find the center without peeking).
Tip!

Advantages to walking the treadles:
  • You develop a nice rocking motion that is very comfortable,
  • It allows you to improve your rhythm and speed up your weaving
  • The fact that your shuttle is always heading towards the depressed foot helps “cue you in” if you accidentally get off pattern.  If suddenly your shuttle is going left and your right foot is down, it means you have made a treadling error.

Tips for not losing your place and other notes:
  • After pressing a treadle, I keep my foot there (lightly) until ready to use that foot again.  In other words I never move my foot completely off a treadle so I always know what I did last.
  • If I am doing a sequence that starts over at treadles 1&2 (center treadles), I move my feet back to center together.
  • I use heavy rubber bands to mark my center treadles and other significant treadles to help my feet find the correct treadles without peeking. 
Tips!
  • For example, if I am doing a straight twill with 4 treadles, I would put rubber bands on just the center treadles (1&2). 
  • If I have a twill pattern that I am walking with 6 treadles like the point twill pattern below, I would put rubber bands on the center treadles and the outer treadles (5&6).  This helps me easily find the center treadles when I am returning to center but also helps me distinguish between 3 vs 5 and 4 vs 6 so that I don’t accidently press a treadle in error (because 3&4 are “naked” and 5&6 have bands).
  • Note: I do NOT recommend leaving “space” (untied) treadles between your treadles.  I think it disturbs the rhythm of weaving and the farther from center your treadle is, the more tiring the weaving will be.  SO keep them as close to the center of your body as possible.

A harder example:
 
​Suppose you have a simple point twill treadling.  Normally the tieup would be presented as shown with 4 treadles.  One full repeat consists of the six shots or picks shown above the red line in the draft to the right:
  • Treadle 1 lifts harnesses 1 & 2
  • Treadle 2 lifts harnesses 2 & 3
  • Treadle 3 lifts harnesses 3 & 4
  • Treadle 4 lifts harnesses 1 & 4
  • Treadle 3 lifts harnesses 3 & 4
  • Treadle 2 lifts harnesses 2 & 3
You could set those 4 treadles up in the traditional left to right configuration or walking style.  The problem with this is that anytime you are treadling 2 or 3, you need to remember whether you were going toward treadle 4 or returning from treadle 4.  The possibility of confusion is high.
​

Picture
Everything above the red line is one repeat
6 treadle walking option​:
​

But we can take it one step farther (assuming you have 6 treadles) and assign each of the 6 picks in the repeat their own treadle. Set those 6 treadles up walking style and you will find this treadling pattern easier to weave with no confusion.
  • Treadle 1 lifts harnesses 1 & 2
  • Treadle 2 lifts harnesses 2 & 3
  • Treadle 3 lifts harnesses 3 & 4
  • Treadle 4 lifts harnesses 4 & 1
  • Treadle 5 lifts harnesses 3 & 4
  • Treadle 6 lifts harnesses 2 & 3 
Picture
Everything above the red line is one repeat and weaves the same cloth as the repeat in the draft above.

​​Set the treadles up for walking as follows:
     
    Treadle      5          3        1      Center     2       4        6
    Lifting        34       34      12                23     41     23
    Foot             -----Left-----                         -----Right-----      

Rubber bands on the center treadles help your feet find the center at the end of the sequence. Bands on 5 & 6 also help your feet with the "no peek" treadling.   
 ​
Picture

13 Comments

Treadling for Dummies: A Series of Tips / Part 1

7/15/2016

0 Comments

 
​My Treadle Minder
​When weaving my Bronson Weave tieup, my left foot travels from treadles 1 to 2 and back, while my right foot travels down the pattern treadles 3,4,5,6,7,8,9 and 10. My feet are always treadling left right, left right. But my left foot is going 1-2-1-2-1-2 while my right is going 3-4-5-6-7-8-9-10. For my brain this is a little like patting my head and rubbing my tummy, and I have always had the tendency for my left foot to "wander" to treadle 3.
Tip!
​SO... I am now using my MS 150 biking award between treadles 2 and 3 to remind my left foot not to stray. It's nice to know that award is good for something! If you don't happen to have one, I guess anything narrow and vertical would do.
Picture
Picture
​This would work well for any pattern where you left foot is working one set of treadles independently from your right.  For example, I use the left 2 treadles for tie down treadles and the treadles to the right for pattern treadles in summer and winter.
0 Comments

Tales of Bad Selvedges: Part 2  (Tencel Likes to be Wet)

5/16/2016

4 Comments

 
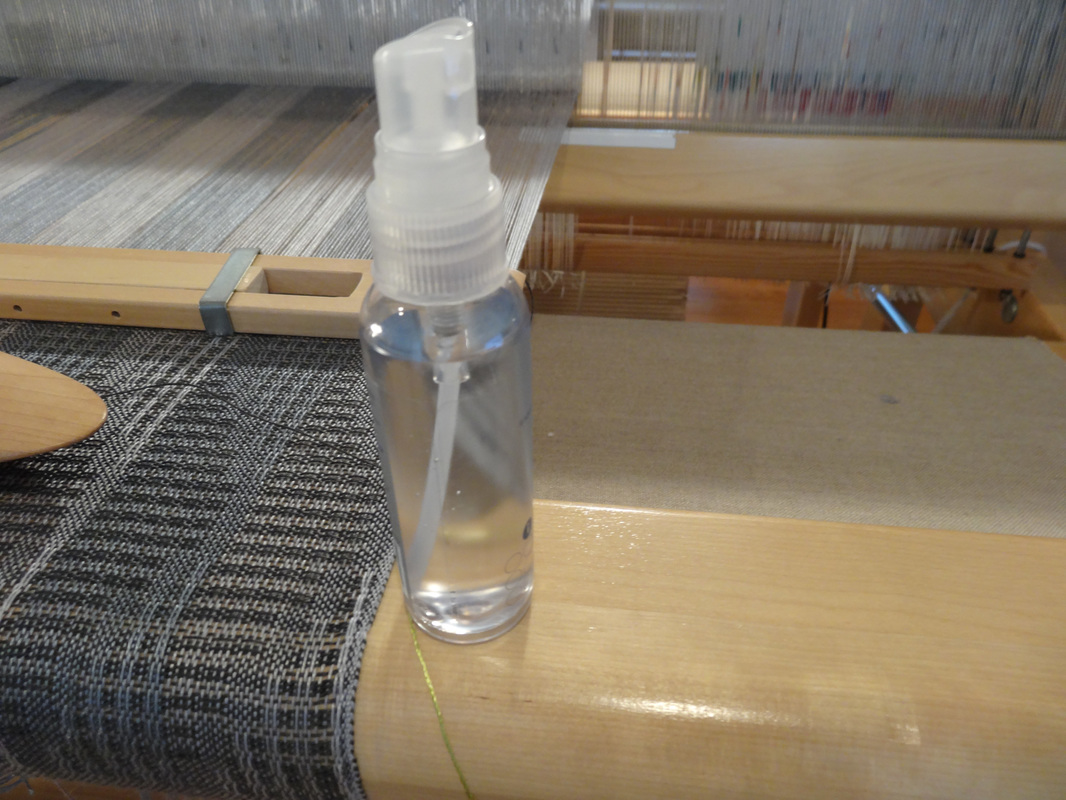
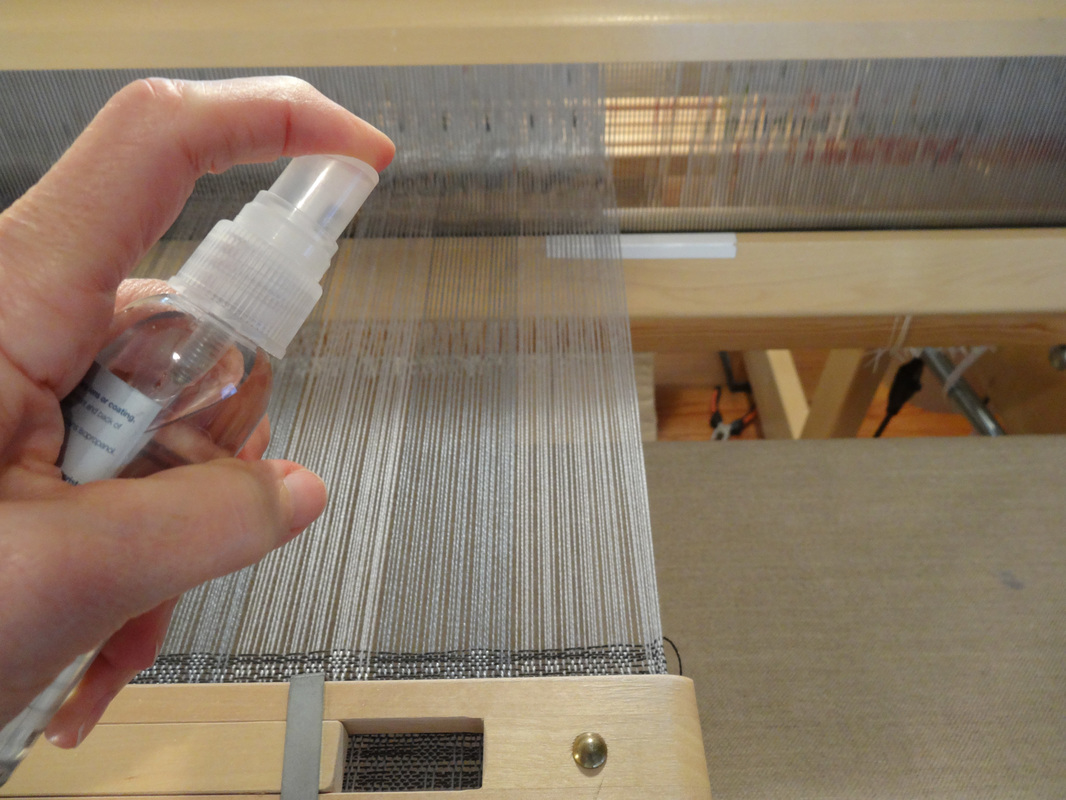
​Consider this an Addendum to yesterday's post about my attempts to weave off 6 shawls for my son's wedding attendants.
 
There was an additional adjustment to my weaving that I made midway through Shawl #1.  Once I realized that the tencel was going to be "sensitive" and prone to breaking, I began misting the warp lightly with water every time I advanced the warp.
 
The tencel experts of the weaving world have told me that tencel like to be wet and that keeping the warp damp (especially the selvedge threads) helps to strengthen the fiber.  This can be especially helpful if you have to unweave tencel!
​


​Tip!
Every time I advanced the warp I spritzed the warp lightly:
  • between the fell of the cloth and the reed
  • behind the reed
  • and between the heddles and the back beam
Picture
I use a little spray bottle with a fine spray so I don't soak the warp
Picture

4 Comments

Teaching an Old Lamb New Tricks:  Tales of Bad Selvedges

5/15/2016

2 Comments

 
Picture
​
There are two things you may or may not know about me:
  1. I pride myself on good selvedges
  2. I always beat with a closed shed
Along comes a project that changed everything.  I have been happily charged with weaving the shawls for the attendants in my son's wedding. These are shawls I have woven many times before (see photo on the left), using the exact same yarn I have used before.  
​It should have been a no-brainer.  Apparently not!
 
I wound a 20 yard warp for 6 nice long shawls in stripes of light gray and silver 8/2 tencel.  Each shawl was to be woven in a modified Bronson weave using a charcoal gray weft.  I decided to weave several different treadlings so that the shawls for each young lady would be a little different.
​
Right from the start, there was trouble.  The silver tencel began to break - sometimes at the back beam, sometimes behind the heddles, sometimes it was a thread near the selvedge, sometimes about 6 inches in from the selvedge.  Before I knew it, I had about 10 repair threads hanging from the back of the loom and I was sure that I had a bad batch of tencel.  The light gray tencel was behaving just fine.  The repair threads behaved better except that one of the 3 threads near the right selvedge continued to break about every 6 to 10 inches.  Needless to say:
  1. The right selvedge was suffering (a lot),
  2. I would have a lot of repairs to do,
  3. Weaving was going very slowly,
  4. And I was getting really frustrated!
Picture
This mess is what the back of the loom looked like after a dozen or so broken threads had been repaired.

Tip!
​Repairing broken threads: 
1. Attach the repair thread to the woven cloth
2. Hang it off the back of the loom
Picture
​First wrap the broken thread back around a T-pin in a figure 8. (left)
 
​After threading the repair thread properly through the heddle and reed, wrap it around the same t-pin and secure it around the pin with a figure 8. (right)
Picture
Picture
This is how I hang and weight my repair end at the back of the loom: a thread keeper, a ring and a heavy washer
​HOWEVER, If I just let it hang, it will spin and the yarn will unply itself (not good). So I secure the hanging thread keeper and weight to the loom by tying it loosely to the loom with shoelaces as shown on the right.
Picture

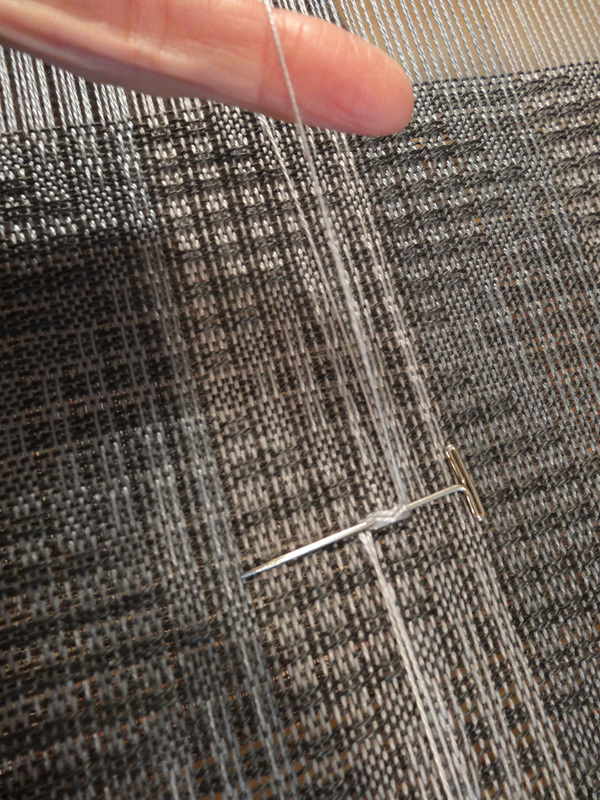
​The saga continues:
 
I cut Shawl #1 off the loom and retied the warp to make sure I had perfect tension before beginning the next shawl. 
 
The selvedges in Shawl #2 were somewhat better, but I continued to have broken threads along the right selvedge as well as in two sections in the center of the shawl.  By the time I cut the shawl off the loom, I had about 20 repairs to make, and more than a dozen of them were along the right hand selvedge.  And I can assure you I do not enjoy making repairs in the finished cloth - especially along the selvedge edge!
​
Before starting Shawl #3, I had two light bulb moments:
  1. My friend Sue suggested that I add a strand of 10/2 pearl to each side of the warp to strengthen the selvedges.  I happened to have some pearl cotton in colors that matched the 2 edge colors pretty well so I could "buddy up" one strand of pearl cotton with one warp thread.  I simply threaded a strand of 10/2 pearl through the same heddle and dent with the outermost warp thread on each side of the shawl and hung it off the back of the loom with a weight - just as I do with my repair threads.
  2. I decided to try to reduce draw-in even more (even though I was already weaving with a temple) by beating with my shed open.  That took a little getting used to because I have beating on a closed shed for almost 30 years!
Tips!
​I was shocked at how much this helped!  The selvedges were great and I did not have a single selvedge thread break for the entire 95" length of the shawl.  

I still had threads break in the other two trouble areas of the shawl, confirming my belief that this batch of silver yarn was probably defective, under-plied in sections, or otherwise weakened for some reason.  But just to be able to solve the problem on the selvedge was a huge relief!
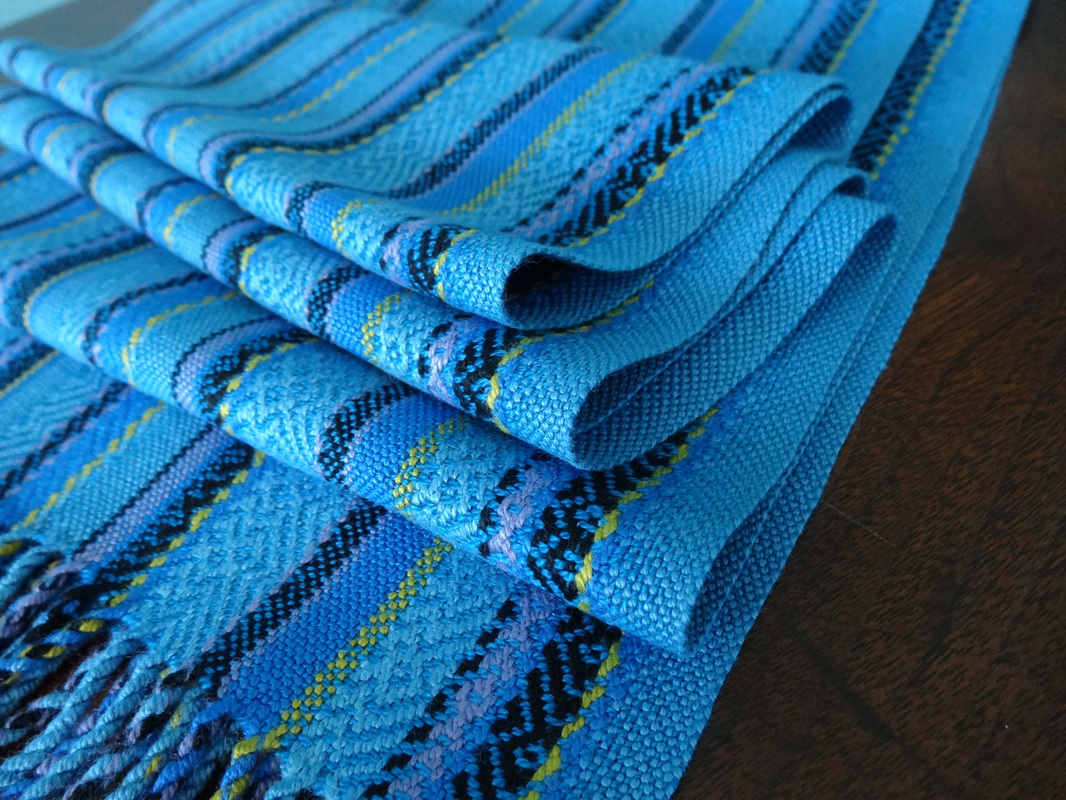
Picture
Nice selvedge! :-)
Picture

Three shawls down, three to go…
​

2 Comments

Life History of a Scarf - Final reflections

2/18/2016

4 Comments

 
Well the scarves are done, and you might be thinking that this seemed like a lot of work and a lot of days.  I can assure you that it did not really take 9 days to make these 2 scarves. ​
These 2 scarves were actually a joy to weave, and the only complication in the whole project was deciding what colors to use and planning my draft.
 
My timetable probably went something like this:
  • Planning:  1-2 hours
  • Measuring the Warp:  2-3 hours
  • Winding onto the back beam: 1 hour
  • Threading the loom:  2- 3 hours
  • Getting Ready to weave: 30 minutes - 1 hour
  • Weaving the samples:  30 minutes
  • Weaving the scarves: 4 hours
  • Finishing the Scarves: 3 hours
  • Documentation: 1 hour
Total 15-18 ½  hours for 2 scarves and samples
Picture
Picture
Scarf with the blue ming tencel weft
Picture
Scarf with the black bamboo weft

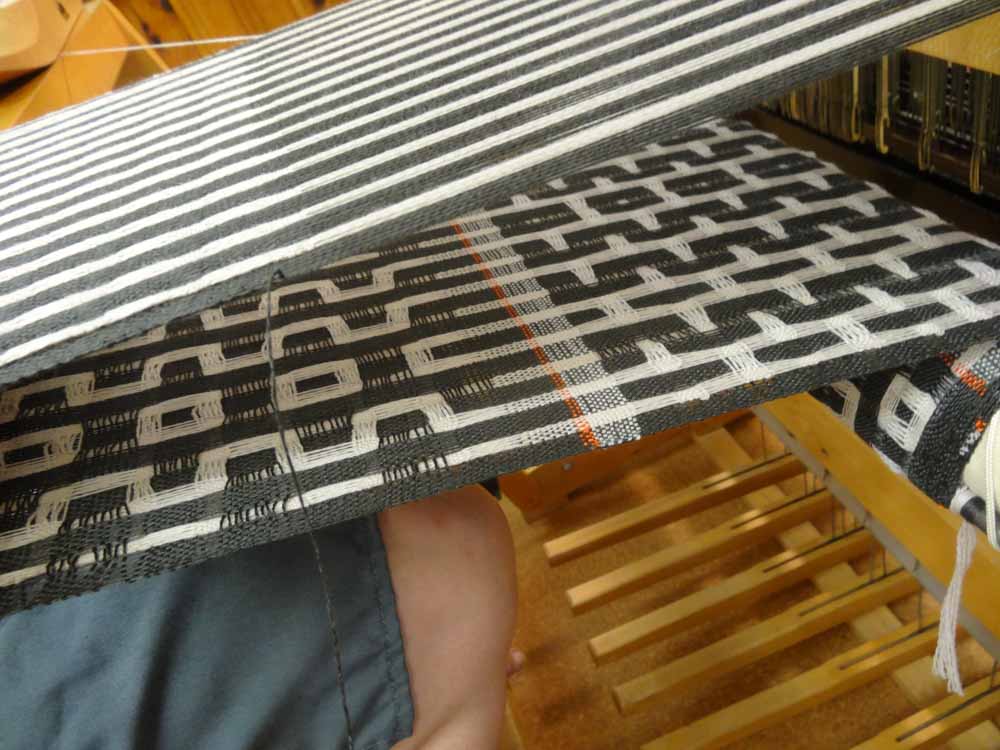
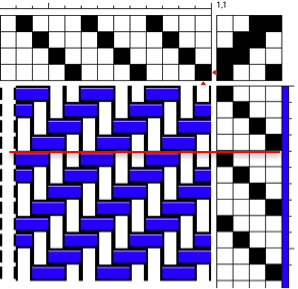
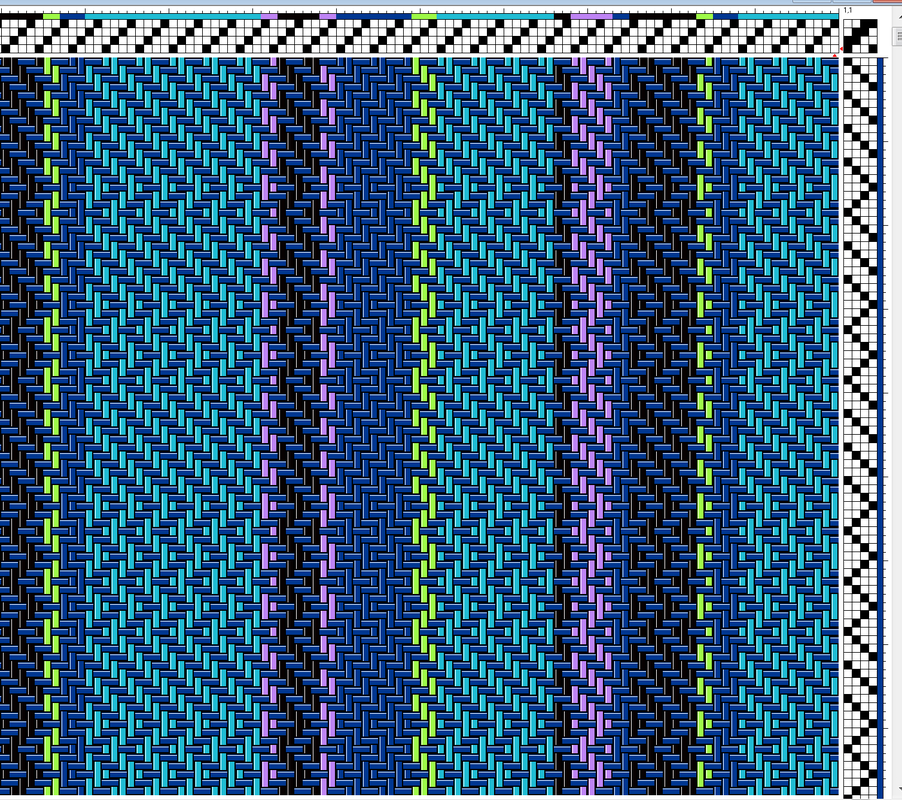
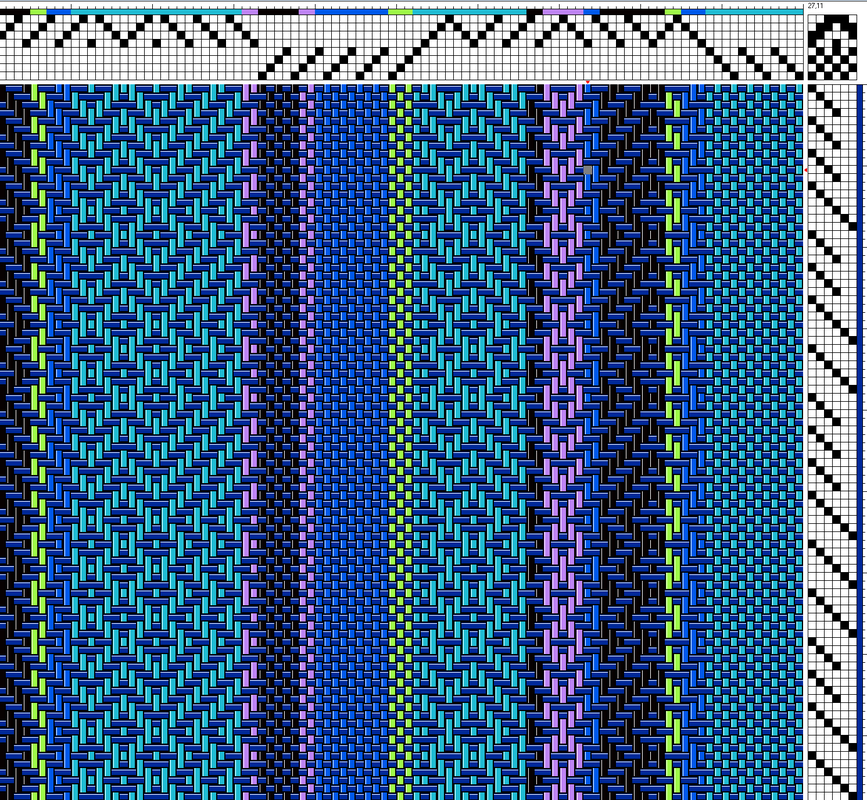
Four Harness Alternatives
I have had a request for a draft for a similar scarf for those who only have a 4 harness loom.  It is not possible to mix plain weave and twill in the same way with only 4 harness, but I have come up with a draft that uses the same bamboo warp in a twill, with a couple of possible options for treadling.
Note: Because both of these drafts are entirely twill and have no plain weave, I might be inclined to sett them at 27 epi rather than 24 epi. I frequently sett bamboo and tencel at 27 epi for a slightly warp emphasis cloth.  It has a lovely hand.  But as always, sampling is recommended if you are unsure.

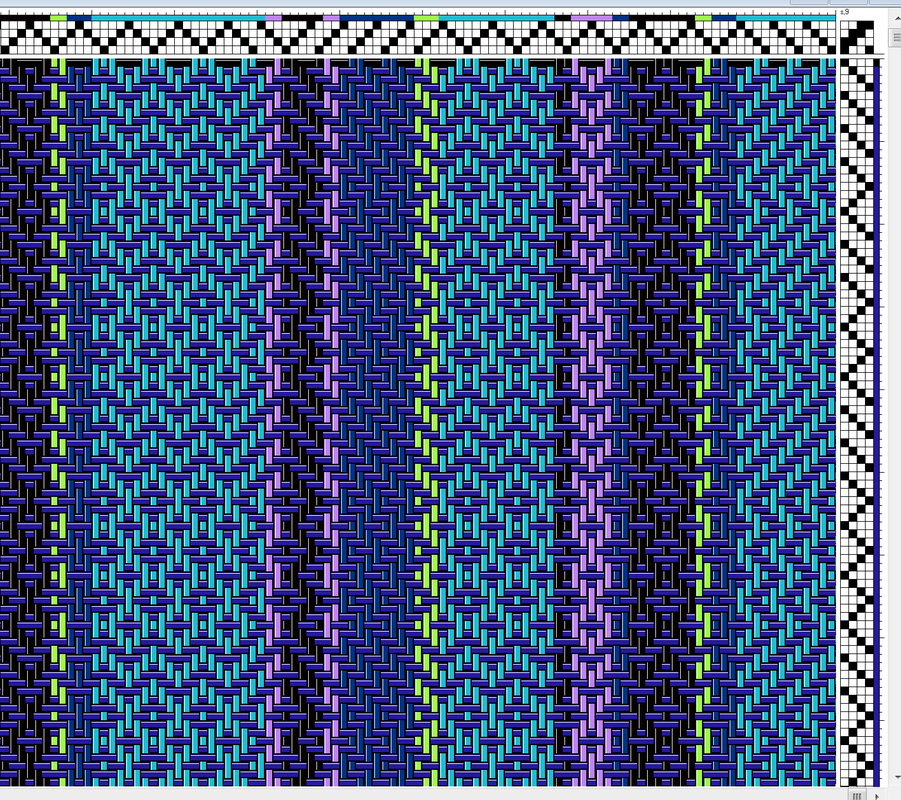
Alternative 1
This draft uses EXACTLY the same colorway and treadling as the scarves that I wove.  It has 281 threads, just like the warp I used.  It is a point twill threading, and I would recommend using a floating selvedge with this treadling. The draft is shown below, and a partial drawdown is shown to the right so you can see what the cloth would look like.  Click on either photo to zoom in.
Picture
Picture

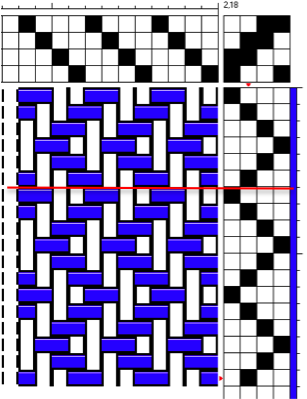
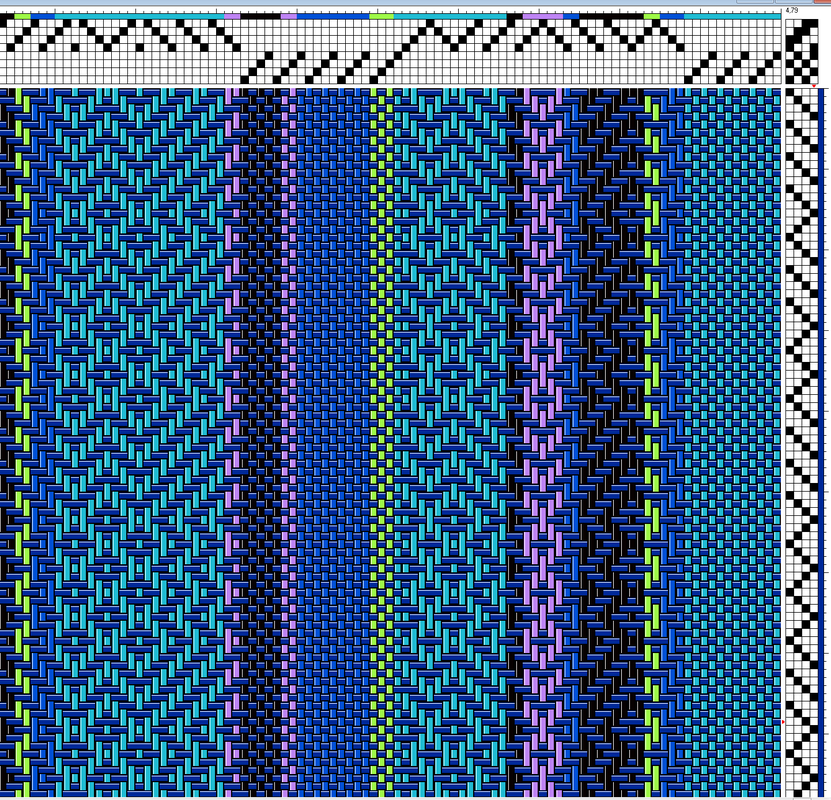
Alternative 2
This draft uses the same colorway as the scarves I wove EXCEPT that the last group of aqua threads on the far left of the draft has 11 threads in it instead of 12, giving a total of 280 instead of 281.  This allows for a multiple of 4 for the straight draw threading.  You would not need a floating selvedge with this threading (as long as you start your shuttle from the right side).  This draft uses the same treadling as the scarves that I wove.  The draft is shown below, and a partial drawdown is shown to the right so you can see what the cloth would look like.  Click on either photo to zoom in.
Picture
Picture


​Tip!
I intentionally set up the threading for the straight draw so that I thread 4-3-2-1 (going from right to left).  If you are sitting at the front of the loom  and you pull over a group of 4 heddles, one from each harness, it is much easier to thread 4-3-2-1 than 1-2-3-4.  If you thread 1-2-3-4, you will have to reach around  the 2, 3 and 4 to thread 1, then to thread the 2 you will have to reach around the 3 and 4, and to thread the 3 you will reach around the 4. Uncomfortable!

To review, go back to Life History-Day 9
4 Comments

LIFE HISTORY OF A SCARF: DAY 9 - Finishing the Scarves

2/18/2016

0 Comments


​Finishing this project requires:
  1. Twisting the fringe 
  2. Wet finishing, pressing and trimming
  3. Documenting the project
Picture

​Twisting the fringe
For these scarves I would twist fringe in bouts of 8 ends (4 + 4).  I wanted my twisted fringe to measure 5” to the knots, so 8” of unfinished fringe will allow me enough leeway for twisting, tying my knots, and applying the fringe protector that I would apply before wet finishing.
  • I trimmed the fringe to 8” on both ends of each scarf (measured from the edge of the finished cloth, not the weft protector)
  • At the middle of the scarf, I carefully clipped all of the weft protector threads except for the last 3 rows.  I then pulled the clipped weft protector threads out from the right side of the scarf.
  • Twisting: I carefully pulled the weft protector out of the first 8 ends of the fringe and twisted the 2 4-end bouts of fringe clockwise until they were kinky and the twisting just began to pull at the edge of the cloth.  I removed the 2 bouts from the twister (without letting them go!) and twisted them back on each other counterclockwise.  I then knotted the end in an overhand knot, carefully positioning the knot at 5” from the fell of the cloth.
  • I continued across the scarf in this manner until I reached the center.  I then removed the clipped weft protector on the left side of the scarf and began twisting from the left edge of the scarf.
  • Any “fudging”  that needed to be done of the 8-count for the fringes (because of miscounting or because the draft did not have an even multiple of 8 warp ends) was done in the middle of the scarf rather than on the edge.

​Tip:  While twisting, I COUNT.  If using a manual twisting, I count the number of turns.  If using the battery-powered twister, I count seconds.  That at least gives me a semblance of consistency from bout to bout.

​
Tip:  I use a gridded board to help guide me in keeping the fringe at a consistent length.  If you don’t have one, simply put 2 pieces of tape on the table.  Keep the fell of the cloth along one.  Line the knots up with the other.
​
Tip:  Keep the fringe under tension by weighting the section of the scarf you are working on

​Tools of the trade:  I like a battery-powered twister (it has 4 clips on the end, but I only use 2) because I do a LOT of fringe.  The wooden manual twisters are very good as well.  A long tapestry needle is helpful for picking out the weft protector.  Heavy bookend or weight of some kind is very helpful to anchor the scarf while you are twisting.
 ​
Picture
Picture
Fringe combed out and trimmed to 8"
Picture
Weft protectors clipped in the center of the scarf (except for the 3 closest to the fell of the cloth)
Picture
Pick out the clipped weft protectors from the right side of the scarf
Picture
Freeing the first 8 threads to be twisted into a fringe bout
Picture
First 3 fringes twisted with knots aligned at the 5" marker
Picture
Fell of the cloth showing bookend weight and the first 3 fringe bouts
Picture
Right side of the scarf done. Ready to pull clipped weft protectors from left side, and begin fringing from the left side toward the center
Picture
Fringe complete and ready to have interfacing applied

Wet finishing, pressing and trimming
The final finishing took 5 steps (Note: My choice for wet finishing varies depending on the fiber and structure of the scarves.  Bamboo and tencel scarves in twill and plain weave do very well with machine washing and drying)
  1. Protecting the fringe: I ironed on really thin, cheap interfacing around the ends of the fringe below the knots.  This keeps the fringe from tangling and makes trimming the fringe later a little easier too.  See photos.
  2. Machine washing: I machine washed the scarves o a gentle cycle in warm water with a little Dawn. 
  3. Machine drying: I dried them on a gentle cycle in the dryer until they were almost dry.
  4. Pressing: I pressed them with a hot iron until they were dry.  This brings out the sheen and makes them very soft.
  5. Trimming: I then trimmed any weft ends that were still sticking out of the cloth and trimmed the fringe to within ¼” of the knots, removing the interfacing in the process.
Picture
Place a strip of iron-on interfacing glue side up under the fringe. This should measure about 2 1/2" high and be the width of the scarf.
Picture
Fold the interfacing over the ends of the fringe. DO NOT cover the knots or any part of the fringe that you are not going to trim away later
Picture
Use a pressing cloth and stram press the interfacing and fringe to seal it onto the fringe
Picture
The fringe has been "trapped" between the layers of the interfacing

Documenting the project
I keep a plastic sleeve (or two) for every project I do.  In that sleeve, I put
  • Project writeup, including any calculations I did for the project
  • Draft
  • Yarn wraps I used
  • Yarn samples for warp and weft
  • Calculations for cost of the project
  • Samples
  • Photos of the finished project
Picture

To read my final thoughts on this project go to Life History-Final 
​
To review, go back to Life History-Day 8

0 Comments

LIFE HISTORY OF A SCARF: DAY 8 - Weaving the Scarves

2/16/2016

0 Comments

 
My samples proved to me that my sett was fine, so I did not need to re-sett the warp in the reed.

But after cutting off the samples, I did need to :
  1. Tie the warp back to the front apron rod 
  2. Weave a header​
See Day 7 for a description of tying on and weaving the header
Picture


​Because the treadling sequence for this draft is not regular, I wrote out a treadling aid which I tacked to my loom castle.  It consists of a strip of cardstock on which I have written the treadle numbers for the entire treadling repeat.  The large paperclip is used to mark my place.  I marked the treadling sequence off into 4 sections that I thought I could remember, and after weaving a  section, i move the paperclip along.
Picture
My treadling aid: a list of the treadling sequence for an entire repeat (the numbers represent treadle numbers)
Scarf #1
  • I wove the scarf with black 8/2 bamboo
  • I got about 23 picks per inch (23 ppi)
  • I wove with an end feed shuttle
  • I kept a grosgrain ribbon pinned to the cloth to keep track of the woven length of the scarf.  I moved the pins as the cloth was wound forward so that the ribbon was never wound onto the cloth beam.  The ribbon was marked off every in 10" increments (not shown in photo)
  • I wove the scarf until it measured 80” in length, ending the pattern with a straight twill series by omitting the last two 123456 sequences in the treadling
  • I wove a rayon header/weft protector at the end of the scarf

Scarf #2
  • Before beginning the scarf, I left 16" of warp unwoven to allow for the fringe for both scarves (8" for each scarf).
  • I wove a header in rayon of about 10 picks.
  • I wove the scarf with ming blue 8/2 tencel
  • I wove this scarf in the same manner as Scarf #1
  • I wove a rayon header/weft protector at the end of the scarf.
  • I cut the scarves from the loom, making sure to leave at least 8" for fringe on Scarf #2

Tip:
The area of unwoven warp can cause tension problems if the warp ends "fall off" the edges of the roll of cloth that has built up on the cloth beam from the first scarf.

To avoid this problem, wind a piece of corrugated cardboard, heavy paper or some slats on with the cloth when the fringe begins to go around the cloth beam.
Picture
Scarf #1, woven with black 8/2 bamboo weft. Shows the grosgrain ribbon attached.
Picture
Scarf #2, woven with ming blue 8/2 tencel weft

Once the scarves were woven it was time to finish them.  Go to Life History-Day 9.
To review, go back to Life History-Day 7
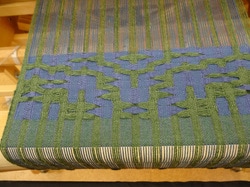
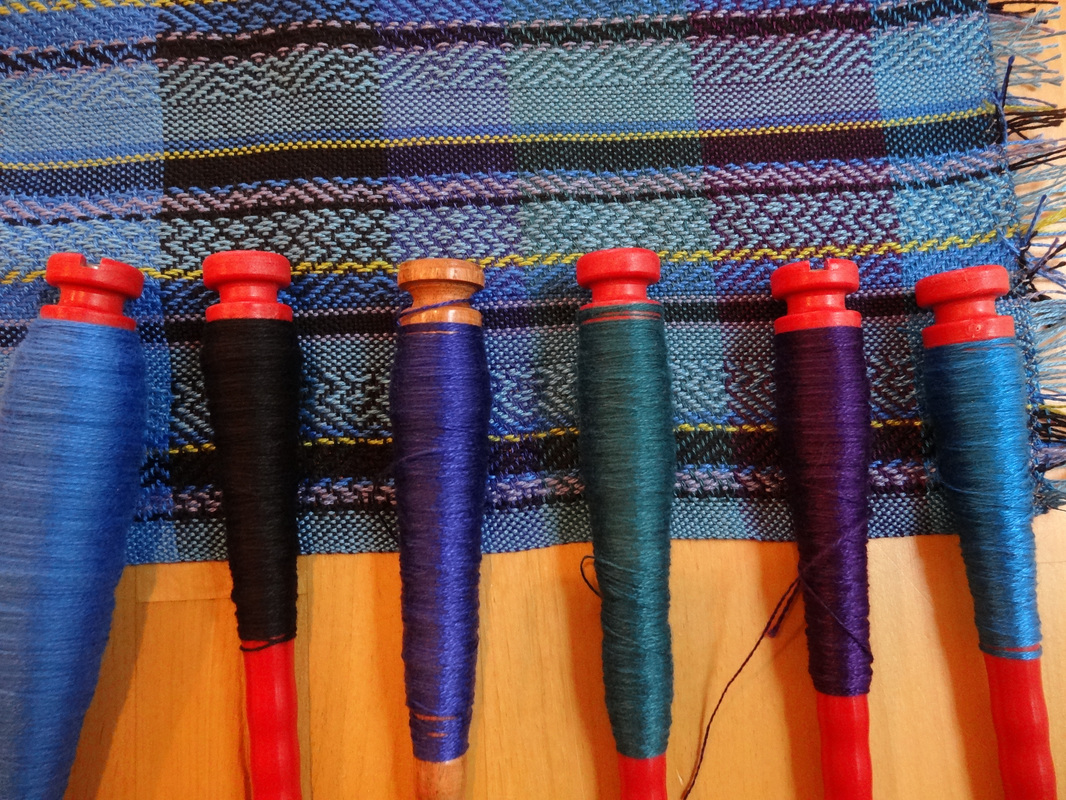
0 Comments

LIFE HISTORY OF A SCARF: DAY 7 - Weaving the Samples

2/16/2016

0 Comments

 
Weaving samples is a virtue, they say.  Truthfully I don't always weave samples, But I DO weave samples when:
  • I am not sure how to sett the yarn for the draft I am using
  • I am not sure what color I want to use for weft
  • I am not sure if the draft I want to use will work or if I will like it 
In this case, I was worried that the sett of 24 epi might be too loose, so the plan was to weave a sample a 24 epi, cut the sample off the loom, and wash it before proceeding.  While I was at it, I decided to try a variety of colors.
Picture
Tip: ​In the long run, sampling saves time and money!

I wove 13" of samples, using 6 different wefts:  royal 8/2 tencel, black 8/2 bamboo, iris 8/2 tencel, teal 8/2 bamboo, amethyst 8/2 tencel, and ming blue 8/2 tencel.  Weaving in pattern, I got about 23 picks per inch (ppi).
Picture
Sample woven with 6 different wefts
Picture
Cutting the sample off the loom. Tying the warp in slipknots to protect it before retying to the front apron rod.
I cut the sample off the loom, tying the warp in slipknots in front of the reed to protect it before it gets retied to the front apron rod.

I zigzagged across both ends of the sample, washed it in the washing machine in warm water and dried it in the dryer on a gentle cycle.  I pressed the sample with a hot iron.

Conclusion:  I liked the hand of the fabric so no need to re-sett the warp.  I liked 4 out of 6 of the weft colors and decided to weave the 2 scarves using the black bamboo and the blue ming tencel.

Samples done.  Now to weave the scarves!  Go to Life History-Day 8.
To review, go back to Life History-Day 6

0 Comments

LIFE HISTORY OF A SCARF: DAY 6 - Getting Ready to Weave

2/16/2016

0 Comments


​After the loom was threaded there were still 3 things that needed to be done before the real weaving could begin:
  1. Tying the warp to the front apron rod
  2. Tying up the treadles
  3. Weaving a header
Picture

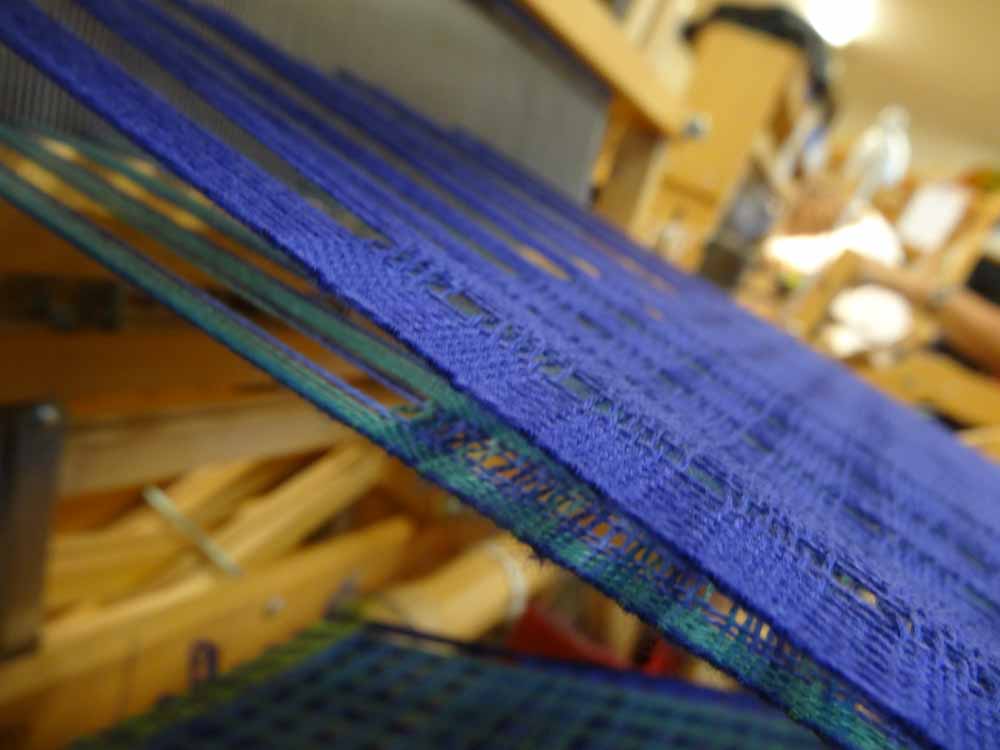
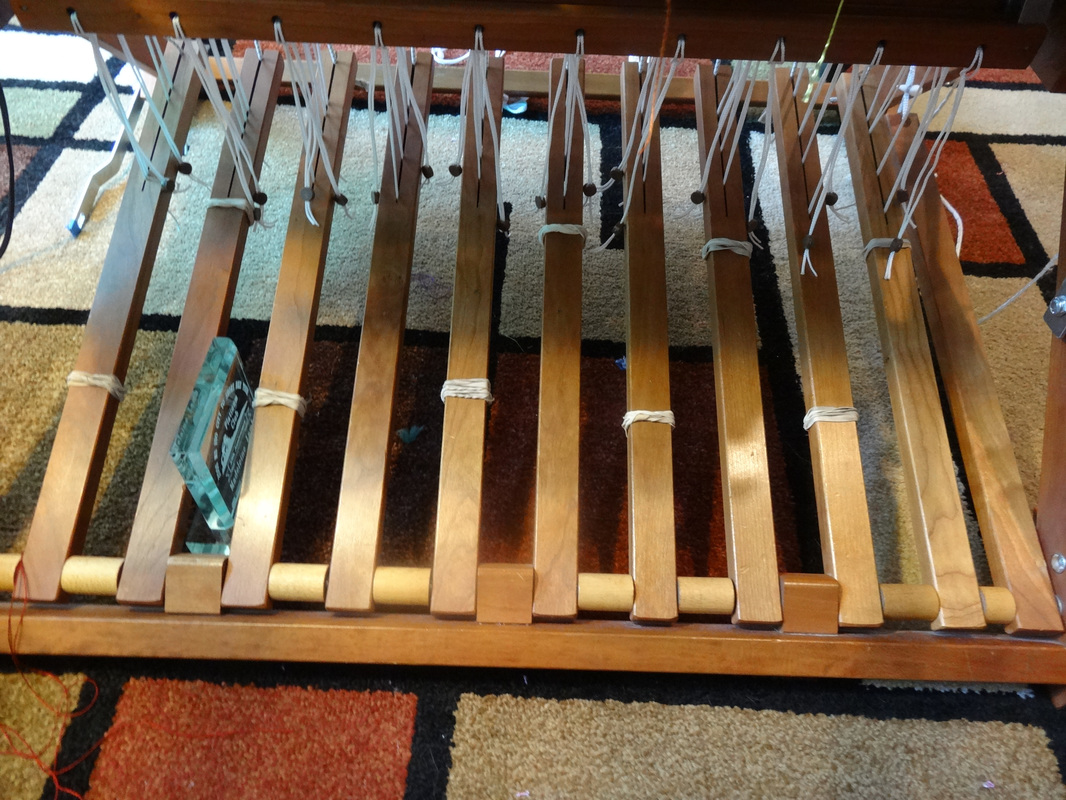
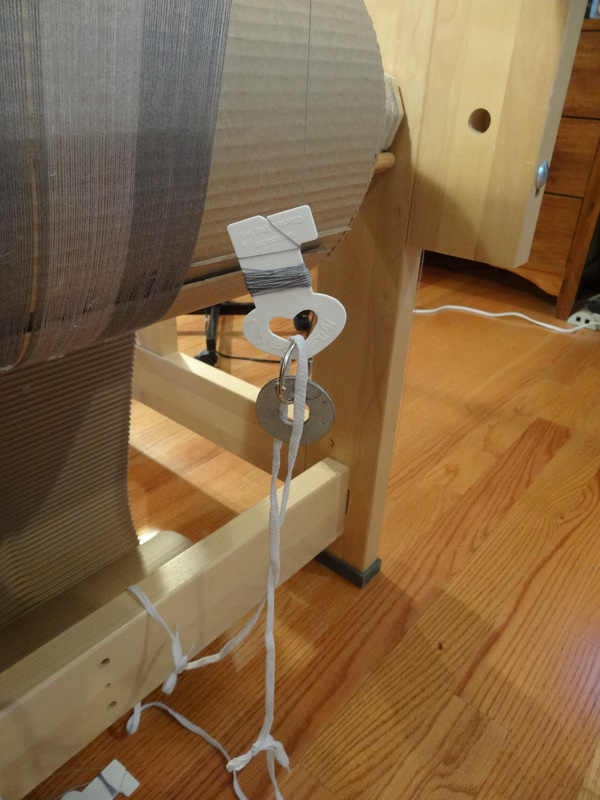
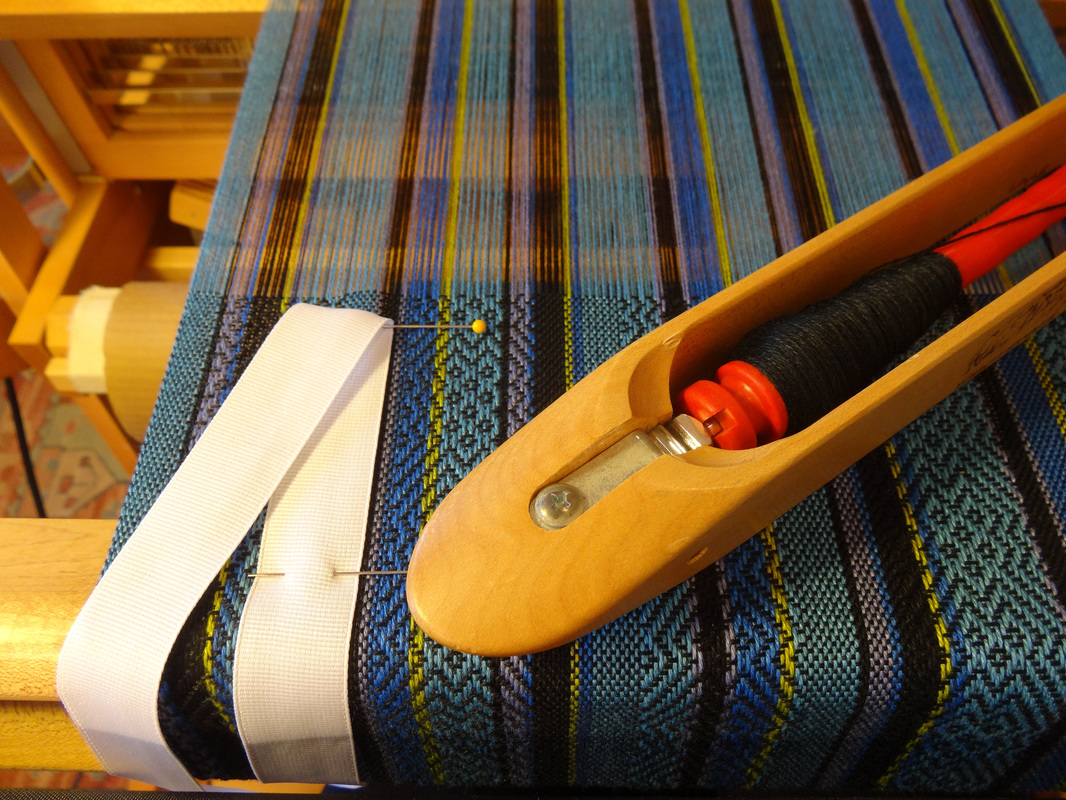
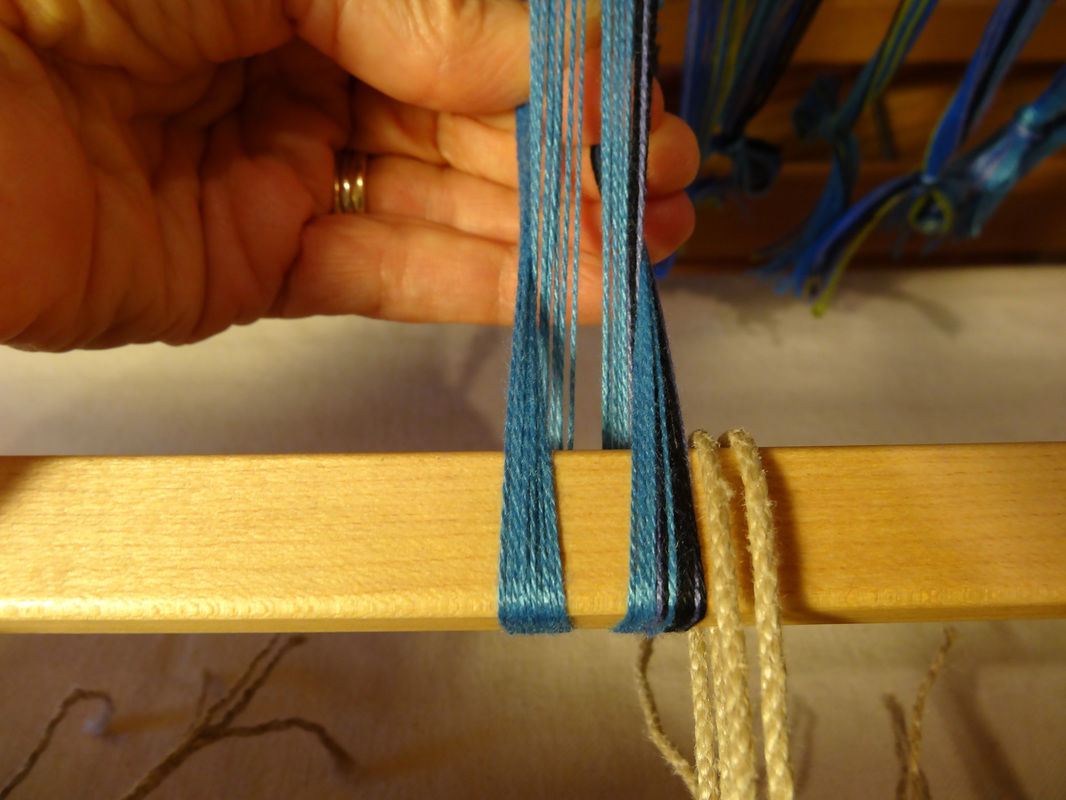
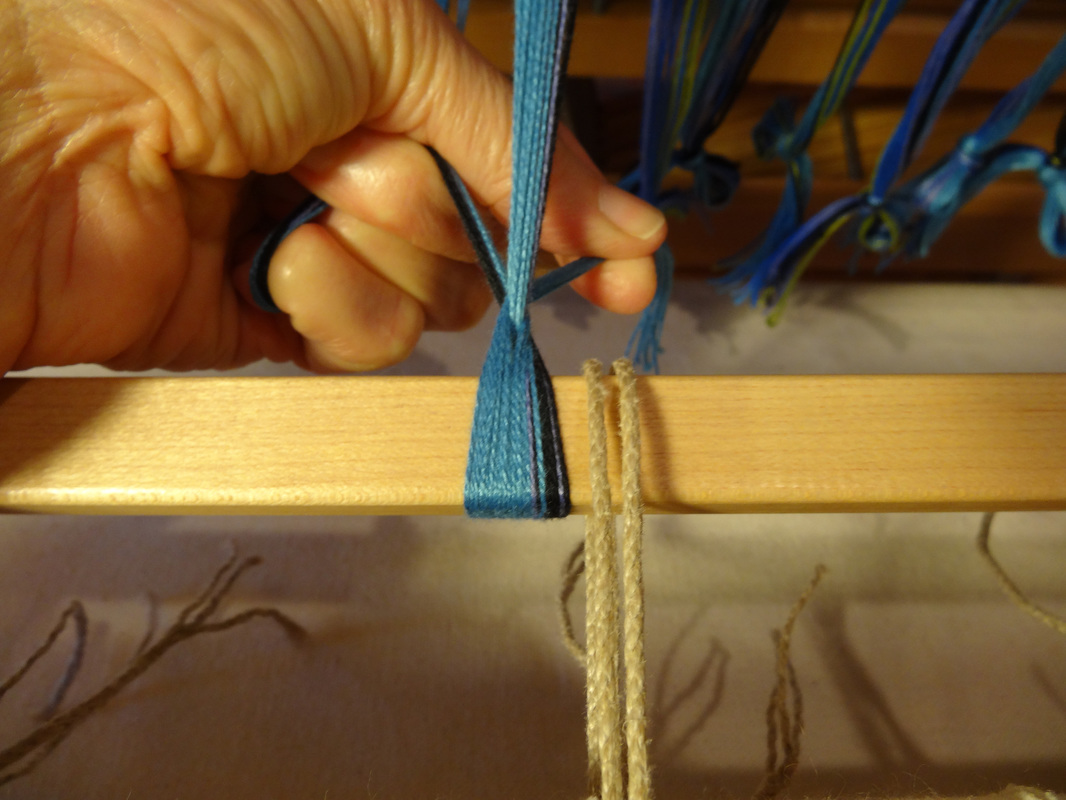
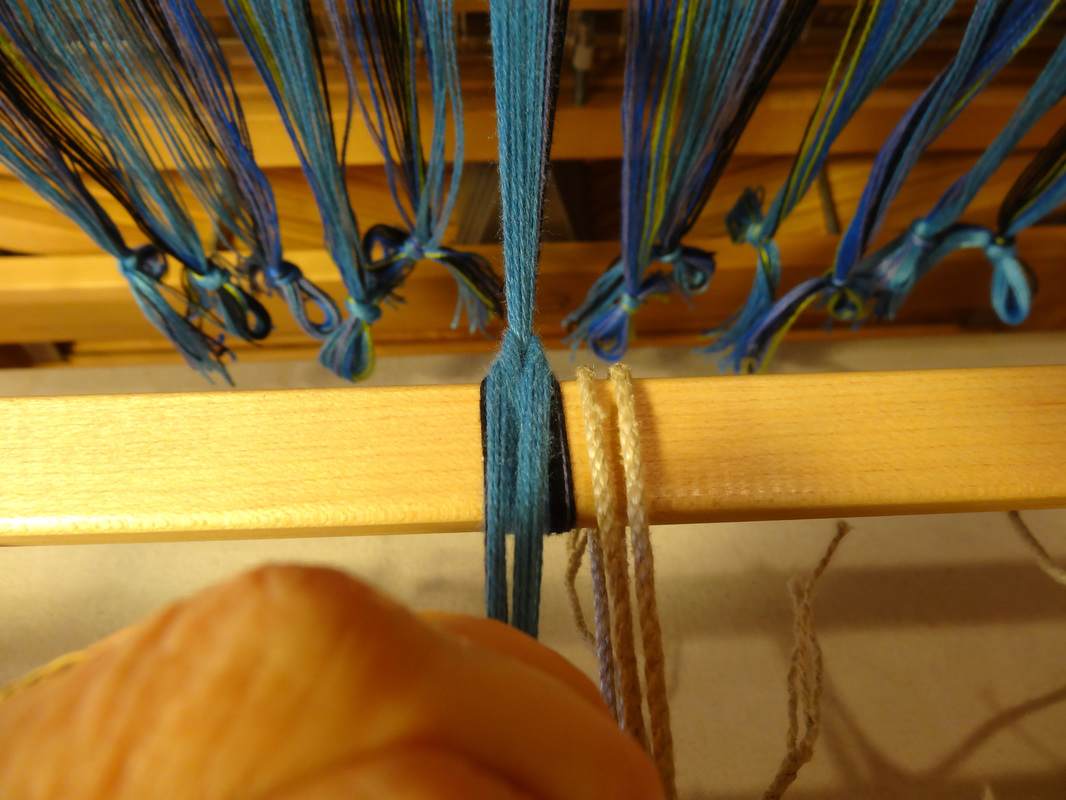
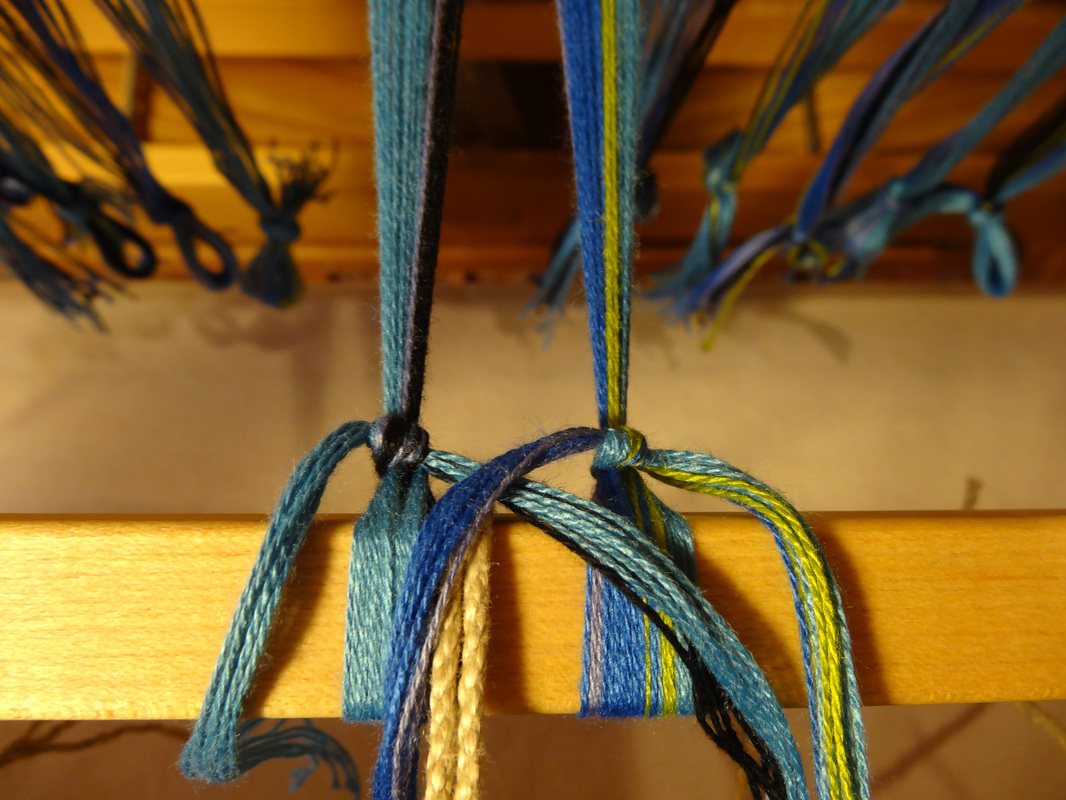
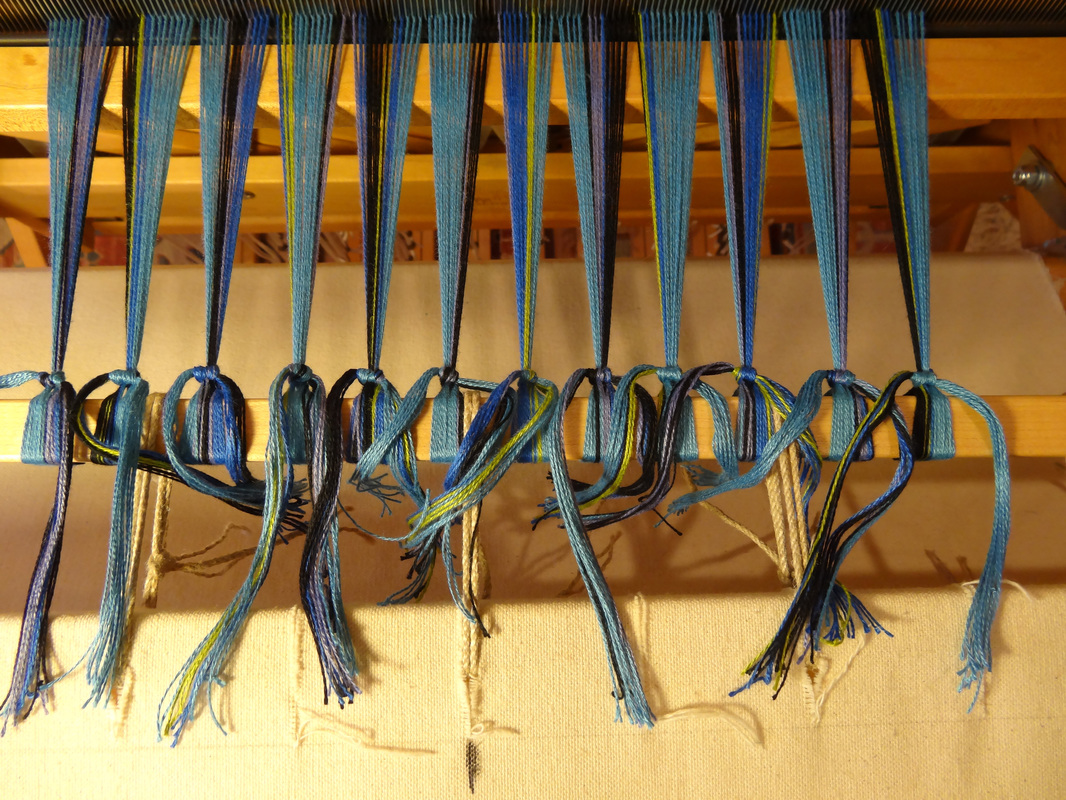
Tying the warp to the front apron rod
Before I even began this step, I removed the raddle and lease sticks from the back of the loom, and I removed the texsolv cords that were used to support the raddle, lease sticks and reed while winding on and threading.
Next I bundled the warp into 1” bouts starting at the edges of the warp and working my way toward the center.  I tied a slipknot in each bundle.

Next I tied the bouts to the apron rod.  There are many ways to do this.
  1. My favorite method: Start in the center and work out, tying with even tension for 4 to 6 1” bouts (2 or 3 on each side of center), then wind the cloth beam forward 1 click.  Continue to tie 1 bout on each side for another 2-3 bouts on each side, and wind forward another click.  Continue in this way until done.
  2. My favorite tie-on knot is to split the bout, take both sides under the apron rod, and back over the apron rod, cross the two sides under the bout, come up on opposite sides of the bout, pull snugly back towards the castle to tension, pull the ends back towards you and tie in a half surgeon’s knot on top of the bout.
  3. Check the tension in front of the reed and behind the reed.  Adjust if necessary.
  4. When all bouts are tied and tension seems even, secure each bout with a half bow.
Tip: 
​Try to never have bouts for tying on that are larger than 1” wide, and make sure the selvedge bouts are the same size (which is why I start on the edges and work toward the middle).

 
My draft doesn’t have an even multiple of 1” bouts, so I fudged a little in the middle, making the middle 3-5 bouts a little bit smaller.
Picture
Both sides of the bout passed under the apron rod, back over the rod and down beside the bout
Picture
Crossing the end of the bout underneath
Picture
After tensioning, the two sides are being held, ready to tie the half surgeon's knot
Picture
The half surgeon's knot on the first 2 bouts
Picture
All bouts tied with half surgeon's knots
Picture
All bouts finished with a half bow

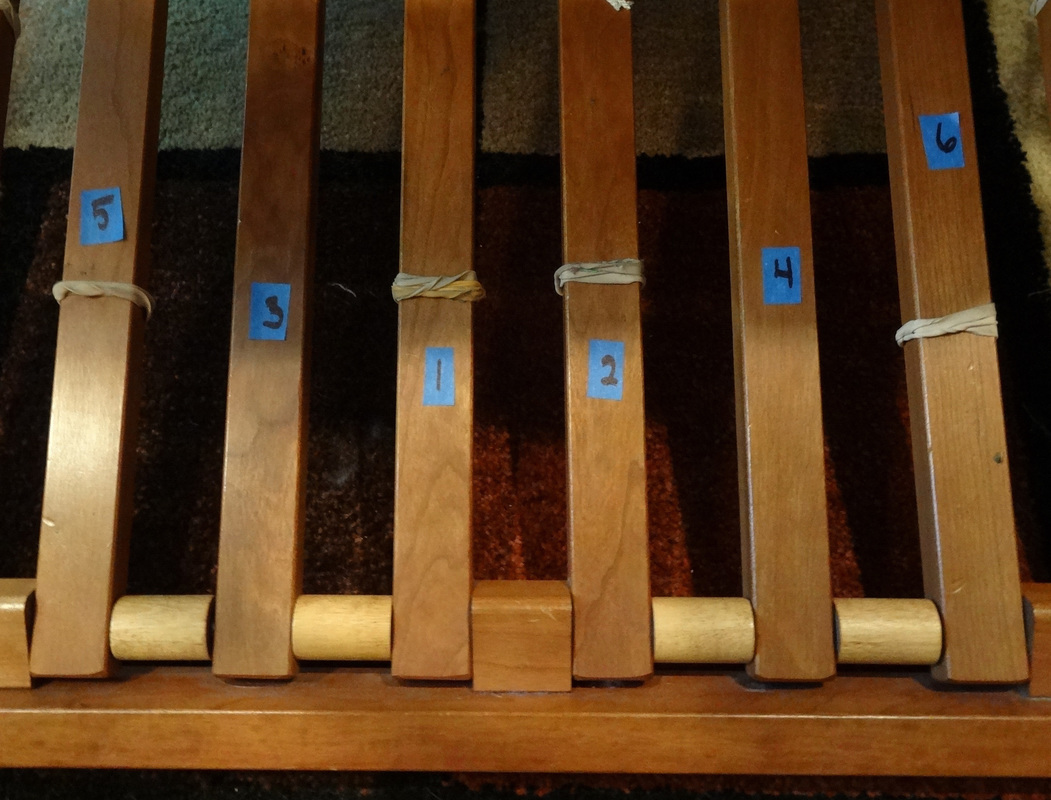
Tying up the treadles
The treadling is a point twill treadling and the original tieup required 4 treadles.  I like “walking” my treadles. 
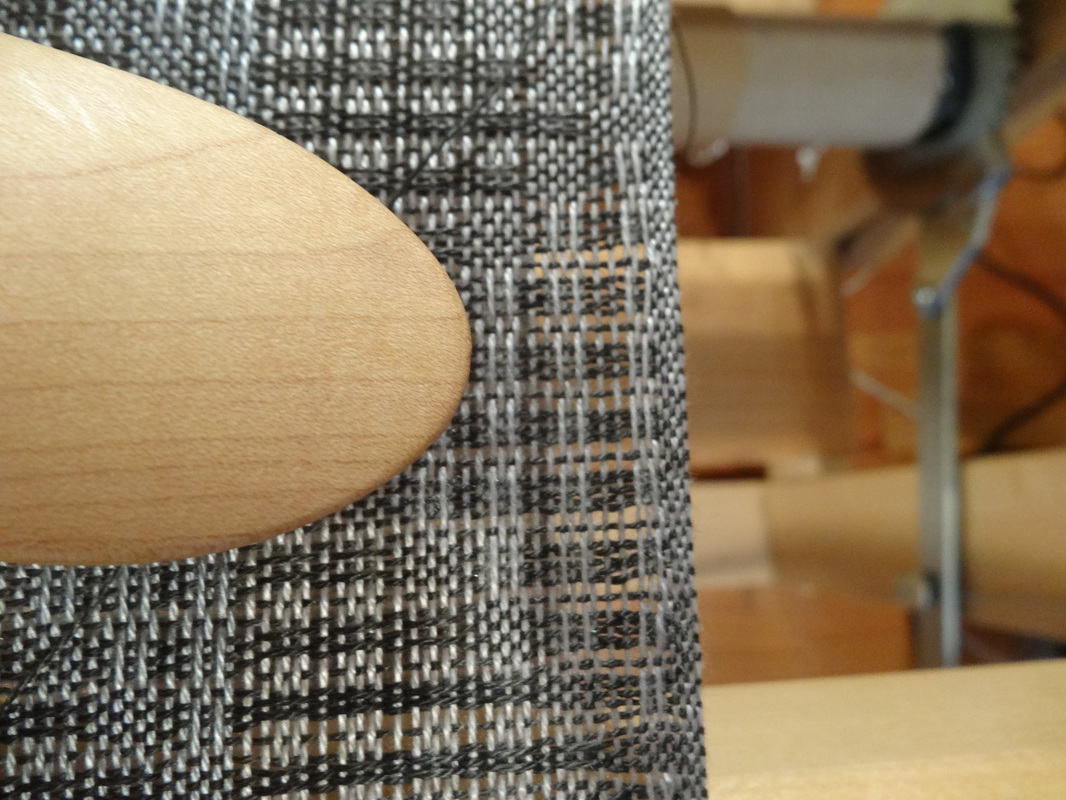
Option 1
Traditional walking treadles would mean that I would set up the 4 treadles like this:
Treadle          3          1         2         4
Tieup            34        12      23       41
Foot               ---Left ---     -- Right --
I would then press treadles 1,2,3,4  (left, right, left, right) for the straight twill runs and I would press treadles 1,2,3,4,3,2 (left, right, left, right, left, right) for the longer turning runs.
Option 2
For a point treadling like this I find it less confusing to add extra treadles to deal with the turning points in the treadling so I set up my treadles like this instead:
Treadle          5          3         1            2         4          6
Tieup             34       34       12          23       41       23
Foot               -------Left -------         ------ Right -----
I would then press treadles 1,2,3,4  (left, right, left, right) for the short straight twill runs and 1,2,3,4,5,6 (left, right, left, right, left, right) for the longer turning runs
​
So for this project I tied up my treadles according to the Option 2, and the treadling shown on the far right. 

To be clear, both of these treadlings weave EXACTLY the same cloth, the second one simply makes it easier for me to weave efficiently.

I placed rubber bands on the center treadles (1 & 2) so I my stocking feet could find the middle treadles without peeking.  I also placed rubber bands on treadles 5 & 6 to help me distinguish them from 3 & 4.
Picture
Original treadling
Picture
Modified treadling
Picture
6 treadles marked with rubber bands, labelled and tied up for walking style treadling

​After tying up the treadles, I checked my sheds:
  1. I pressed each treadle to make sure I was lifting the harnesses I intended to lift
  2. I used a mirror to look at the shed – both in front of the reed and behind it – looking for any crossed threads
  3. Double check that the threading and spacing through the reed look correct.

Weaving a header
  1. I wove a header with a yarn that was similar in size to the weft I would be weaving with. 
  2. I chose a slippery rayon that could be easily removed when I finished the scarves.
  3. I wove the header in pattern.
  4. For the first few shots, I wove 2 shots at a time before beating them in to help spread the warp threads faster, and I wrapped the weft around the apron rod before throwing the next shot to help keep the selvedge from curling while I get the warp spread.
  5. After the first 1/2" or so, I wove without wrapping around the apron rod, and I wove until the warp was spread evenly and I was sure the tension was even and there were no threading errors.
Picture
First 2 shots of the header wrapped around the apron rod. Both shots were thrown before beating them in.
Picture
First several shots of header all wrapped around the apron rod. Warp is nearly spread evenly.
Picture
Header complete. Last section was woven without wrapping the weft around the apron rod.

Now on to weaving some samples!  Go to Life History-Day 7
To review, go back to Life History-Day 5

0 Comments
<<Previous
Forward>>

    Pattie Lamb

    I have been happily weaving since my son was born in 1988.

    All pictures on my blog are "zoomable" - just click on them to enlarge.

    Archives

    June 2023
    March 2023
    June 2022
    November 2020
    October 2020
    February 2020
    October 2019
    June 2019
    May 2019
    June 2018
    July 2017
    June 2017
    May 2017
    April 2017
    February 2017
    January 2017
    August 2016
    July 2016
    May 2016
    February 2016
    February 2015
    January 2015
    October 2014
    September 2014

    Categories

    All
    Artificial Intelligence
    Baby Wraps
    Blankets
    Block Twill
    Block Weave
    Block Weaves
    Cat's PJs
    Challenges
    Charity
    ChatGBT
    Classes
    Commissions
    Deflected Doubleweave
    Design
    Doubleweave
    Dyeing
    Facebook Challenge
    Felting
    Finishing
    Fringing
    Hemstitching
    John C Campbell
    Knitting
    Knots
    Lace Weaves
    Leftovers
    Life History-Day 1
    Life History-Day 2
    Life History-Day 3
    Life History-Day 4
    Life History-Day 5
    Life History-Day 6
    Life History-Day 7
    Life History-Day 8
    Life History-Day 9
    Life History-Final
    Life History Of A Scarf
    More Than Pink
    Paper Quills
    Plain Weave
    Ply Split
    Process
    Rugs
    Runners
    Scarves
    Selvedges
    Shawls
    Storyboard
    Study Group
    Tencel
    Tie-ups
    Tip Of The Month
    Tips
    Tools
    Towels
    Travel
    Treadling For Dummies
    Turned Twill
    Twill
    Videos
    Walking Pink
    Warping
    Weaving
    Weaving Pink
    Weaving Tips
    Wedding
    Yarn Wraps

    RSS Feed

         HOME        //      SHOP      //       BLOG       //        EVENTS       //       GALLERY     //      ABOUT       //      CONTACT

  • Home
  • SHOP
    • Scarves
    • Shawls & Wraps
    • Wool Scarves & Shawls
    • Blazing Shuttles
    • Throws & Baby Blankets
    • For the Home
    • Odds & Ends
    • Shop All Handwovens
    • Schacht Equipment
    • Gift Cards
  • Blog
  • Events
  • Gallery
    • Scarves & Shawls
    • Baby
    • For the Home
    • The Wedding
    • Komen
  • About
    • Storyboard