
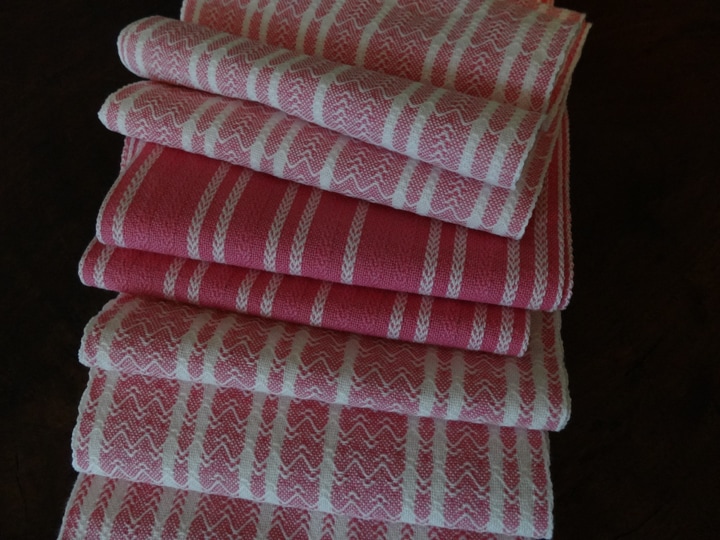
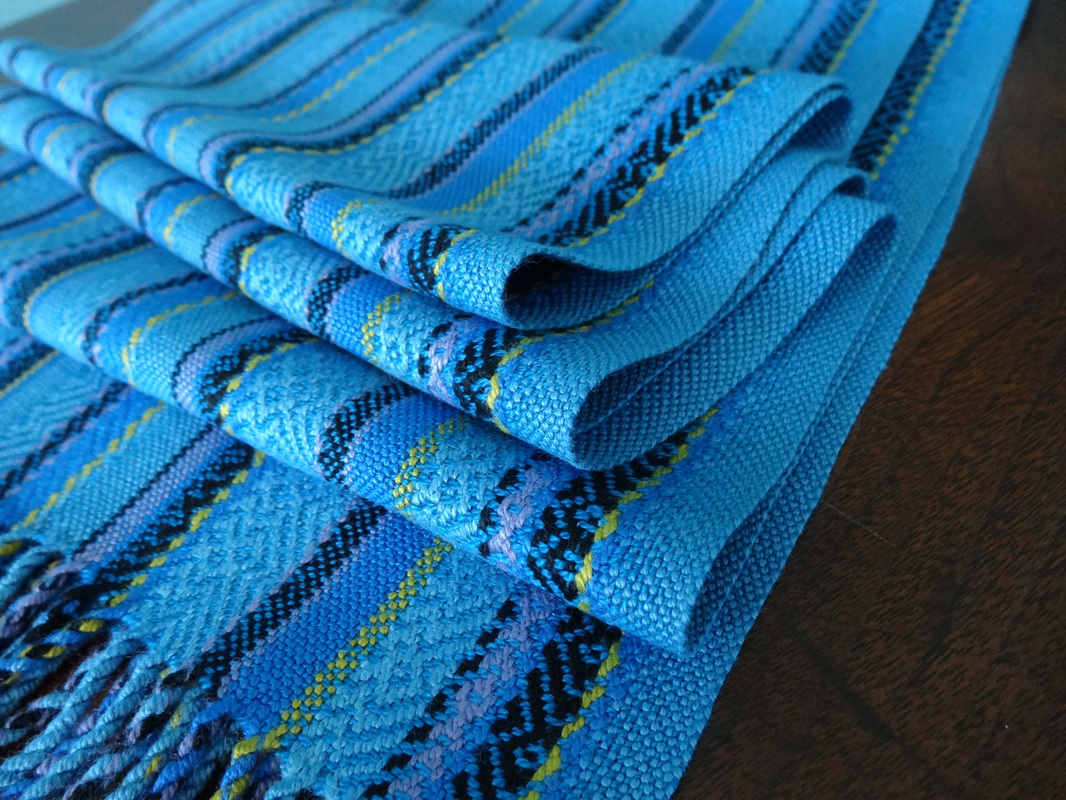
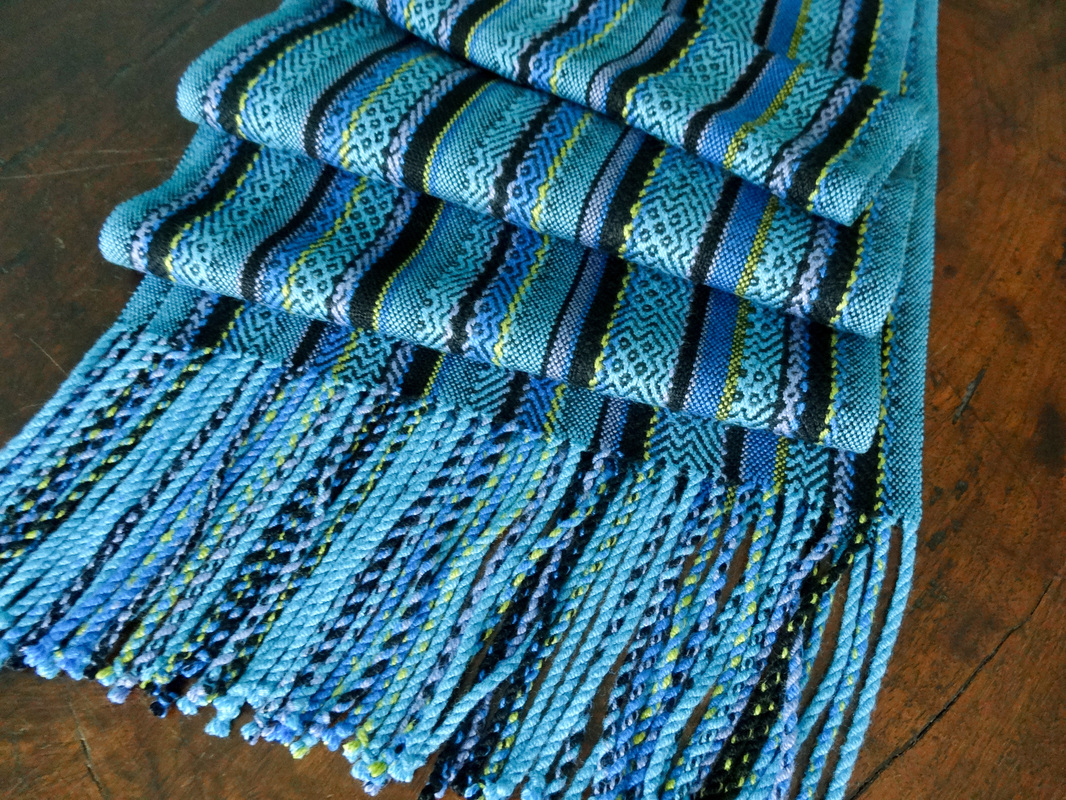
But first we wove. We decided that scarves were in order for a bunch of weavers walking in a More Than Pink event. Some of these scarves would be worn by the walkers. Some would be sold and proceeds donated to the cause. I put on 3 pink and white warps for 5 scarves each:
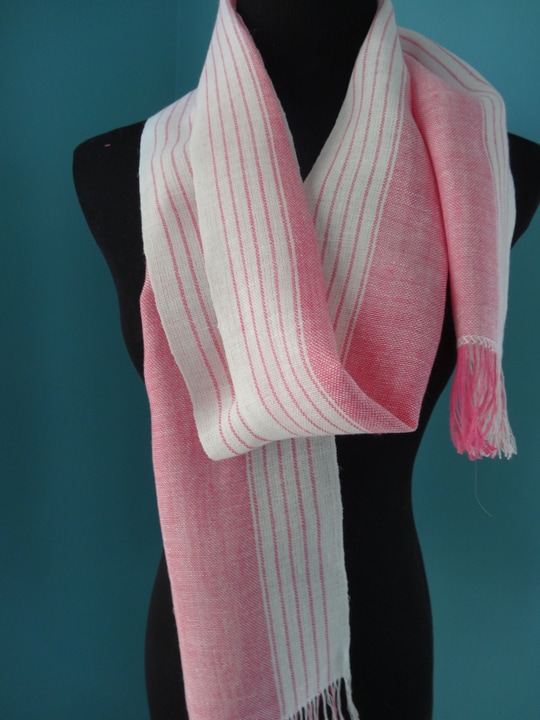
The Linen Scarves
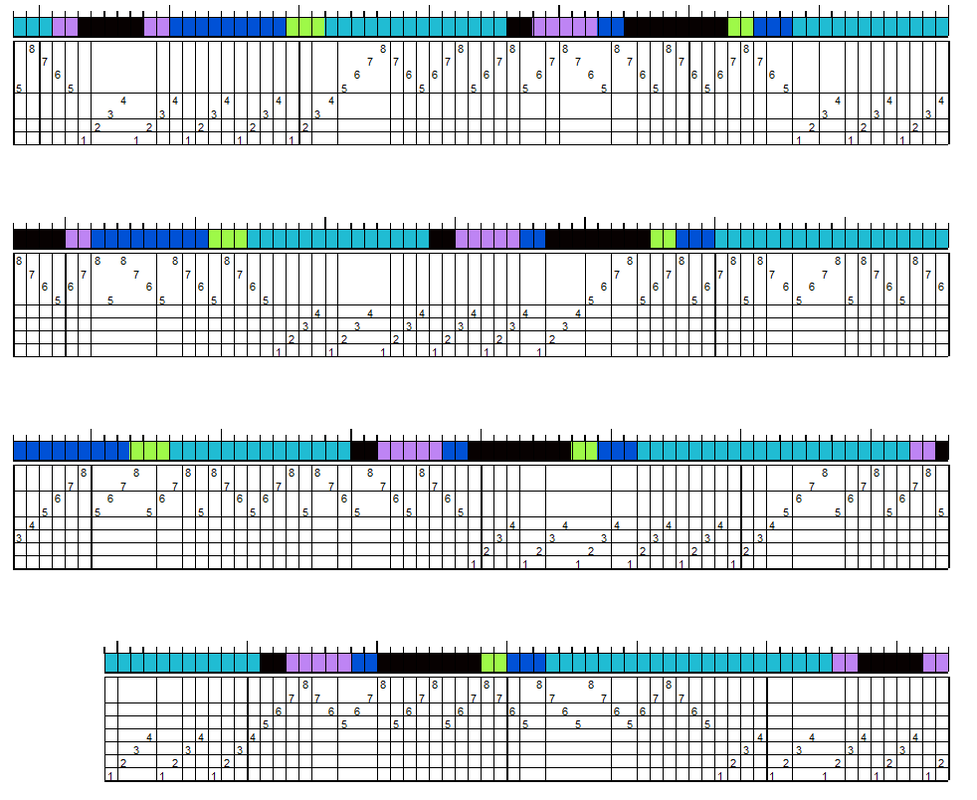
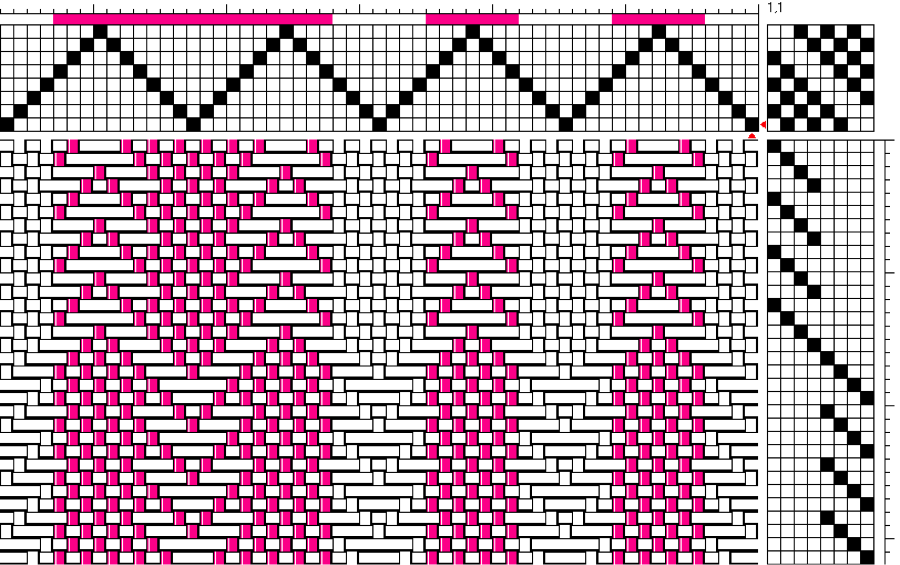
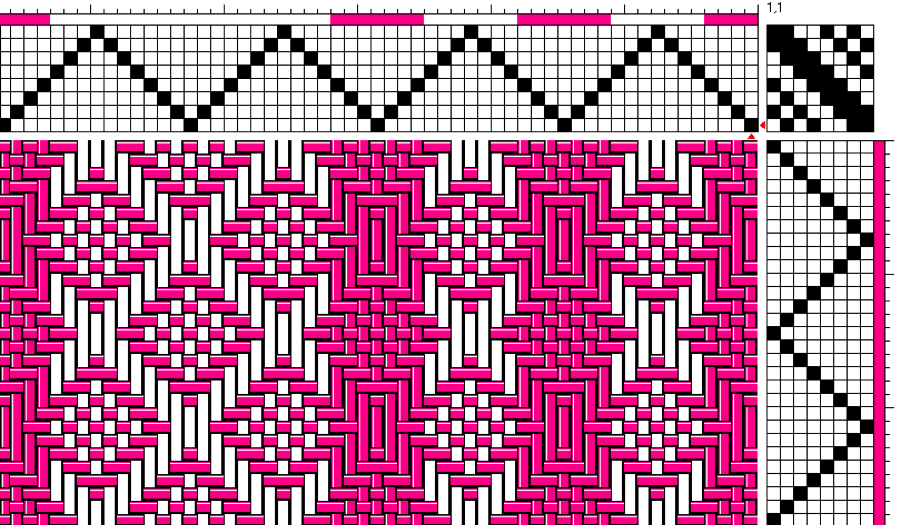
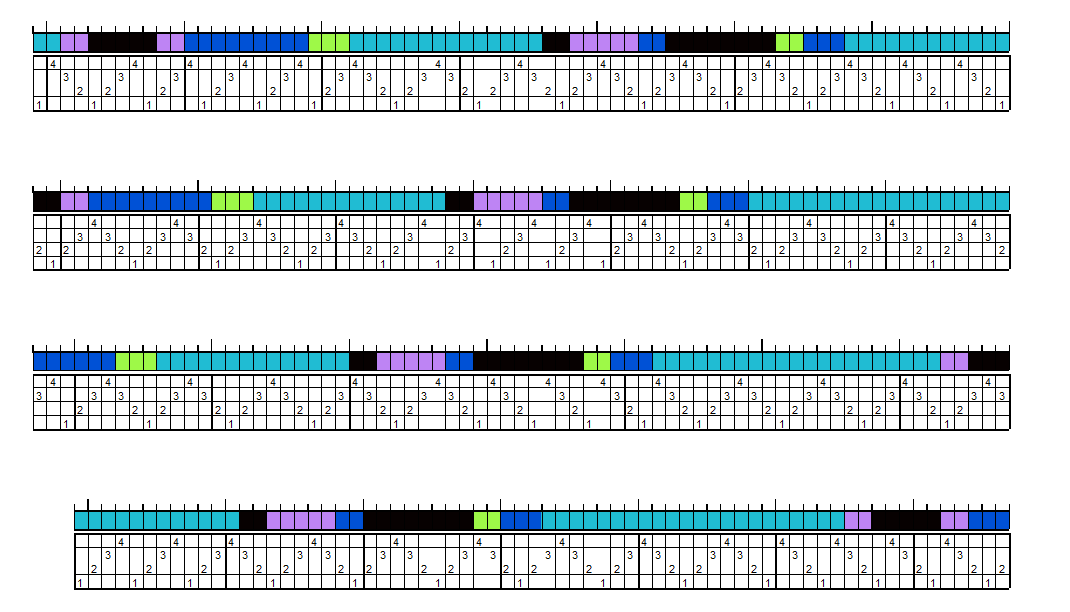
 Threading & tieup for the linen scarves
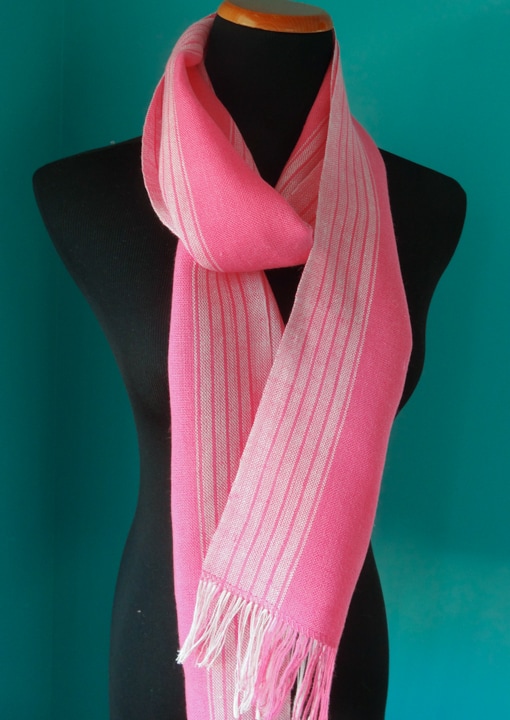
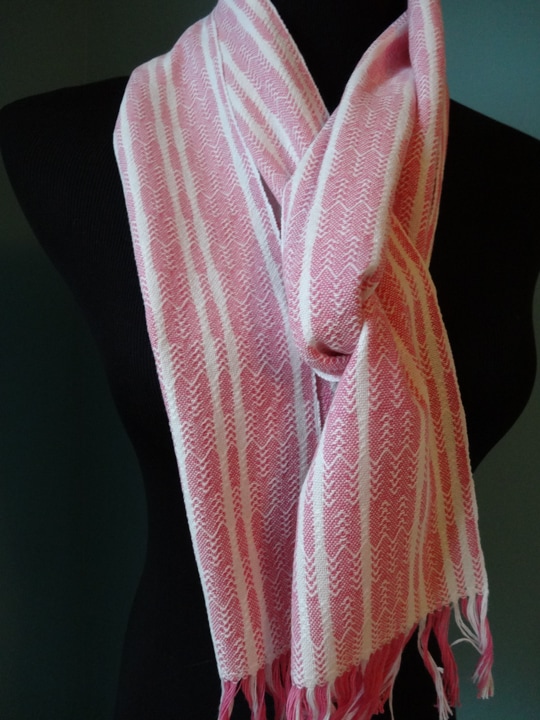
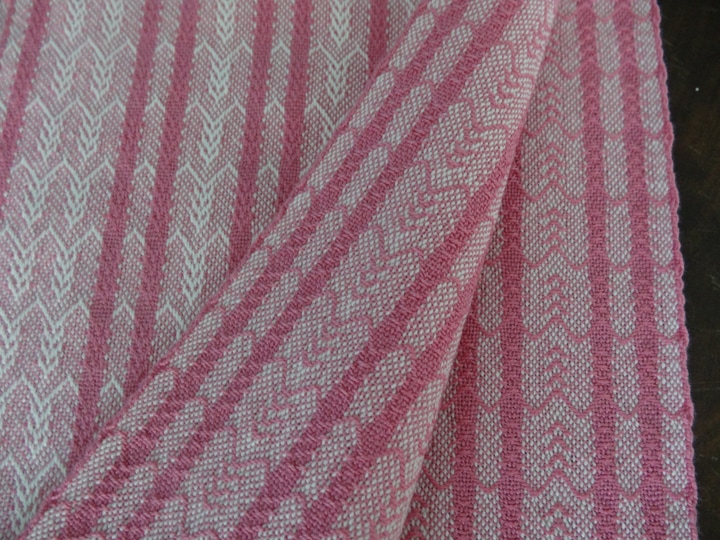
The Pink Scarves with White Stripes
 Threading for the pink scarves with white stripes
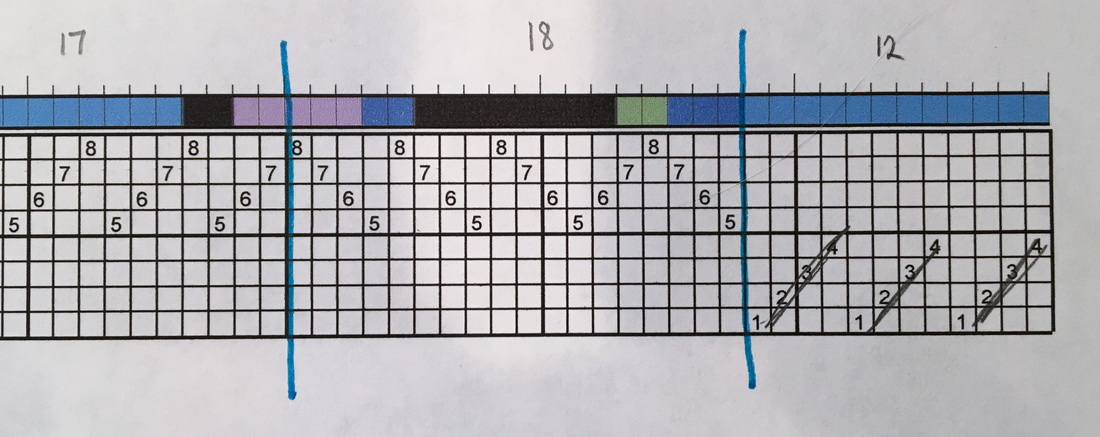
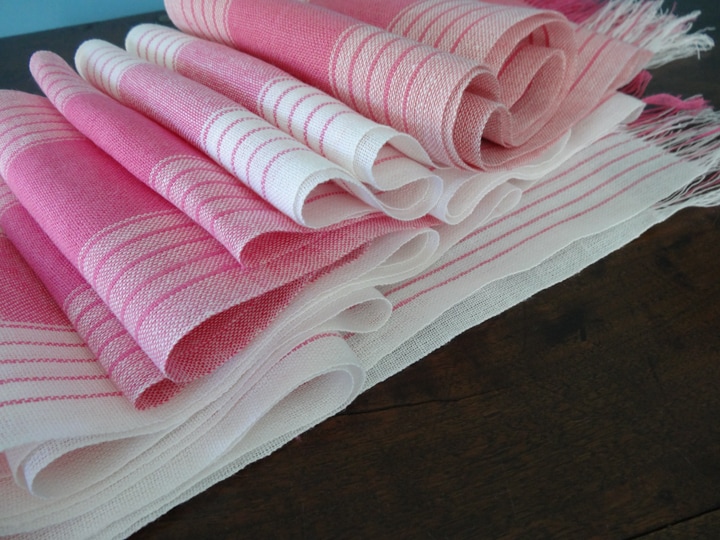
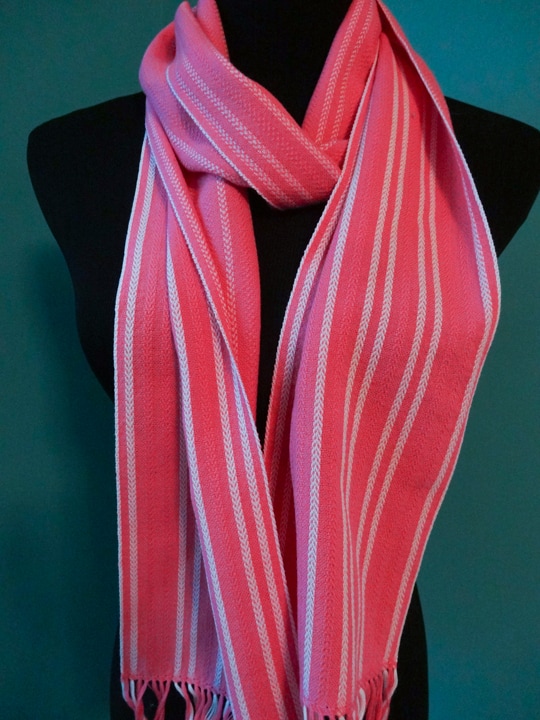
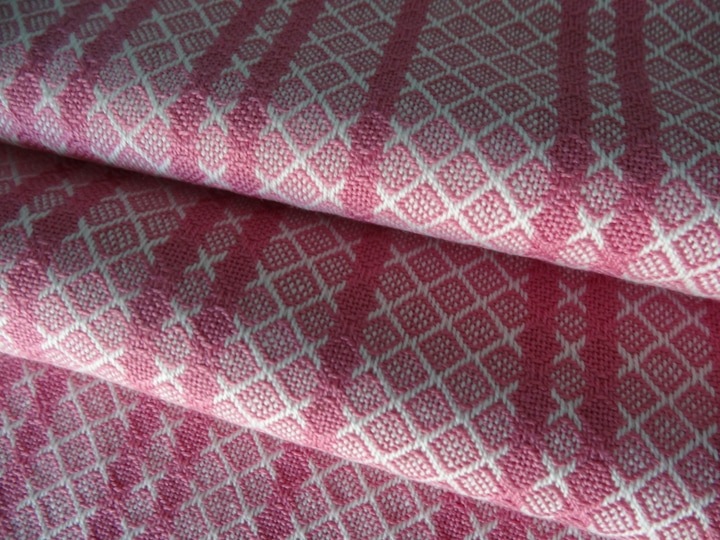
The White Scarves with Pink Stripes
 Threading for the white scarves with pink stripes
The Walk We will walk on May 6th, and I will post photos of the event in the next blog post: Walking More Than Pink. Check back after the event! In the meantime, if you would like to make a donation to my fundraising team and the Susan G. Komen Foundation, click here -- Pattie Lamb
5 Comments
Well the scarves are done, and you might be thinking that this seemed like a lot of work and a lot of days. I can assure you that it did not really take 9 days to make these 2 scarves.
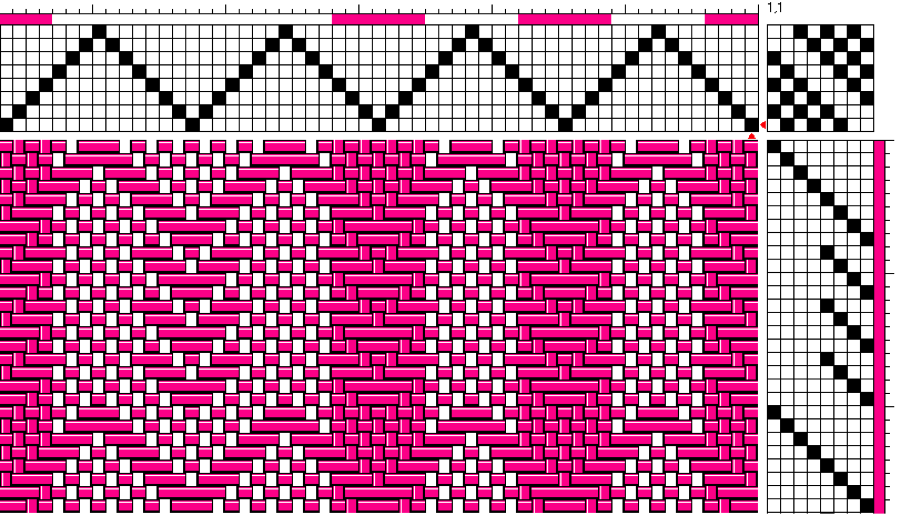
Four Harness Alternatives I have had a request for a draft for a similar scarf for those who only have a 4 harness loom. It is not possible to mix plain weave and twill in the same way with only 4 harness, but I have come up with a draft that uses the same bamboo warp in a twill, with a couple of possible options for treadling.
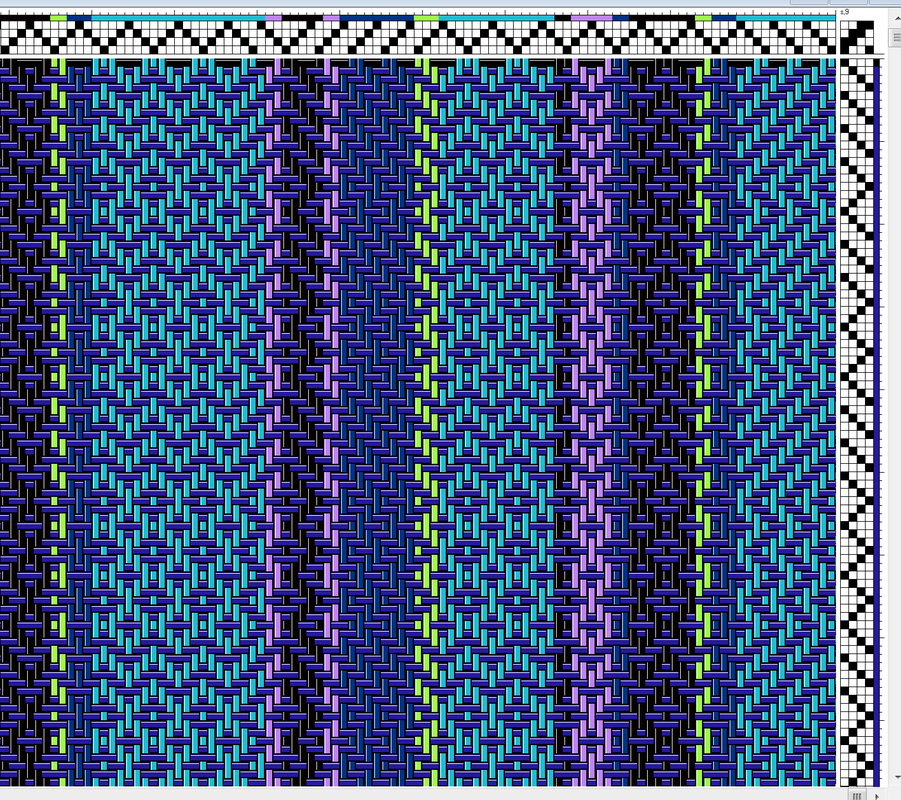
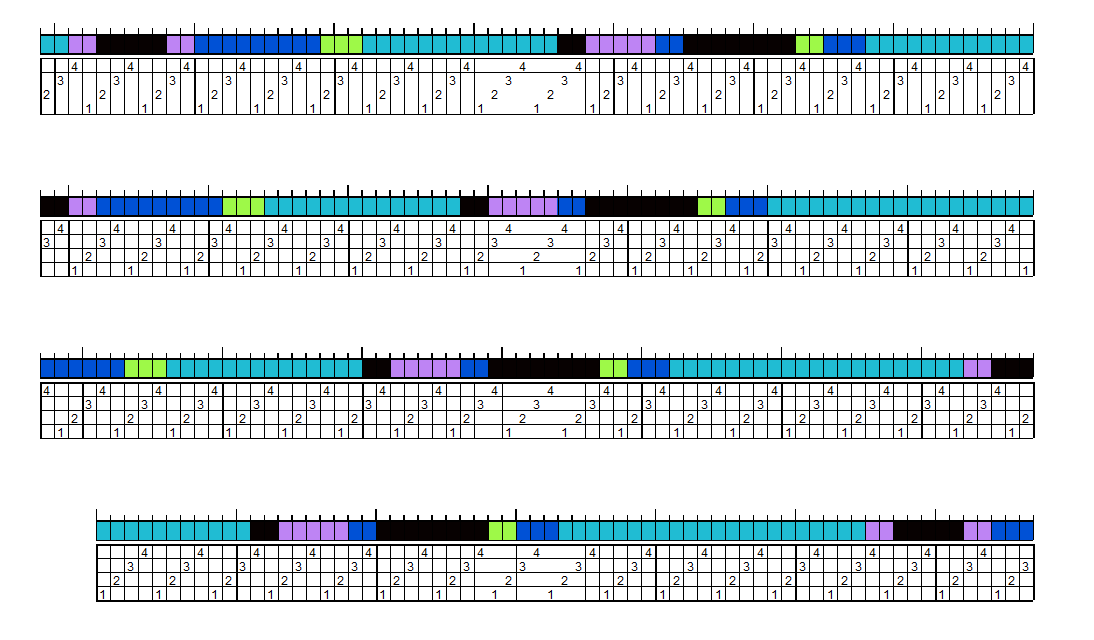
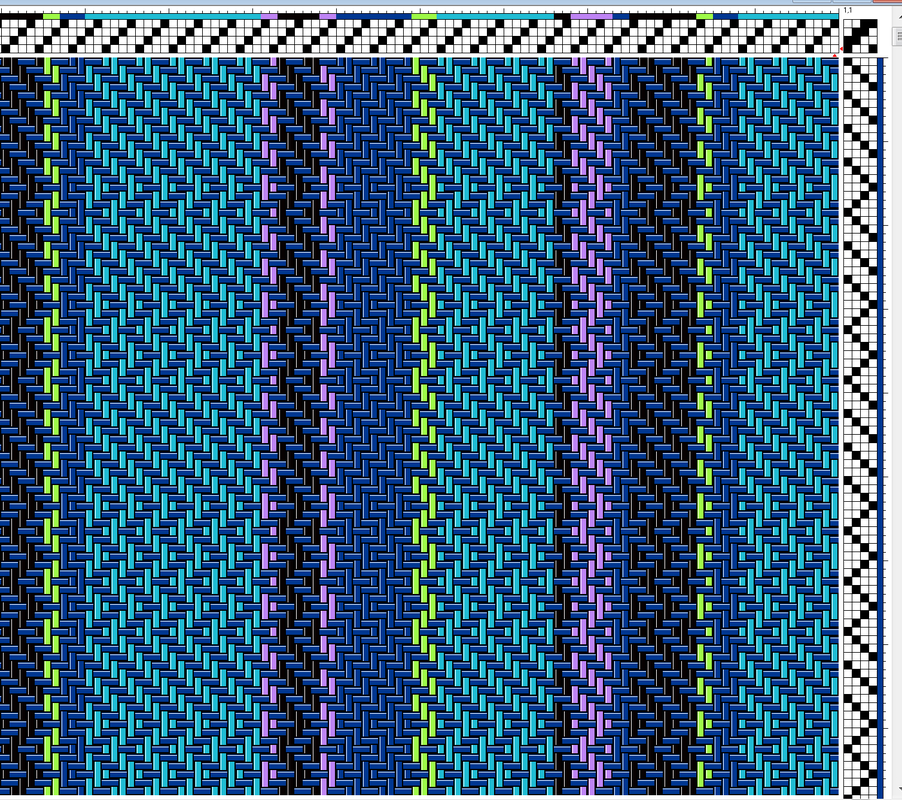
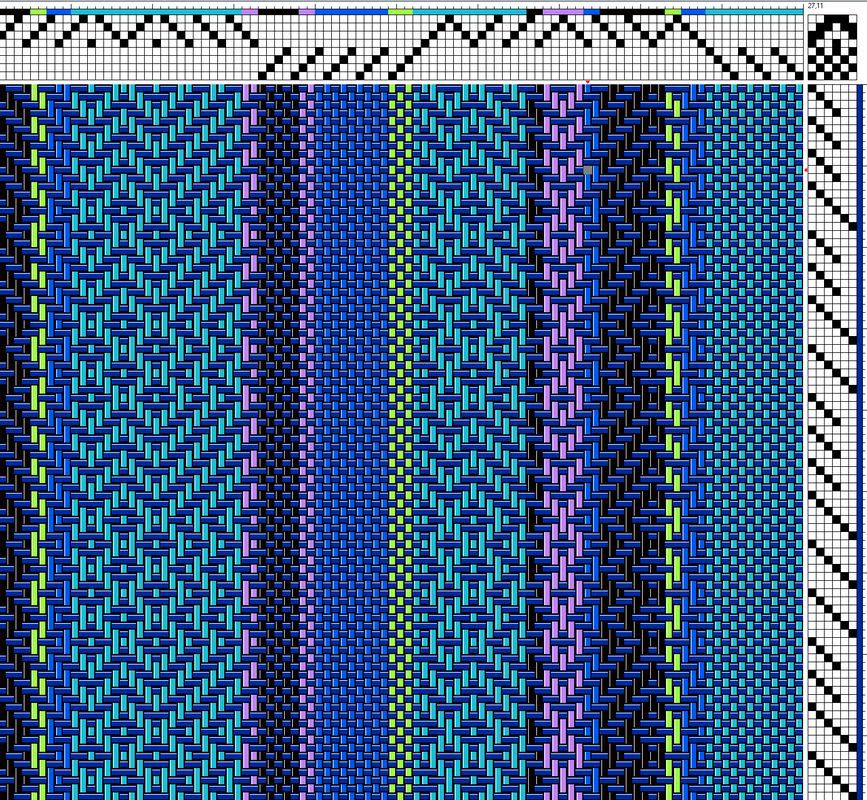
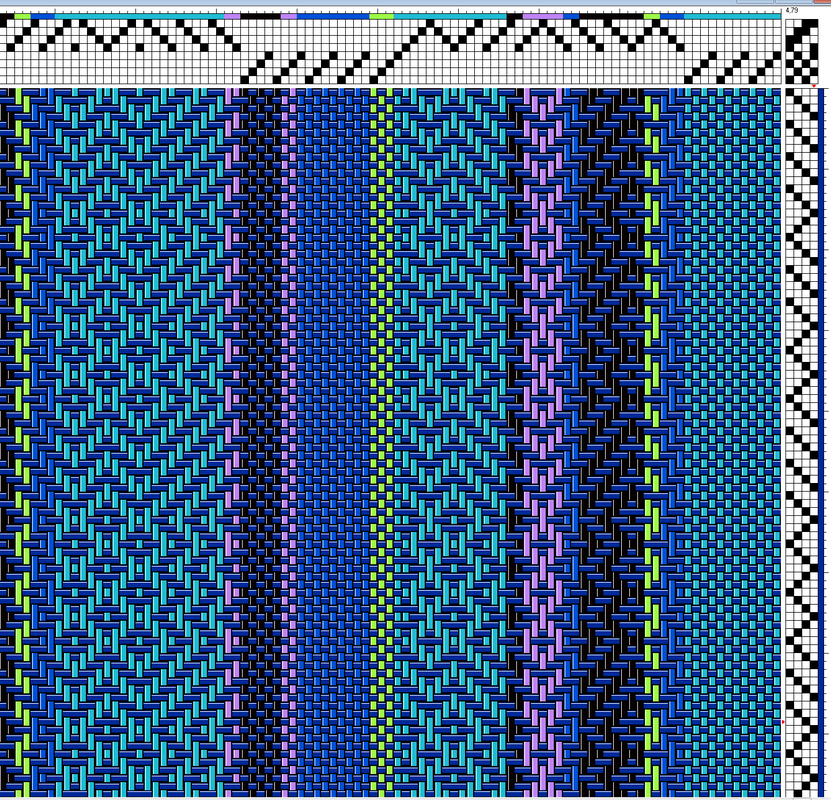
Alternative 1 This draft uses EXACTLY the same colorway and treadling as the scarves that I wove. It has 281 threads, just like the warp I used. It is a point twill threading, and I would recommend using a floating selvedge with this treadling. The draft is shown below, and a partial drawdown is shown to the right so you can see what the cloth would look like. Click on either photo to zoom in.
Alternative 2 This draft uses the same colorway as the scarves I wove EXCEPT that the last group of aqua threads on the far left of the draft has 11 threads in it instead of 12, giving a total of 280 instead of 281. This allows for a multiple of 4 for the straight draw threading. You would not need a floating selvedge with this threading (as long as you start your shuttle from the right side). This draft uses the same treadling as the scarves that I wove. The draft is shown below, and a partial drawdown is shown to the right so you can see what the cloth would look like. Click on either photo to zoom in.
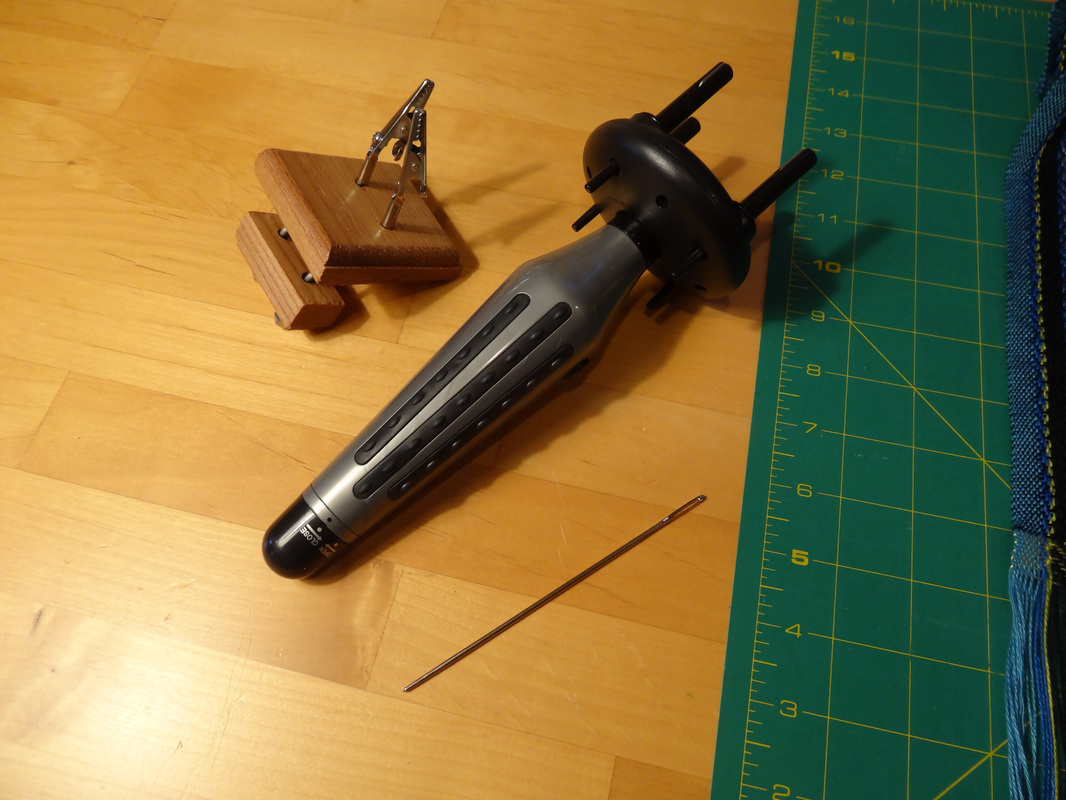
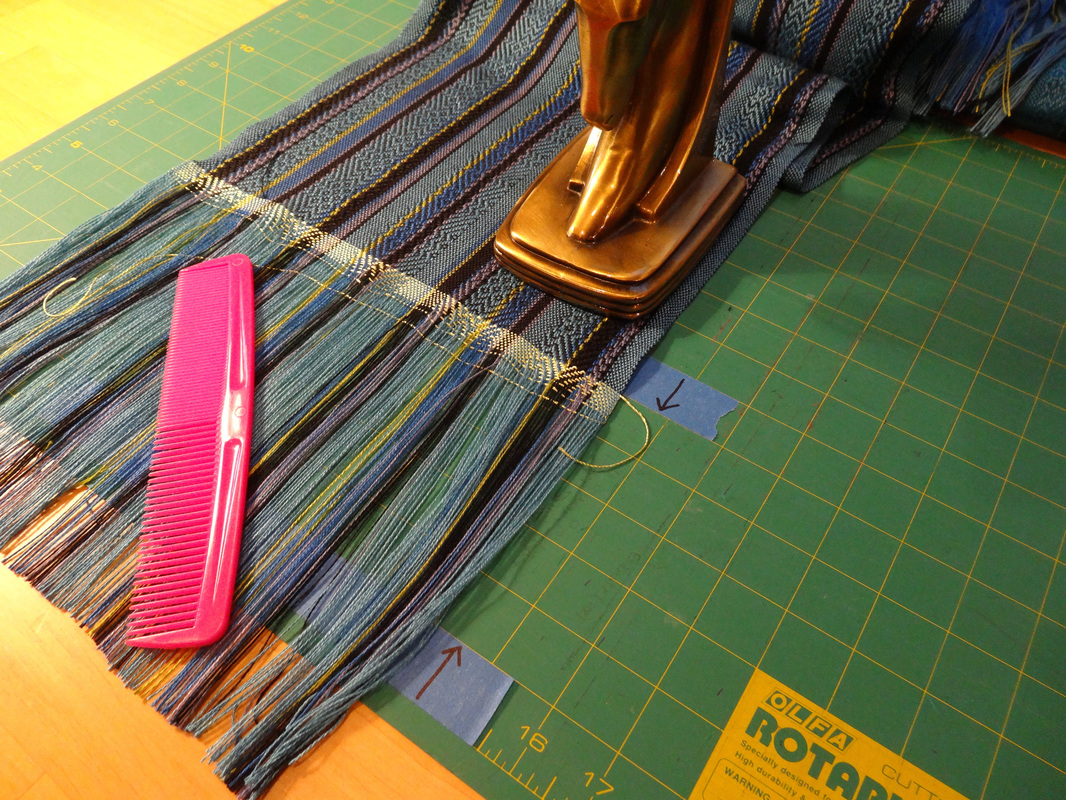
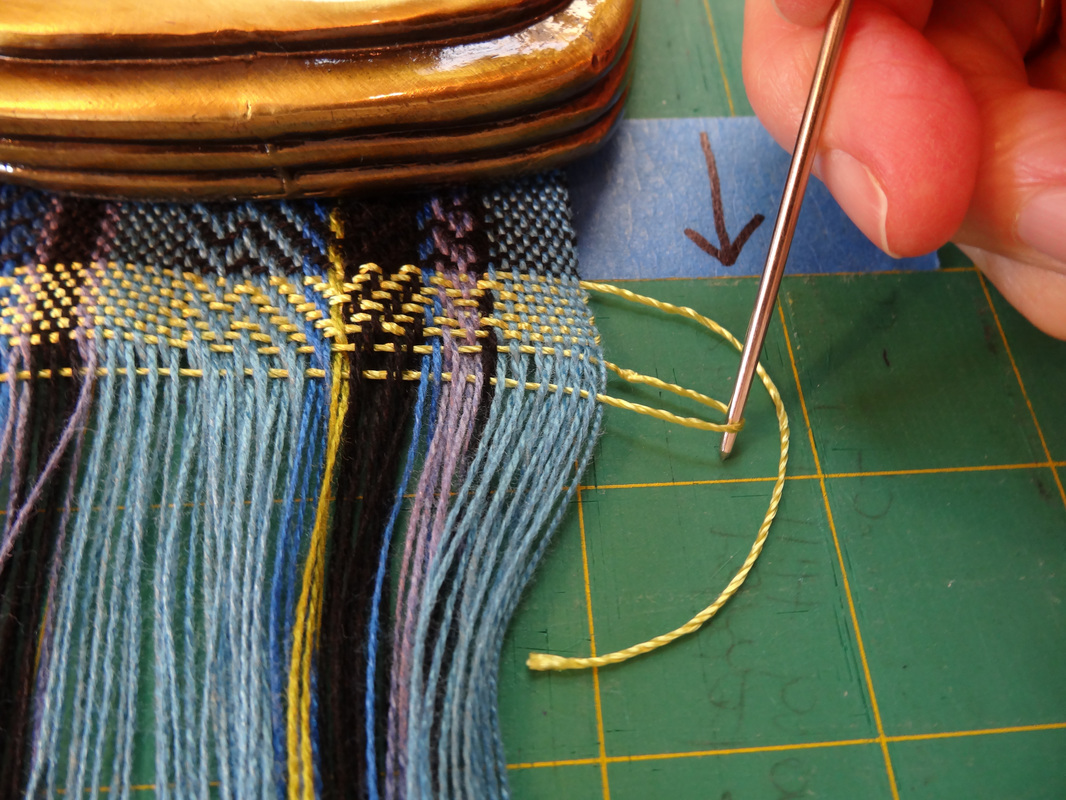
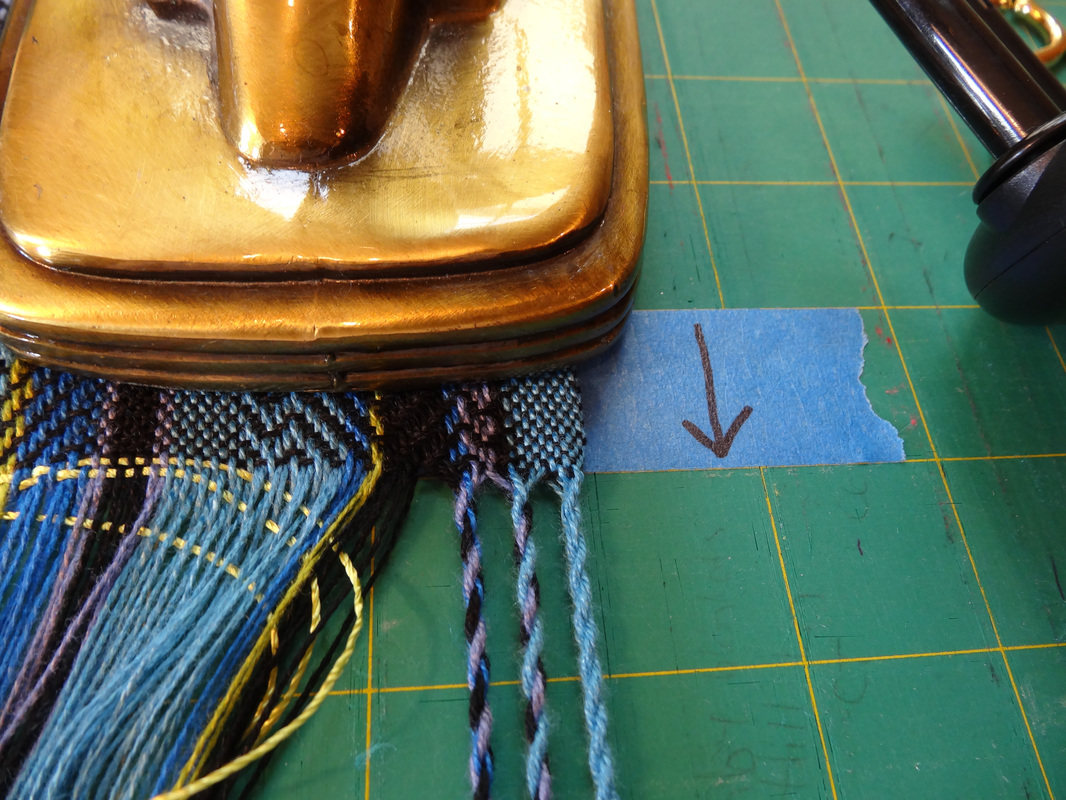
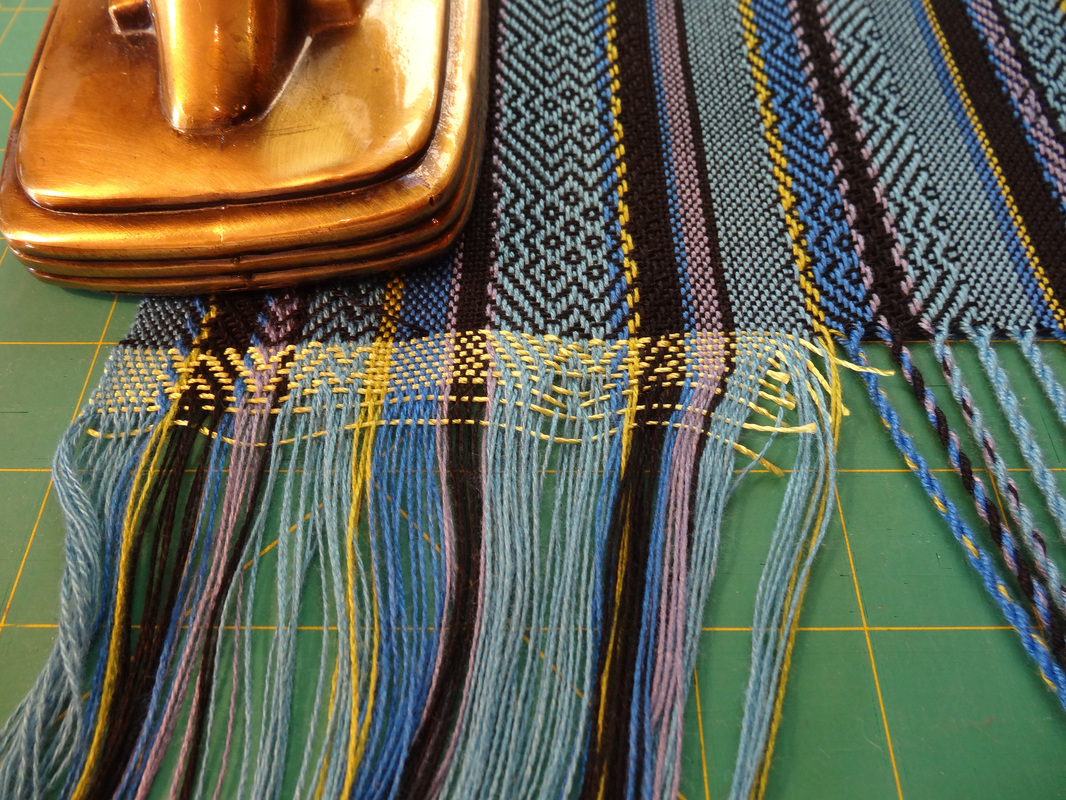
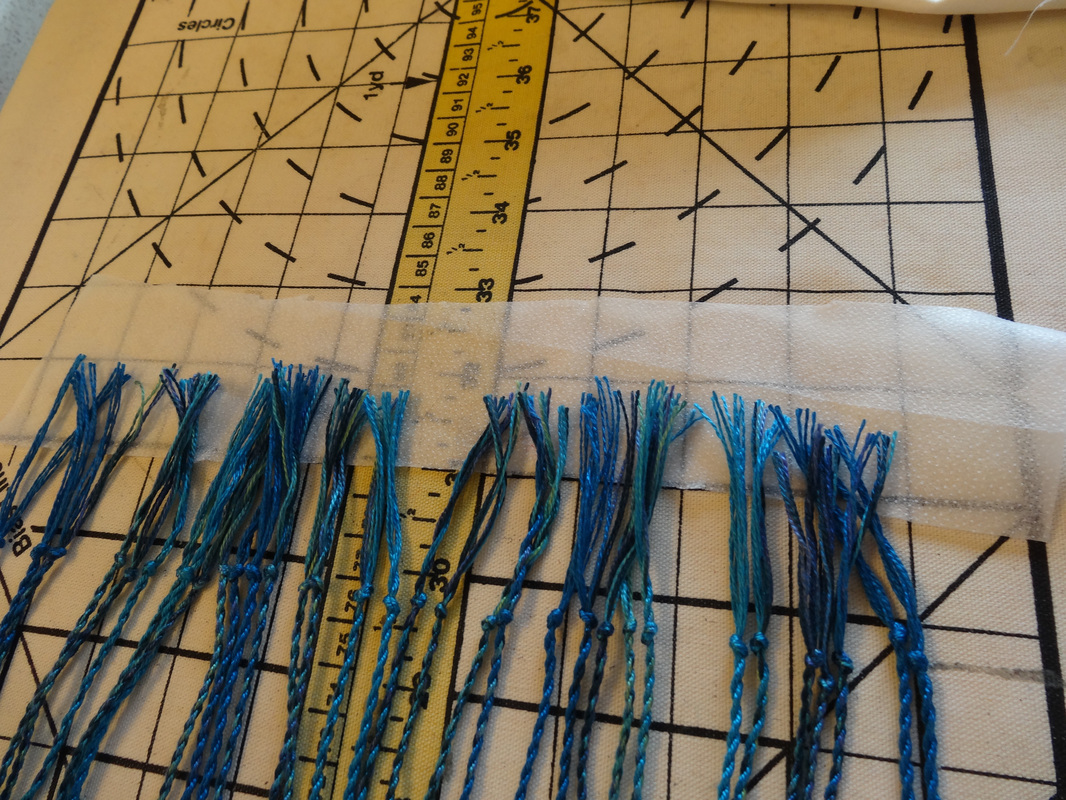
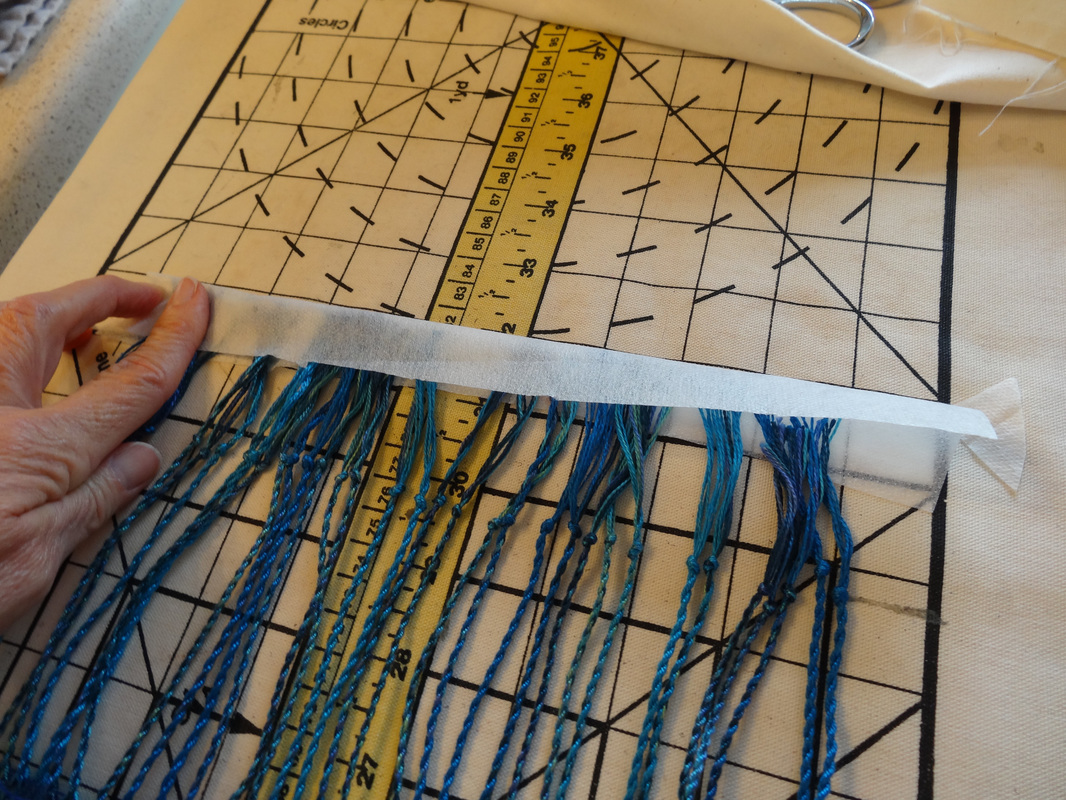
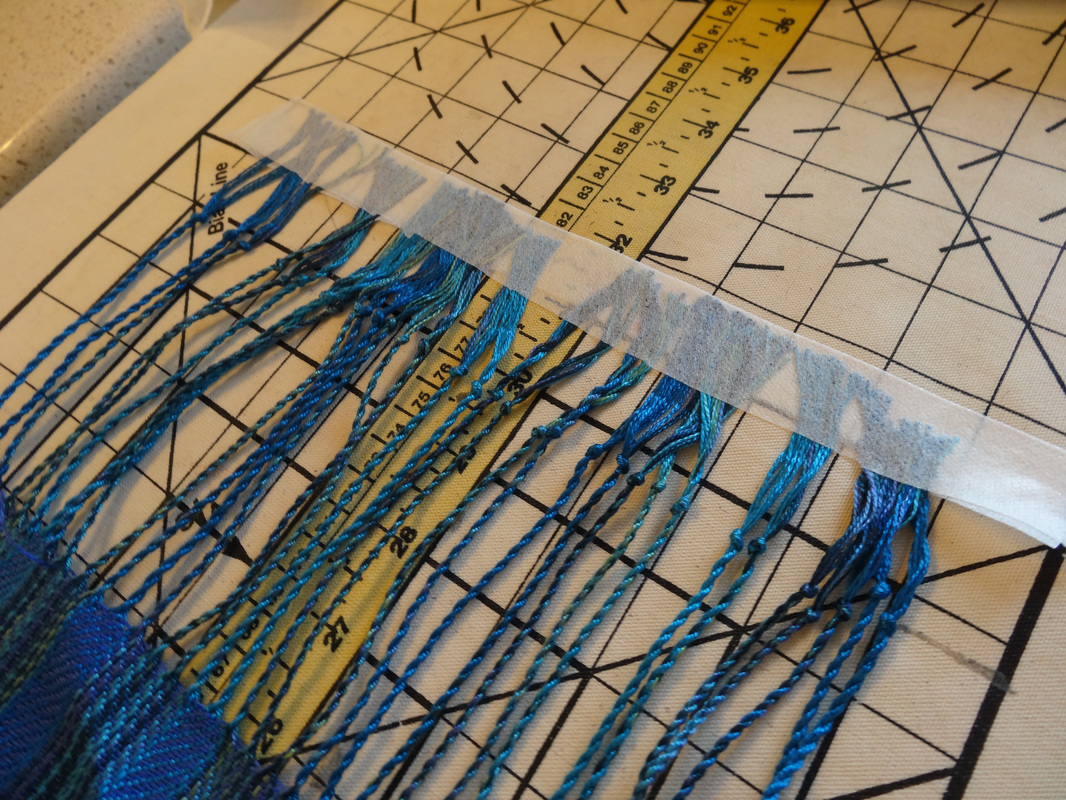
Wet finishing, pressing and trimming The final finishing took 5 steps (Note: My choice for wet finishing varies depending on the fiber and structure of the scarves. Bamboo and tencel scarves in twill and plain weave do very well with machine washing and drying)
To read my final thoughts on this project go to Life History-Final To review, go back to Life History-Day 8
Scarf #1
Once the scarves were woven it was time to finish them. Go to Life History-Day 9. To review, go back to Life History-Day 7
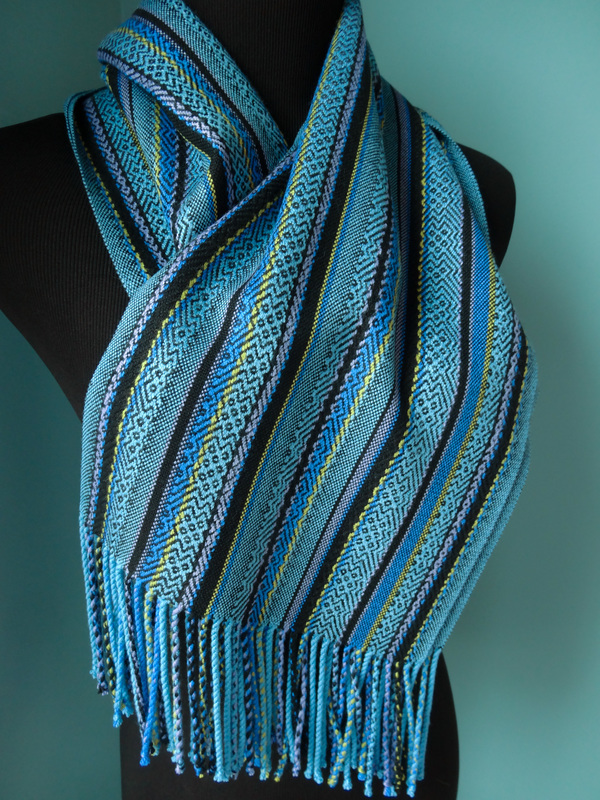
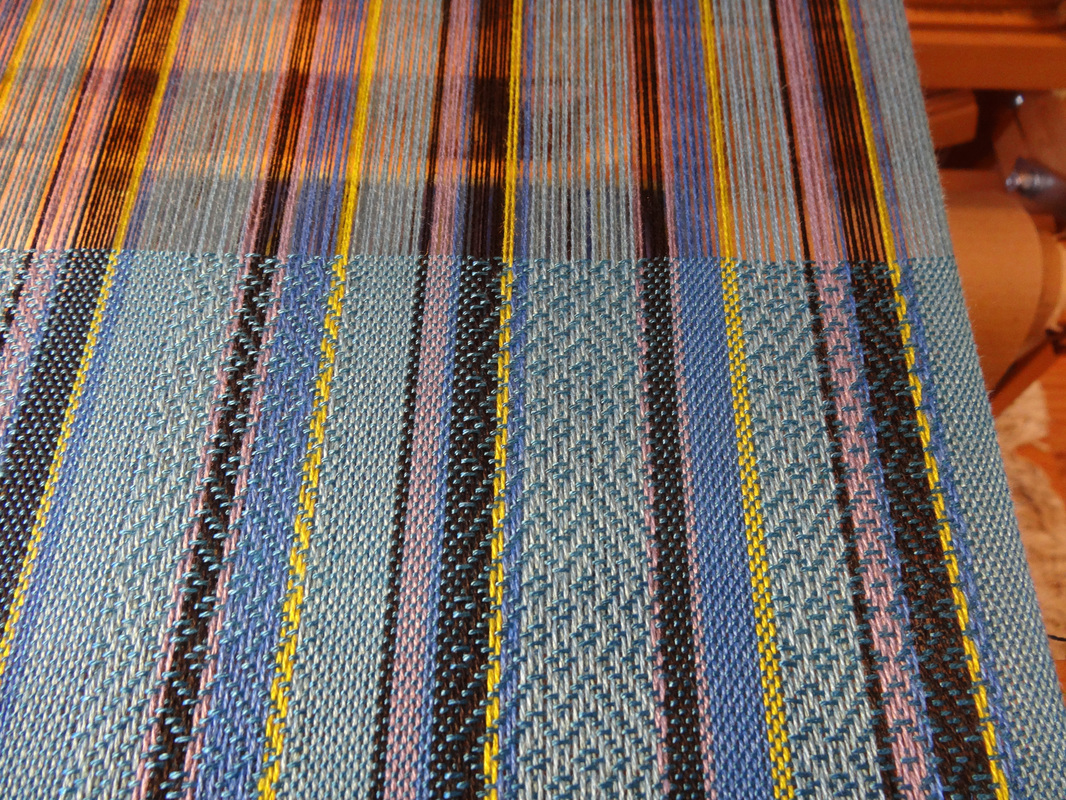
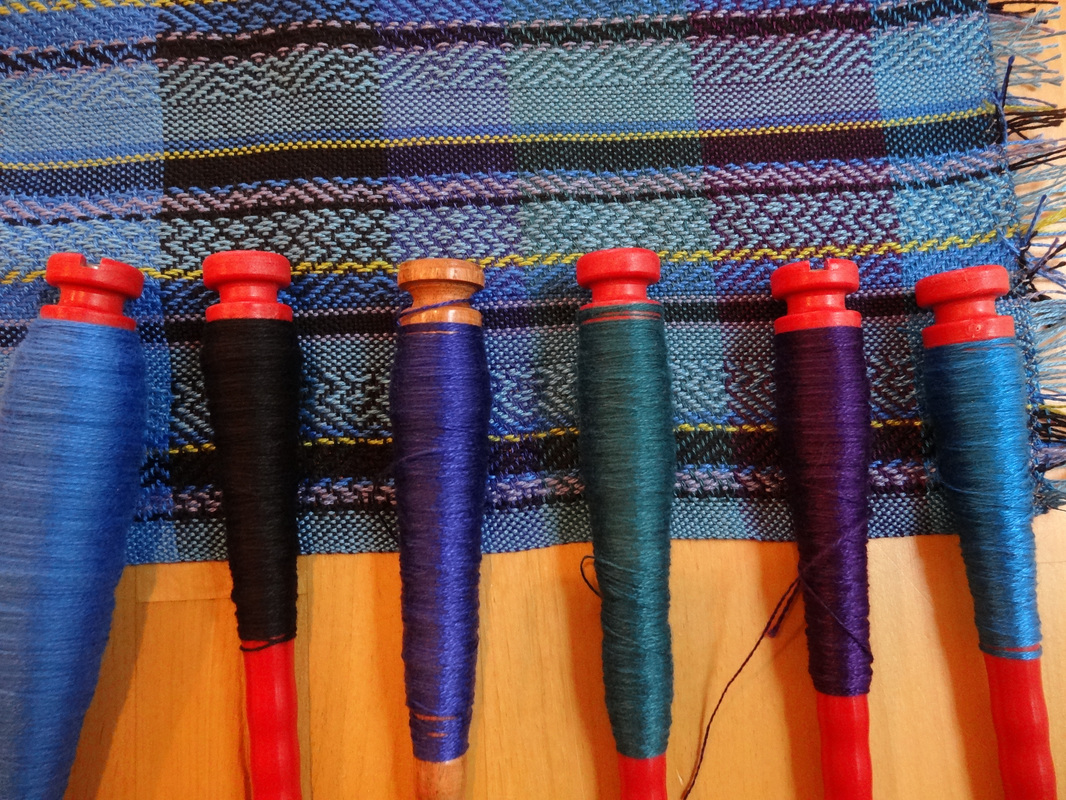
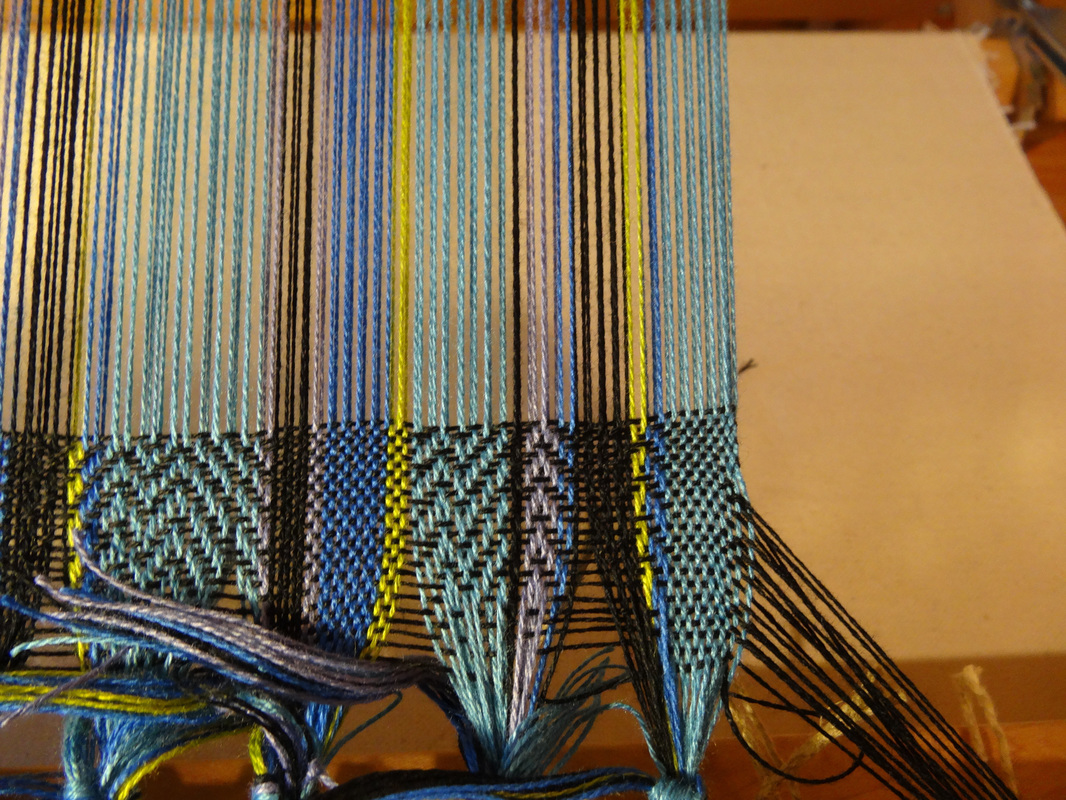
Tip: In the long run, sampling saves time and money! I wove 13" of samples, using 6 different wefts: royal 8/2 tencel, black 8/2 bamboo, iris 8/2 tencel, teal 8/2 bamboo, amethyst 8/2 tencel, and ming blue 8/2 tencel. Weaving in pattern, I got about 23 picks per inch (ppi).
I cut the sample off the loom, tying the warp in slipknots in front of the reed to protect it before it gets retied to the front apron rod. I zigzagged across both ends of the sample, washed it in the washing machine in warm water and dried it in the dryer on a gentle cycle. I pressed the sample with a hot iron. Conclusion: I liked the hand of the fabric so no need to re-sett the warp. I liked 4 out of 6 of the weft colors and decided to weave the 2 scarves using the black bamboo and the blue ming tencel. Samples done. Now to weave the scarves! Go to Life History-Day 8. To review, go back to Life History-Day 6
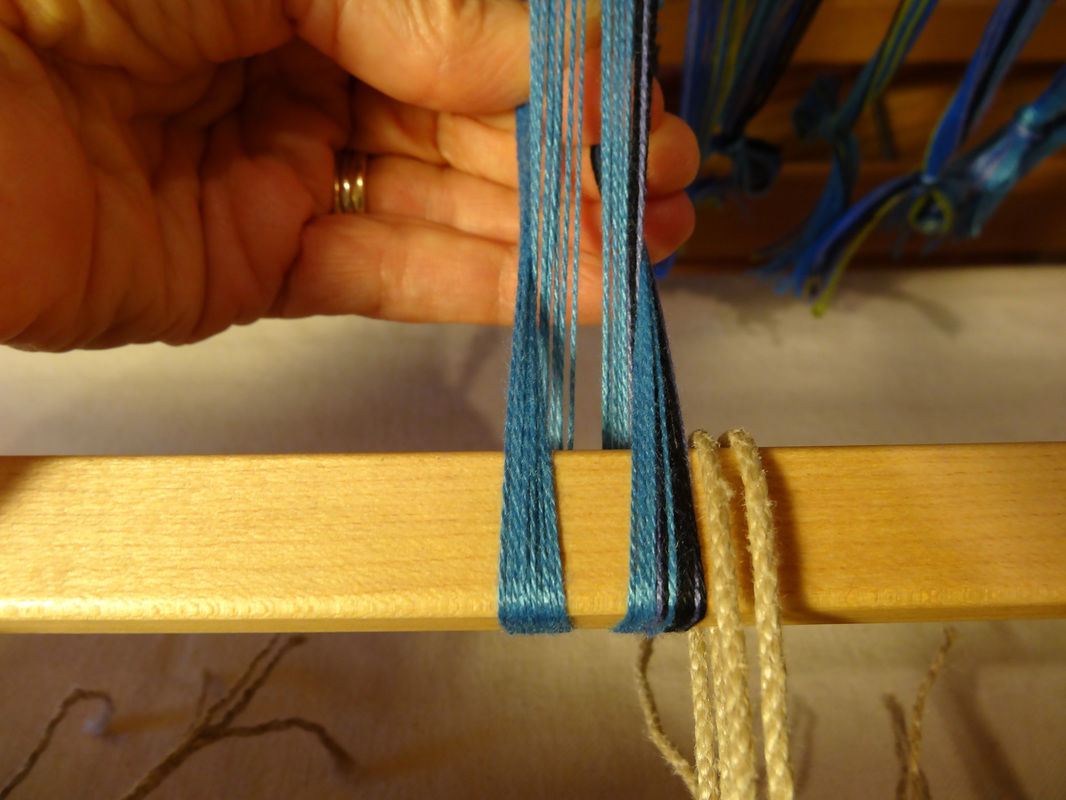
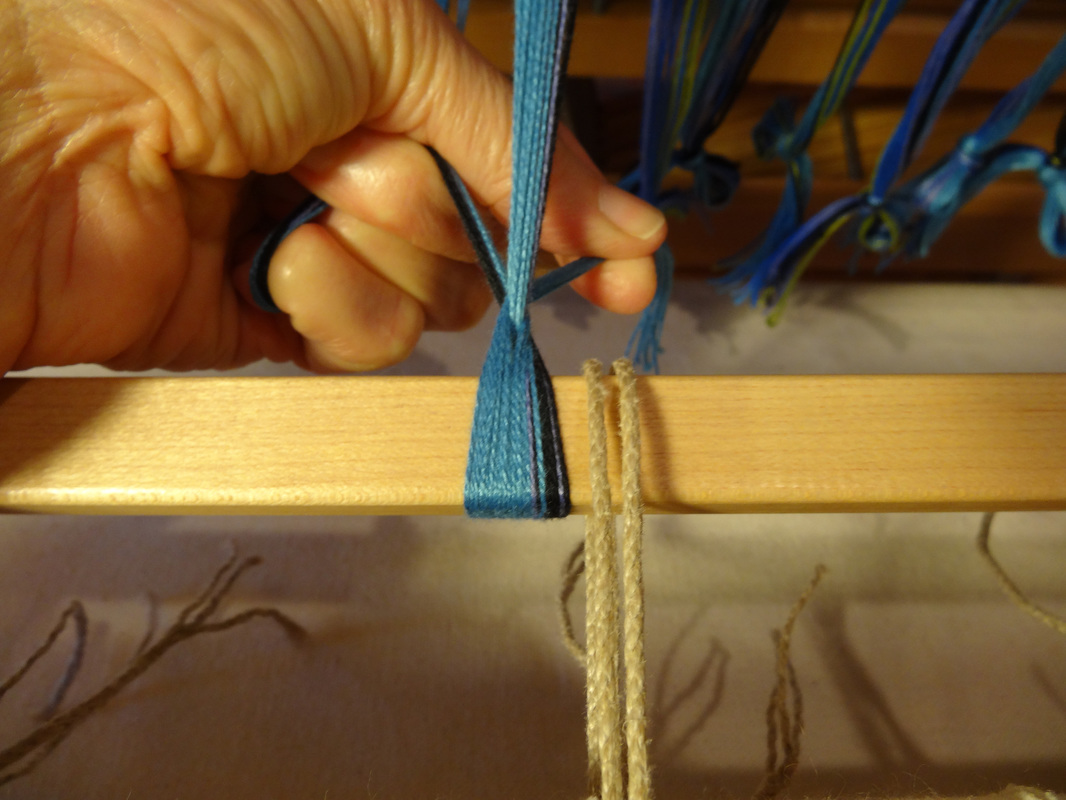
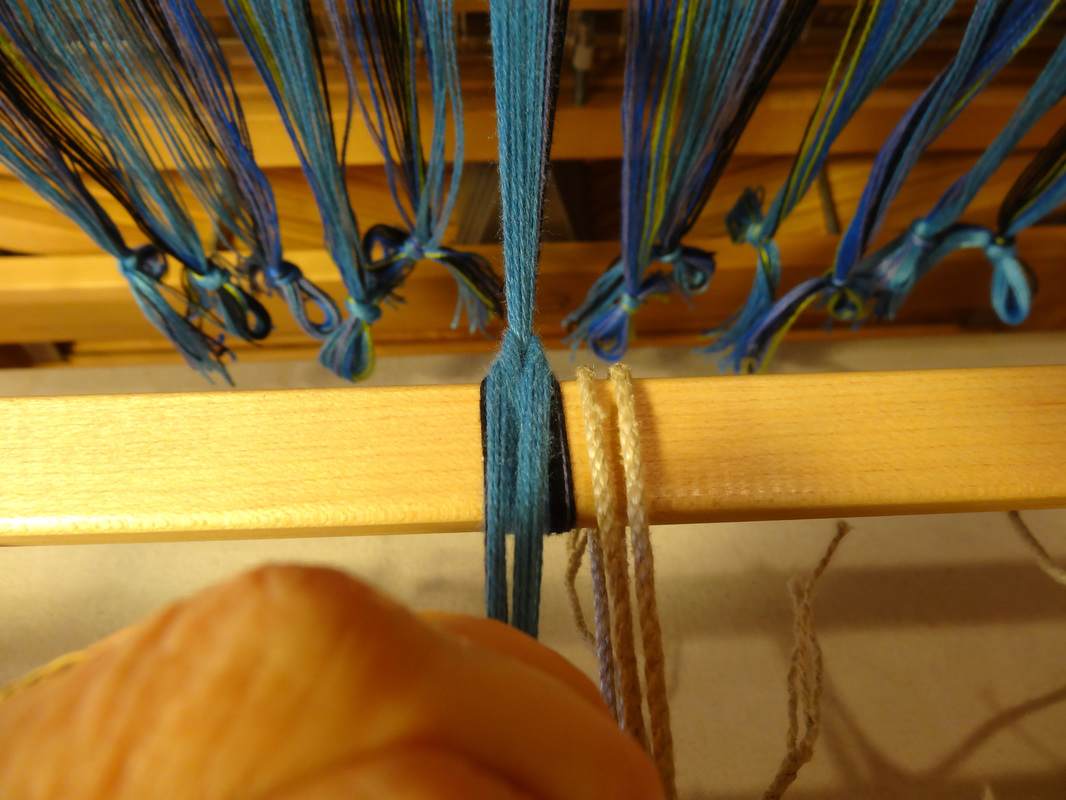
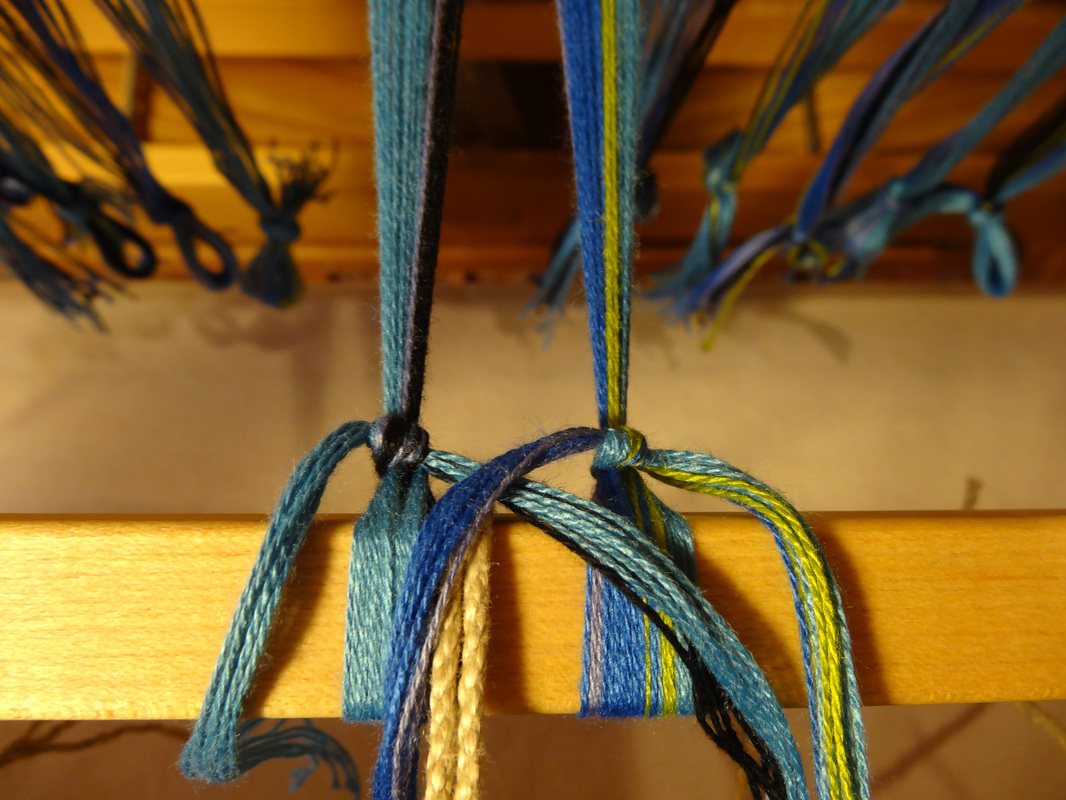
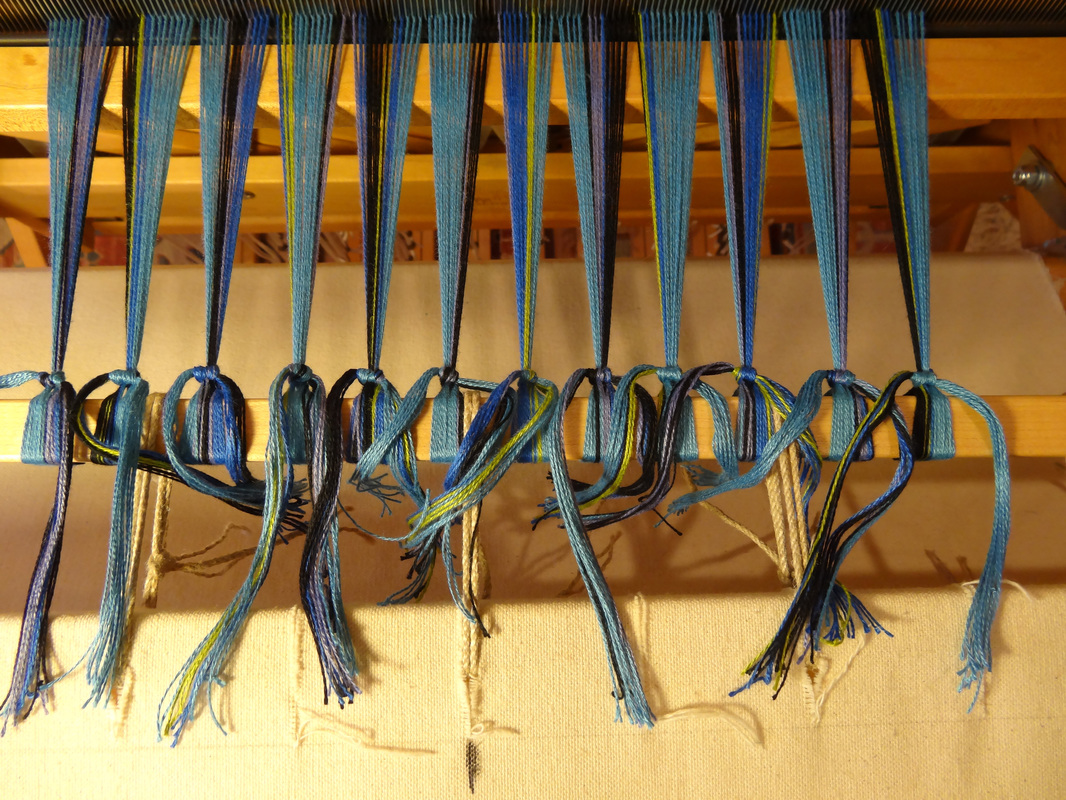
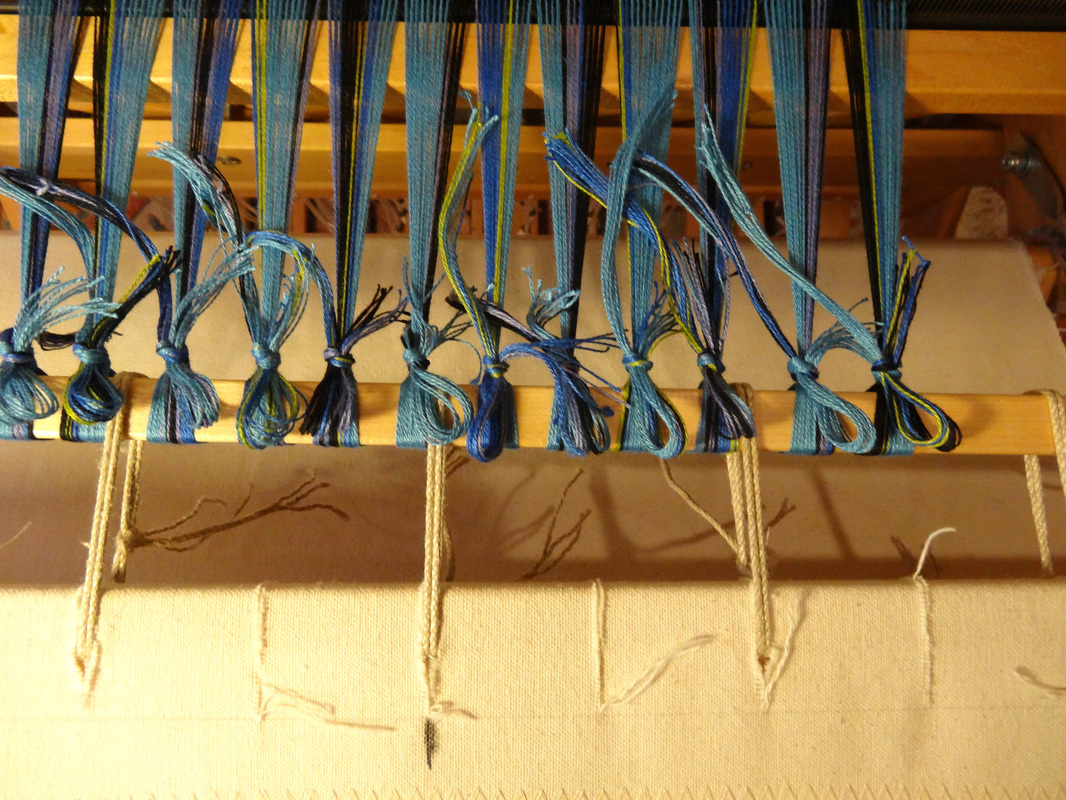
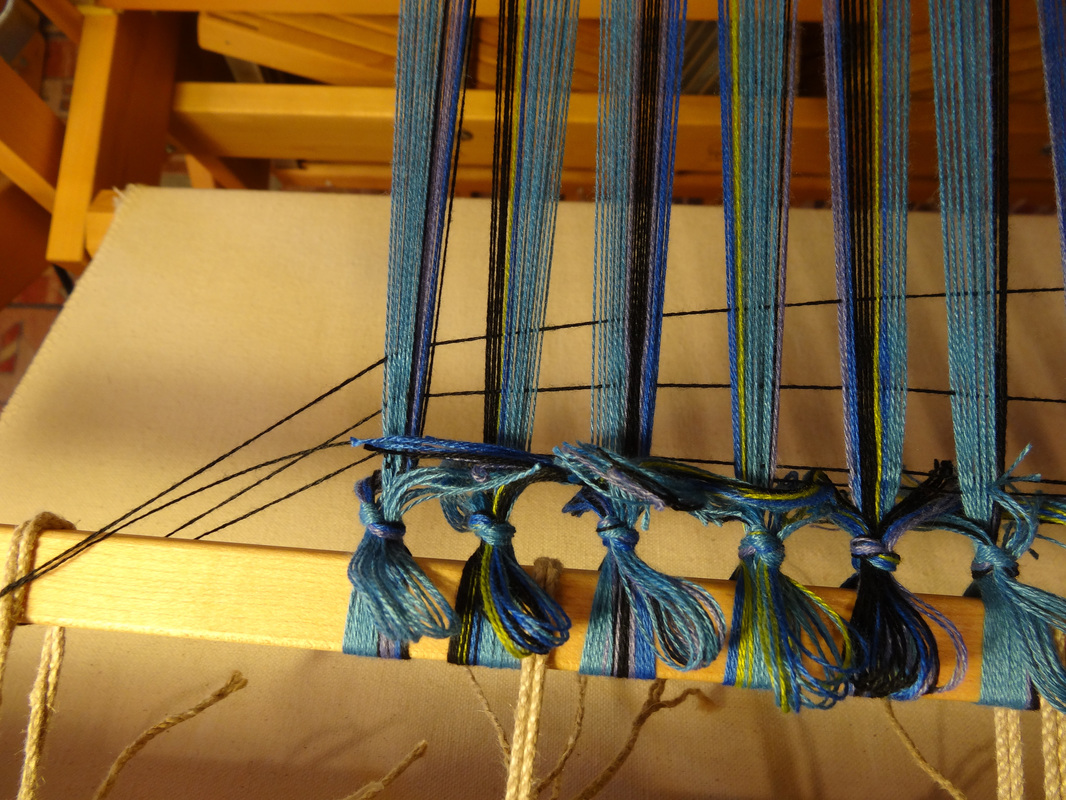
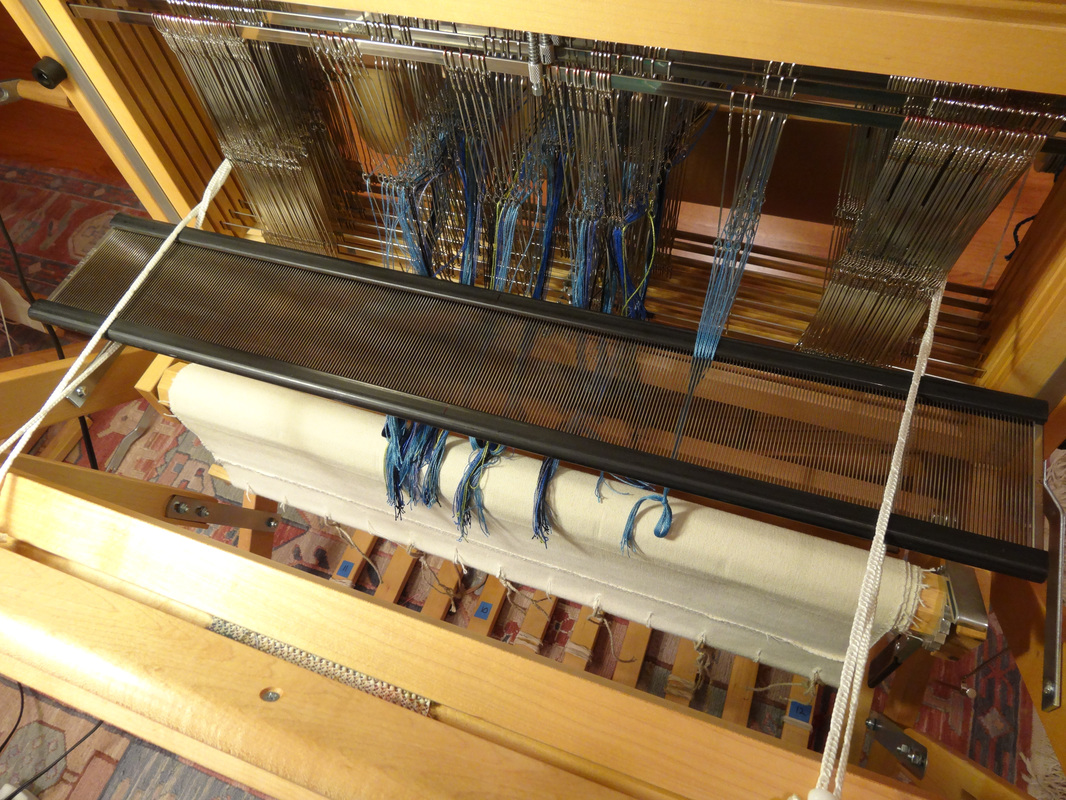
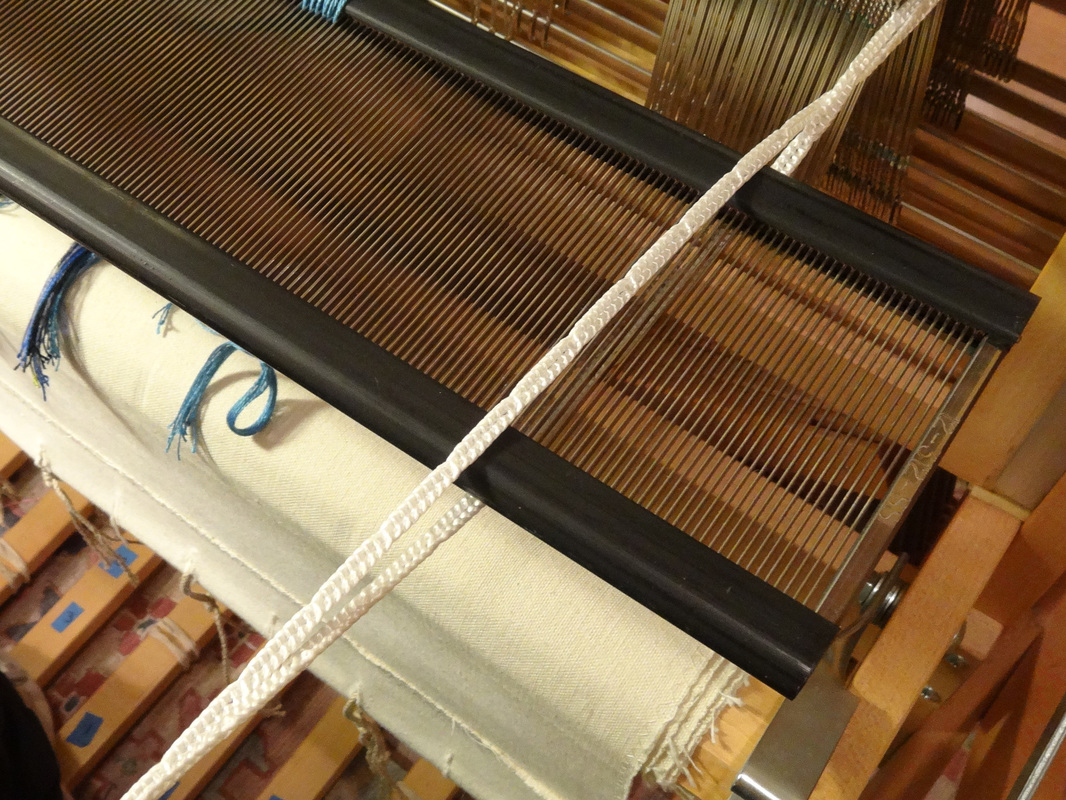
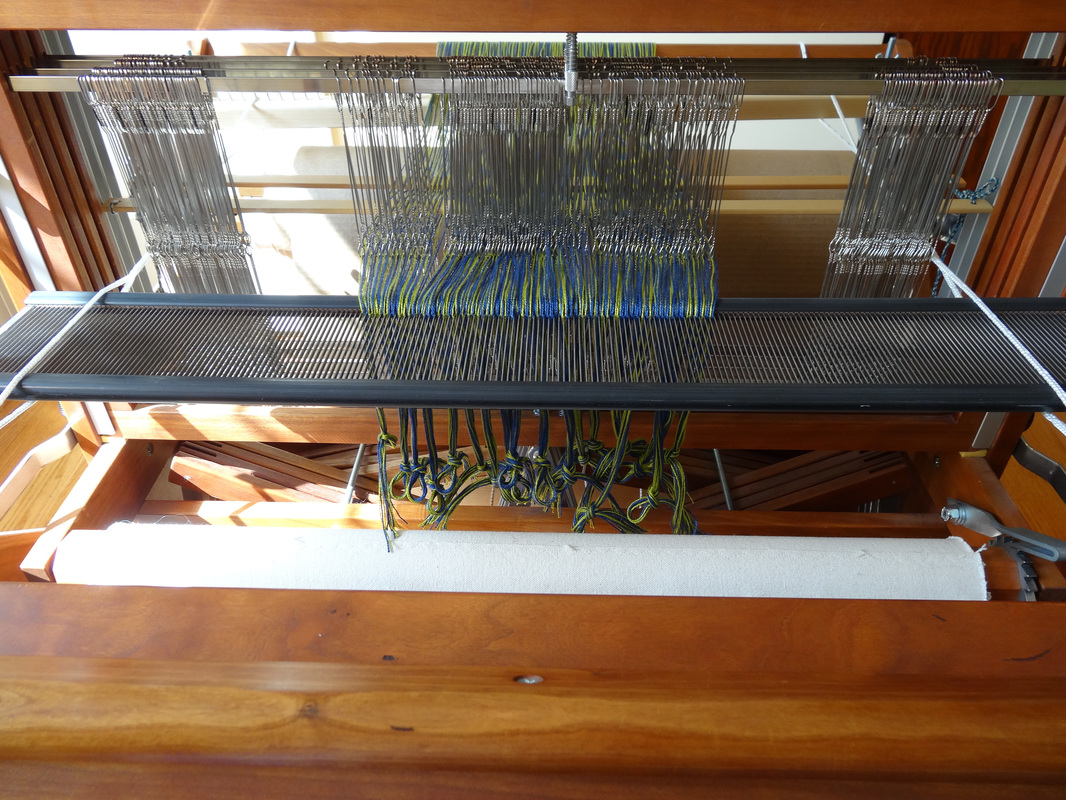
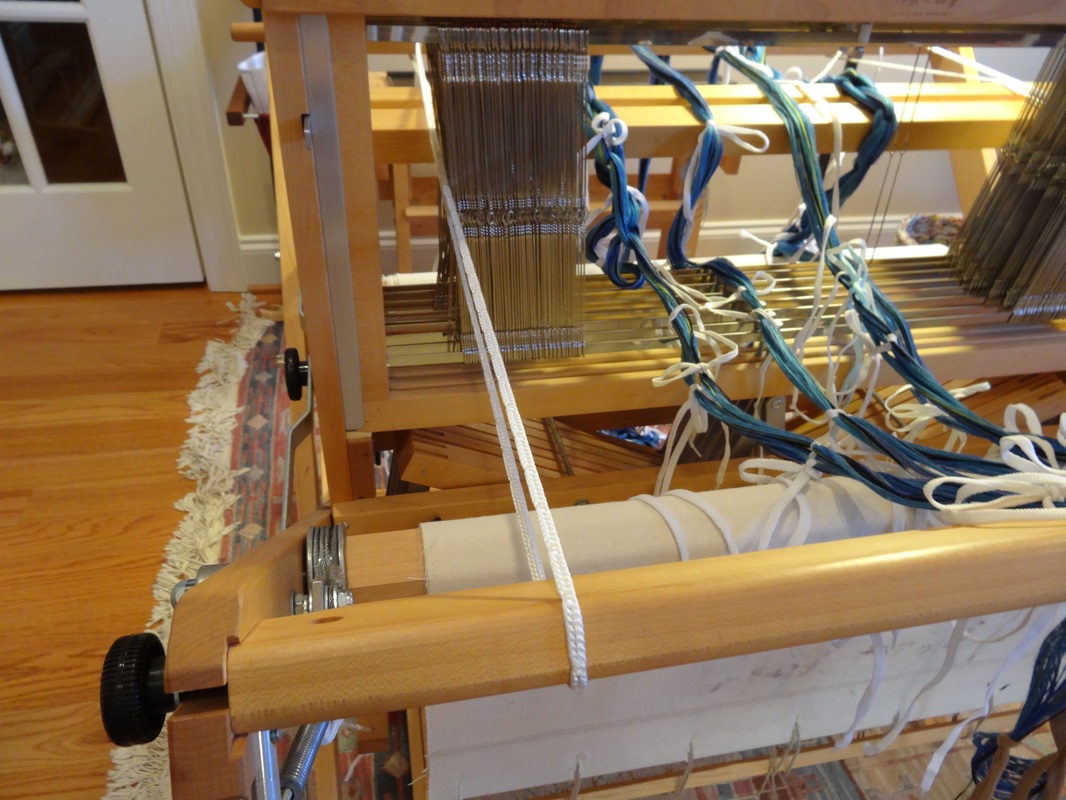
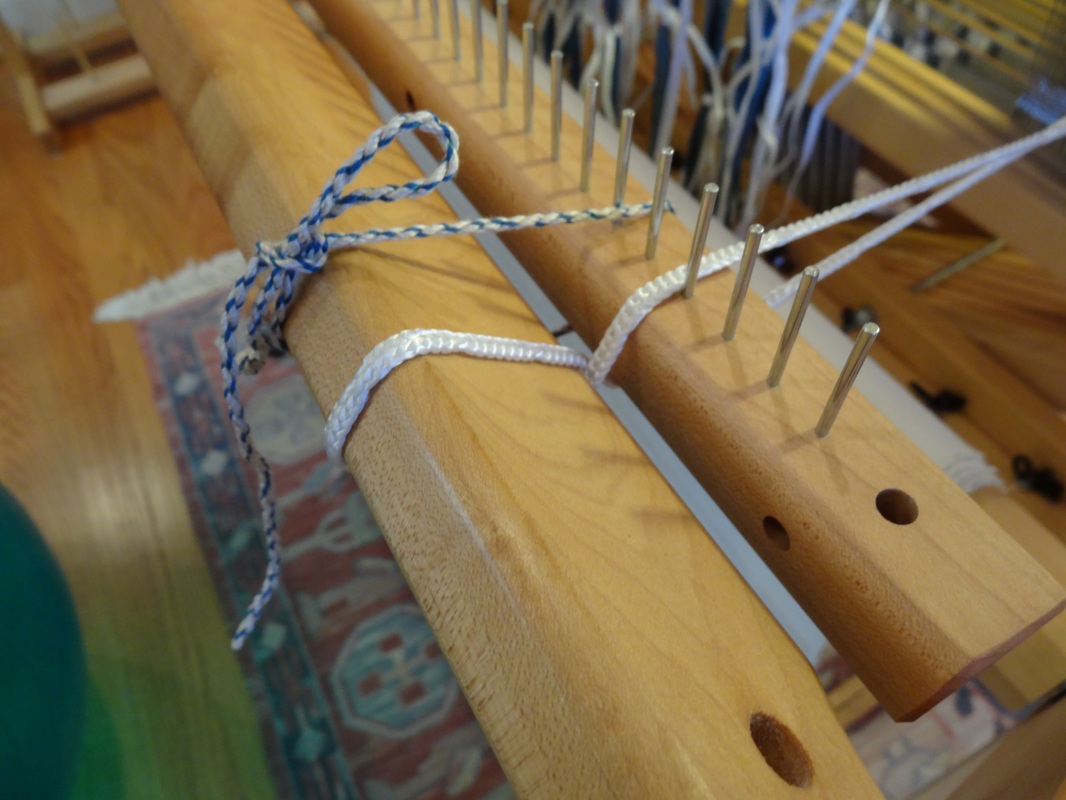
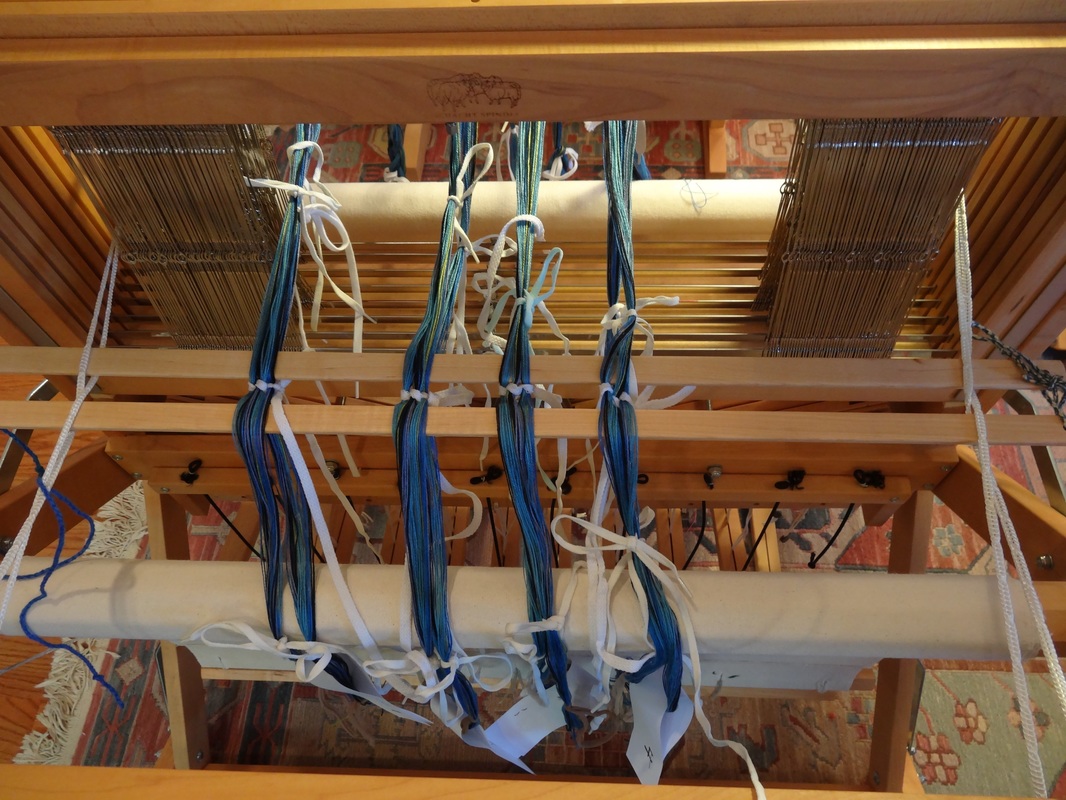
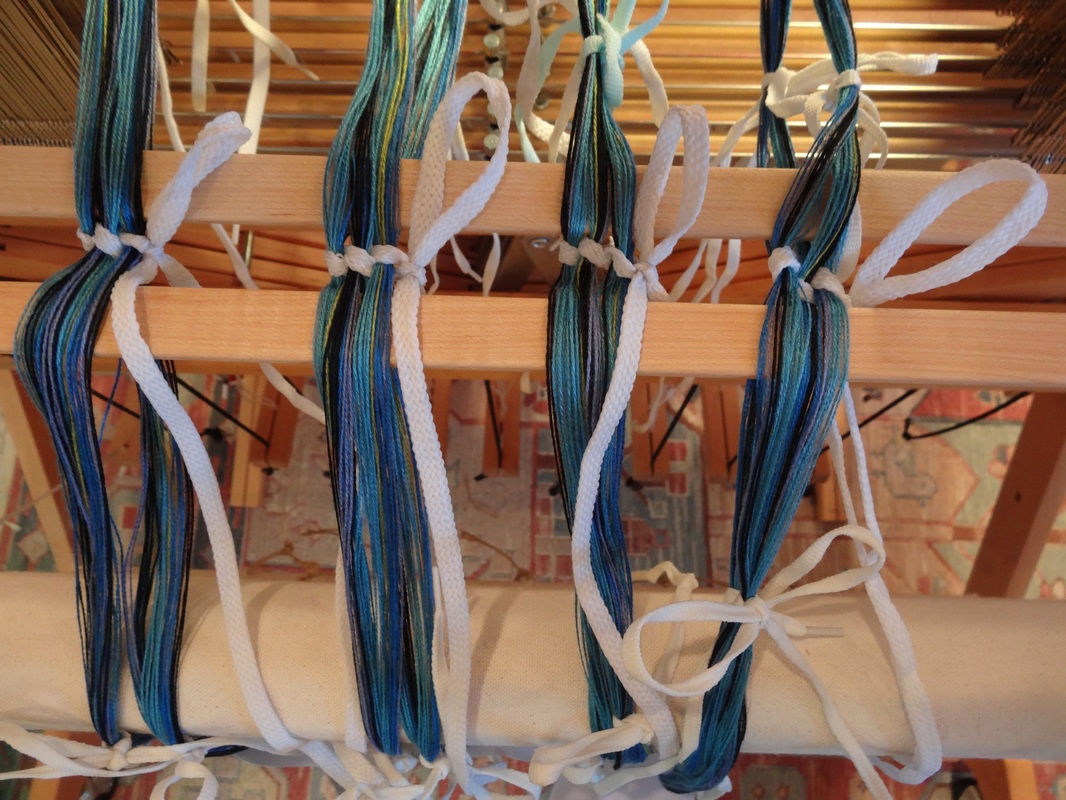
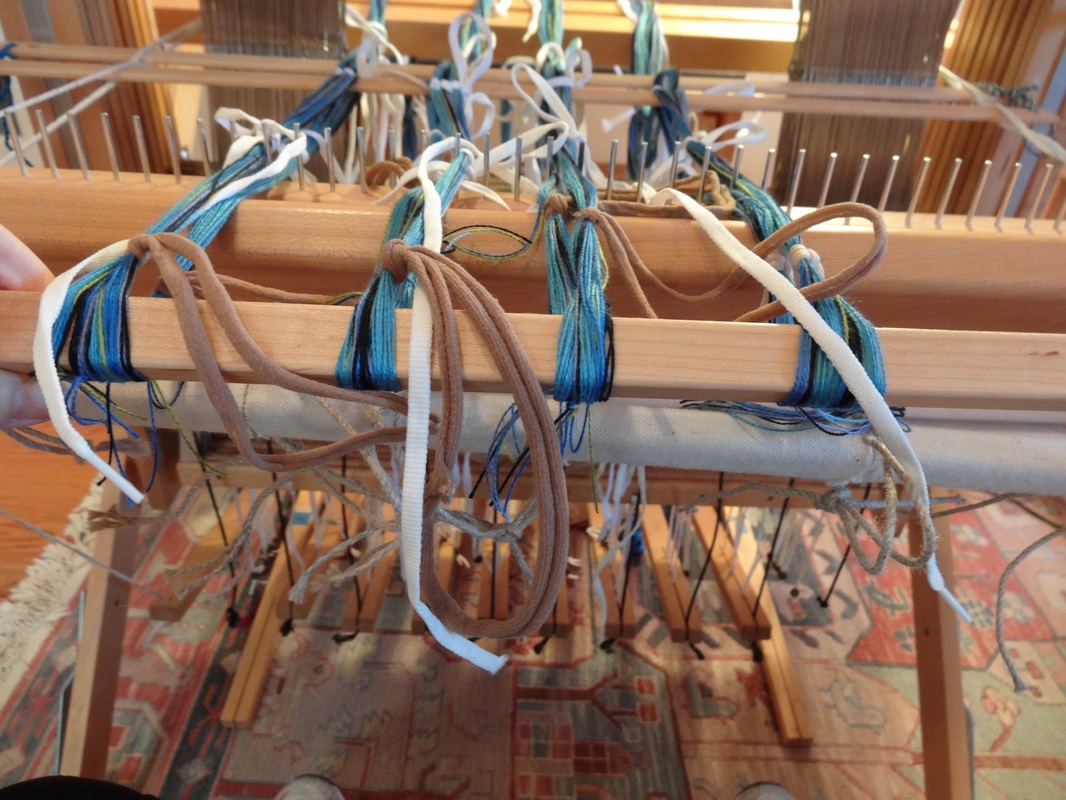
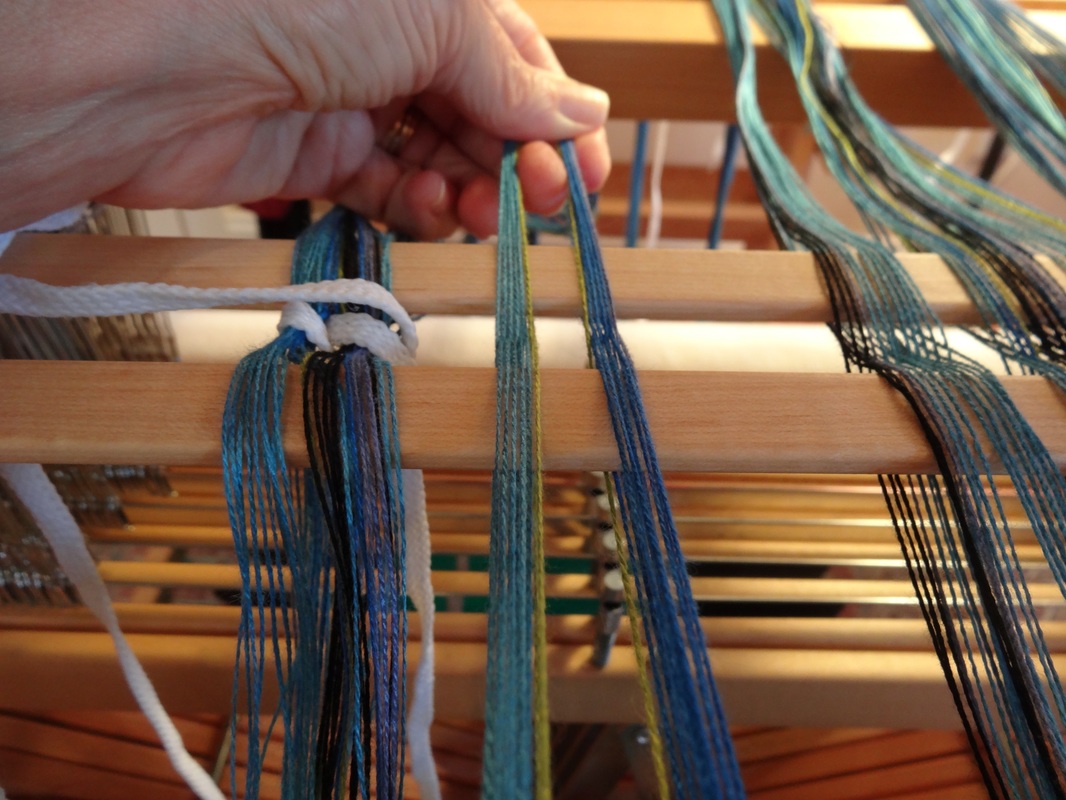
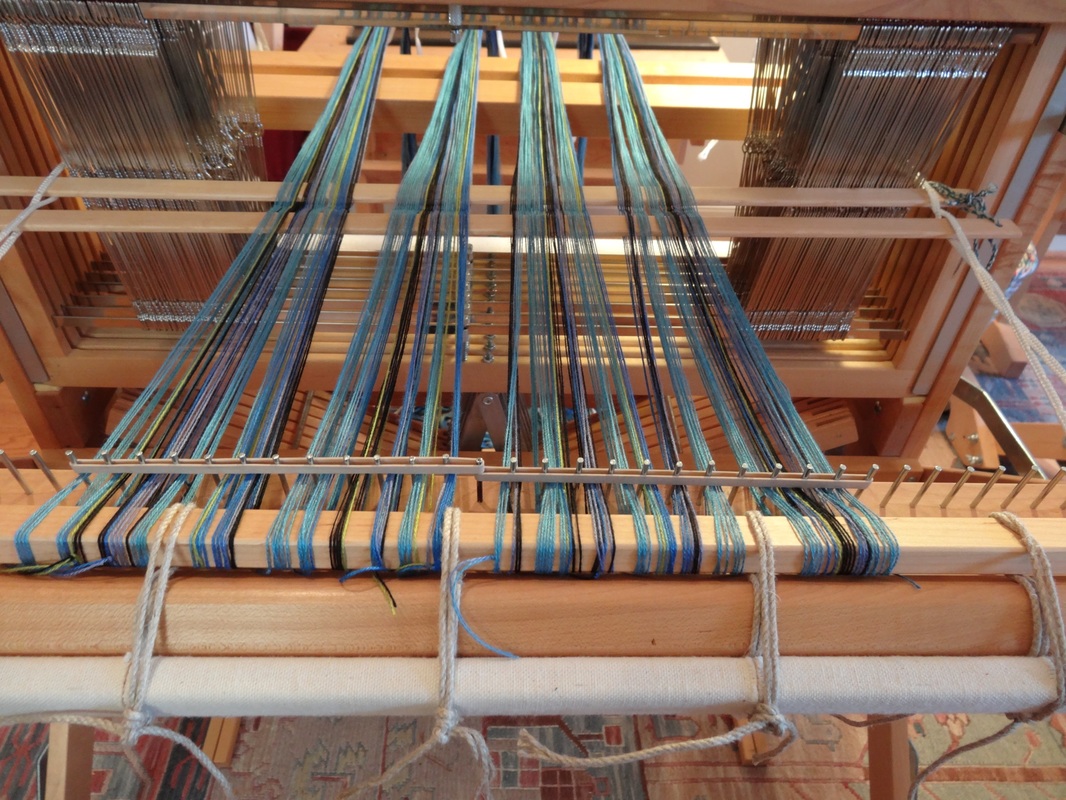
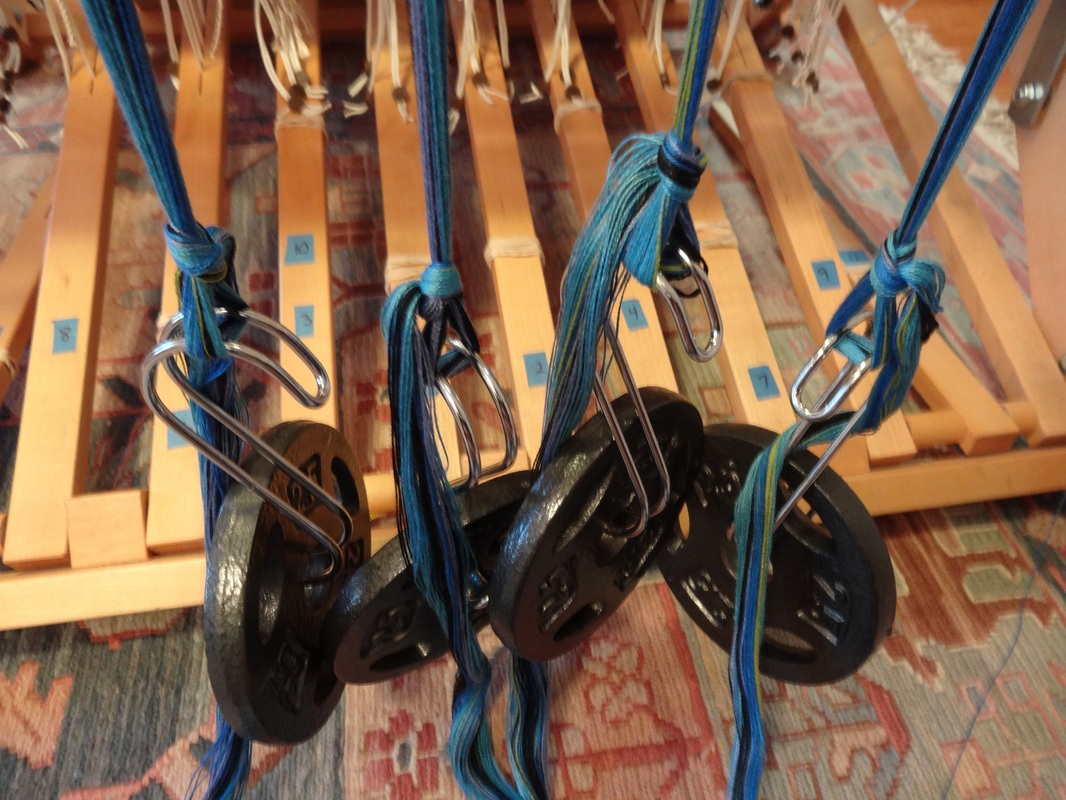
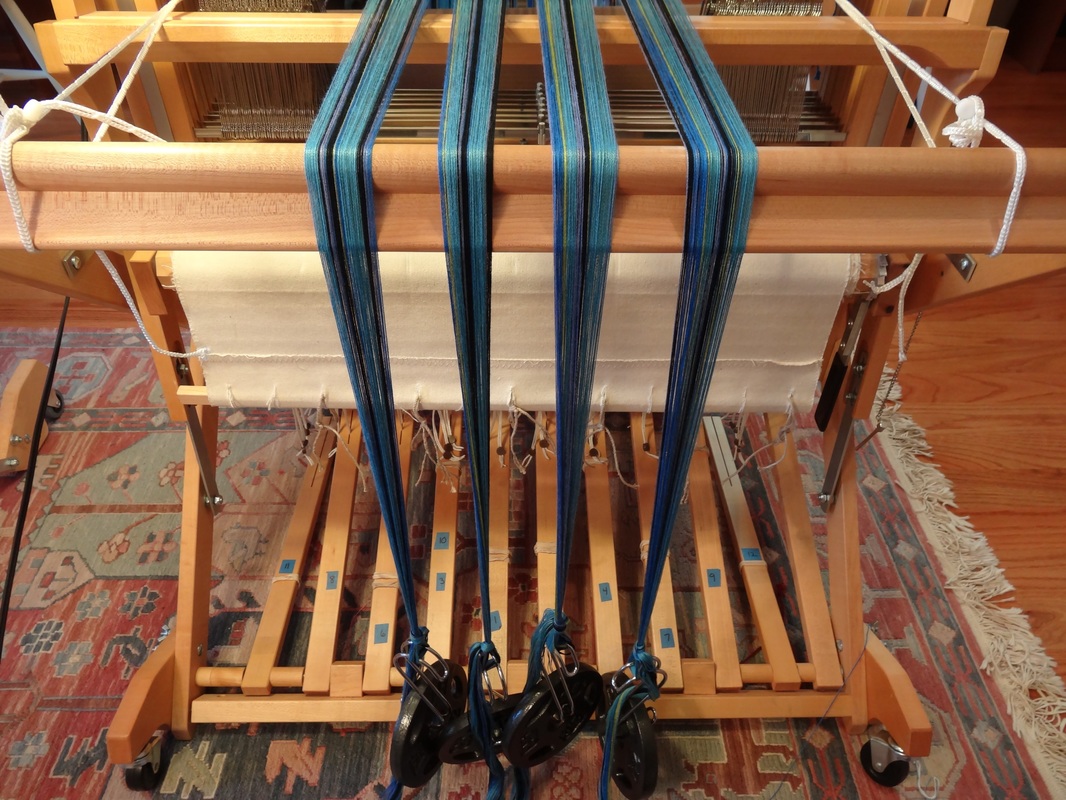
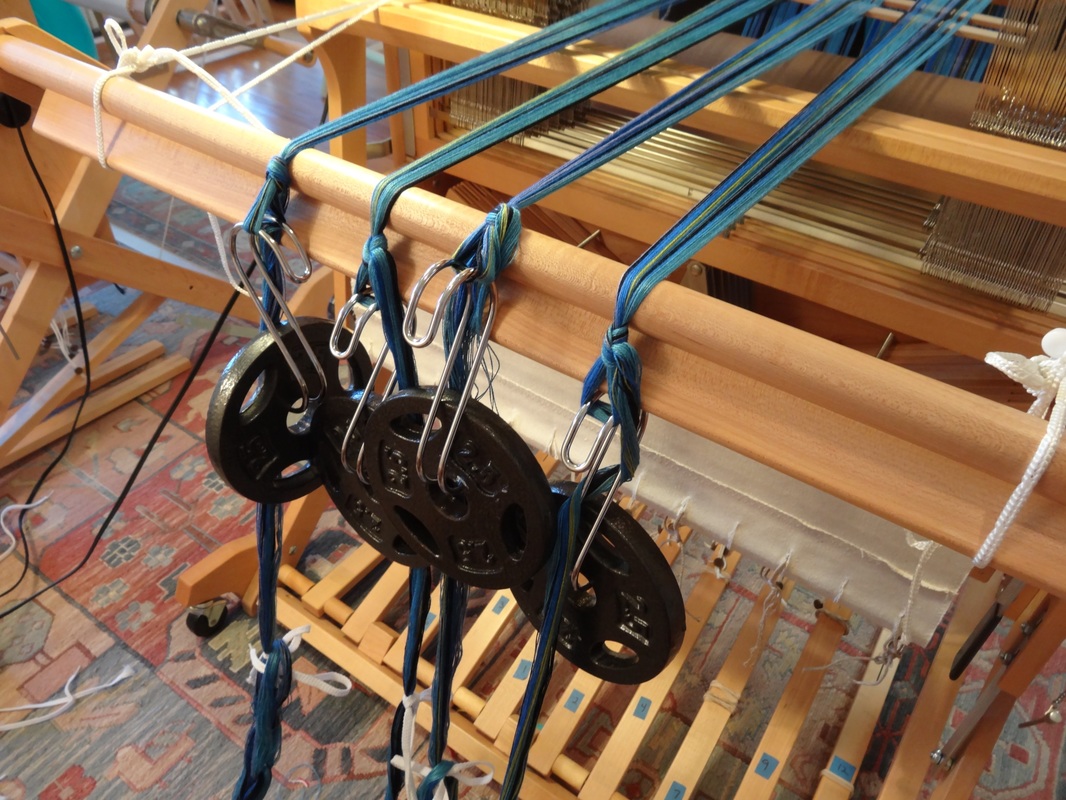
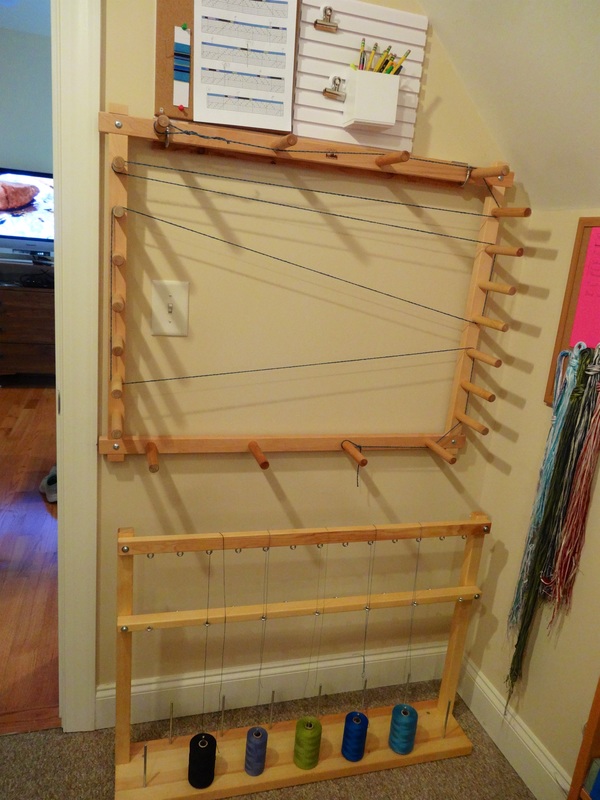
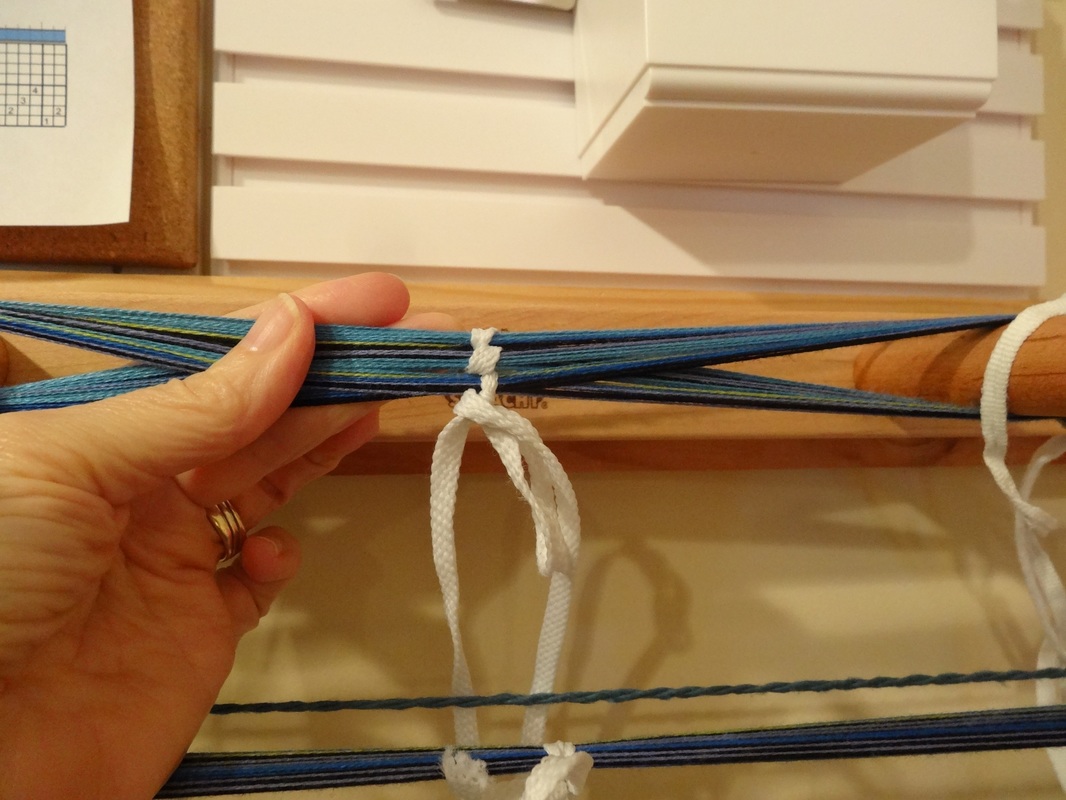
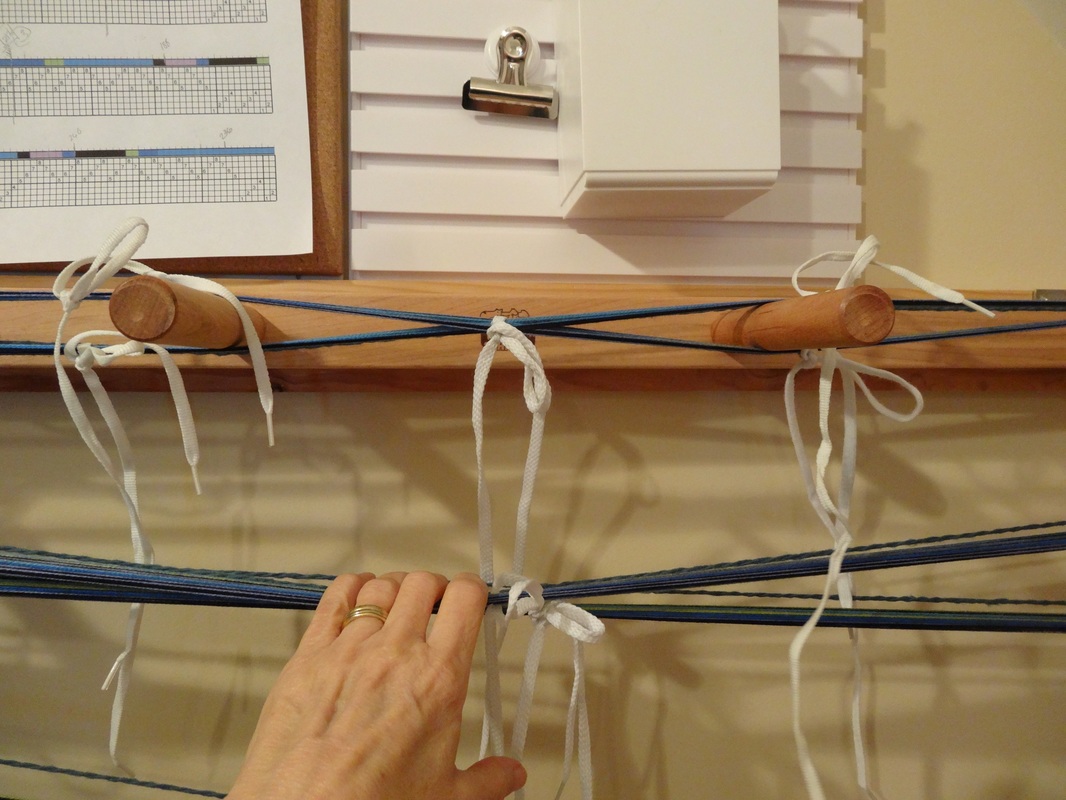
Tying the warp to the front apron rod Before I even began this step, I removed the raddle and lease sticks from the back of the loom, and I removed the texsolv cords that were used to support the raddle, lease sticks and reed while winding on and threading.
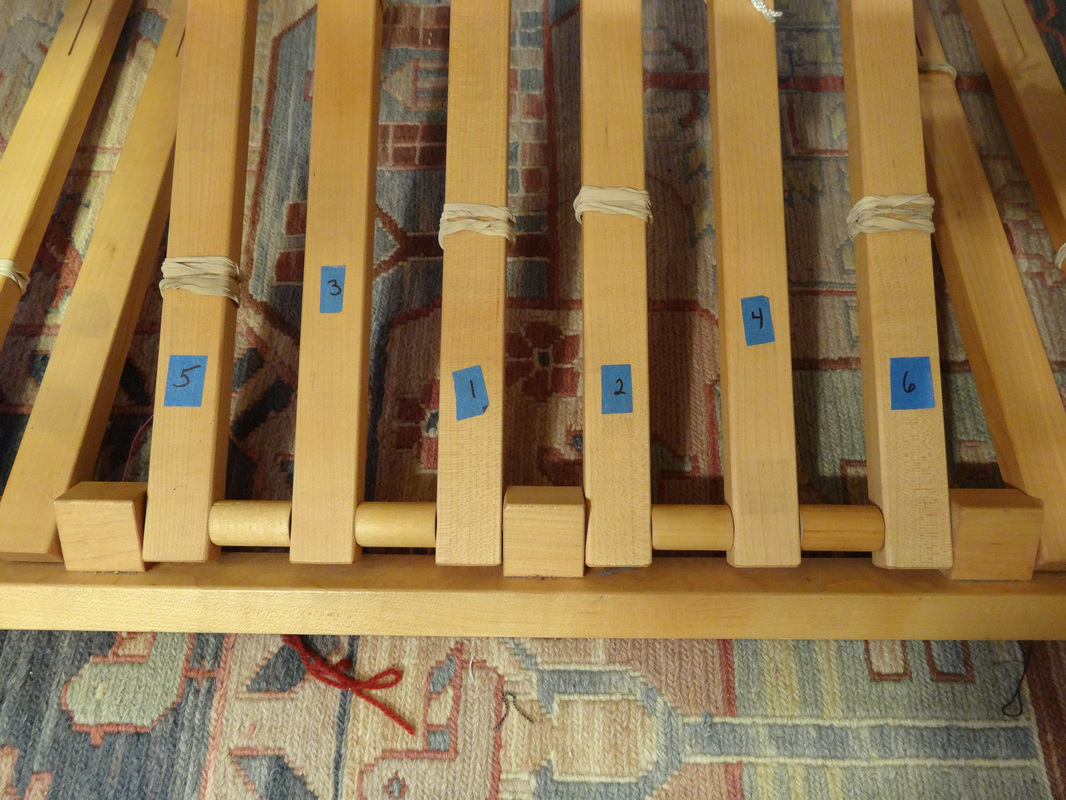
Tying up the treadles The treadling is a point twill treadling and the original tieup required 4 treadles. I like “walking” my treadles.
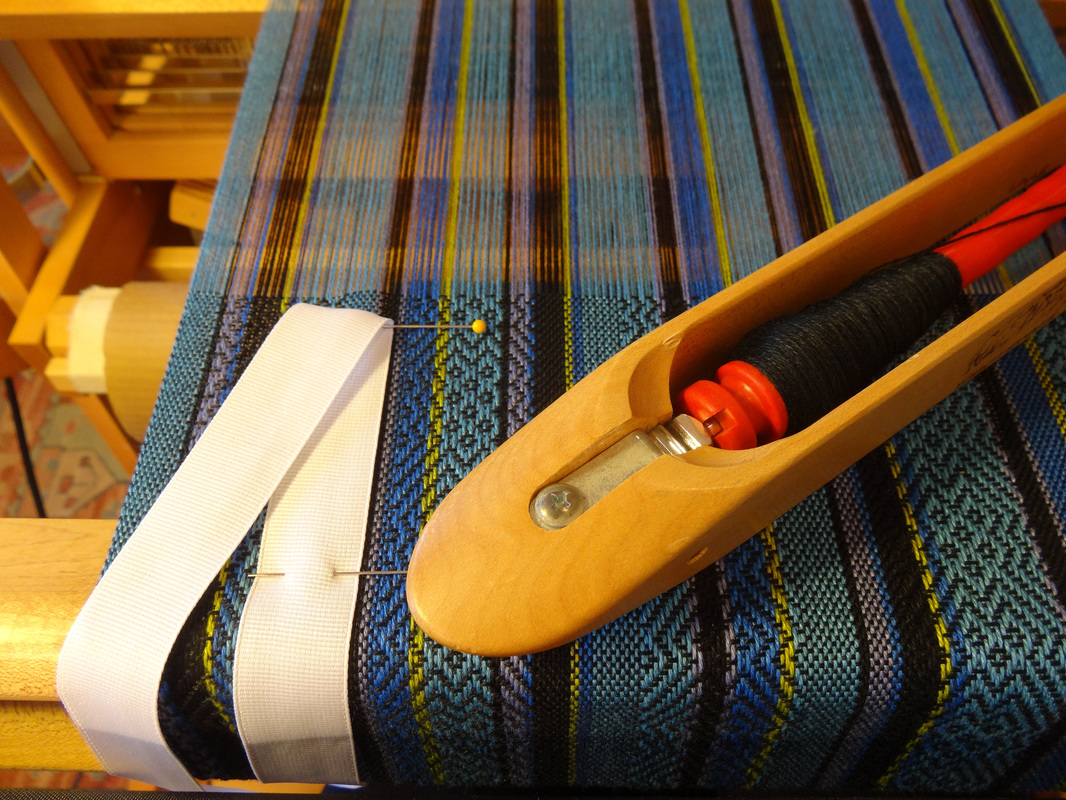
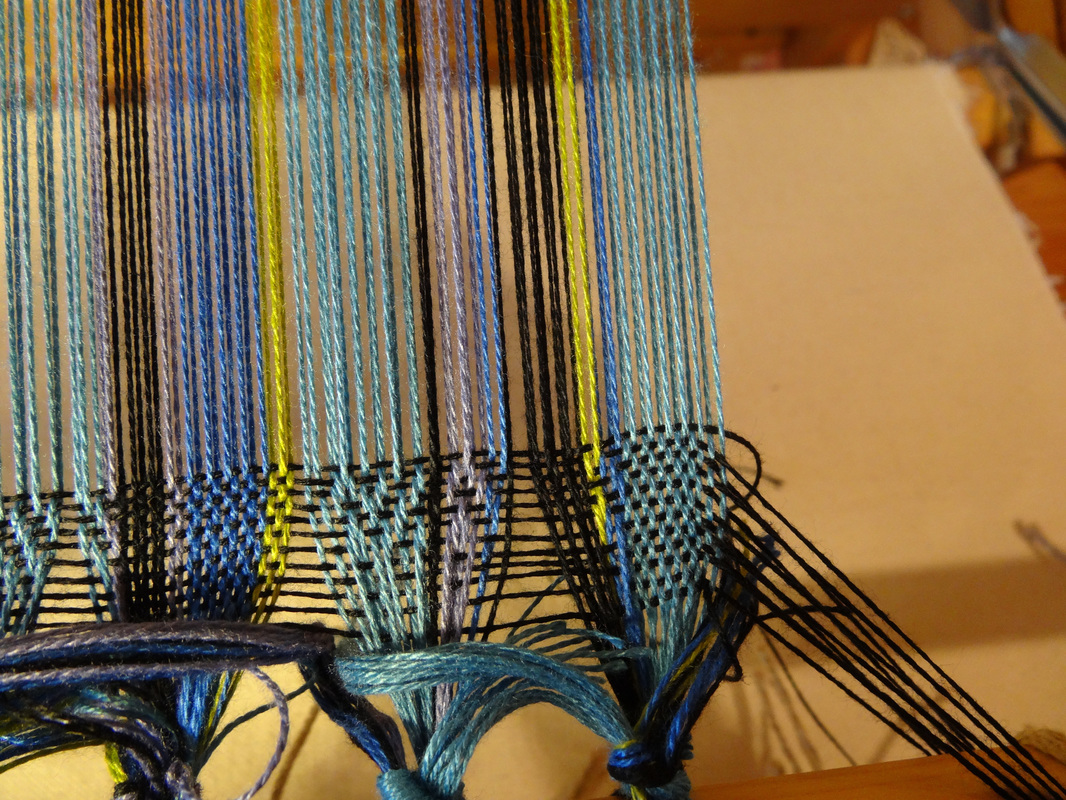
Weaving a header
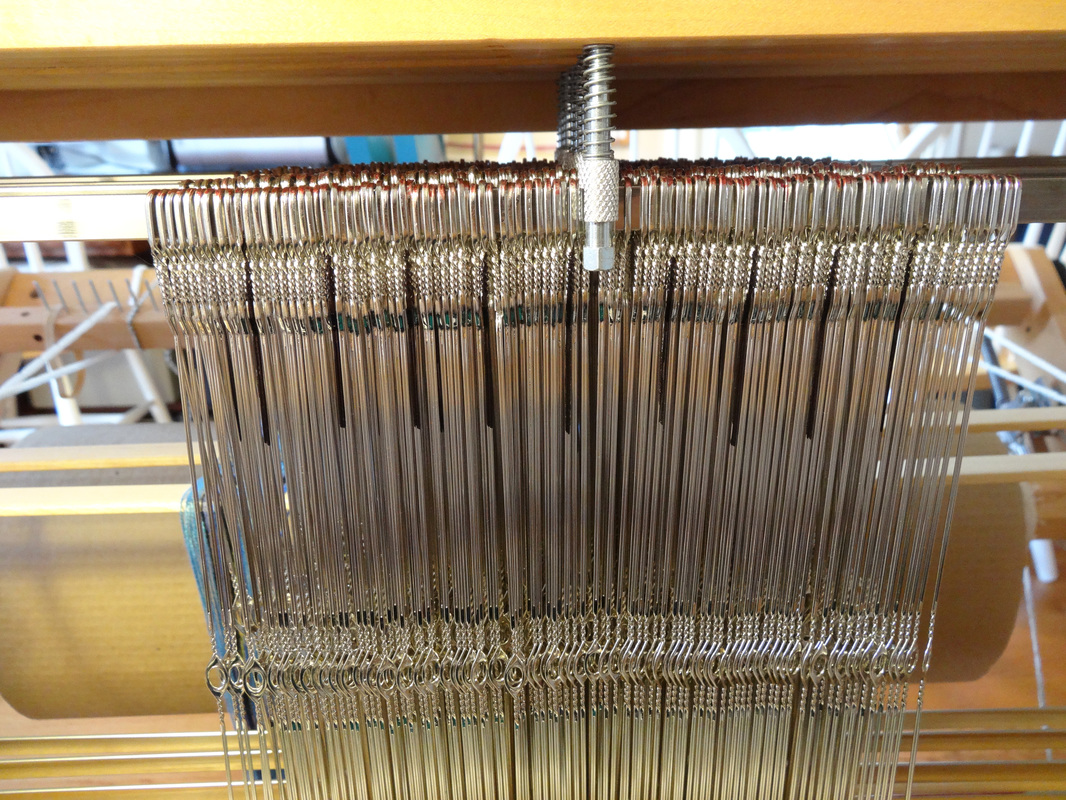
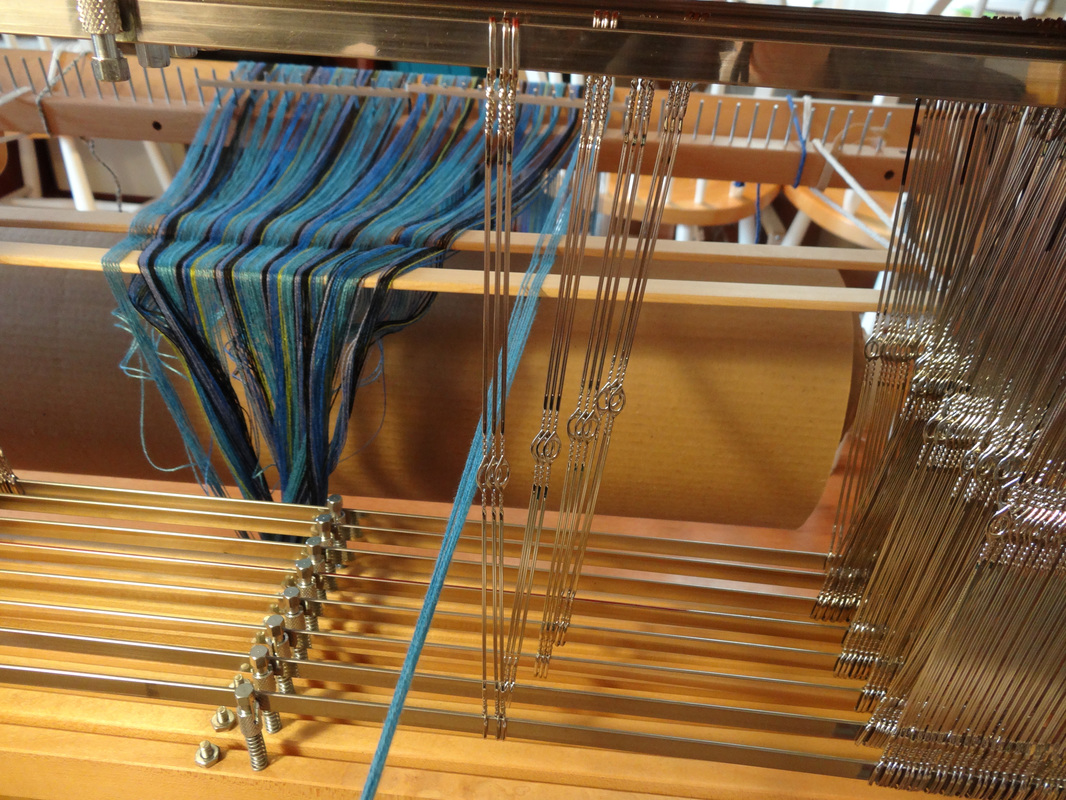
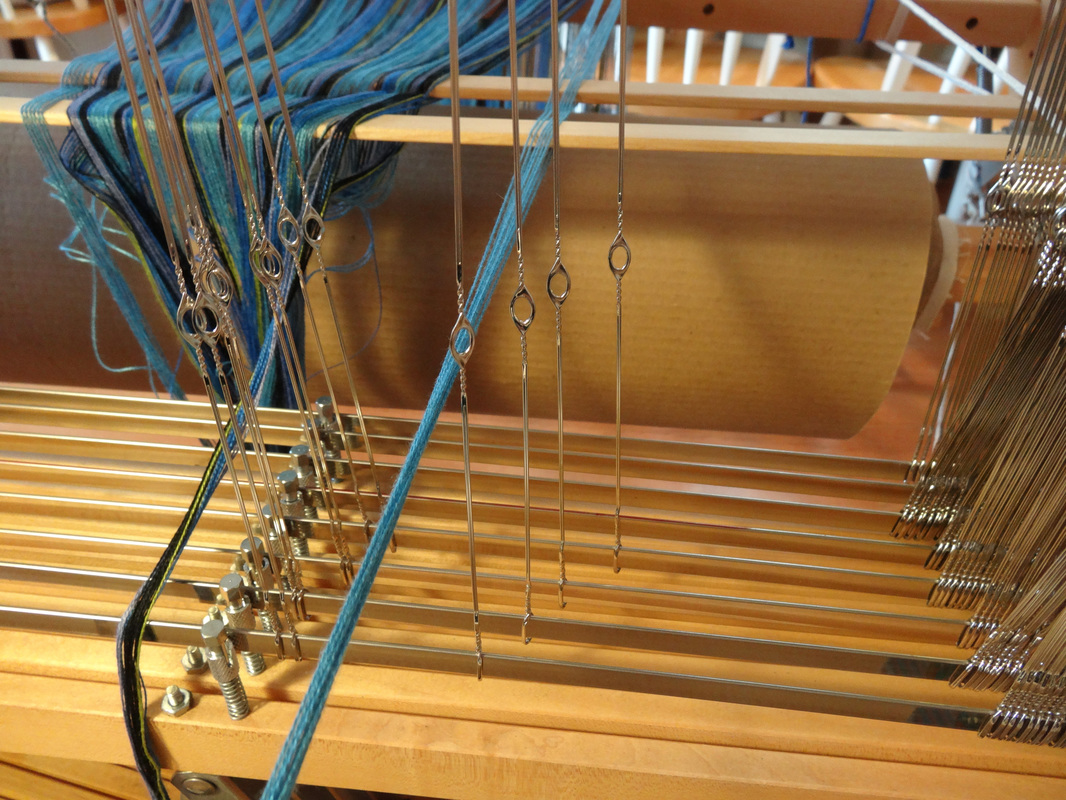
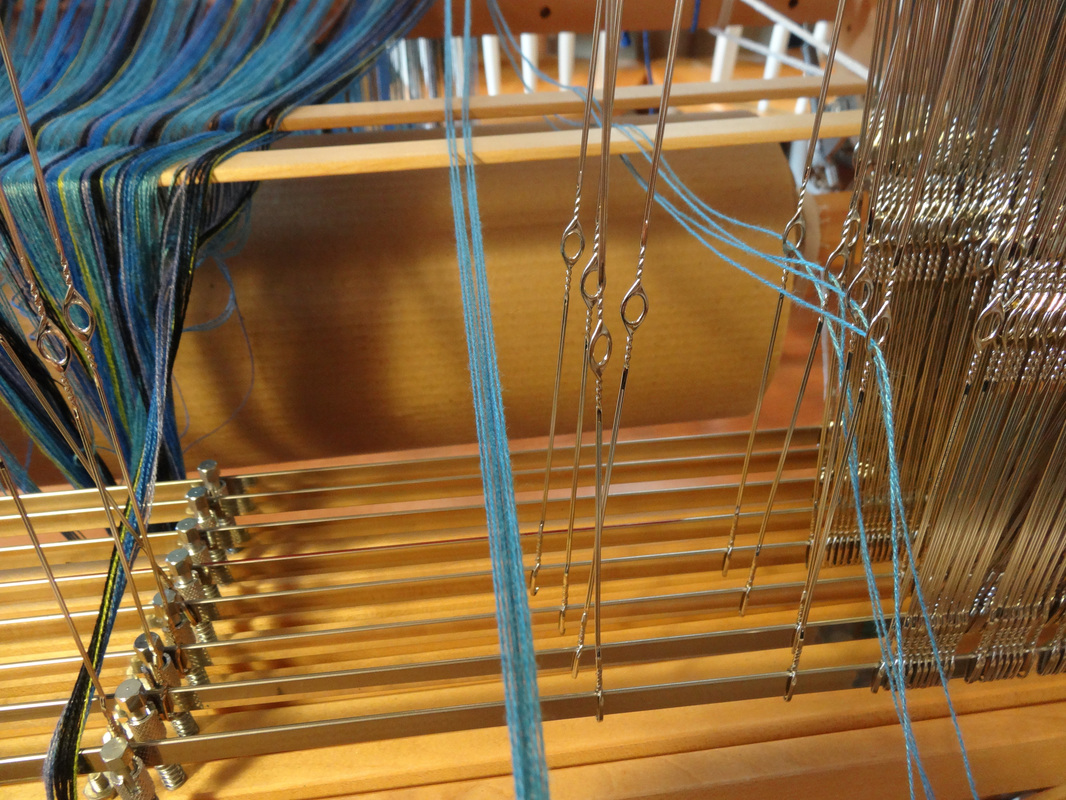
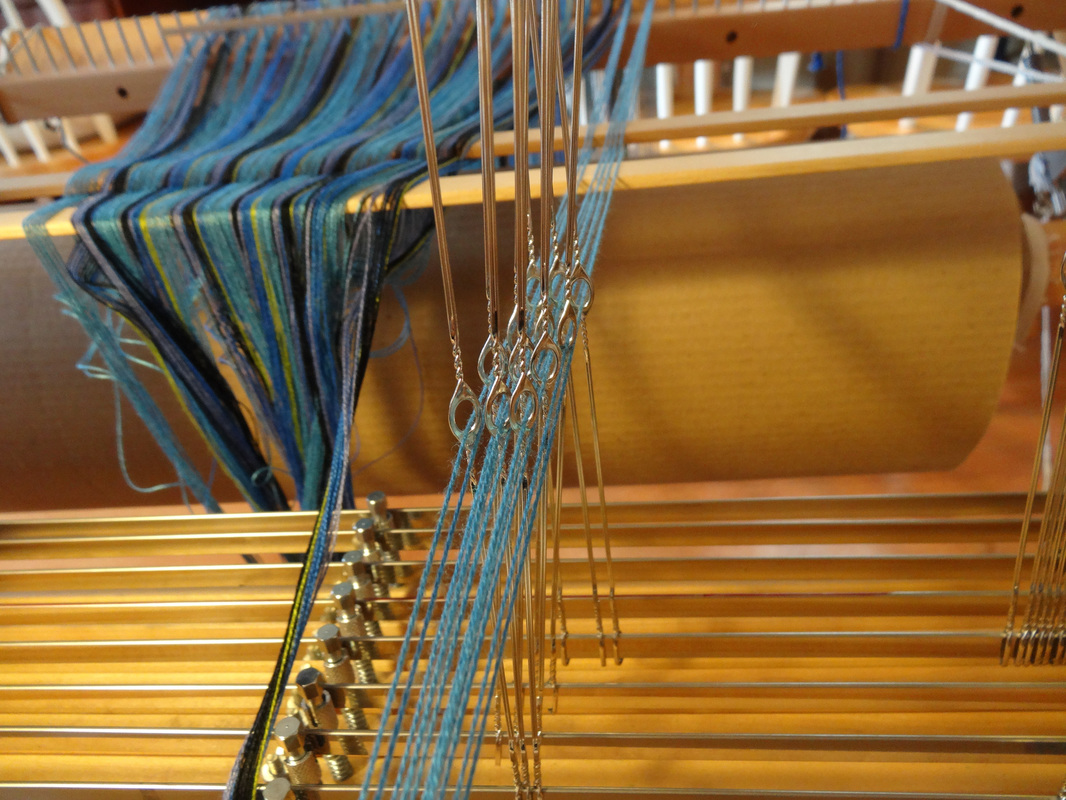
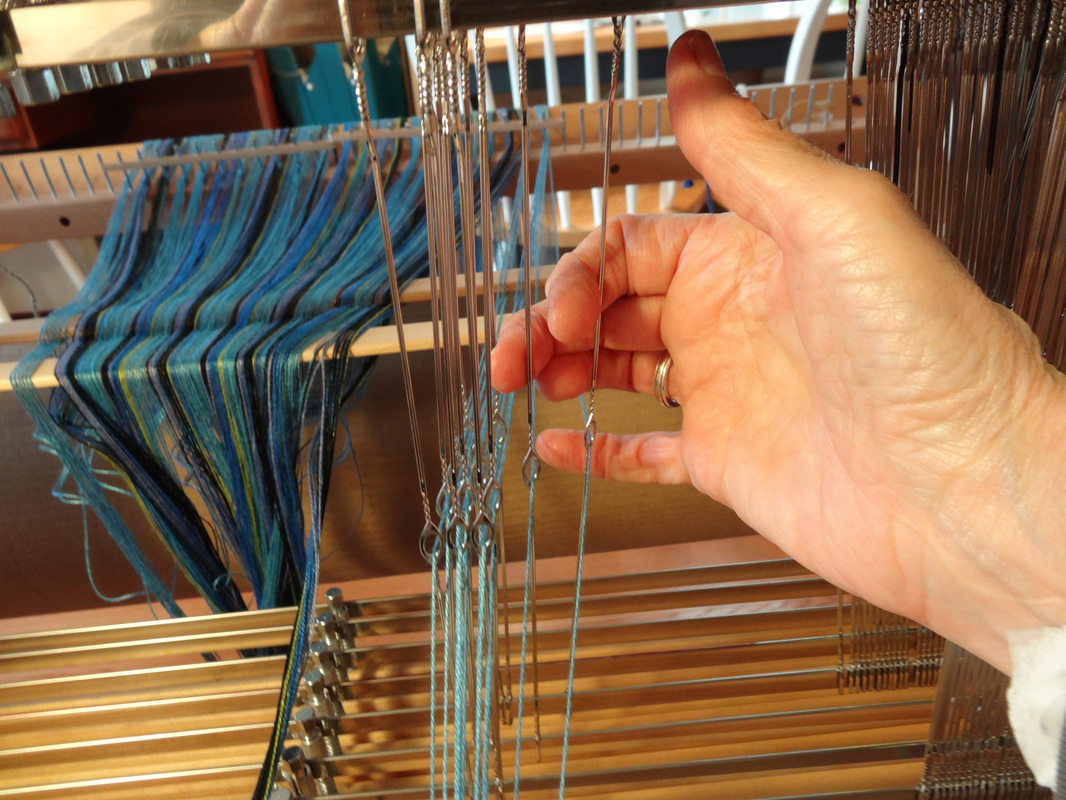
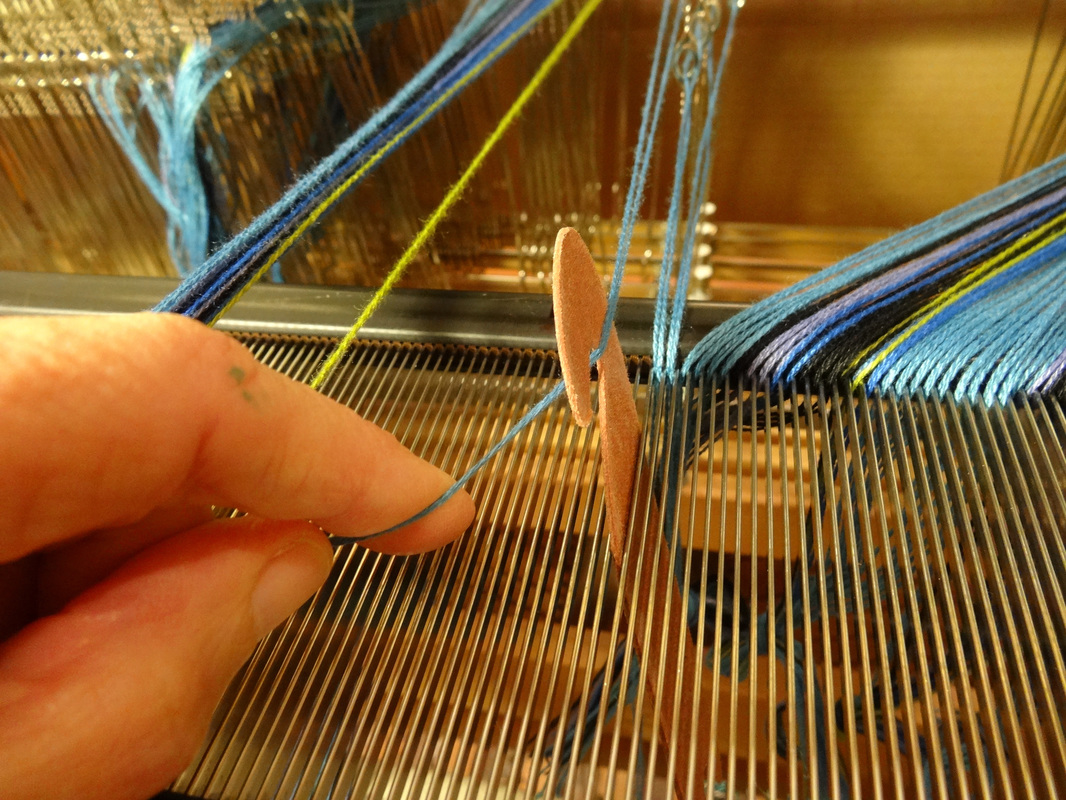
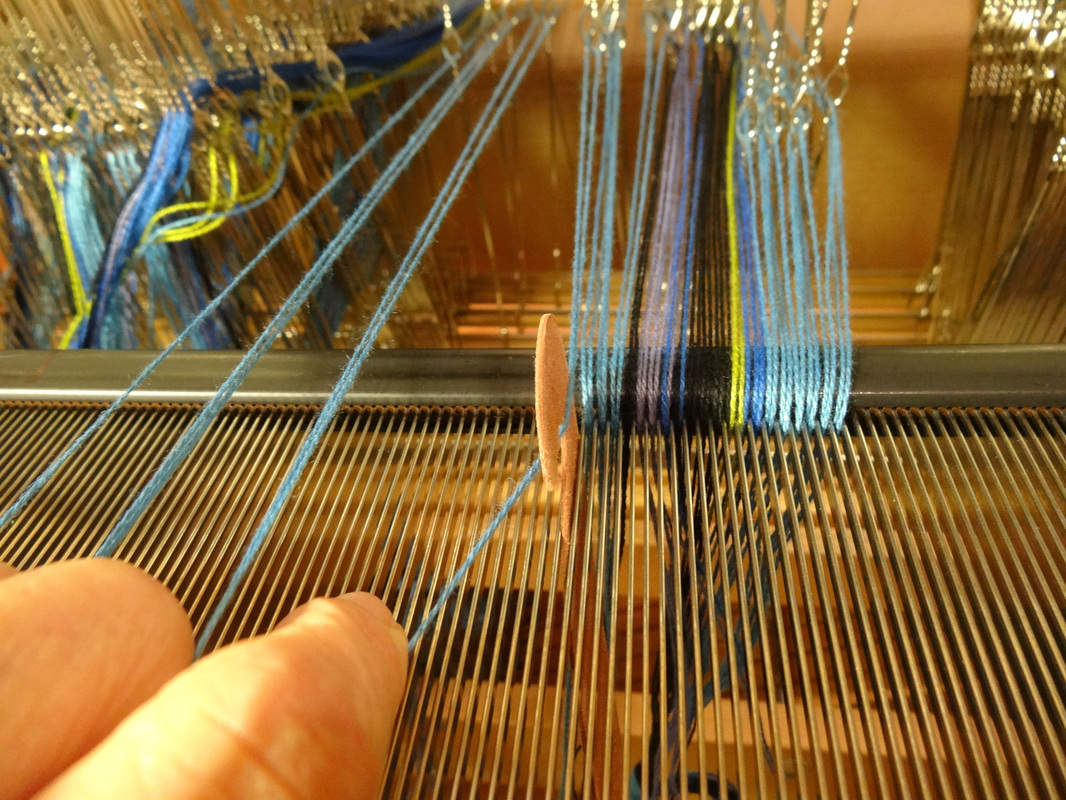
Get the heddles into position Ultimately I want to thread the heddles in the center of each harness, so that by the time I am done I will have about the same number of leftover heddles on the right and left of the warp on each harness. This will help keep the harnesses well balanced as I weave. To do this I need to know how many heddles my draft will require on each harness. My weaving software (Fiberworks) tells me I will need: 
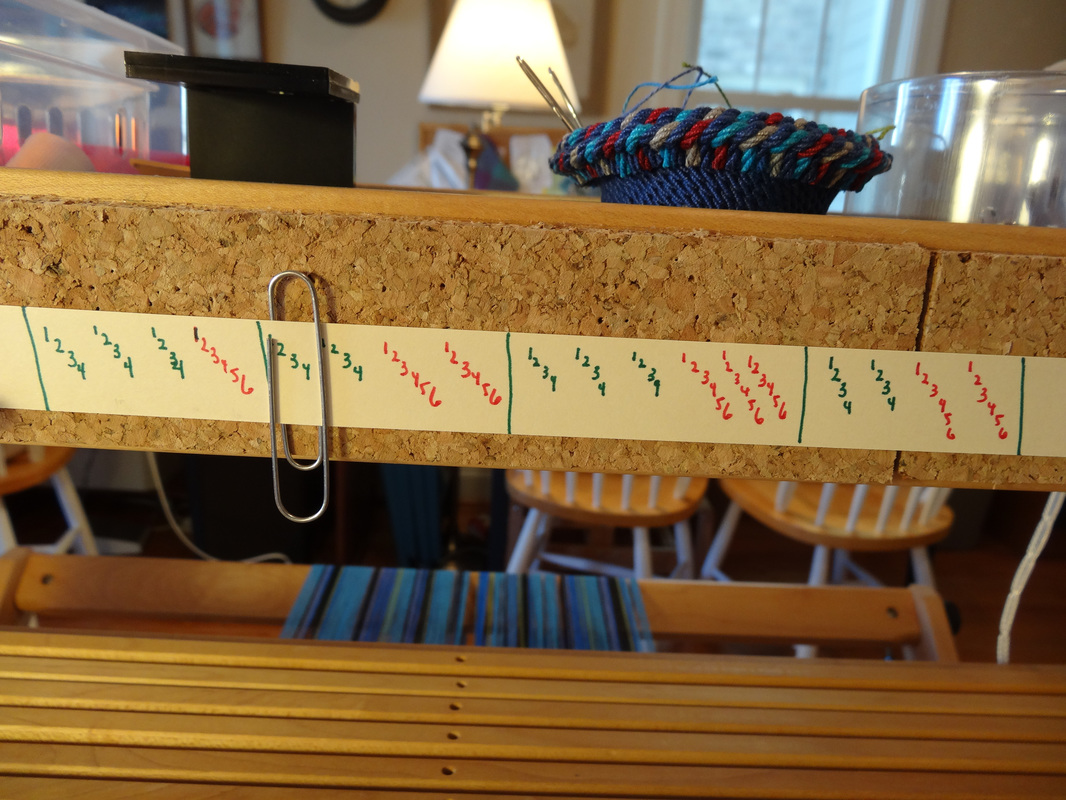
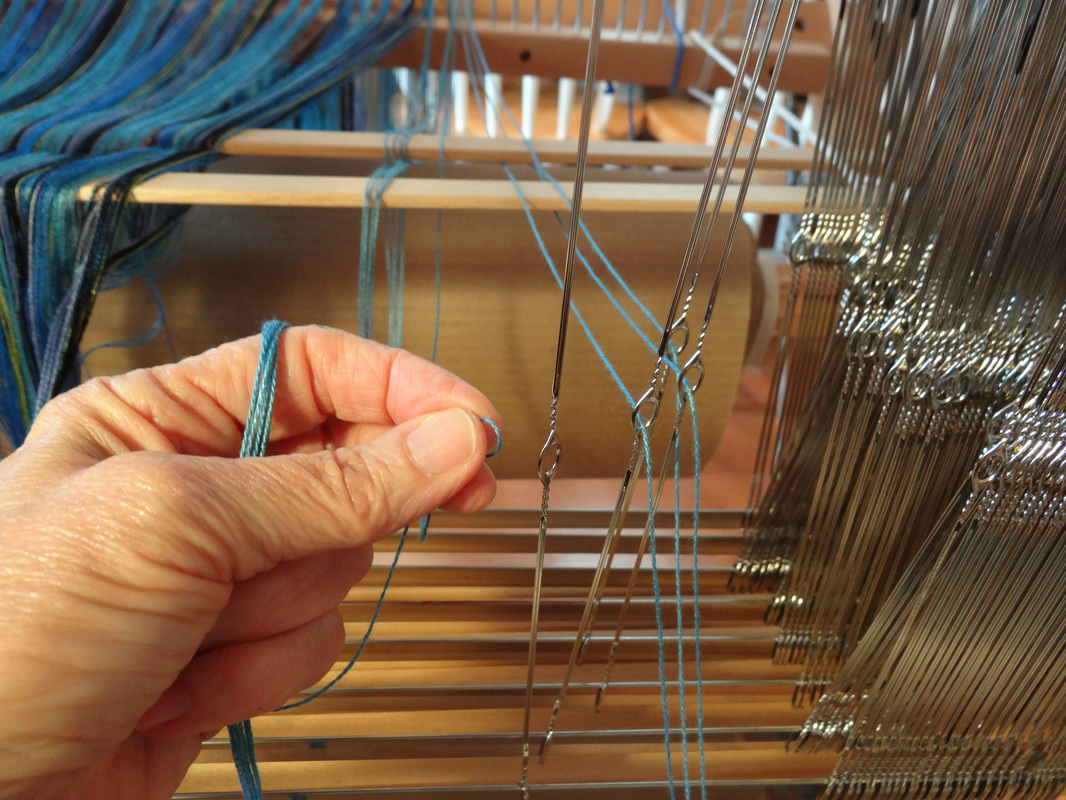
Step 6 is repeated over and over for each section of the draft until the threading is completed. 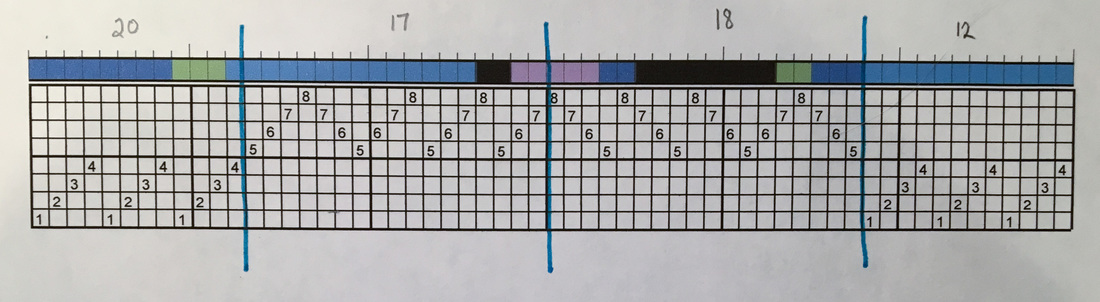 Marking up my draft in logical threading sections. The numbers above each section indicate the number of threads in the bundle.
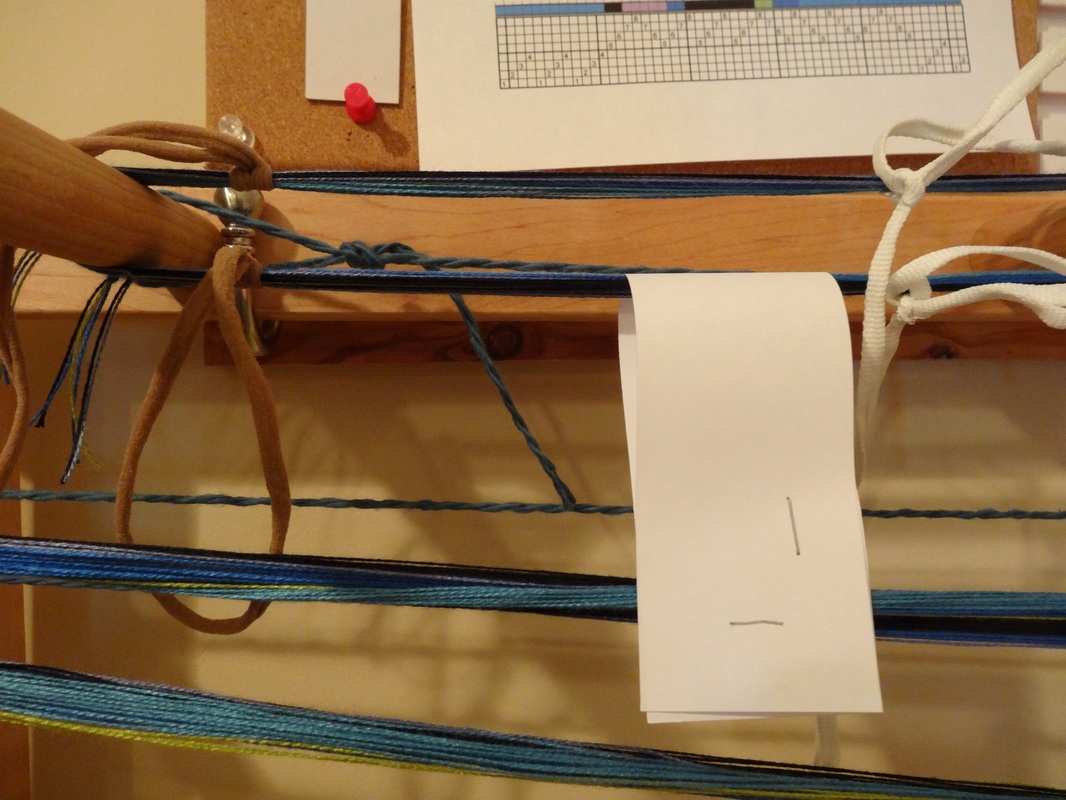
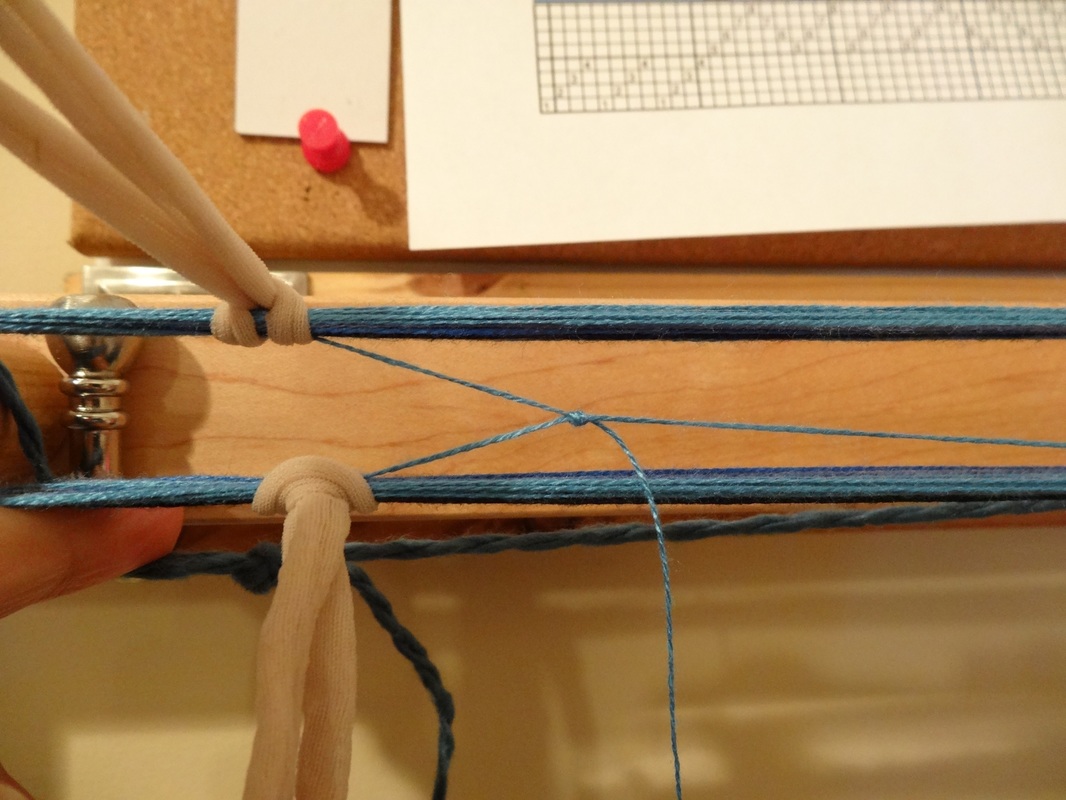
 Bundle marked off on draft to indicated that threading is done. Threading the reed I find it more comfortable to thread the reed when the reed it horizontal (parallel to the floor) rather than vertical (sitting in the beater). I can’t stress this enough! This method is so much more ergonomically correct: easier to see what you are doing, easier on your body and faster to boot.
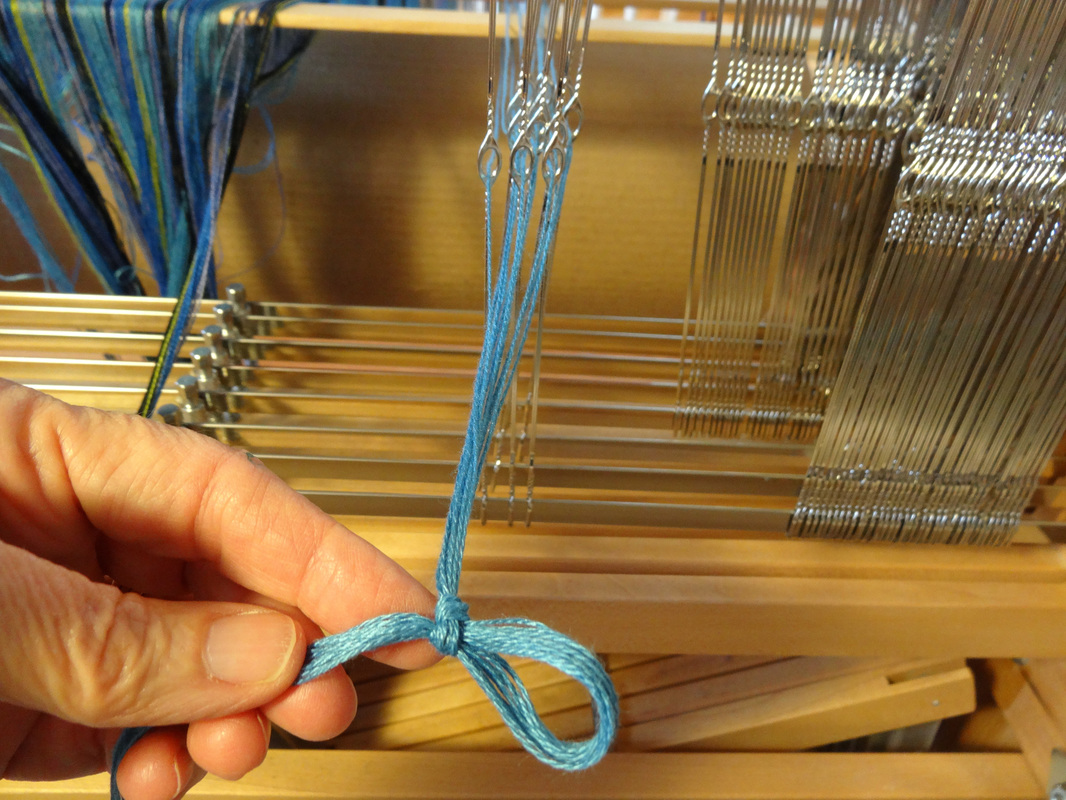
Every inch or so, I tie a slipknot underneath in the bundle underneath the reed. This is really important. There is not much holding this reed in those cords. If it gets dislodged and you haven’t tied those knots, the reed will fall on the floor and you get to start over :-). That could really ruin your day! When the threading is done, I put the reed into the beater, center the warp (NOT the reed) in the beater, and put the top on the beater. Click on any picture to zoom in.
Ready for Day 6 - Tying up the loom. Go to Life History-Day 6 To review, go back to Life History-Day 4
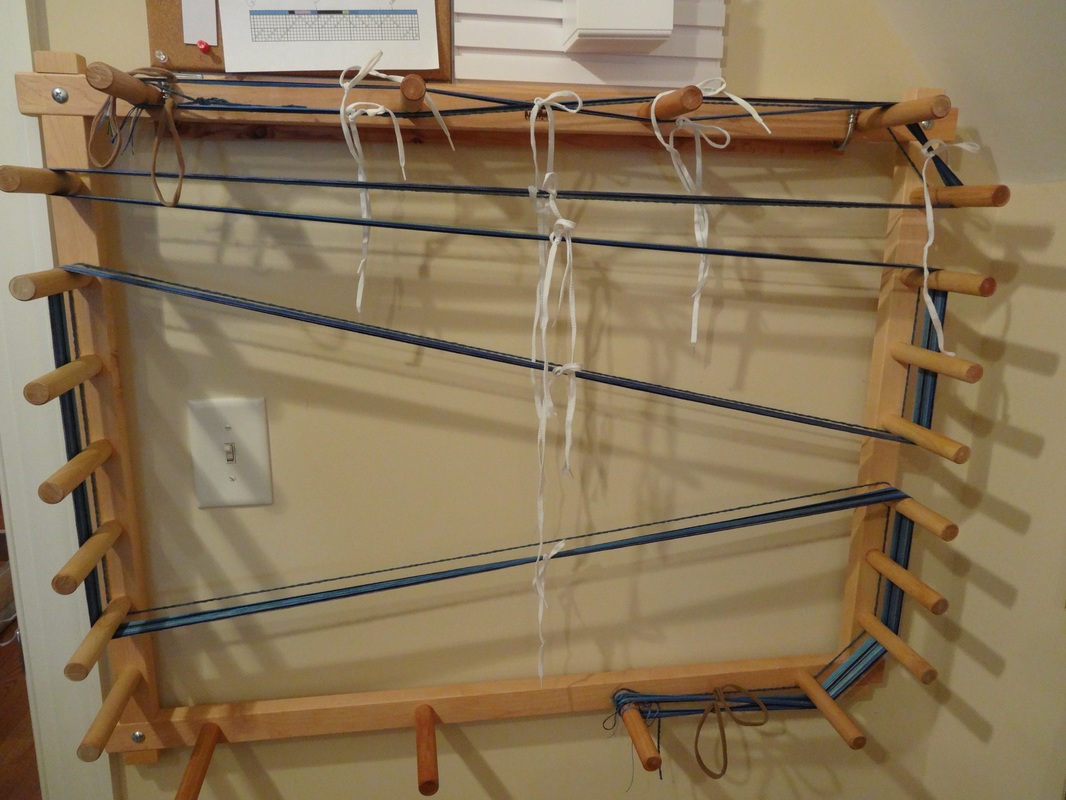
Spreading the warp in the raddle
I was now ready to thread the loom. Go to Life History-Day 5 To review, go back to Life History-Day 3
Remember from Day 2: The warp is 11.8" wide (281 ends, sett at 24 epi) and 228" long)
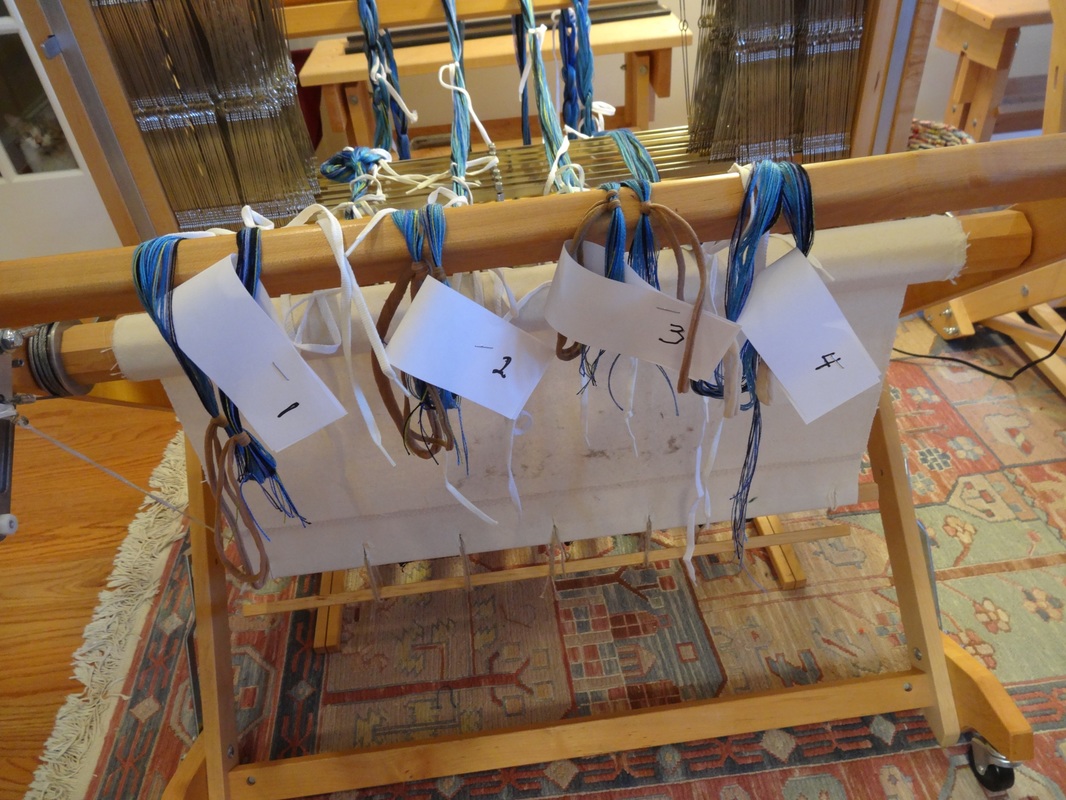
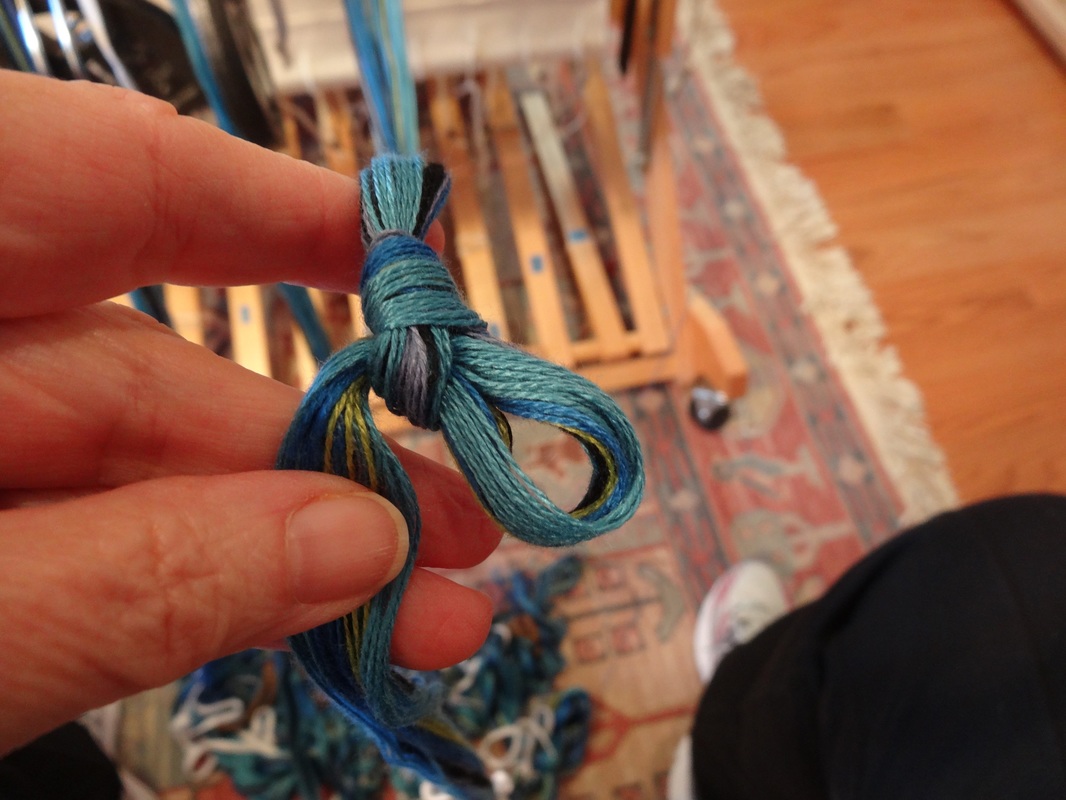
I chained off warp chain #1, beginning at the starting post. I chained loosely and only up to the cross portion of the warp chain. I took the warp to the loom and laid it across the front beam on the right side of the loom. I measured chains # 2 & 3 in the same way and laid them on the front beam to the left of chain # 1 I measured warp chain #4 in the same way with a couple of exceptions:
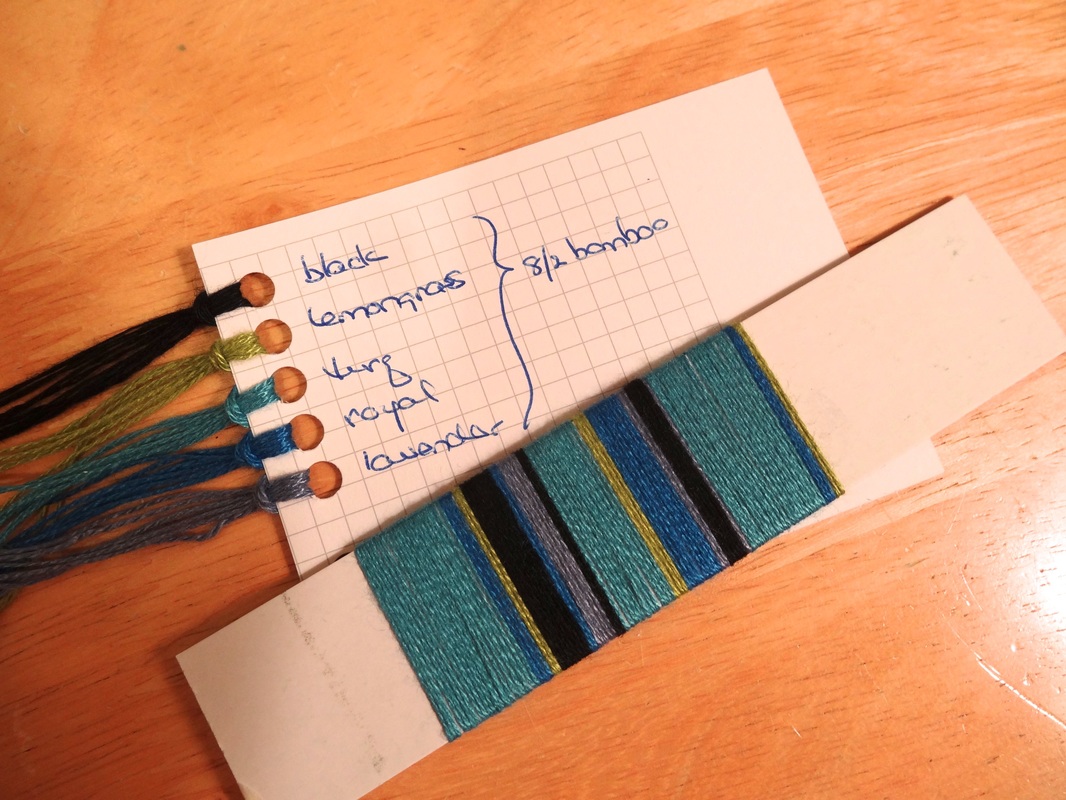
I tied off Chain #4, labelled it. chained it off the warping board, and took it to the loom where I laid it across the front beam to the left of Chain #3. Stay tuned for Day 4 - Winding onto the Loom. Go to Life History-Day 4 To review, go back to Life History-Day 2 Step 1 - Yarn Wraps. For me, the first step in planning almost always involves doing some yarn wraps to decide exactly which colors I will use and in what approximate proportions. I did several wraps, using 6 or 7 colors and chose the 2 wraps you see below as the final two. Finally I decided the warp needed a little extra "punch" and chose the wrap that has the black in it. The thread counts in the wrap use Fibonacci numbers in random order (1-2-3-5-8-13-21). I used 5 colors all together: black, turquoise, royal, chartreuse and lavender.
Step 2:- Planning my draft. I knew I wanted to use a mix of point twill and plain weave, just as I did in the Weaver's Challenge scarf, but this scarf was going to be a little different:
Step 3 - Warp calculations. The last thing I needed to do before I started measuring my warp was to do some calculations to figure out how long my warp should be, how much yarn I would need for the warp and weft, and to make sure I had enough yarn on hand. Warp width: 281 ends / 24 epi ==> 11.7" in the reed
Warp length: Planning for weaving 2 scarves plus 1 sample that is to be woven, cut off, and washed before proceeding with weaving the scarves.
Once my calculations were done, I was ready to start measuring my warp chains. A project for another day. To be continued on Life History-Day 3 To review, go back to Life History-Day 1 |
Pattie LambI have been happily weaving since my son was born in 1988. Archives
June 2023
Categories
All
|


 RSS Feed