Lamb...on the Loom
  • Home
  • SHOP
    • Scarves
    • Shawls & Wraps
    • Throws & Baby Blankets
    • Bags & Purses
    • For the Home
    • Odds & Ends
    • Shop All Handwovens
    • Schacht Equipment
  • Blog
  • Events
  • Gallery
    • Scarves
    • More Scarves
    • Shawls
    • Baby
    • For the Home
    • Just for Fun
    • The Wedding
    • Komen
    • Baby Wraps
  • About
    • Storyboard

LIFE HISTORY OF A SCARF: DAY 6 - Getting Ready to Weave

2/16/2016

0 Comments


​After the loom was threaded there were still 3 things that needed to be done before the real weaving could begin:
  1. Tying the warp to the front apron rod
  2. Tying up the treadles
  3. Weaving a header
Picture

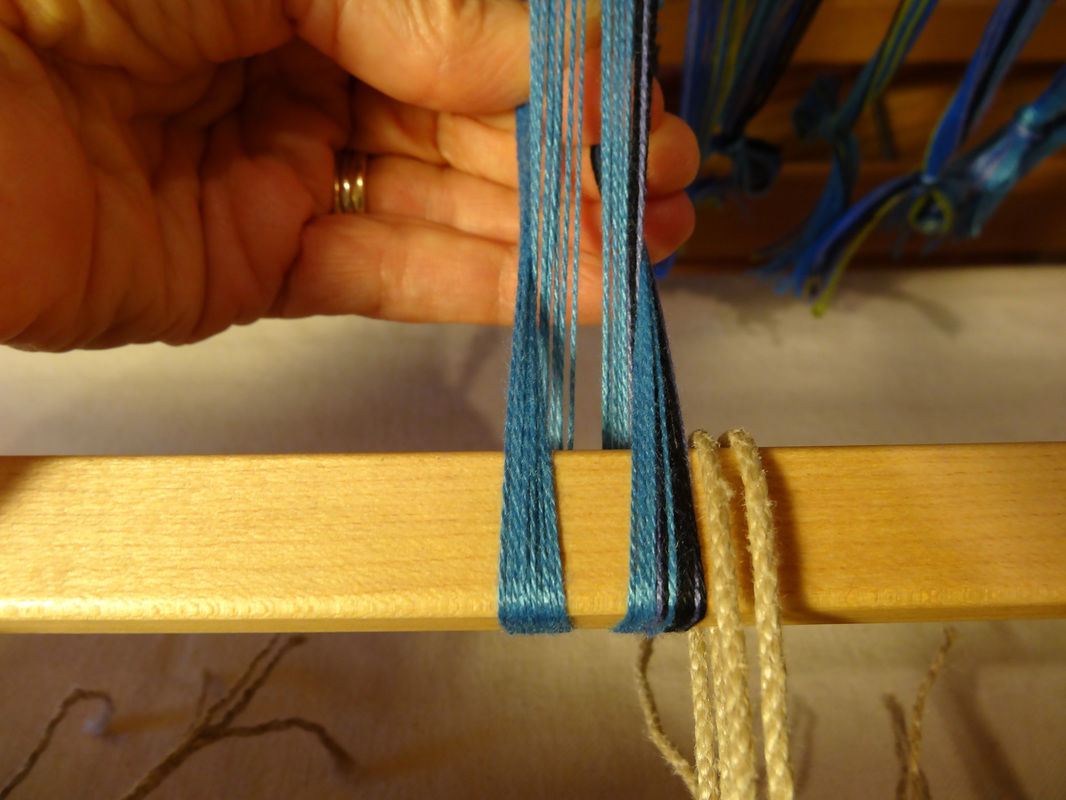
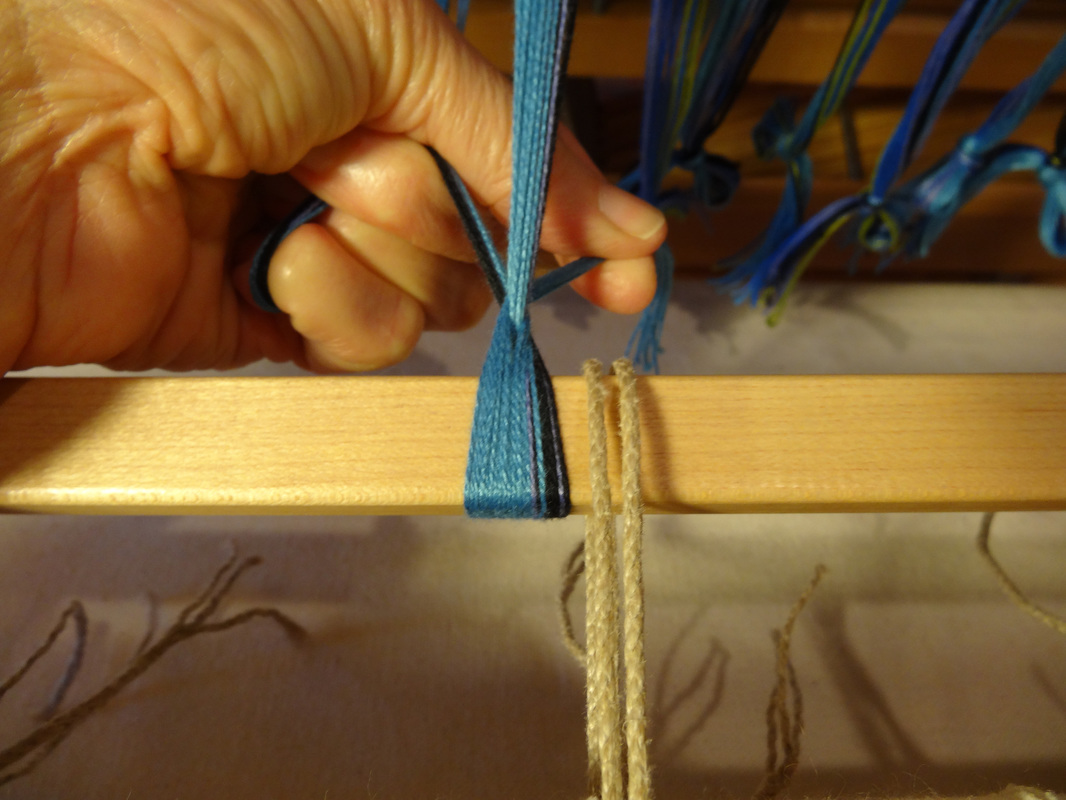
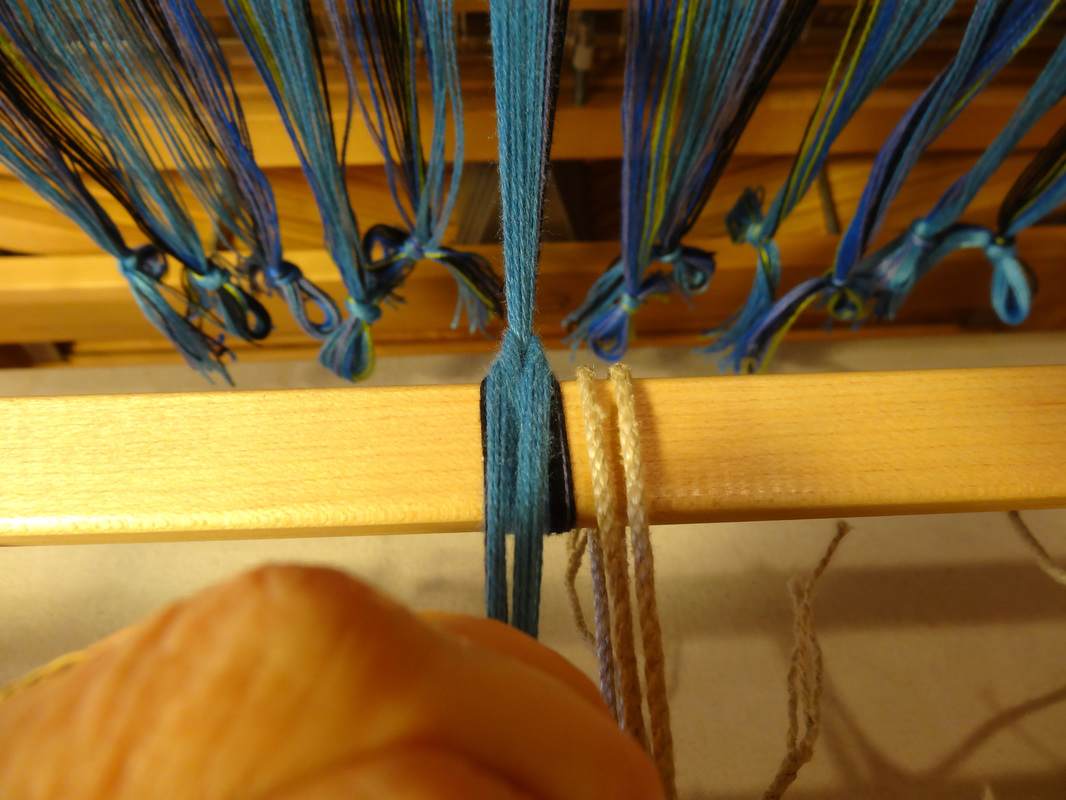
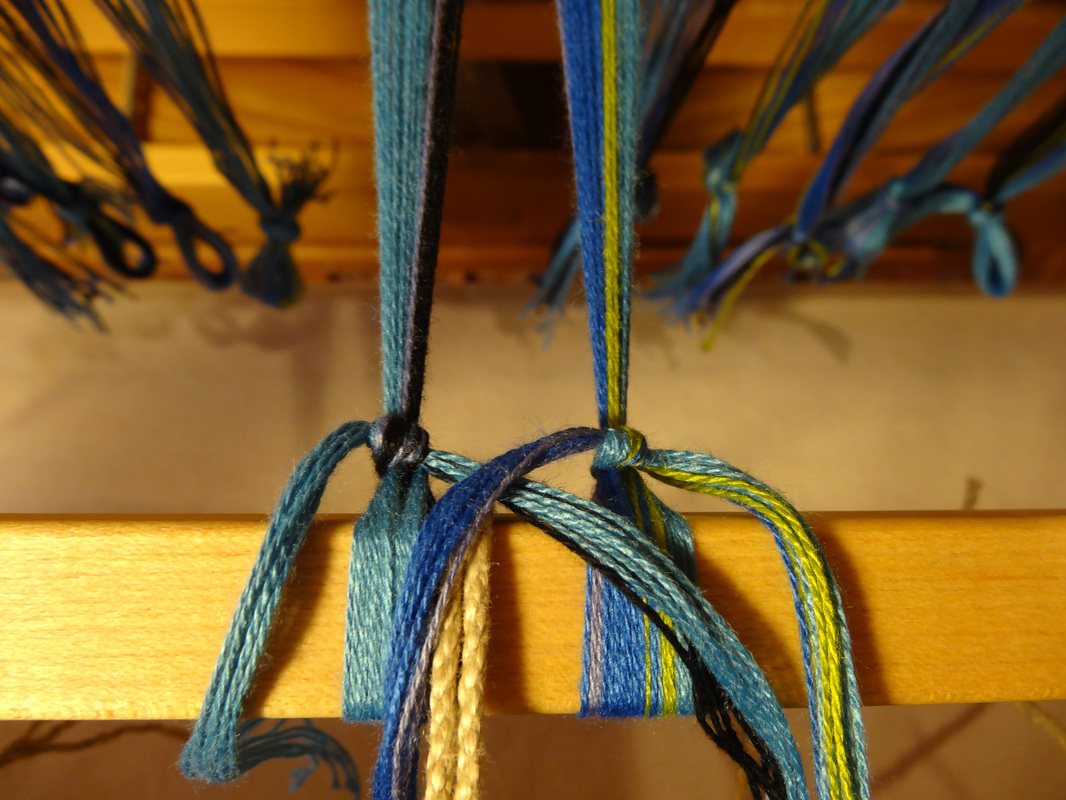
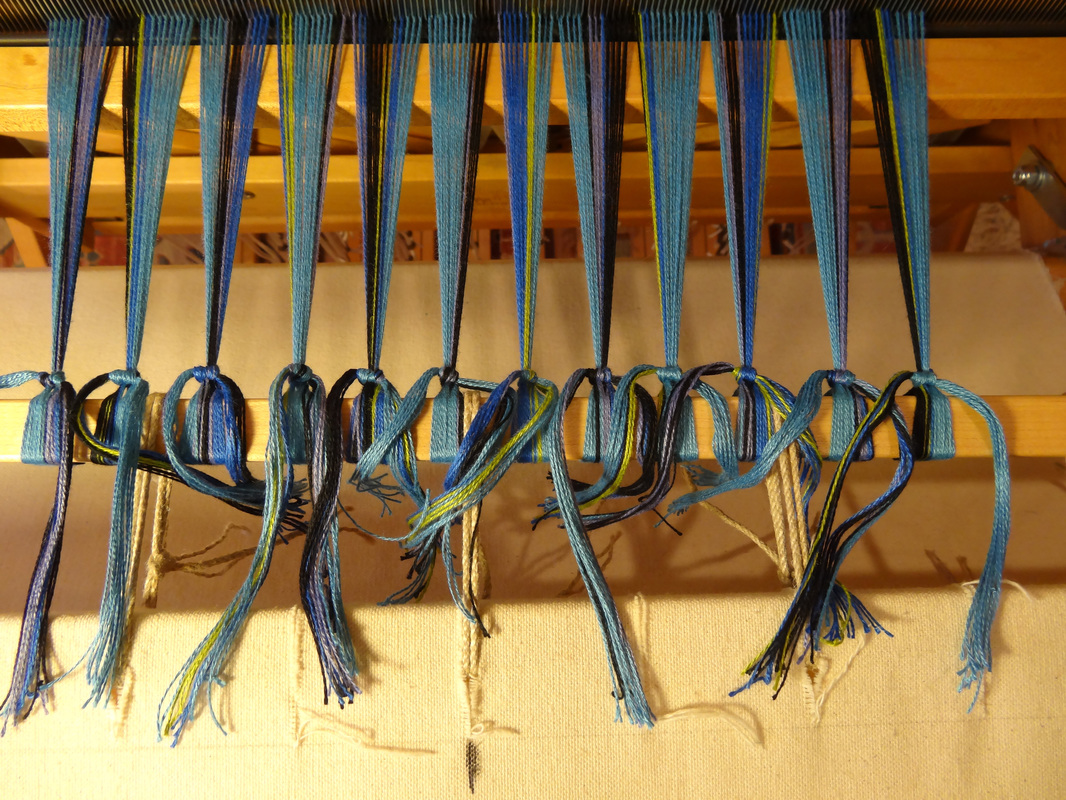
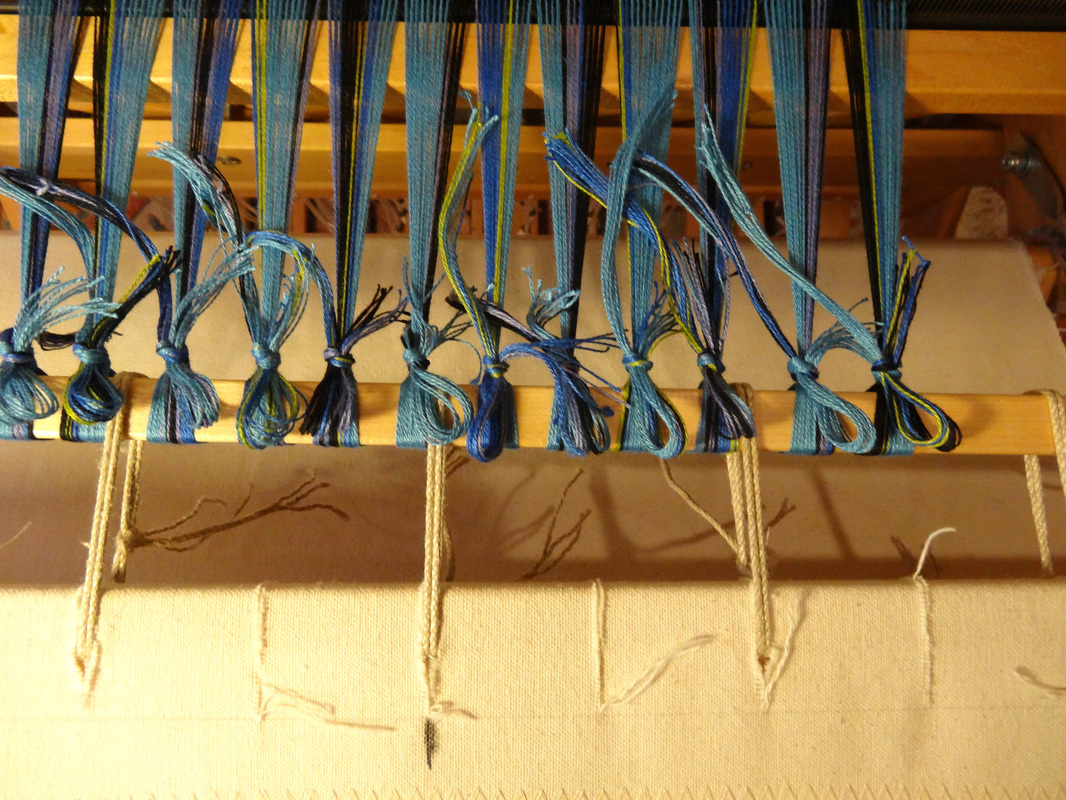
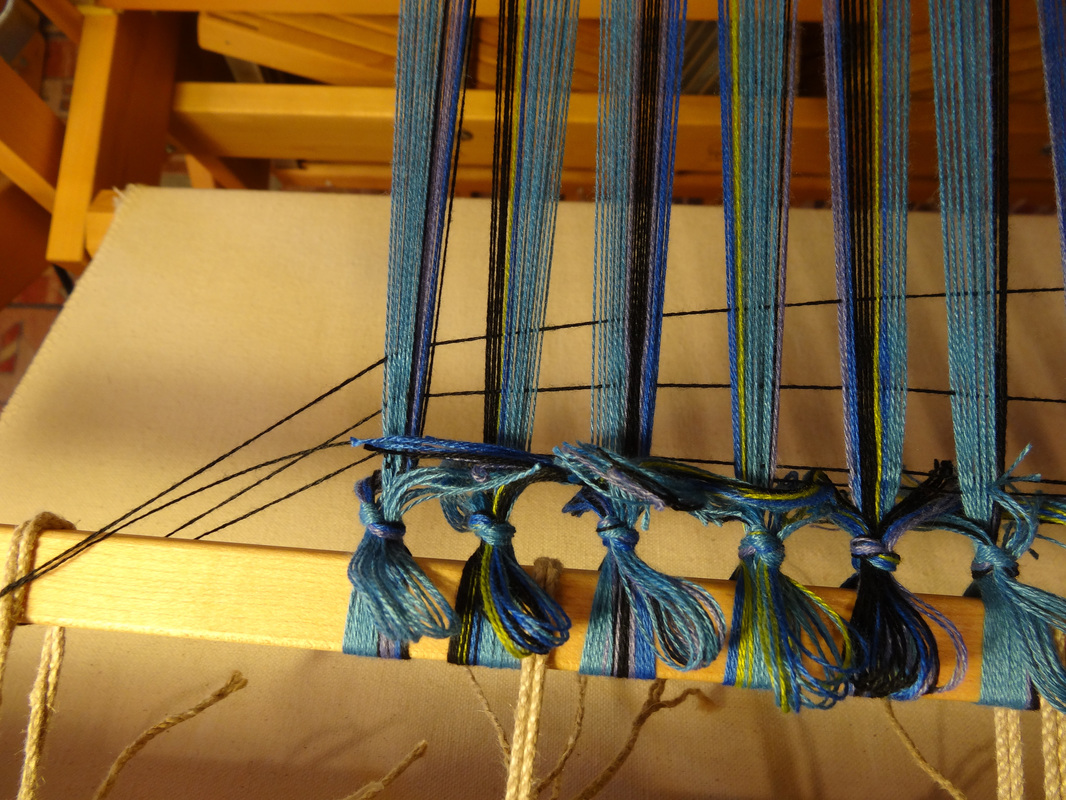
Tying the warp to the front apron rod
Before I even began this step, I removed the raddle and lease sticks from the back of the loom, and I removed the texsolv cords that were used to support the raddle, lease sticks and reed while winding on and threading.
Next I bundled the warp into 1” bouts starting at the edges of the warp and working my way toward the center.  I tied a slipknot in each bundle.

Next I tied the bouts to the apron rod.  There are many ways to do this.
  1. My favorite method: Start in the center and work out, tying with even tension for 4 to 6 1” bouts (2 or 3 on each side of center), then wind the cloth beam forward 1 click.  Continue to tie 1 bout on each side for another 2-3 bouts on each side, and wind forward another click.  Continue in this way until done.
  2. My favorite tie-on knot is to split the bout, take both sides under the apron rod, and back over the apron rod, cross the two sides under the bout, come up on opposite sides of the bout, pull snugly back towards the castle to tension, pull the ends back towards you and tie in a half surgeon’s knot on top of the bout.
  3. Check the tension in front of the reed and behind the reed.  Adjust if necessary.
  4. When all bouts are tied and tension seems even, secure each bout with a half bow.
Tip: 
​Try to never have bouts for tying on that are larger than 1” wide, and make sure the selvedge bouts are the same size (which is why I start on the edges and work toward the middle).

 
My draft doesn’t have an even multiple of 1” bouts, so I fudged a little in the middle, making the middle 3-5 bouts a little bit smaller.
Picture
Both sides of the bout passed under the apron rod, back over the rod and down beside the bout
Picture
Crossing the end of the bout underneath
Picture
After tensioning, the two sides are being held, ready to tie the half surgeon's knot
Picture
The half surgeon's knot on the first 2 bouts
Picture
All bouts tied with half surgeon's knots
Picture
All bouts finished with a half bow

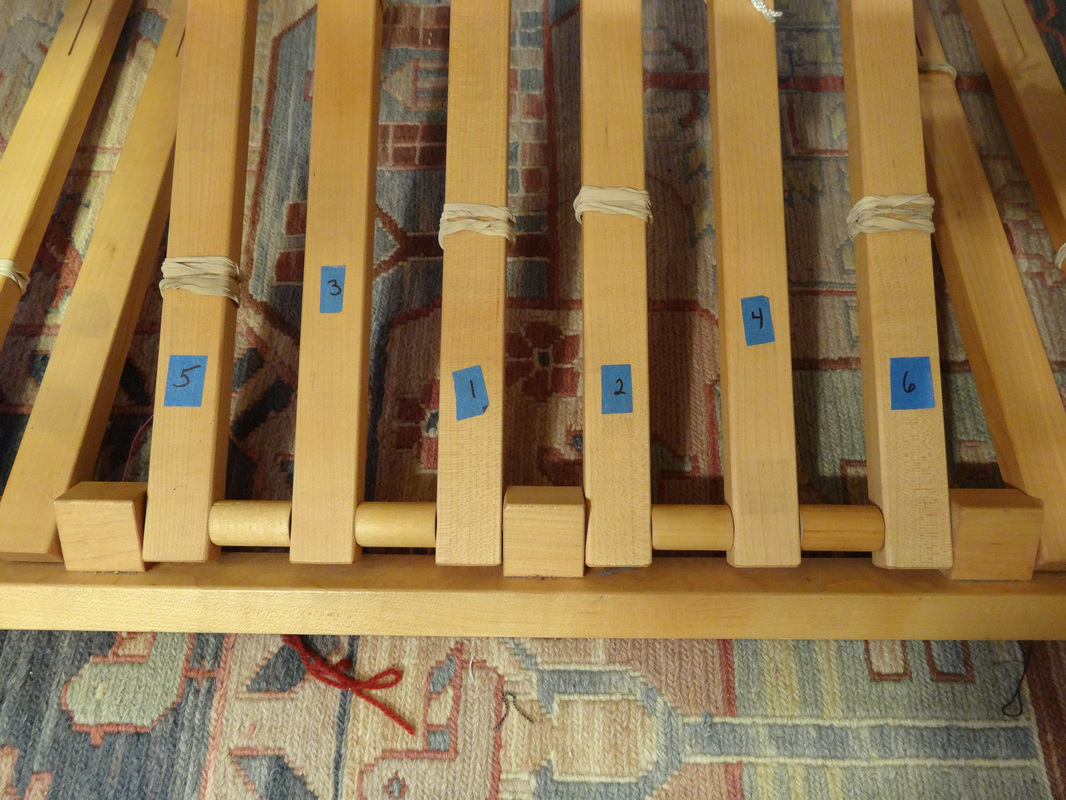
Tying up the treadles
The treadling is a point twill treadling and the original tieup required 4 treadles.  I like “walking” my treadles. 
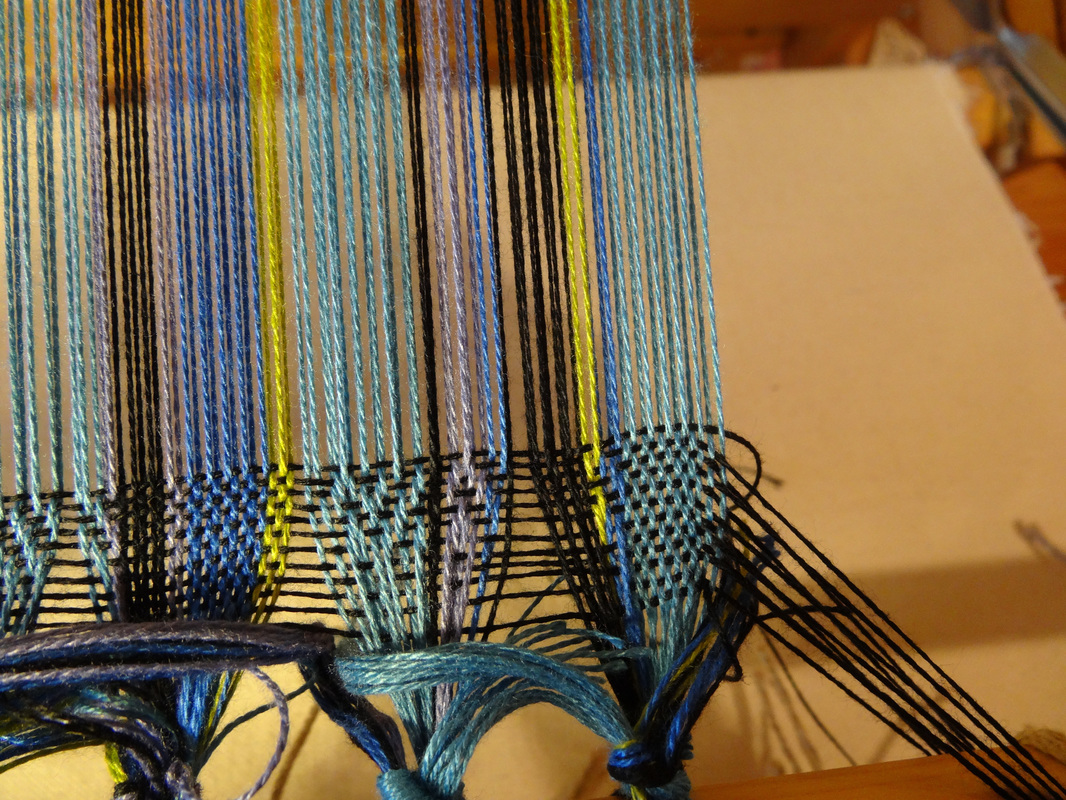
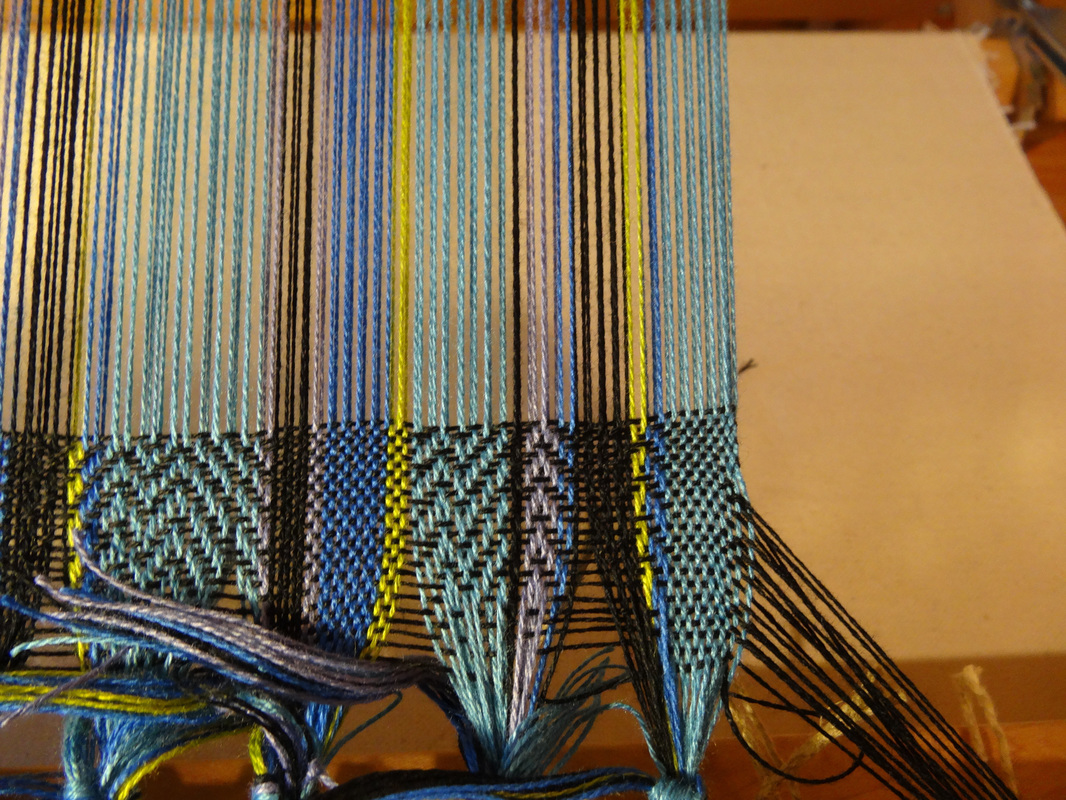
Option 1
Traditional walking treadles would mean that I would set up the 4 treadles like this:
Treadle          3          1         2         4
Tieup            34        12      23       41
Foot               ---Left ---     -- Right --
I would then press treadles 1,2,3,4  (left, right, left, right) for the straight twill runs and I would press treadles 1,2,3,4,3,2 (left, right, left, right, left, right) for the longer turning runs.
Option 2
For a point treadling like this I find it less confusing to add extra treadles to deal with the turning points in the treadling so I set up my treadles like this instead:
Treadle          5          3         1            2         4          6
Tieup             34       34       12          23       41       23
Foot               -------Left -------         ------ Right -----
I would then press treadles 1,2,3,4  (left, right, left, right) for the short straight twill runs and 1,2,3,4,5,6 (left, right, left, right, left, right) for the longer turning runs
​
So for this project I tied up my treadles according to the Option 2, and the treadling shown on the far right. 

To be clear, both of these treadlings weave EXACTLY the same cloth, the second one simply makes it easier for me to weave efficiently.

I placed rubber bands on the center treadles (1 & 2) so I my stocking feet could find the middle treadles without peeking.  I also placed rubber bands on treadles 5 & 6 to help me distinguish them from 3 & 4.
Picture
Original treadling
Picture
Modified treadling
Picture
6 treadles marked with rubber bands, labelled and tied up for walking style treadling

​After tying up the treadles, I checked my sheds:
  1. I pressed each treadle to make sure I was lifting the harnesses I intended to lift
  2. I used a mirror to look at the shed – both in front of the reed and behind it – looking for any crossed threads
  3. Double check that the threading and spacing through the reed look correct.

Weaving a header
  1. I wove a header with a yarn that was similar in size to the weft I would be weaving with. 
  2. I chose a slippery rayon that could be easily removed when I finished the scarves.
  3. I wove the header in pattern.
  4. For the first few shots, I wove 2 shots at a time before beating them in to help spread the warp threads faster, and I wrapped the weft around the apron rod before throwing the next shot to help keep the selvedge from curling while I get the warp spread.
  5. After the first 1/2" or so, I wove without wrapping around the apron rod, and I wove until the warp was spread evenly and I was sure the tension was even and there were no threading errors.
Picture
First 2 shots of the header wrapped around the apron rod. Both shots were thrown before beating them in.
Picture
First several shots of header all wrapped around the apron rod. Warp is nearly spread evenly.
Picture
Header complete. Last section was woven without wrapping the weft around the apron rod.

Now on to weaving some samples!  Go to Life History-Day 7
To review, go back to Life History-Day 5

0 Comments

    Pattie Lamb

    I have been happily weaving since my son was born in 1988.

    All pictures on my blog are "zoomable" - just click on them to enlarge.

    Archives

    March 2023
    June 2022
    November 2020
    October 2020
    February 2020
    October 2019
    June 2019
    May 2019
    June 2018
    July 2017
    June 2017
    May 2017
    April 2017
    February 2017
    January 2017
    August 2016
    July 2016
    May 2016
    February 2016
    February 2015
    January 2015
    October 2014
    September 2014

    Categories

    All
    Artificial Intelligence
    Baby Wraps
    Blankets
    Block Twill
    Block Weave
    Block Weaves
    Cat's PJs
    Challenges
    Charity
    ChatGBT
    Classes
    Commissions
    Deflected Doubleweave
    Design
    Doubleweave
    Dyeing
    Facebook Challenge
    Felting
    Hemstitching
    John C Campbell
    Knitting
    Lace Weaves
    Leftovers
    Life History-Day 1
    Life History-Day 2
    Life History-Day 3
    Life History-Day 4
    Life History-Day 5
    Life History-Day 6
    Life History-Day 7
    Life History-Day 8
    Life History-Day 9
    Life History-Final
    Life History Of A Scarf
    More Than Pink
    Paper Quills
    Plain Weave
    Ply Split
    Process
    Rugs
    Runners
    Scarves
    Selvedges
    Shawls
    Storyboard
    Study Group
    Tencel
    Tie-ups
    Tip Of The Month
    Tips
    Tools
    Towels
    Travel
    Treadling For Dummies
    Turned Twill
    Twill
    Videos
    Walking Pink
    Warping
    Weaving
    Weaving Pink
    Weaving Tips
    Wedding
    Yarn Wraps

    RSS Feed

         HOME        //      SHOP      //       BLOG       //        EVENTS       //       GALLERY     //      ABOUT       //      CONTACT

  • Home
  • SHOP
    • Scarves
    • Shawls & Wraps
    • Throws & Baby Blankets
    • Bags & Purses
    • For the Home
    • Odds & Ends
    • Shop All Handwovens
    • Schacht Equipment
  • Blog
  • Events
  • Gallery
    • Scarves
    • More Scarves
    • Shawls
    • Baby
    • For the Home
    • Just for Fun
    • The Wedding
    • Komen
    • Baby Wraps
  • About
    • Storyboard