Lamb...on the Loom
  • Home
  • SHOP
    • Scarves
    • Shawls & Wraps
    • Throws & Baby Blankets
    • Bags & Purses
    • For the Home
    • Odds & Ends
    • Shop All Handwovens
    • Schacht Equipment
  • Blog
  • Events
  • Gallery
    • Scarves
    • More Scarves
    • Shawls
    • Baby
    • For the Home
    • Just for Fun
    • The Wedding
    • Komen
    • Baby Wraps
  • About
    • Storyboard

Out Out Damned Cat: Repairing Yet Another Rug

7/19/2017

4 Comments

 
Picture
Lizzie, the culprit

​​She looks really innocent, doesn't she?
She is a very sweet cat.  
Her name is Lizzie.  
She is two now,
​Lizzie narrowly escaped death by weaver at age one. 
​
​I have (had) a handwoven wool rug at my front doorway.  I wove the rug over a decade ago when we lived in Buffalo.  So about a year ago I bent over to pick up what I thought was a dead moth on the rug. Much to my horror, I discovered it was a severed knot from one of the fringe bouts.  On further inspection I realized that the knots had been chewed off of no fewer than THIRTY FIVE fringe bouts!
Picture
1 of 35 severed fringe bouts
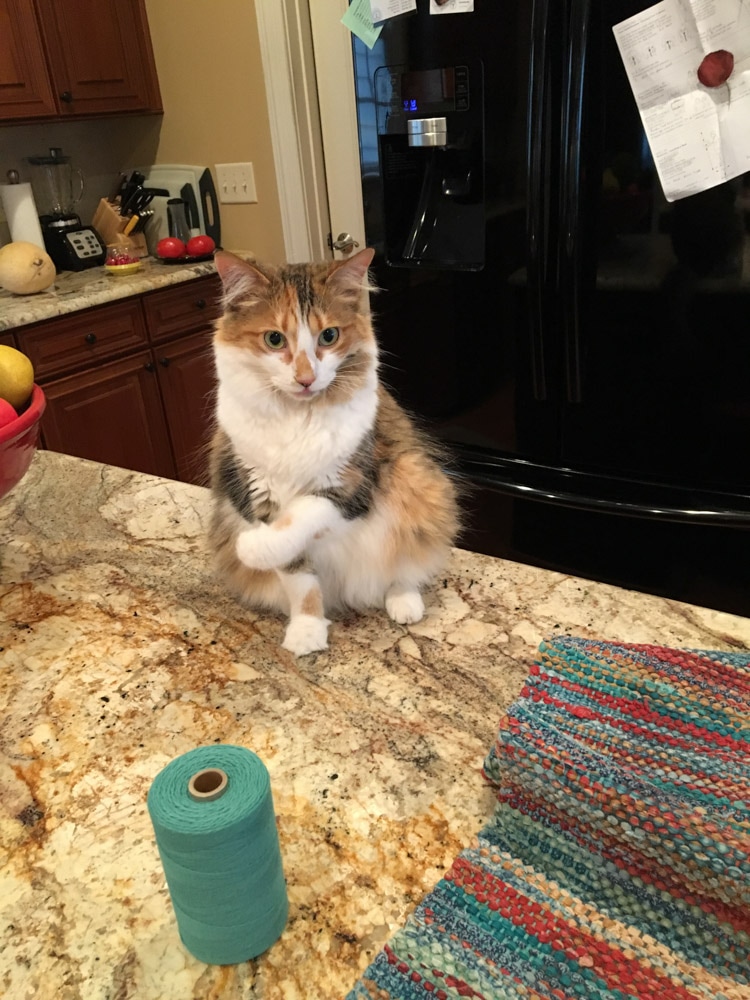
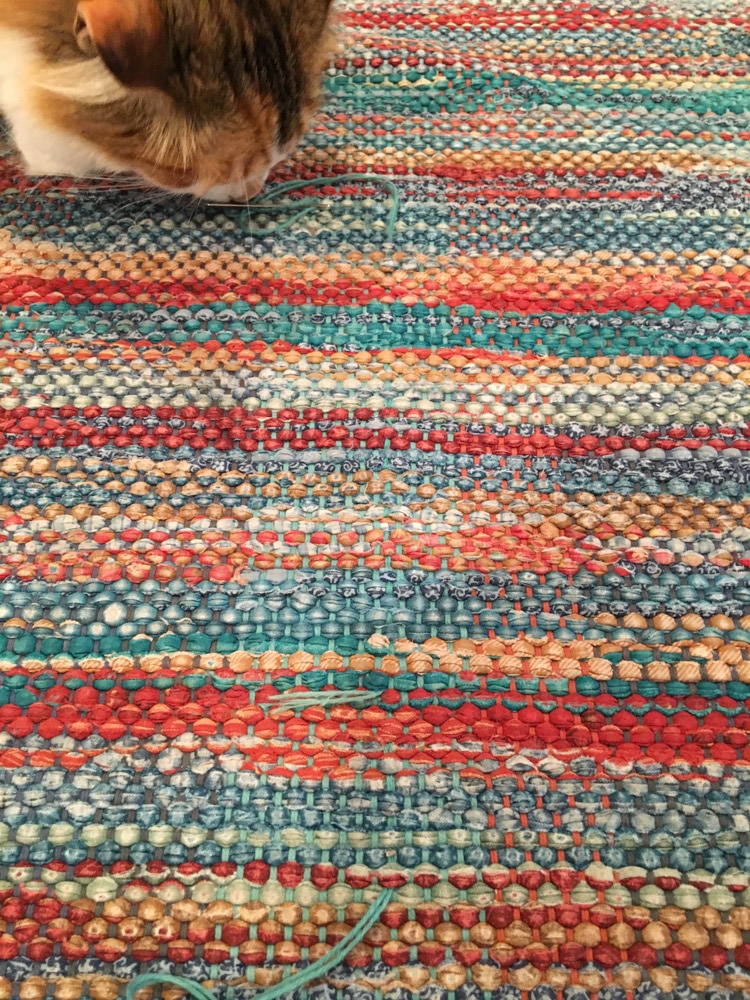
​There were only three possibilities (all cats):
  1. Pressy who was 21 years old and could hardly walk
  2. Dexter who was 16 years old and literally has no teeth
  3. Lizzie the baby in the family, full of vim and vigor and still teething and about to be murdered by her loving mother

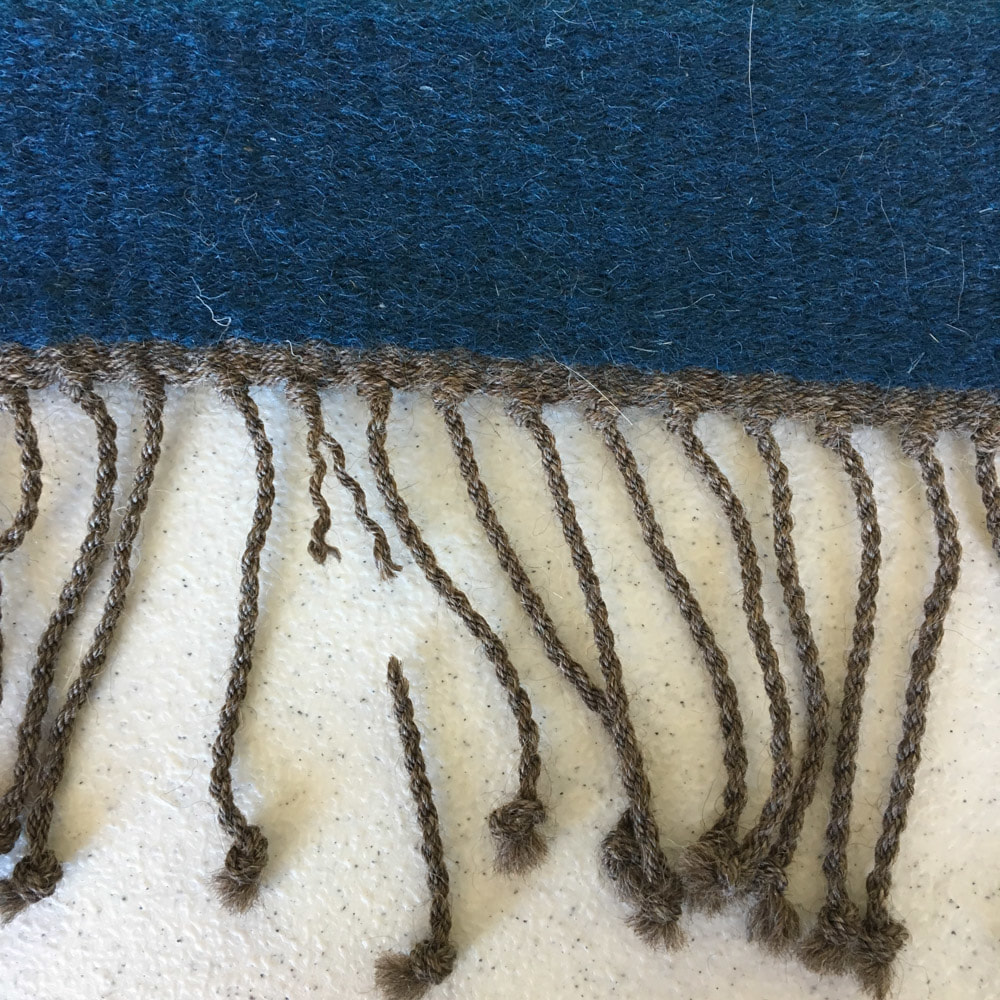
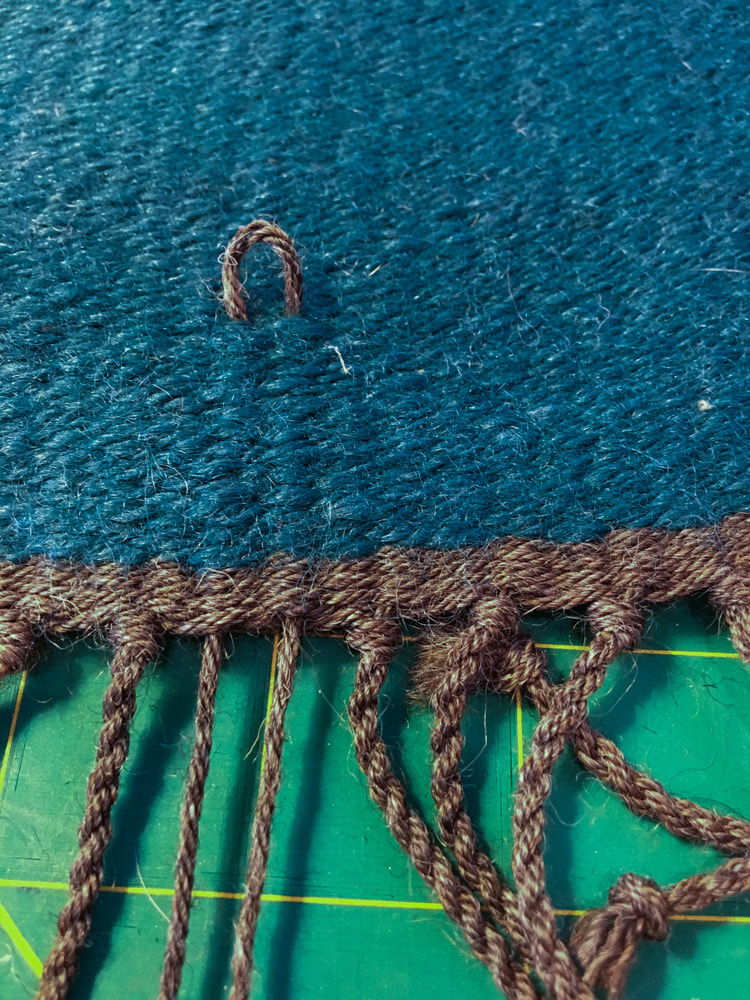
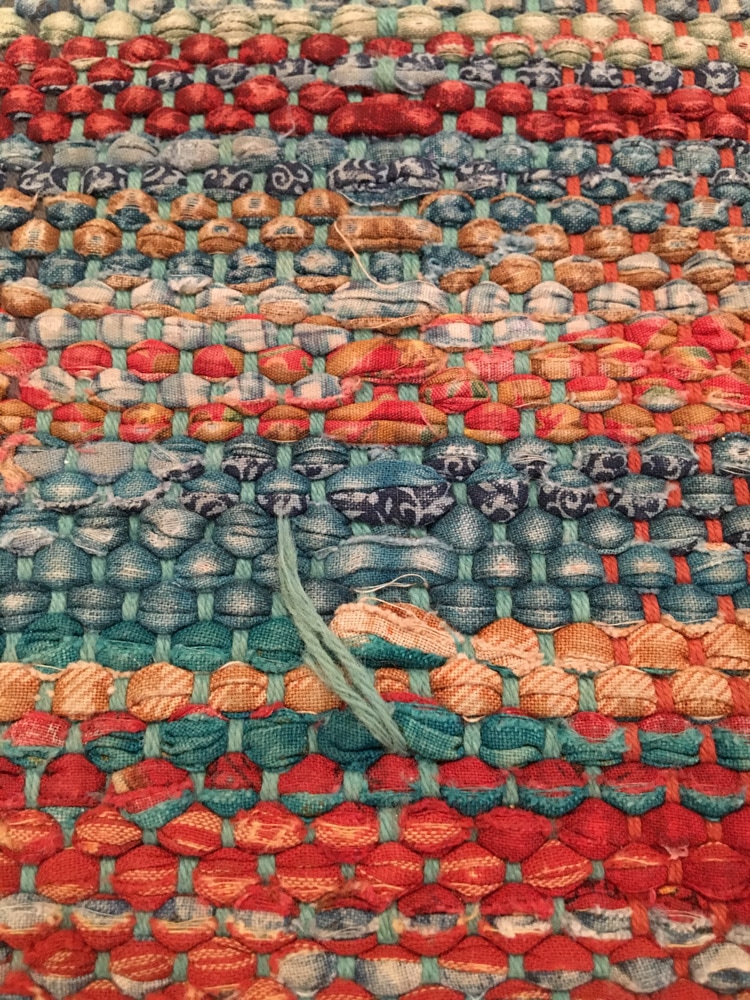
So Lizzie was found guilty by a process of elimination.  I pulled the rug up and growled and fumed for a few days while I debated what to do.

Fully a year later, I finally got around to repairing this debacle.  Fortunately, I still had some of the linen I used for the warp for the rug.  And the structure of the rug was a simple plain weave.
 

​Tools needed:
  • Heavy duty needle with a sharp point for undoing linen knots
  • Linen Warp
  • Tapestry needle for weaving in new fringe
  • Scissors
  • Fringe twister
Picture
The tools
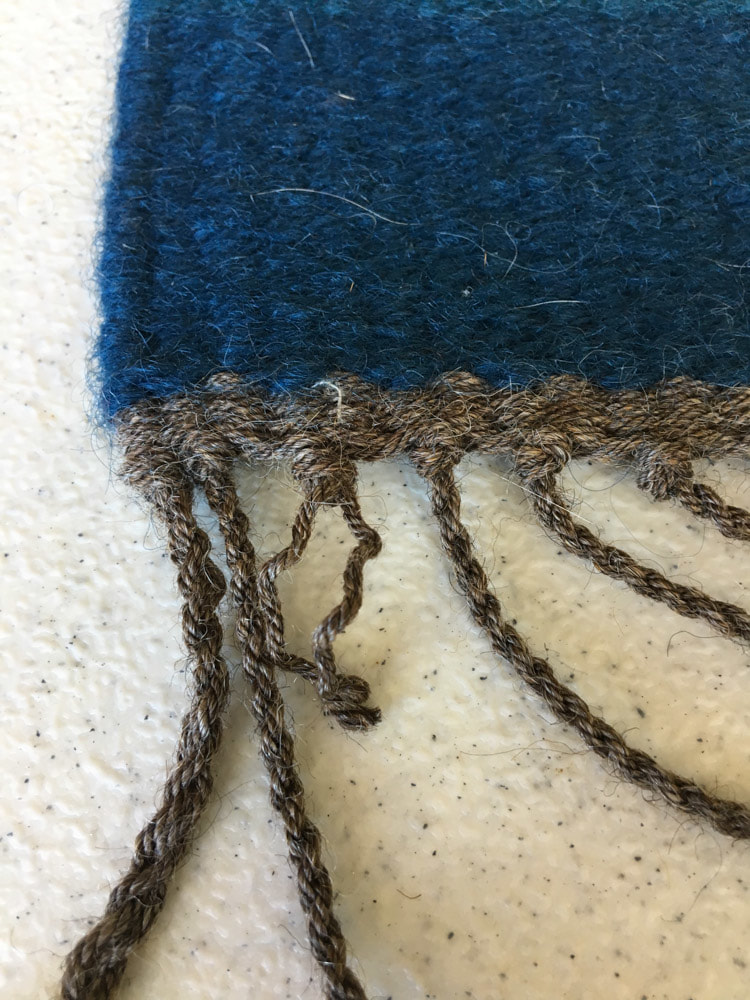
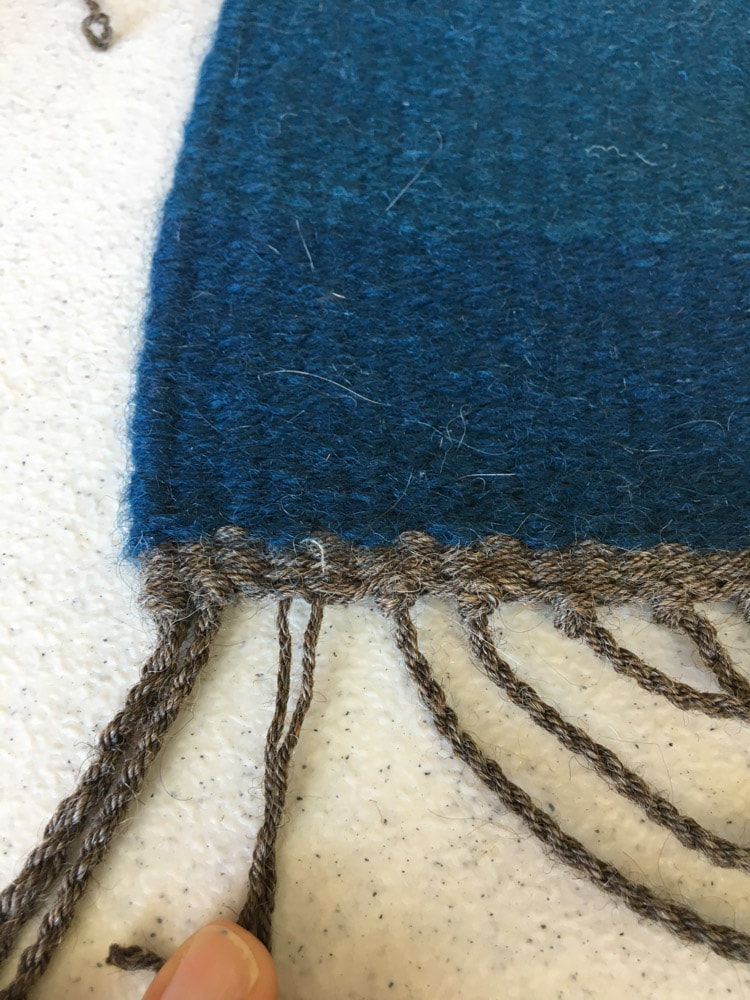
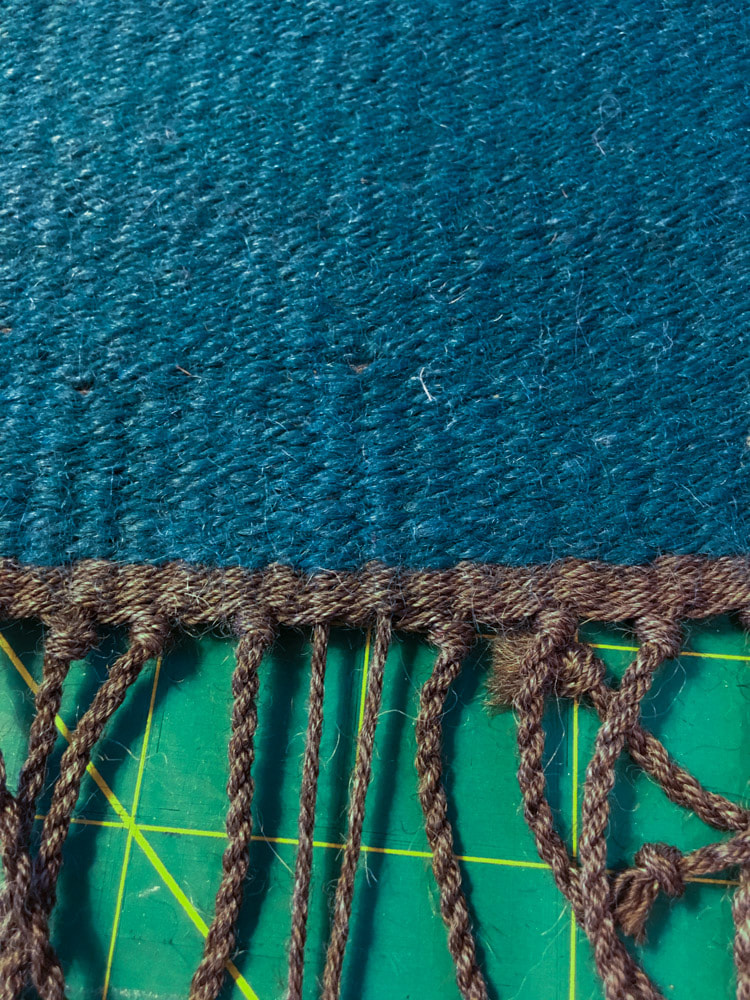
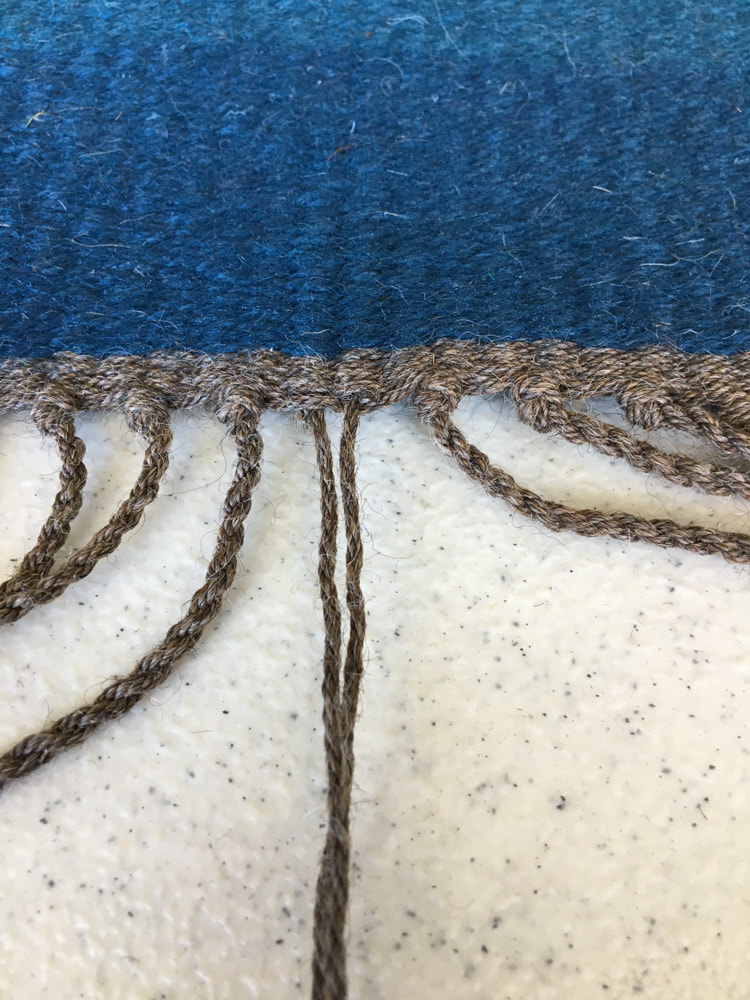
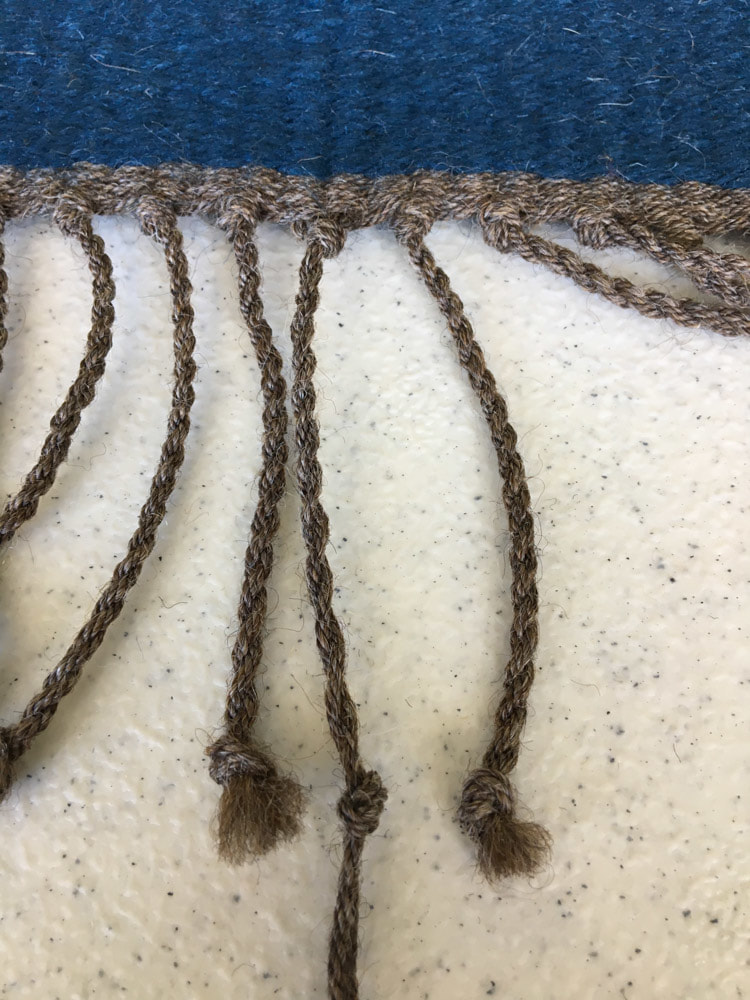
A photo journal of the steps for replacing the fringe follows.  The basic steps are:
  1. I untwisted the fringe of the severed bout (for this rug the fringe bouts consisted of only 2 warp ends)
  2. I untied the knot at the fell of the cloth (using the sharp needle to help pick out the knot)
  3. With the tapestry needle, I wove the loose ends 3/4-1" back up into the rug alongside the warp thread NEXT to the thread I was weaving in
  4. I trimmed the ends close to the surface of the rug
  5. I cut a piece of rug warp that was about 14" long and wove it 1 1/4" - 2" up into the rug along one warp end, turned and wove down along the other warp end back to the fell of the cloth
  6. I knotted the 2 ends together at the fell (like the original 2 warp ends were knotted) 
  7. I twisted the fringe (the 2 new warp ends) and knotted at 3" and clipped close to the knot
  8. I repeated this for 23 bouts on one end of the rug and 12 on the other end of the rug, until my fingers were raw and the rug was almost back to new!
 
Picture
The fringe has been untwisted
Picture
The knot at the fell has been untied
Picture
Weaving the right warp end up alongside the left warp end
Picture
Weaving the left warp end up alongside the right warp end
Picture
Both warp ends woven back into the rug
Picture
Old warp ends trimmed close to the rug surface
Picture
New warp ends woven up 2" into the rug and back down to the fell
Picture
New warp ends pulled snuggly into the cloth
Picture
New warp ends ready to knot at the fell
Picture
Warp ends knotted at the fell, twisted, knotted at 3" and ready to trim
Picture
The finished repair
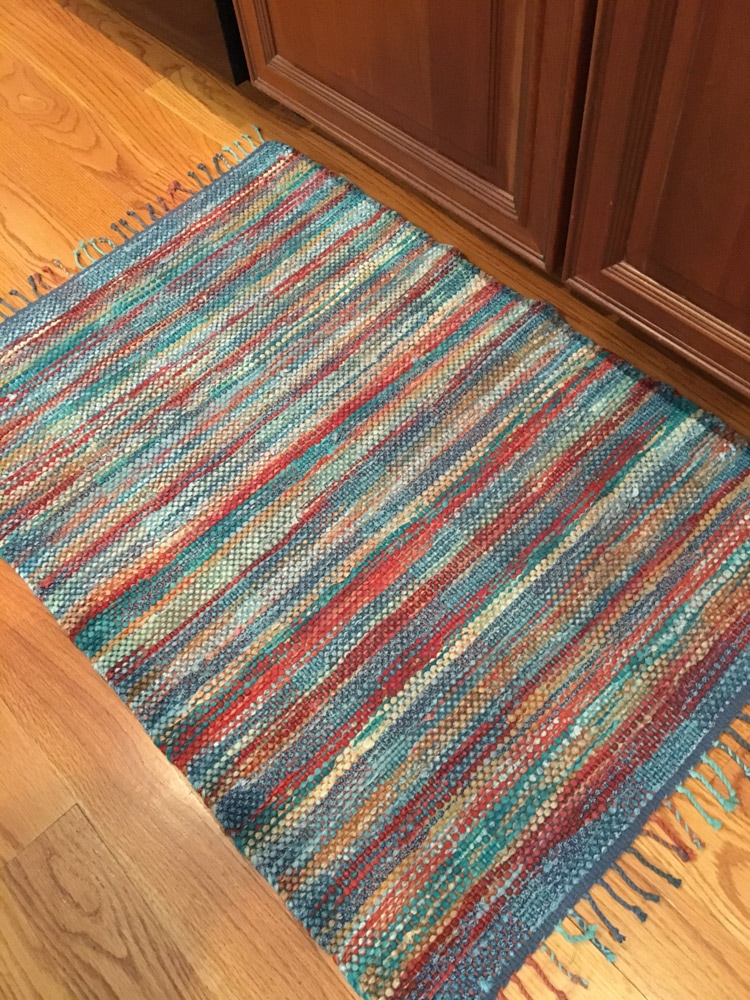
What a relief to finally have this little project done and the rug repaired.  I have missed having it at my front door.  ​

​But unfortunately now it will probably go back into storage for another two years because....

​Piper has arrived.
Piper is 2 months old.
She is a good kitten.
She has teeth.

Picture
Piper, the new kitten
Picture
Truth be told, the rug would probably have stayed in the closet waiting to be repaired if I had not been inspired and shamed into doing this simple repair after watching this incredible post on Facebook.  Watch and be amazed:  Oriental Rug Rebuild

4 Comments

New Life for a Little Rug

6/18/2017

10 Comments

 
Picture
This is what the fringe USED to look like.
​Years ago I wove a little Rag Rug to use in front of my kitchen sink.  I finished the rug with twisted fringe and left the fringe about 4" long - probably too long.  Over the years I have had to periodically retie some of the fringe bouts,  but slowly but surely more and more of the bouts had become untied, frayed and I could no longer re-twist them and knot them back to their original length. In addition, some of the warp threads in the body of the rug had broken and the rug was really looking shabby and worn.
Remember: You can click on any picture to zoom in!
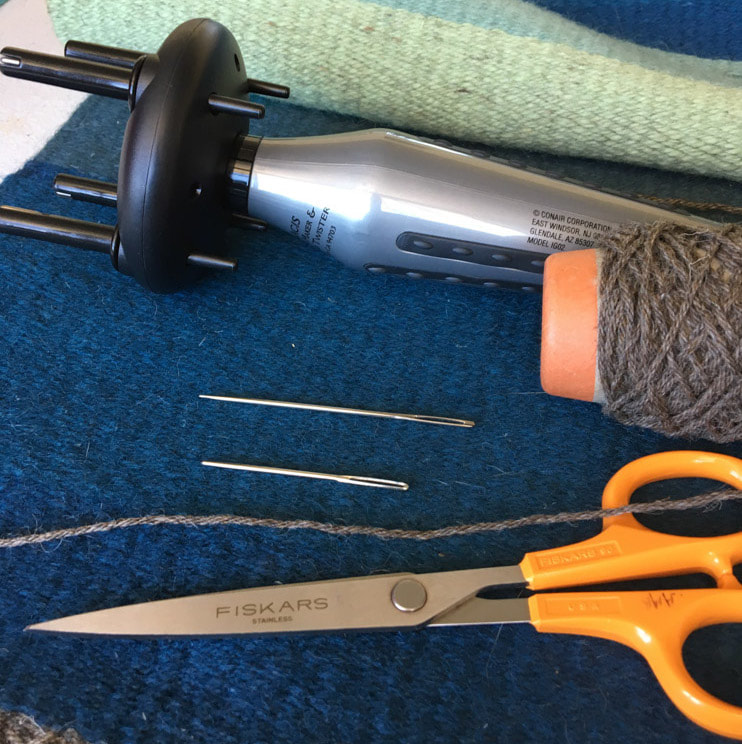
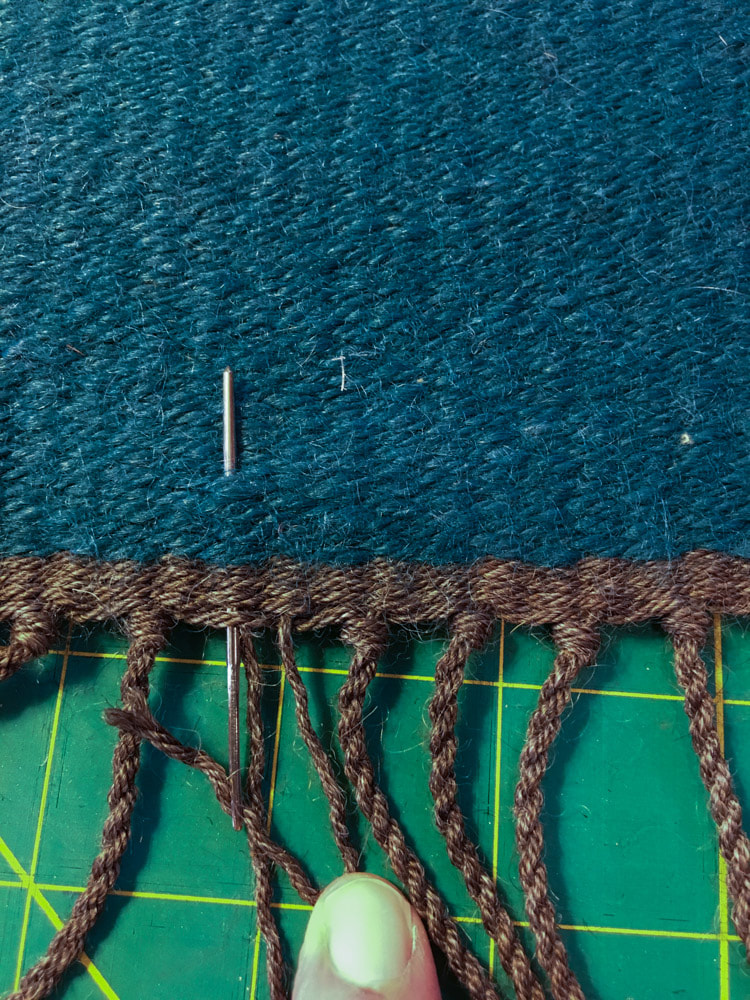
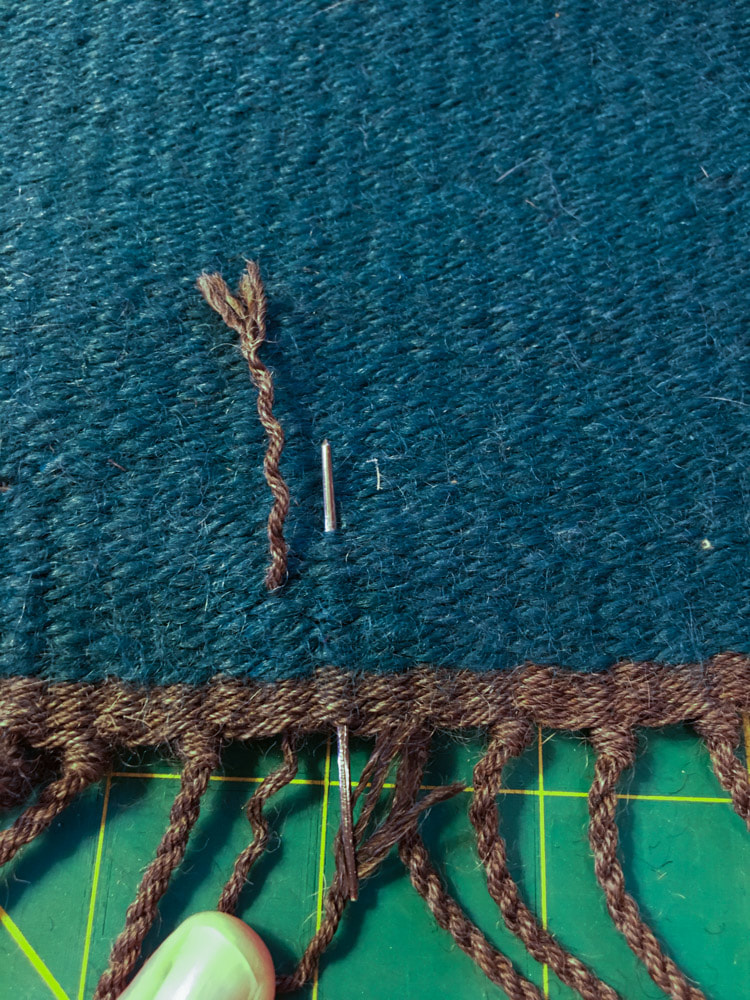
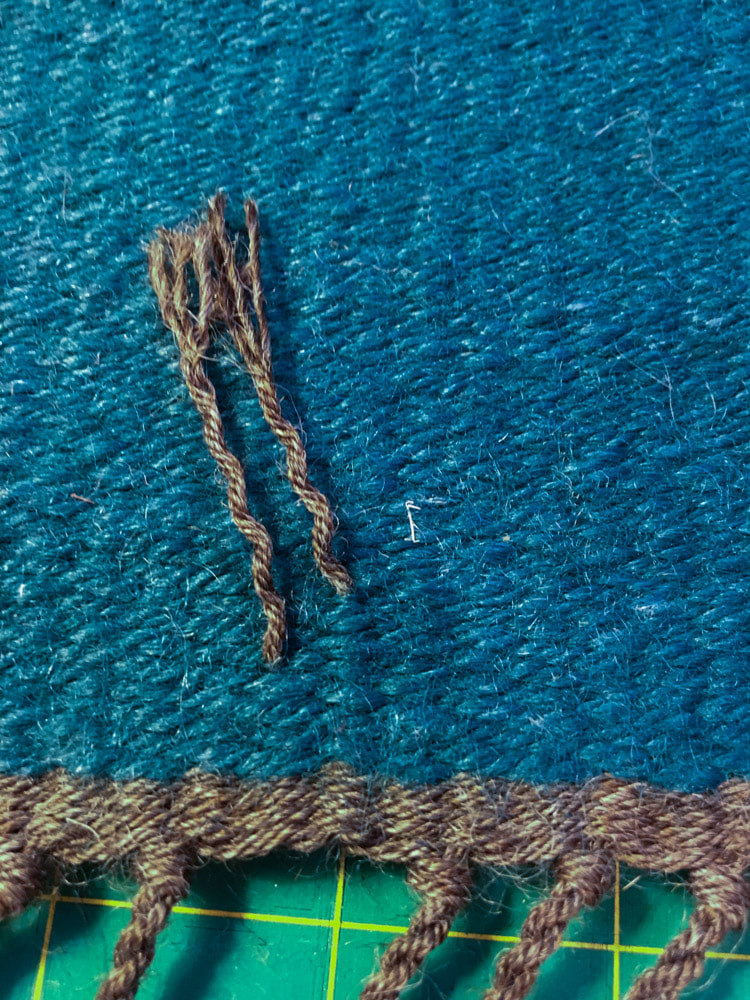
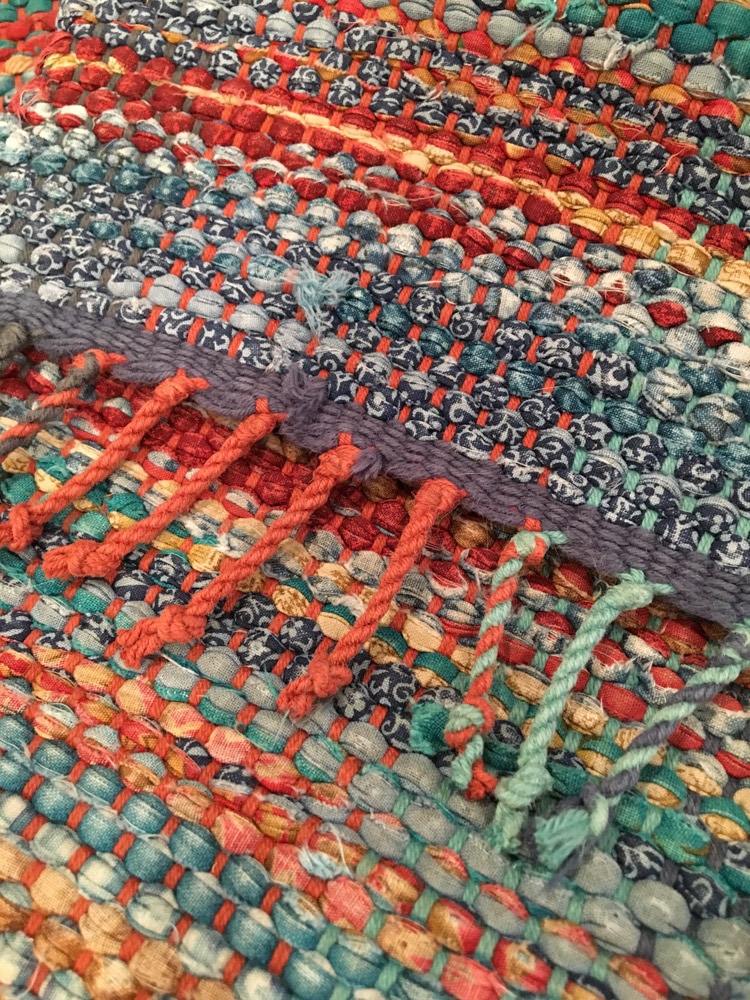
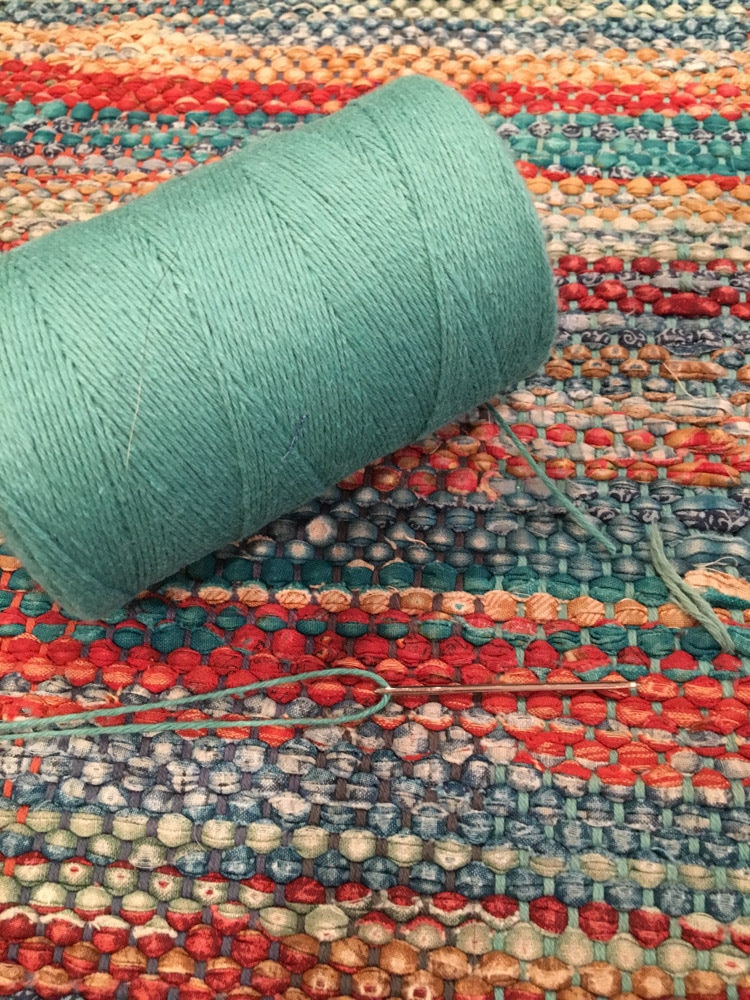
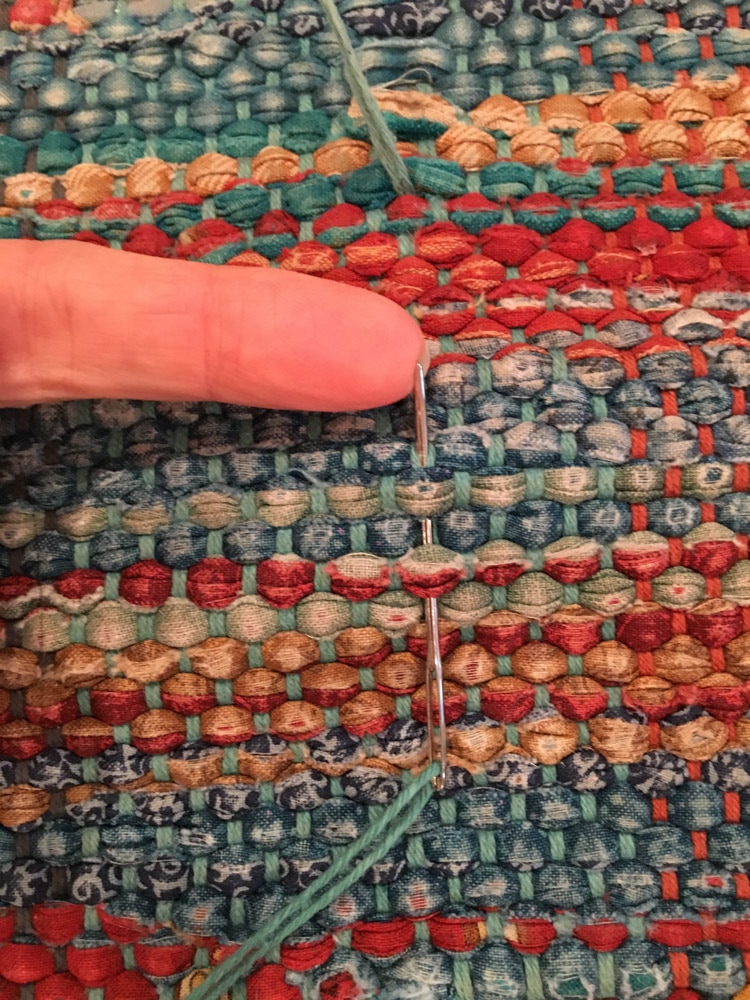
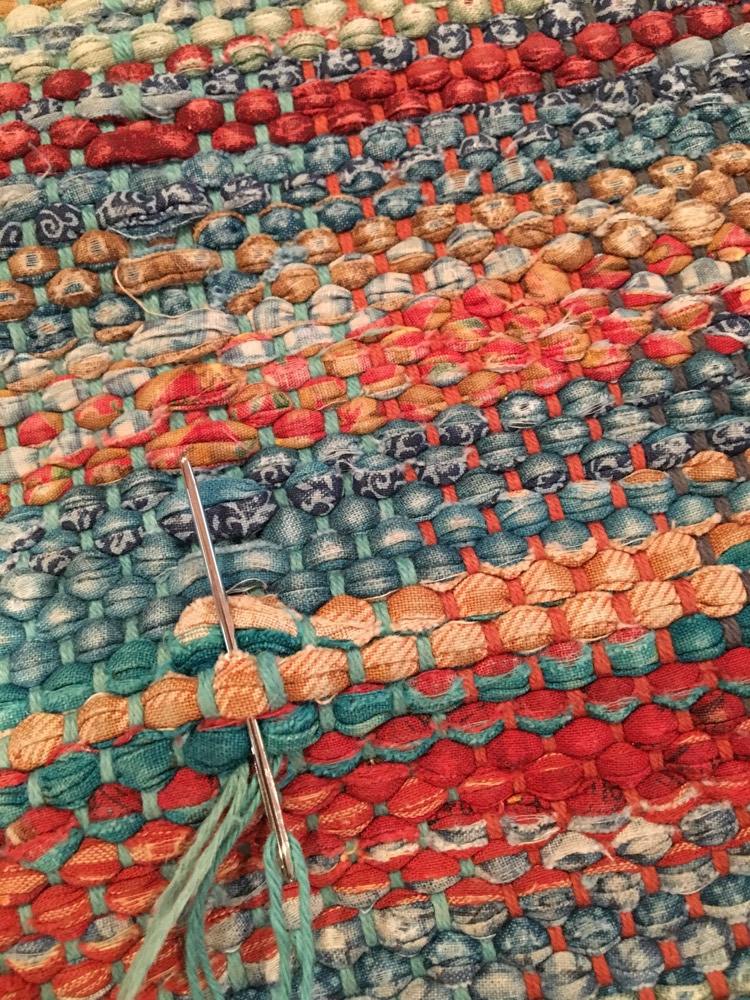
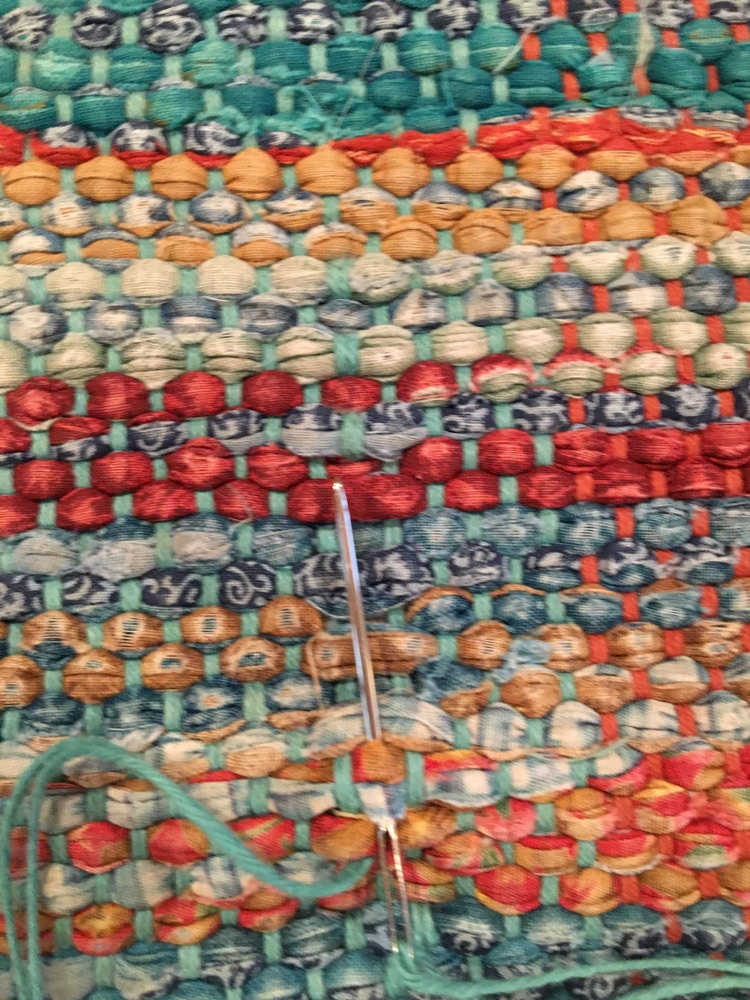
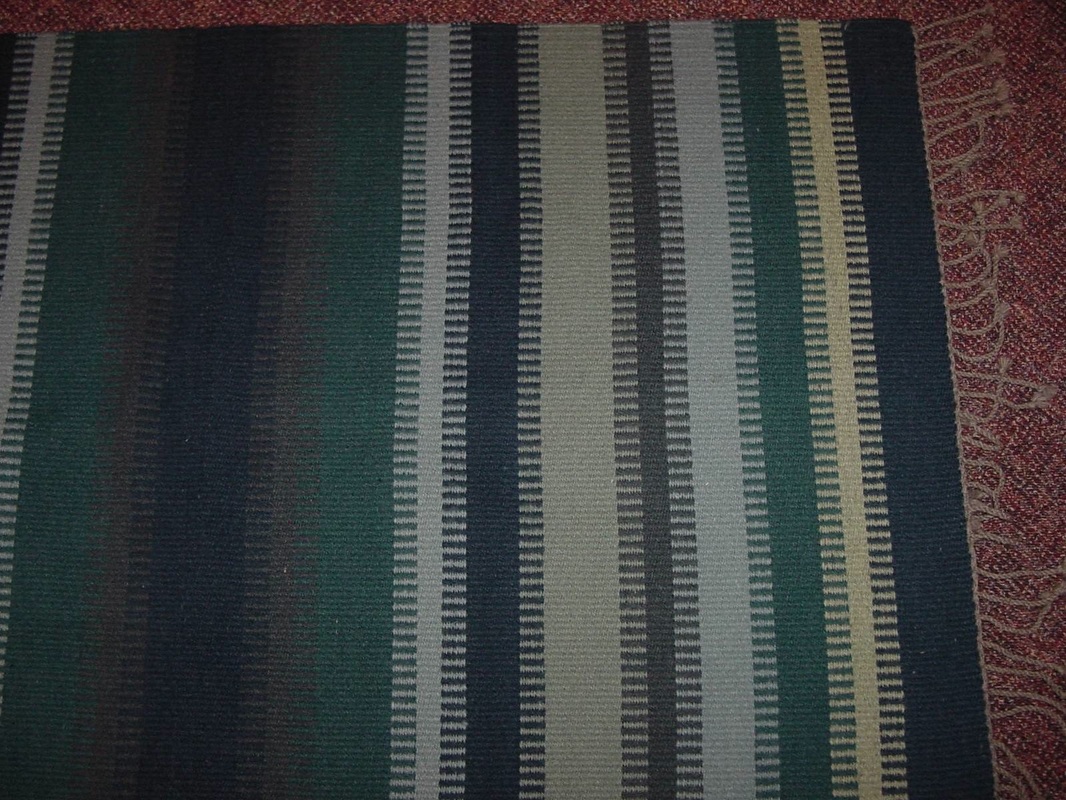
​Step 1:
I first decided to re-twist the fringe bouts that had come undone and to shorten all of the bouts to the shortest common denominator.  It seemed that I could get away with shortening them all to about 1 1/2". There are a couple of bouts where the ends were so frayed that I do not have high hopes for them holding up for much longer, but at least they are shorter now..
Picture
The newly shortened fringe
Picture
This shows a broken warp thread and a row of rag weft floats above it. These need to be repaired.
Picture
These are the only tools I need: a tapestry needle and the matching rug warp

​Step 2: 
​I gathered the tools I would need for repairing the broken warp threads The warp used in this rug was 8/4 cotton rug warp used double, and luckily I still had some on hand (this will not surprise anyone who knows me and has seen my yarn stash).  

So now all I need was a tapestry needle threaded with a doubled strand of the warp thread and a little patience. The weaving should be easy because the rug was woven in plain weave.

​Step 3 - Fixing the Broken Threads
  • I started about 2-3" below the broken warp thread (photo 1)
  • I wove along the same warp thread with the repair thread for the 2" until I got to the break (photo 2)
  • At that point I have to weave over and under the rags in the same way the missing warp thread used to.  It helped to hold the needle in my right hand and put my left hand underneath the rug for support (photo 3)
  • When I reached the end of the damaged area, I continued to weave along the same warp thread for another 2-3 inches.  When I finished with the weaving I checked the weaving on both sides of the rug.  
  • When I was satisfied, I pulled on the ends of the repair threads where it entered and exited the weaving to "seat it" in the cloth.  
  • Then I trimmed the tails of the repair thread and the broken warp thread from the surface of the rug.​
Picture
Photo 1: Starting 2-3" below the break. Broken warp thread can be seen at the top of the photo.
Picture
Photo 2: Weaving up to and just beyond the break in the warp thread.
Picture
Photo 3: Weaving continues above the break - over and under the weft floats.
Picture
My supervisor
Picture
Weaving is finished. The tails have not been trimmed yet. Lizzie is checking my work.
Picture
The finished rug. Hopefully with a few more years of life in it.

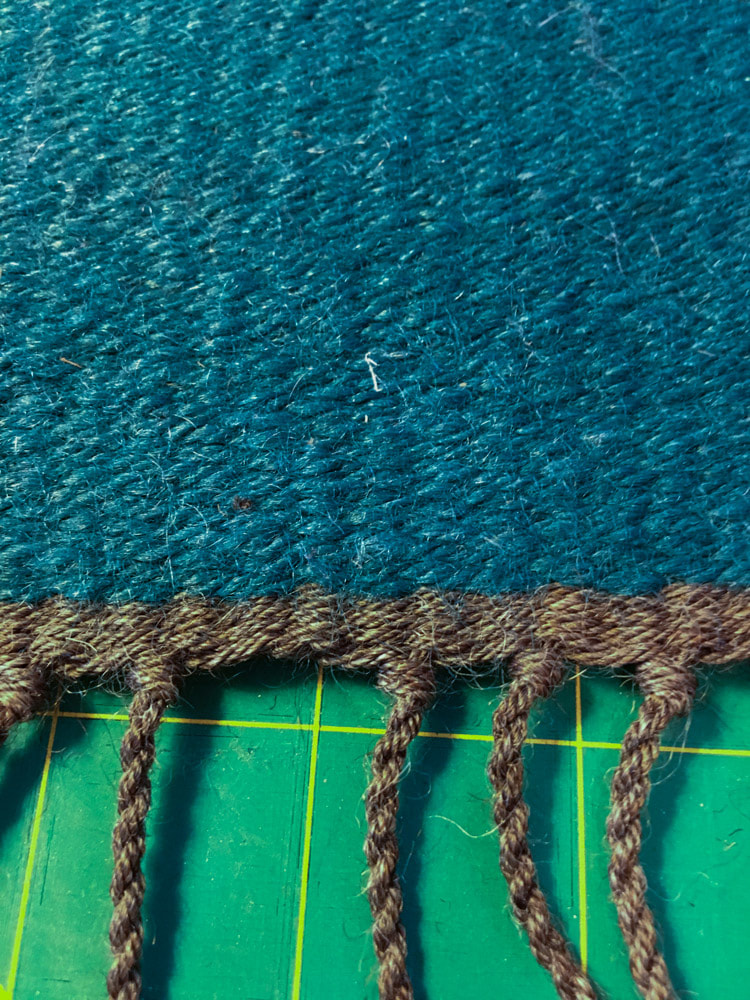
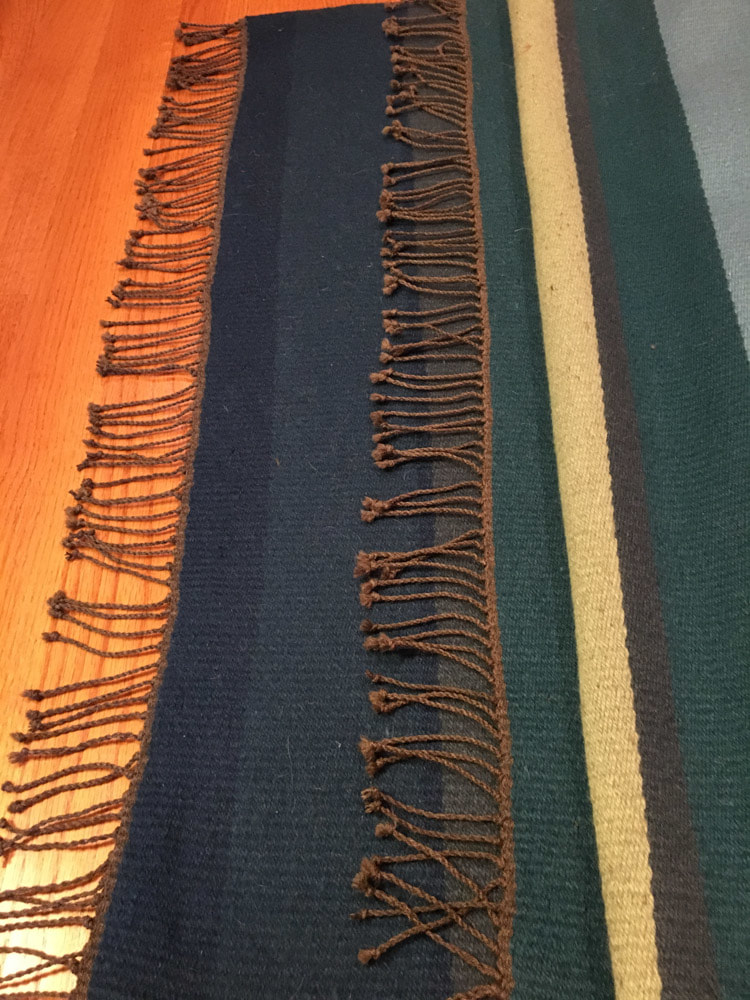
​All done!  
And I think the rug looks better with short fringe anyway.

10 Comments

Facebook Art Challenge - Day 1

2/4/2015

0 Comments

 
Picture
Krokbragd Rug
The challenge was to post 3 items I have made each day for 5 days on Facebook. I will post them here too.  So I begin with rugs. The first rug was woven for my mother, a wool Krokbragd rug. The second rug is actually a wool saddle blanket (I learned too late that horses don't actually like fringe - ha ha). And the third rug is my "ratio rug" so called because it was made in the proportions allowed from the leftover yarn from the before mentioned saddle blanket (I had all of 3 yards of yarn left over when I was done). The second part of this challenge is to challenge some else to do this each day, but instead I think I will challenge my Triangle Weavers Guild Facebook group to participate. So the challenge is ON!
Picture
Saddle Blanket
Picture
Ratio Rug
0 Comments

    Pattie Lamb

    I have been happily weaving since my son was born in 1988.

    All pictures on my blog are "zoomable" - just click on them to enlarge.

    Archives

    March 2023
    June 2022
    November 2020
    October 2020
    February 2020
    October 2019
    June 2019
    May 2019
    June 2018
    July 2017
    June 2017
    May 2017
    April 2017
    February 2017
    January 2017
    August 2016
    July 2016
    May 2016
    February 2016
    February 2015
    January 2015
    October 2014
    September 2014

    Categories

    All
    Artificial Intelligence
    Baby Wraps
    Blankets
    Block Twill
    Block Weave
    Block Weaves
    Cat's PJs
    Challenges
    Charity
    ChatGBT
    Classes
    Commissions
    Deflected Doubleweave
    Design
    Doubleweave
    Dyeing
    Facebook Challenge
    Felting
    Hemstitching
    John C Campbell
    Knitting
    Lace Weaves
    Leftovers
    Life History-Day 1
    Life History-Day 2
    Life History-Day 3
    Life History-Day 4
    Life History-Day 5
    Life History-Day 6
    Life History-Day 7
    Life History-Day 8
    Life History-Day 9
    Life History-Final
    Life History Of A Scarf
    More Than Pink
    Paper Quills
    Plain Weave
    Ply Split
    Process
    Rugs
    Runners
    Scarves
    Selvedges
    Shawls
    Storyboard
    Study Group
    Tencel
    Tie-ups
    Tip Of The Month
    Tips
    Tools
    Towels
    Travel
    Treadling For Dummies
    Turned Twill
    Twill
    Videos
    Walking Pink
    Warping
    Weaving
    Weaving Pink
    Weaving Tips
    Wedding
    Yarn Wraps

    RSS Feed

         HOME        //      SHOP      //       BLOG       //        EVENTS       //       GALLERY     //      ABOUT       //      CONTACT

  • Home
  • SHOP
    • Scarves
    • Shawls & Wraps
    • Throws & Baby Blankets
    • Bags & Purses
    • For the Home
    • Odds & Ends
    • Shop All Handwovens
    • Schacht Equipment
  • Blog
  • Events
  • Gallery
    • Scarves
    • More Scarves
    • Shawls
    • Baby
    • For the Home
    • Just for Fun
    • The Wedding
    • Komen
    • Baby Wraps
  • About
    • Storyboard