Lamb...on the Loom
  • Home
  • SHOP
    • Scarves
    • Shawls & Wraps
    • Throws & Baby Blankets
    • Bags & Purses
    • For the Home
    • Odds & Ends
    • Shop All Handwovens
    • Schacht Equipment
  • Blog
  • Events
  • Gallery
    • Scarves
    • More Scarves
    • Shawls
    • Baby
    • For the Home
    • Just for Fun
    • The Wedding
    • Komen
    • Baby Wraps
  • About
    • Storyboard

Treadling for Dummies Part 2 / No Peeking Allowed

10/27/2019

0 Comments

 
No Peeking Allowed - Treadling Tips

Forgive me if I am repeating things I talked about in other posts, but some things bear repeating.
​
Everyone
handles their treadling differently, and that is just the way of weaving: everyone has their own way.
Personally I hate peeking at my feet while I weave. I feel it disrupts my rhythm and flow.
I do several thing to make sure I do not have to peek.

Walking the treadles:
I almost always walk my treadles.  Inside to outside. I find it easy to walk left right left right as I treadle.  My shuttle is (almost) always moving toward the foot that is depressed.  This is ergonomically preferably to using one foot over and over.  And it is surprisingly easy to manage walking the treadles with most treadling patterns.  My treadles on a 10 treadle loom would be set up for walking as follows:
Picture
Notes:
  • The suggestions outlined below will work as well even if you are opposed to walking your treadles.
  • Not all patterns lend themselves to walking but I have found that those drafts are few and far between.
  • I use computer software that would allow me to rearrange the treadles in the draft.  I COULD rearrange the treadles in the draft to match the way I have tied up the treadles.  But in actuality I DO NOT because I find it much more confusing to follow a pattern with that type of treadling diagram.
Treadling on the LEFT shows a point twill, treadles numbered left to right: 12345678.
I find this easier to follow even though my treadles are actually arranged like the treadling shown on the right.

​Personal preference.
Picture
Picture
Treadling on the RIGHT shows the same point twill with shafts shuffled  to the position used for walking.  Treadles in the tie-up are numbered left to right: 75312468 as if for walking. 
I would have a much harder time following this layout so I do not use the shaft shuffler for this purpose.

​Root your feet:
I NEVER move my foot off of a treadle until I need to use that foot again.  That helps keep me and my feet oriented` as to what treadle comes next.
  • Left foot presses treadle 1 and stays there
  • Right foot presses treadle 2 and stays there
  • Left foot then presses treadle 3 (moving my foot from treadle 1) and stays there
  • Right foot presses treadle 4 (moving my foot from treadle 2) and stays there...
You get the idea.  Not all treadles are a straight draw, but very few treadlings skip around in random order.  Generally you will only have to move your foot to the neighboring treadle or perhaps skip a treadle and move over 2 treadles.  This is easy to do without peeking.
Tip!
Lunatic Fringe Jazz Bands (designed for Schacht Baby Wolf and Wolf Pup looms), work really well to add a little tension to the treadles.  This helps prevent you from accidentally lifting or slightly lifting a shaft you are not using - even if you leave your foot on that treadle.

​Hair bands & treadle divider:
I have hair bands on each of my treadles.  In fact I put 3 hair bands on each treadle because I simply can feel them better with my feet. The purpose of the hair bands is to help my feet identify which treadle is which. Depending on my pattern, I slide the hair bands down where I can feel them or up out of the way.
Typically, I am walking my treadles from the center to the outside, so I might move hair bands down on the middle 2  treadles (treadles 1 & 2), I leave the next 2 treadles (3 & 4) in sequence “naked”, move bands down on the next 2 treadles and so forth.

No need to remove the hair bands between projects.  Just move them up or down on the treadle as needed.

If desired you can put a divider between the center treadles to remind your feet not to cross the midline.
Tip!
Heavy rubber bands can be used instead of hair bands, but BEWARE: they dry rot fairly quickly and will have to be replaced.
Picture
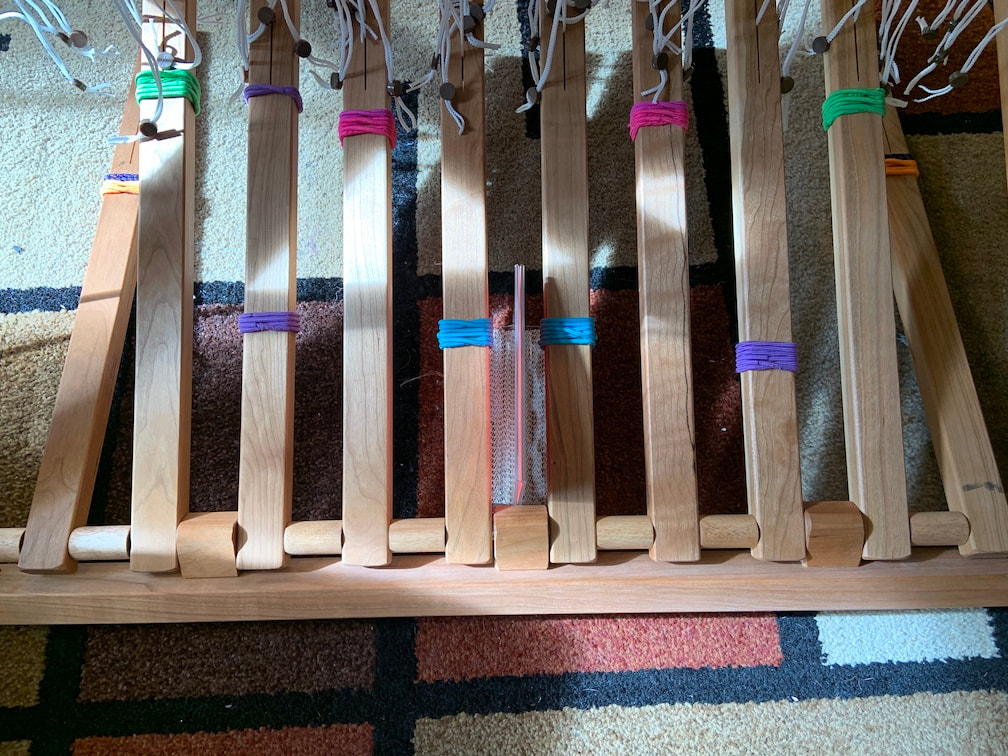
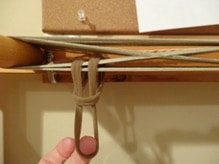
The hair bands and divider for a typical draft would look like this: hair bands on the odd treadles, divider in the center.
Picture
Treadles tied up for walking a twill, treadle divider in the center.
Picture
Hair bands
Picture
Divider made from a picture frame


​Weaving tabby and pattern:
When I am weaving a pattern that requires tabby picks to alternate with pattern picks, I will put my 2 tabby treadles (a & b) on the left and the pattern treadles (1 - 8) on the right.  I will move a hair band down so my foot will feel it on ONE of the tabby treadles and on every other pattern treadle.

I definitely use a treadle divider in this situation because my left foot has a tendency to need a reminder to only travel between the far 2 left treadles
Picture
The hair bands and treadle divider for a draft that requires tabby would look like this
Tip!
If you are weaving a draft that requires tabby and pattern to alternate one for one, there is an added bonus.  For tabby a (left treadle), throw the tabby shuttle to the left, for tabby b (right treadle), throw the tabby shuttle to the right.  This will help you keep track of which tabby is next if your feet get confused.

​Note:
  Many people place their tabby treadles in the middle or on the outside, but this requires moving your foot off of a tabby treadle to find the next pattern treadle.  I personally cannot keep track of which pattern treadle comes next if I do that.  If I use my left foot for the tabby treadles and my right for the pattern treadles, I can follow my rule of never moving my foot until it is needed again.  I will treadle tabby A and leave my left foot there, treadle Pattern 1 and leave my right foot there.  This way when I go back to weave the next tabby, I know I have to use the other tabby treadle (in this case Tabby B).  When I go back to treadle pattern, the fact that my foot is already on Pattern 1 reminds me of where I was and makes it easier to find the next required pattern treadle.

Exception:  On my Spring loom there are 14 treadles and they are quite far apart.  Placing the tabby on one side is pretty uncomfortable, so on that loom, I will put them in the center.  When I am weaving left sided pattern treadles, I weave tabby with my right foot and pattern with my left. When I am weaving right sided pattern treadles, I weave tabby with my left and pattern with my right.

Cheat Sheets:
Any complex treadling warrants using a cheat sheet.
I attach the cheat sheet to my castle.  If your loom does not have a castle, tape it to one side of the beater.
My cheat sheet consist of a strip of card stock and a large paper clip.
I write the treadling sequence on the strip and use the paper clip to mark my place as needed.
I store the cheat sheet with the notes I keep on each project.
Tip!
When you are first learning to walk the treadles, you can create a second cheat sheet to remind you  which treadles are where and which treadles have hair bands on them.  Once you get used to this system, you will not need this second cheat sheet.

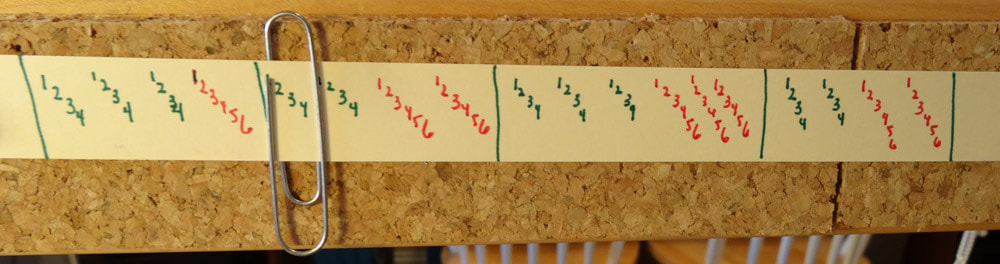
​Examples of my cheat sheets:
Picture
Cheat sheet for an irregular point twill. I created duplicate treadles 5 & 6 to deal with the turn in the draft. They are duplicates of 3 & 2. This allows me to walk treadles 123456 ,and that is easier for me to keep track of than treadling 123432
Picture
Treadling for a simple advancing twill
Picture
Treadling for a plaited twill. The top line of numbers refers to the picks woven with my left foot, the bottom line to picks woven with my right foot. The circles indicate which treadles have hair bands down where my feet can feel them.
Picture
Treadling for a block lace weave. In this case I treated treadles 1 & 2 as tabby and tied them up for my left foot. I treadled the pattern blocks with my right foot. So the treadles were arranged like this: 2 1 3 4. Block A is treadled 13132. Block B is treadled 14142. "2A" means repeat block A twice, "8B" means repeat block B 8 times. "8pw" refers to 8 plain weave picks. "END" refers to the final sequence at the end of the scarf.

No peeking:
With my hair bands are in place and the treadling recorded on my cheat sheet, I can walk my feet happily along my treadles, and I never have to peek at those treadles again.

Try it!  You will like it!
Added bonus: 
​I do not ever have to label my treadles with that dreaded tape!

0 Comments

    Pattie Lamb

    I have been happily weaving since my son was born in 1988.

    All pictures on my blog are "zoomable" - just click on them to enlarge.

    Archives

    March 2023
    June 2022
    November 2020
    October 2020
    February 2020
    October 2019
    June 2019
    May 2019
    June 2018
    July 2017
    June 2017
    May 2017
    April 2017
    February 2017
    January 2017
    August 2016
    July 2016
    May 2016
    February 2016
    February 2015
    January 2015
    October 2014
    September 2014

    Categories

    All
    Artificial Intelligence
    Baby Wraps
    Blankets
    Block Twill
    Block Weave
    Block Weaves
    Cat's PJs
    Challenges
    Charity
    ChatGBT
    Classes
    Commissions
    Deflected Doubleweave
    Design
    Doubleweave
    Dyeing
    Facebook Challenge
    Felting
    Hemstitching
    John C Campbell
    Knitting
    Lace Weaves
    Leftovers
    Life History-Day 1
    Life History-Day 2
    Life History-Day 3
    Life History-Day 4
    Life History-Day 5
    Life History-Day 6
    Life History-Day 7
    Life History-Day 8
    Life History-Day 9
    Life History-Final
    Life History Of A Scarf
    More Than Pink
    Paper Quills
    Plain Weave
    Ply Split
    Process
    Rugs
    Runners
    Scarves
    Selvedges
    Shawls
    Storyboard
    Study Group
    Tencel
    Tie-ups
    Tip Of The Month
    Tips
    Tools
    Towels
    Travel
    Treadling For Dummies
    Turned Twill
    Twill
    Videos
    Walking Pink
    Warping
    Weaving
    Weaving Pink
    Weaving Tips
    Wedding
    Yarn Wraps

    RSS Feed

         HOME        //      SHOP      //       BLOG       //        EVENTS       //       GALLERY     //      ABOUT       //      CONTACT

  • Home
  • SHOP
    • Scarves
    • Shawls & Wraps
    • Throws & Baby Blankets
    • Bags & Purses
    • For the Home
    • Odds & Ends
    • Shop All Handwovens
    • Schacht Equipment
  • Blog
  • Events
  • Gallery
    • Scarves
    • More Scarves
    • Shawls
    • Baby
    • For the Home
    • Just for Fun
    • The Wedding
    • Komen
    • Baby Wraps
  • About
    • Storyboard