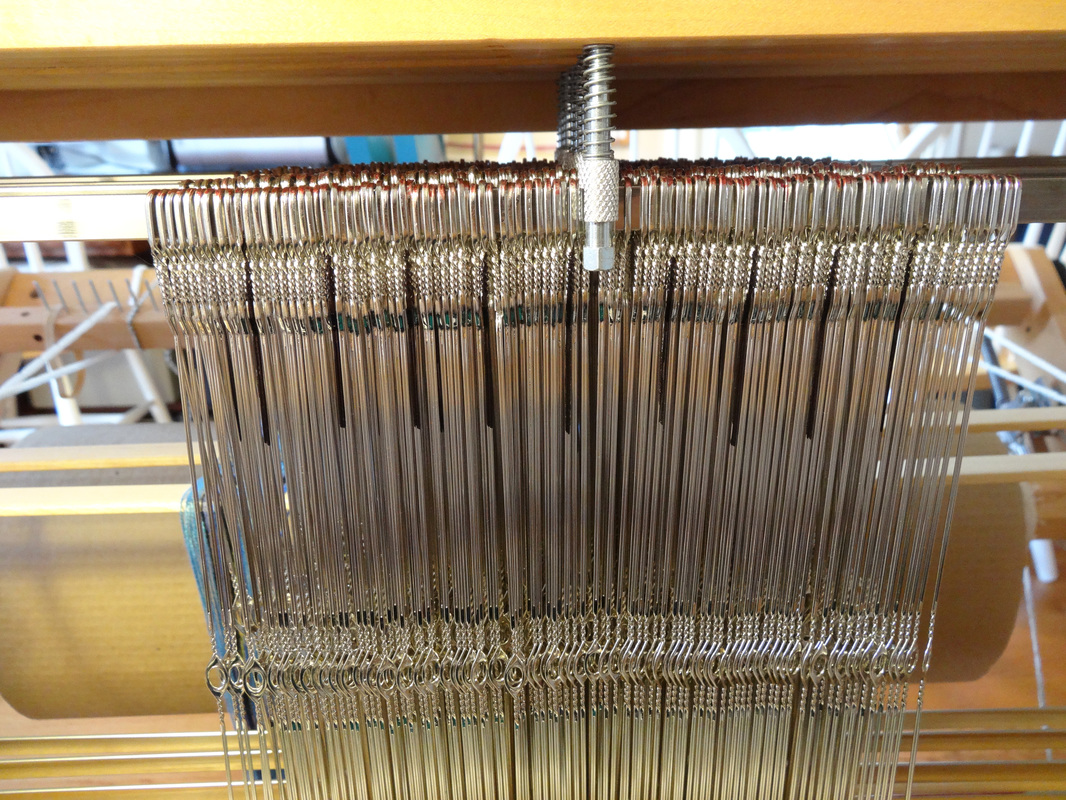
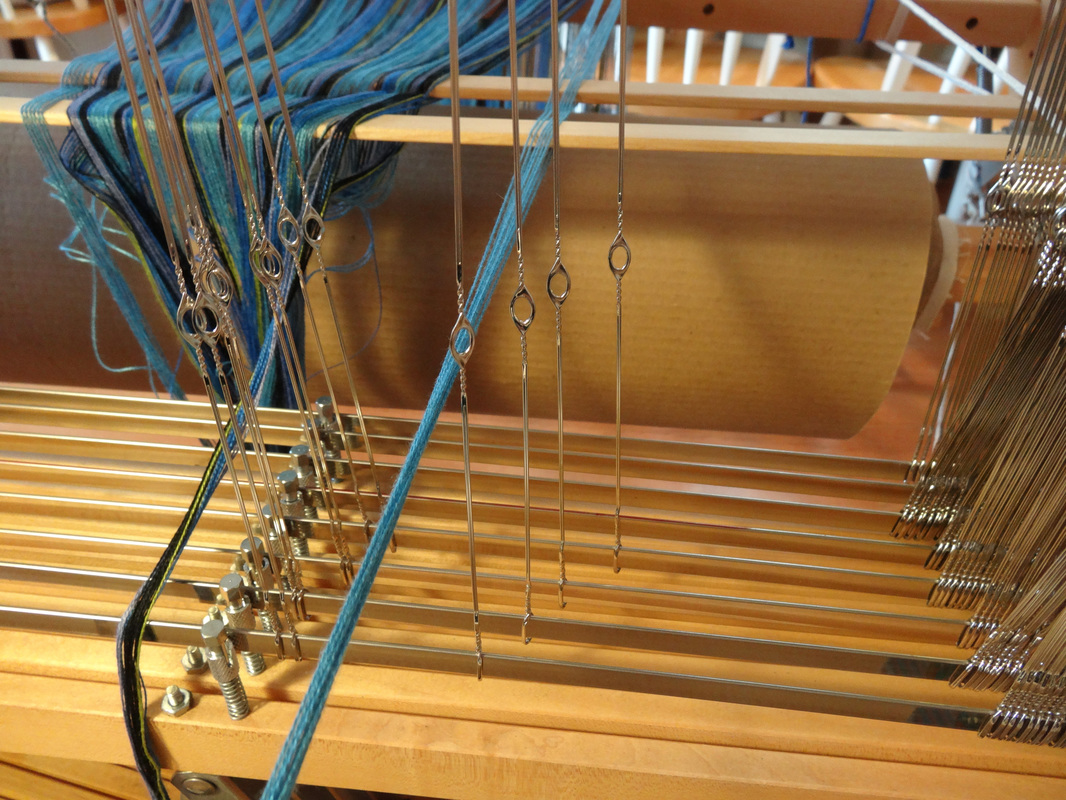
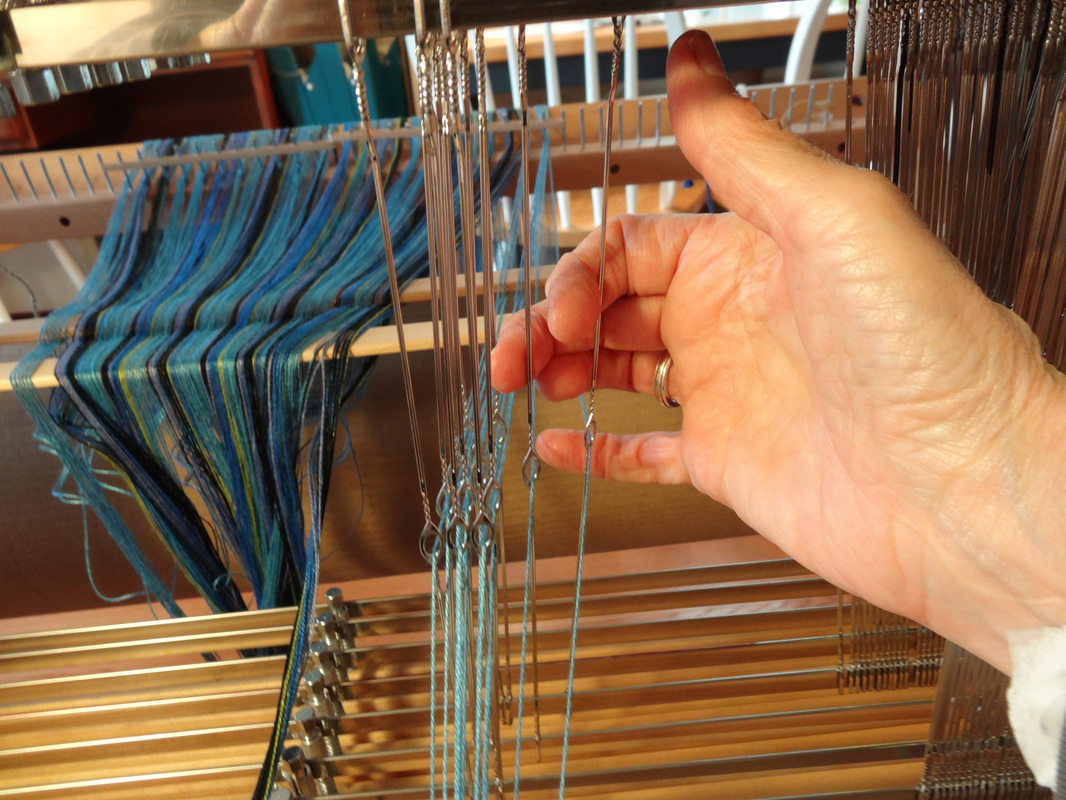
Lamb...on the Loom
  • Home
  • SHOP
    • Scarves
    • Shawls & Wraps
    • Throws & Baby Blankets
    • Bags & Purses
    • For the Home
    • Odds & Ends
    • Shop All Handwovens
    • Schacht Equipment
  • Blog
  • Events
  • Gallery
    • Scarves
    • More Scarves
    • Shawls
    • Baby
    • For the Home
    • Just for Fun
    • The Wedding
    • Komen
    • Baby Wraps
  • About
    • Storyboard

LIFE HISTORY OF A SCARF: DAY 5 - Threading the Loom

2/16/2016

1 Comment


​For me, threading the loom consists of 3 steps:
  1. Getting the heddles into position 
  2. Threading the heddles
  3. Threading the reed
Picture

Get the heddles into position
​Ultimately I want to thread the heddles in the center of each harness, so that by the time I am done I will have about the same number of leftover heddles on the right and left of the warp on each harness.  This will help keep the harnesses well balanced as I weave.
 
To do this I need to know how many heddles  my draft will require on each harness. My weaving software (Fiberworks) tells me I will need:
Picture

​I divide the heddles on each harness in half, pushing half to the right and half to the left.

Next I move half of the heddles that my draft required on each harness from the right group to the left (Remember the other half I need are already on the left!). 

Example: On harness 1 had 100 heddles, I divided them 50 and 50.  My draft required 28 heddles on harness 1 so I pushed  an additional 14 heddles from the group on the right over to the left.  I now had 64 (50 + 14) heddles on the left and 36 on the right.  By the time I am done threading, I will have 36 unused on the left, 28 threaded in the middle, and 36 unused on the right.
​
Now all the heddles I need to thread with are on the left.  
​
Tip: Marking every 10th heddle on each of your harnesses makes counting heddles easier.  
Picture
Every 10th heddles marked with a Sharpie.
Tip: If you are not using weaving software, the draft you are using (like from Handwoven) may give you heddle counts.  Otherwise you may simply need to count the number of times  each harness is used in your draft.

Threading the heddles
  1. I will be threading from right to left, reading the draft from the top right hand corner to the bottom left hand corner.  
  2. ​I make sure the heddles are at a comfortable height for threading.  In my case, that means sitting on an exercise ball.  
  3. I pull the lease sticks up close to the heddles so they are easy to see and to reach
  4. I untie all of the slipknots where I changed colors, cut the loop at the end of each chain and tie a slip knot in each warp chain for security
  5. I mark off my draft in small, logical threading sections
  6. For each section in the draft I do the following:
Tip: Another way of get the heddles to a comfortable height is by placing a small box or a shuttle underneath the harnesses.
​

Tip: If untying all those knots (step 4) seems like too much of a pain, and if you don't mind wasting 2" of your warp, simply cut the last 2" off the end of your warp chain
  • Count out the number of threads needed for the section of the draft
  • Count out the number of heddles needed on each harness for that section and move them from the group on the left to the center of the loom for threading
  • Thread the heddles according to the draft (sometimes breaking the larger group of heddles down into smaller groups for more comfortable threading)
  • When the whole bundle is complete, I check the threading, thread by thread against the draft
  • I tie the bundle into a slipknot in front of the heddles
  • I mark through the section of the draft indicating that it has been threaded.
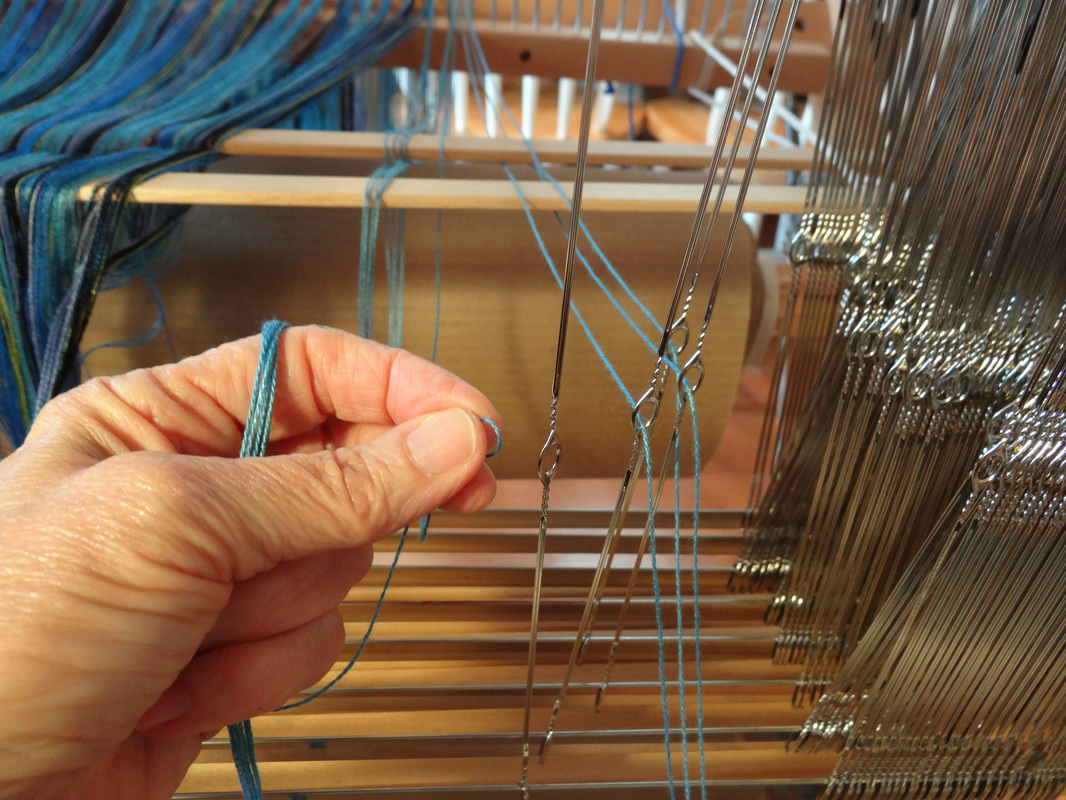
Step 6 is repeated over and over for each section of the draft until the threading is completed.
Picture
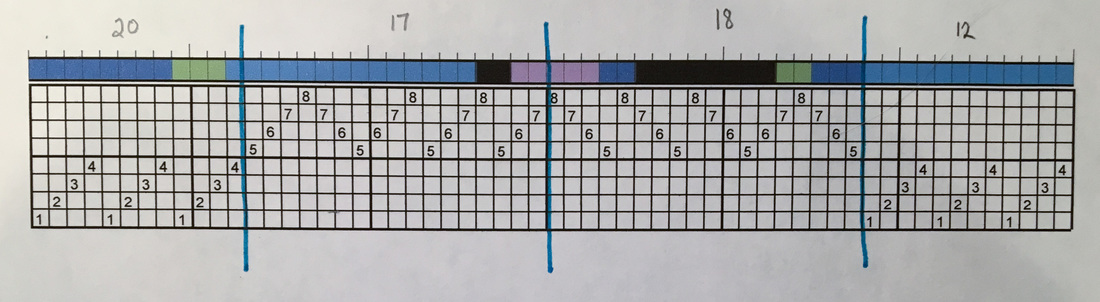
Marking up my draft in logical threading sections. The numbers above each section indicate the number of threads in the bundle.
Picture
First bundle of 12 threads, and the first 12 heddles (3 from harnesses 1-4) moved to the center of the loom
Picture
Smaller group of 4 heddles separated out for easier threading, but I am still holding the entire bundle of 12 threads.
Picture
Threading the heddle on harness 4 by folding thread and pushing it through the eye. Fold and push with left hand, Capture and pull through with right.
Picture
Heddles 4,3,2 threaded, Now threading heddle on harness 1
Picture
Next group of 4 heddles separated out
Picture
Whole bundle threaded and threads are under tension for checking
Picture
Holding bundle under tension with left hand and picking through threading with right hand while checking against the draft
Picture
Slipknot tied in front of heddles
Picture
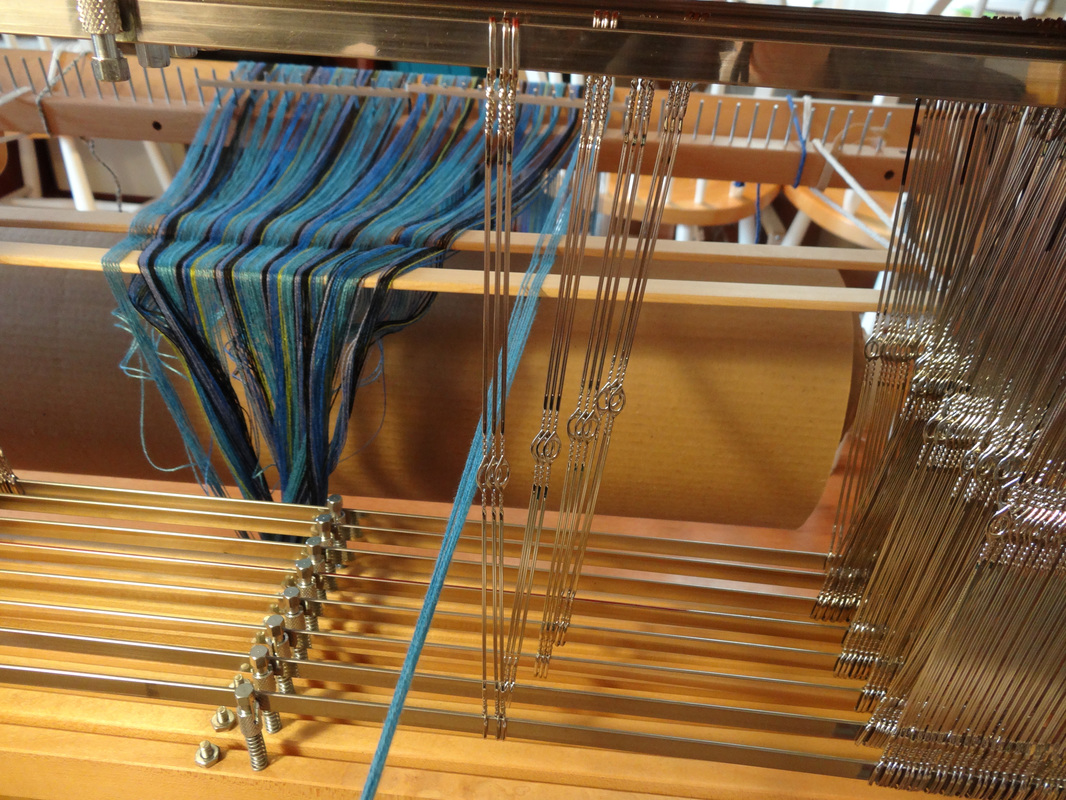
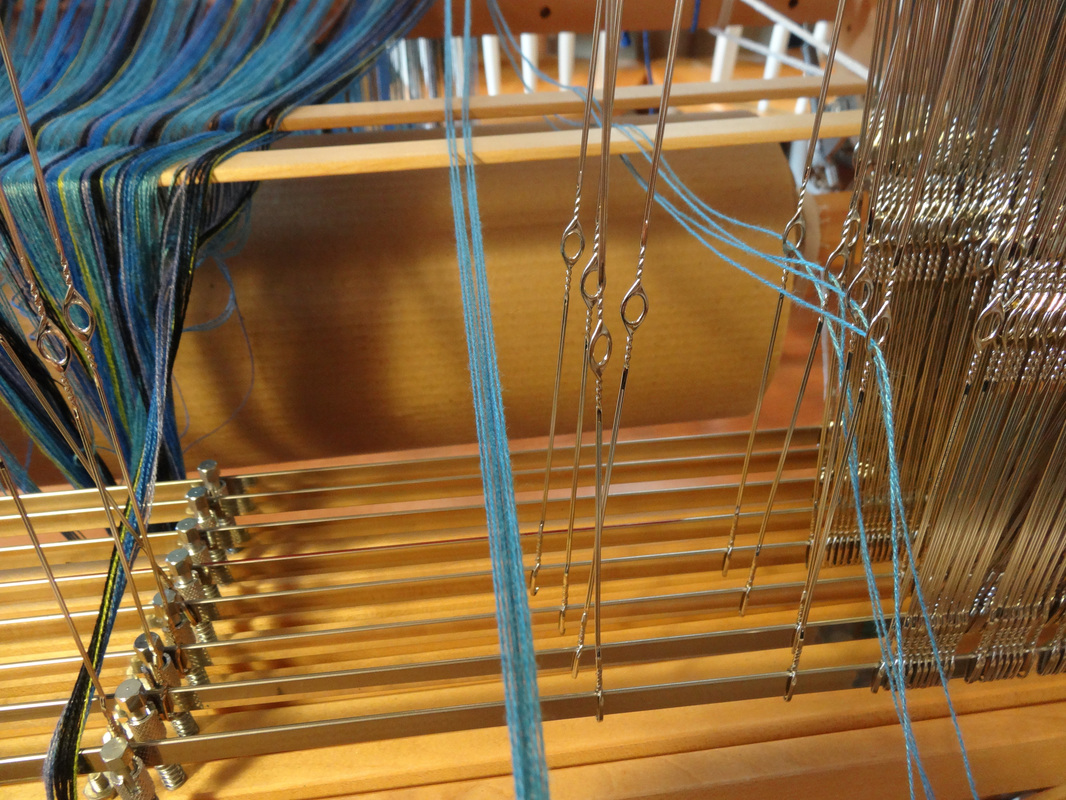
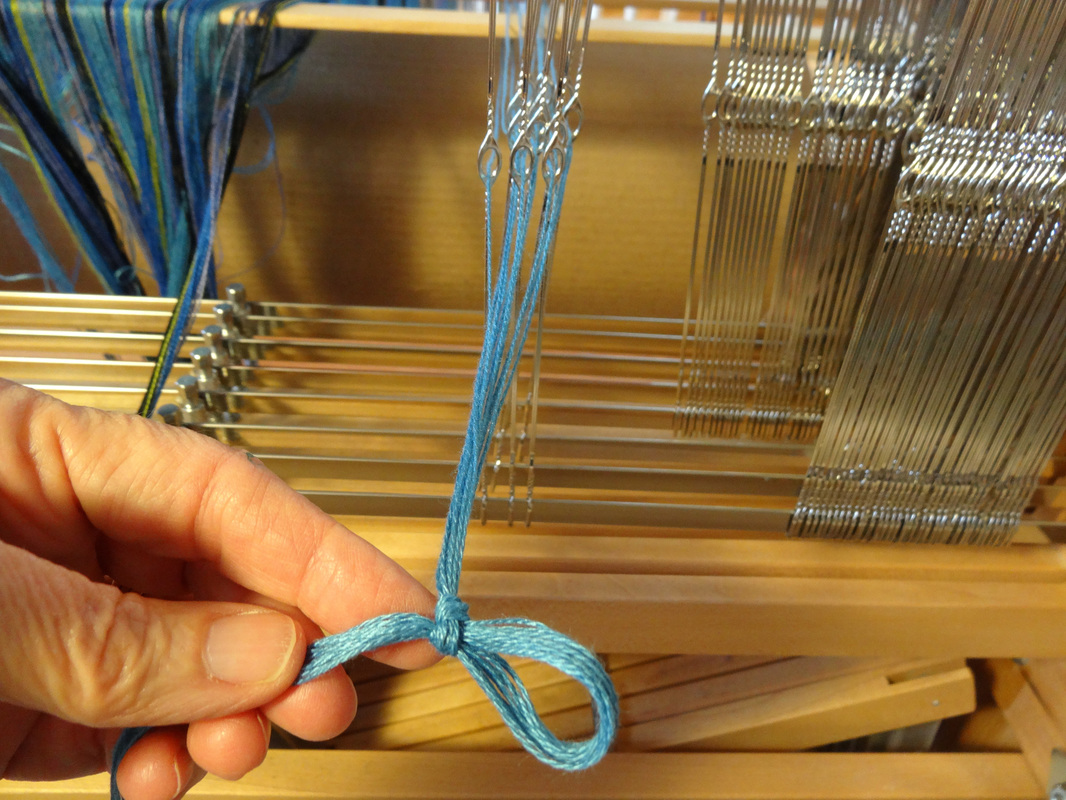
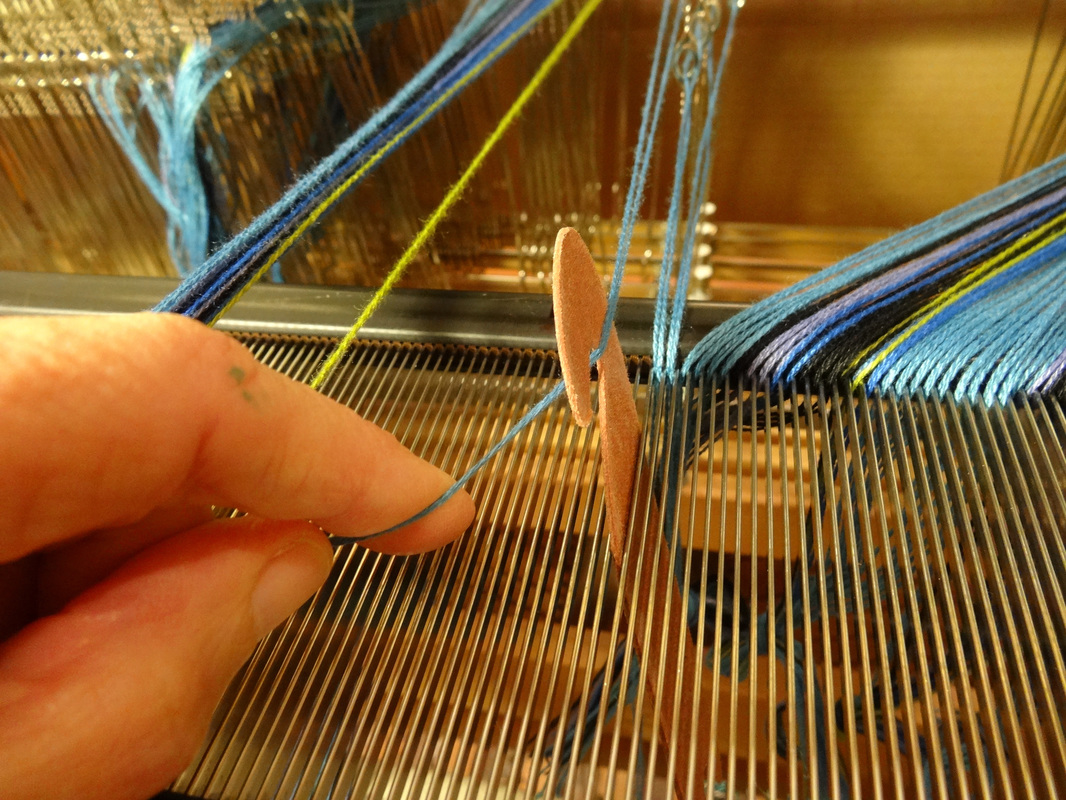
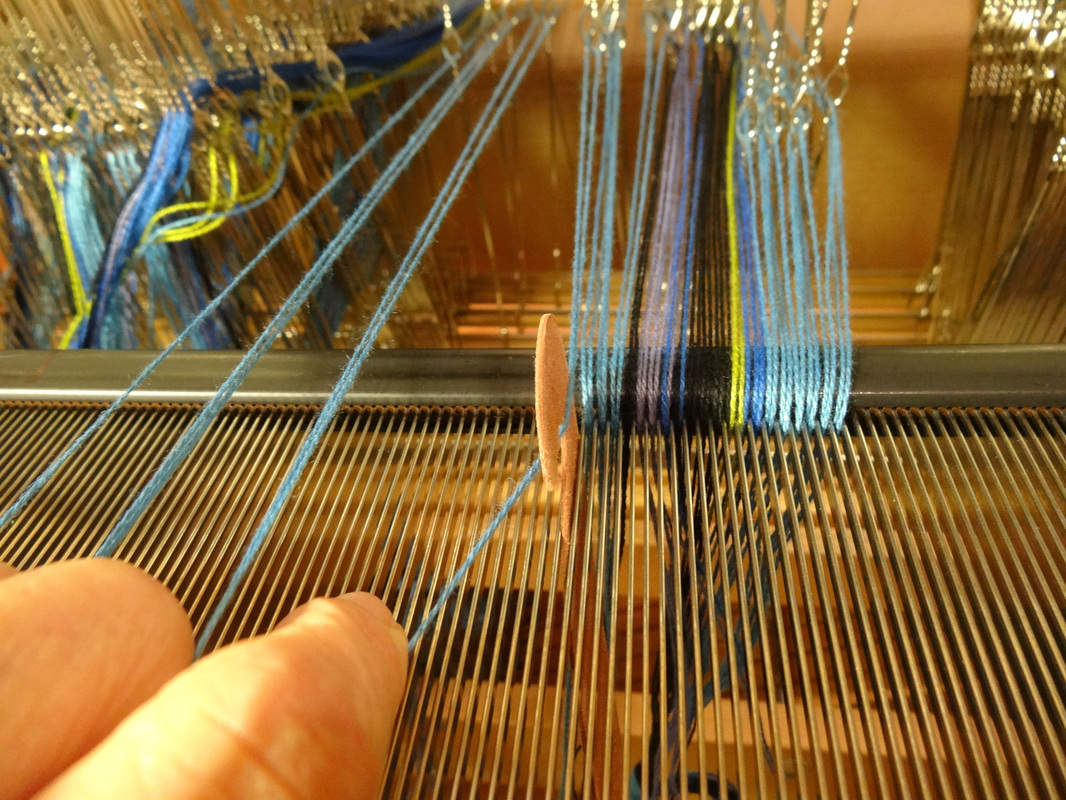
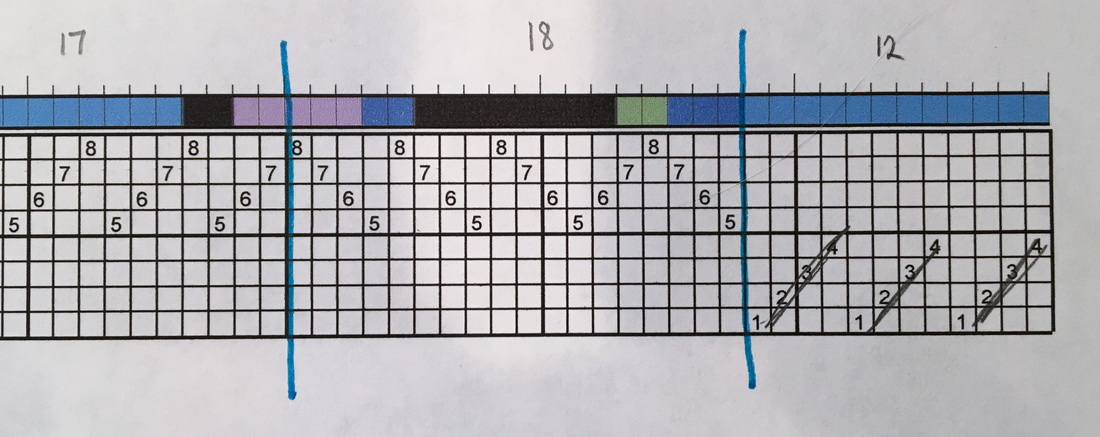
Bundle marked off on draft to indicated that threading is done.

Threading the reed

I find it more comfortable to thread the reed when the reed it horizontal (parallel to the floor) rather than vertical (sitting in the beater).  I can’t stress this enough!  This method is so much more ergonomically correct: easier to see what you are doing, easier on your body and faster to boot.
  1. I will be threading the reed from right to left.
  2. I insert the reed into the cords on either side of the loom, twisting the cords in front of and behind the reed to  make sure it is held snuggly.
  3. I find the center of the reed, and mark it temporarily by pulling a thread through the center dent. (Alternately I could mark the center of the reed with a Sharpie)
  4. I find where the right hand edge of the weaving should begin in the reed.  I do this by taking half the width in the reed of the project and measuring that distance from the center of the reed out to the right.  My scarf is 11.7” in the reed so I measured  about 5 7/8” from the center marker  to the right, and started threading there.
  5. My sample will be woven at 24 epi so I chose a 12 dent reed, and I will thread 2 threads/dent.
Tip:
​Consult a Reed Substitution Chart to determine how your warp should be sleyed in your reed if you are in doubt. 
Here comes the ergonomic advice:
  • My right hand holds the reed hook and stays under the front beam and under the reed at all times
  • My left hand stays above the breast beam and above the reed at all times. 
  • My left hand is picking the threads and delivering them to the reed hook which is poking up through the reed. 
  • I hold the threads under tension, find the 2 threads (because I am threading 2/dent) that go in the next dent, and hook them around the waiting reed hook.  I pull the reed hook down to thread the dent and move it over 1 dent.  Repeat.
Tip:
It is really important to leave your hands in position: right below the reed and left above.  Do NOT keep moving you right hand back and forth (it will wear you out and it is unnecessary.  If you need your right hand to assist your left, do it from below.
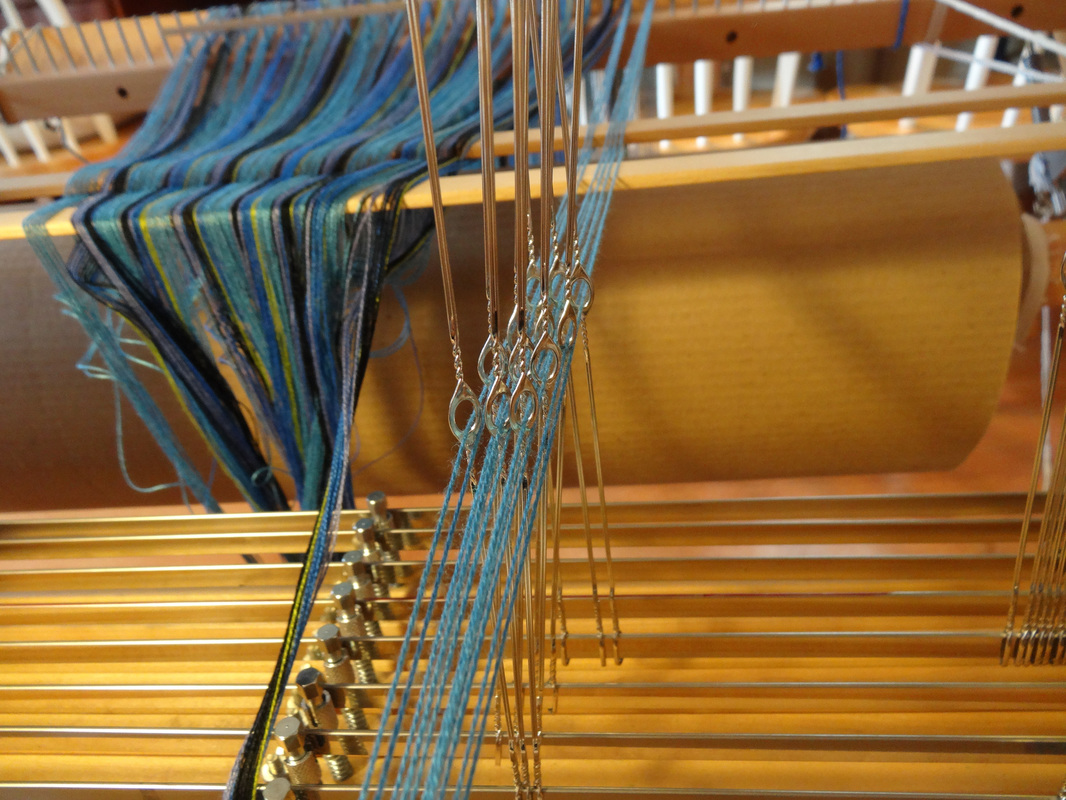
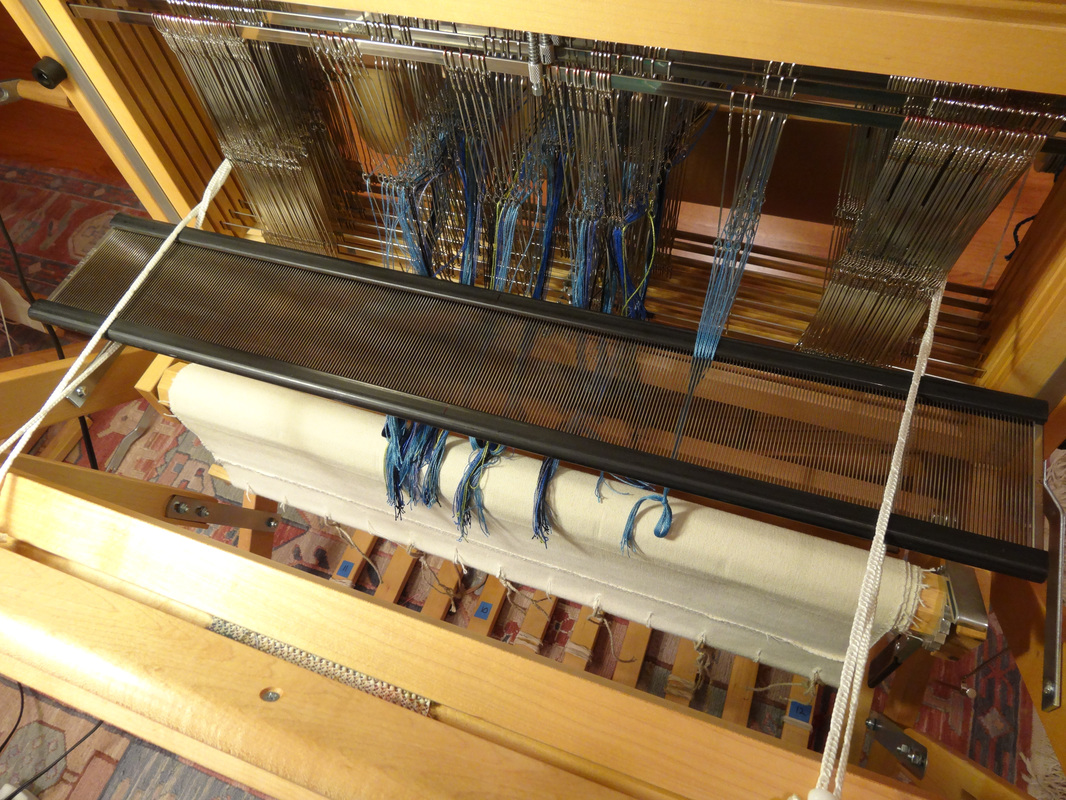
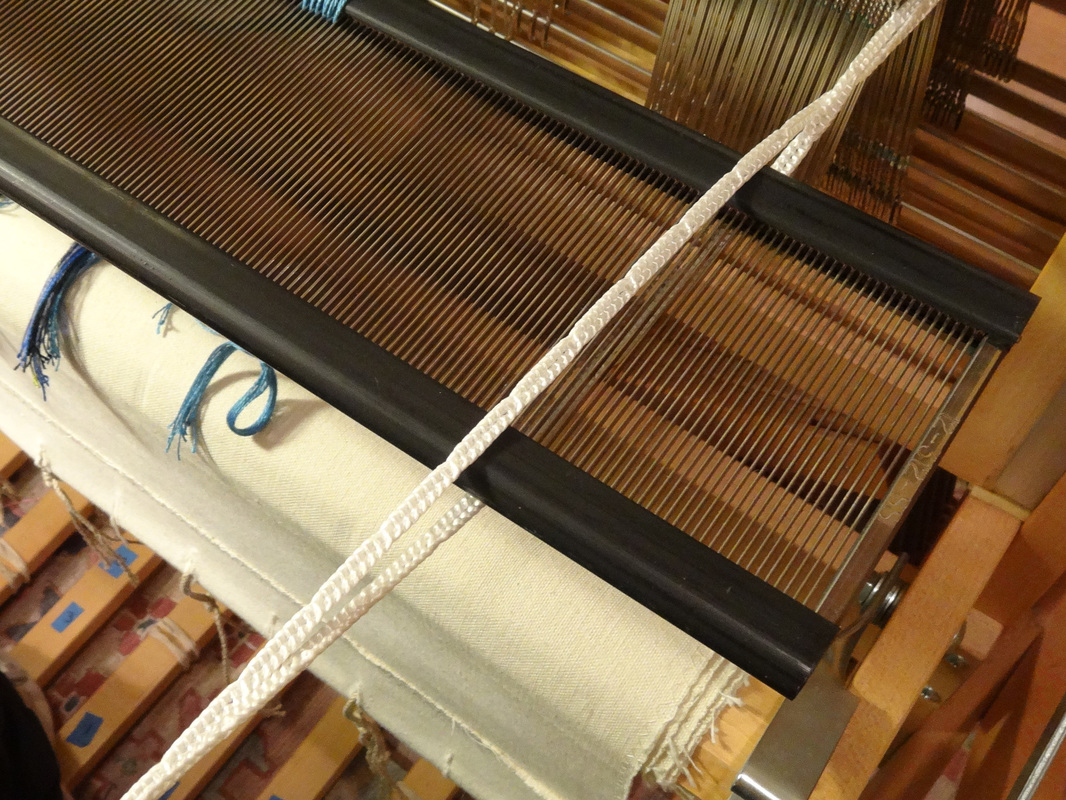
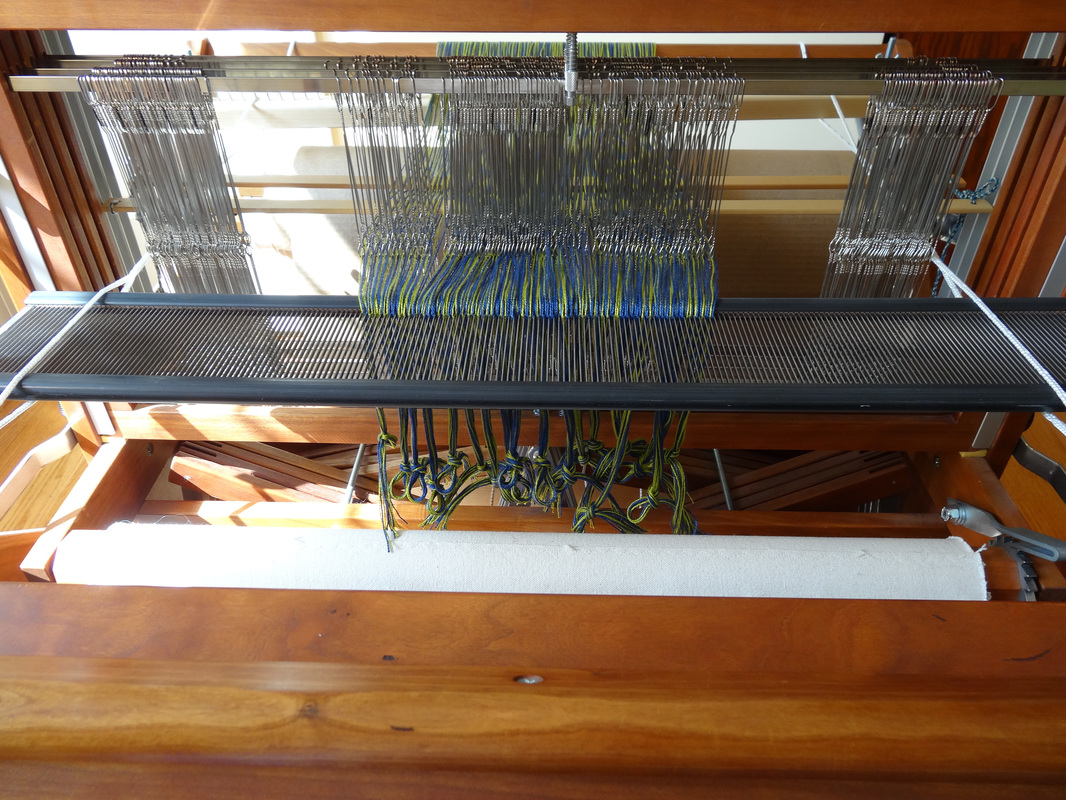
Every inch or so, I tie a slipknot underneath in the bundle underneath the reed.  This is really important.  There is not much holding this reed in those cords.  If it gets dislodged and you haven’t tied those knots, the reed will fall on the floor and you get to start over :-).  That could really ruin your day!
 
When the threading is done, I put the reed into the beater, center the warp (NOT the reed) in the beater, and put the top on the beater.

Click on any picture to zoom in.
Picture
I inserted the reed into the cords that run between the front and back beams
Picture
Closeup of the twisting of the cords that helps to secure the reed
Picture
Bundles of threads under tension in my left hand, 2 threads being presented to the reed hook which is held in my right hand
Picture
Sometimes it speeds things up for me to separate out the next few groups of 2 threads and place them between my fingers so I can quickly pluck them through the reed.
Picture
This shows all of the slipknots underneath the reed which were tied as I threaded. (This is a different warp).

​Ready for Day 6 - Tying up the loom.  Go to Life History-Day 6
​
To review, go back to Life History-Day 4

1 Comment
Private North Carolina link
1/27/2021 01:16:56 pm

Great blog I enjoyed readiing

Reply

Your comment will be posted after it is approved.


Leave a Reply.

    Pattie Lamb

    I have been happily weaving since my son was born in 1988.

    All pictures on my blog are "zoomable" - just click on them to enlarge.

    Archives

    March 2023
    June 2022
    November 2020
    October 2020
    February 2020
    October 2019
    June 2019
    May 2019
    June 2018
    July 2017
    June 2017
    May 2017
    April 2017
    February 2017
    January 2017
    August 2016
    July 2016
    May 2016
    February 2016
    February 2015
    January 2015
    October 2014
    September 2014

    Categories

    All
    Artificial Intelligence
    Baby Wraps
    Blankets
    Block Twill
    Block Weave
    Block Weaves
    Cat's PJs
    Challenges
    Charity
    ChatGBT
    Classes
    Commissions
    Deflected Doubleweave
    Design
    Doubleweave
    Dyeing
    Facebook Challenge
    Felting
    Hemstitching
    John C Campbell
    Knitting
    Lace Weaves
    Leftovers
    Life History-Day 1
    Life History-Day 2
    Life History-Day 3
    Life History-Day 4
    Life History-Day 5
    Life History-Day 6
    Life History-Day 7
    Life History-Day 8
    Life History-Day 9
    Life History-Final
    Life History Of A Scarf
    More Than Pink
    Paper Quills
    Plain Weave
    Ply Split
    Process
    Rugs
    Runners
    Scarves
    Selvedges
    Shawls
    Storyboard
    Study Group
    Tencel
    Tie-ups
    Tip Of The Month
    Tips
    Tools
    Towels
    Travel
    Treadling For Dummies
    Turned Twill
    Twill
    Videos
    Walking Pink
    Warping
    Weaving
    Weaving Pink
    Weaving Tips
    Wedding
    Yarn Wraps

    RSS Feed

         HOME        //      SHOP      //       BLOG       //        EVENTS       //       GALLERY     //      ABOUT       //      CONTACT

  • Home
  • SHOP
    • Scarves
    • Shawls & Wraps
    • Throws & Baby Blankets
    • Bags & Purses
    • For the Home
    • Odds & Ends
    • Shop All Handwovens
    • Schacht Equipment
  • Blog
  • Events
  • Gallery
    • Scarves
    • More Scarves
    • Shawls
    • Baby
    • For the Home
    • Just for Fun
    • The Wedding
    • Komen
    • Baby Wraps
  • About
    • Storyboard