Lamb...on the Loom
  • Home
  • SHOP
    • Scarves
    • Shawls & Wraps
    • Wool Scarves & Shawls
    • Blazing Shuttles
    • Throws & Baby Blankets
    • For the Home
    • Odds & Ends
    • Shop All Handwovens
    • Schacht Equipment
    • Gift Cards
  • Blog
  • Events
  • Gallery
    • Scarves & Shawls
    • Baby
    • For the Home
    • The Wedding
    • Komen
  • About
    • Storyboard

LIFE HISTORY OF A SCARF: DAY 4 - Winding onto the Back Beam

2/13/2016

4 Comments

 
Warping from back to front means I will:
  • Spread the warp in the raddle
  • Wind onto the back beam
  • Thread the heddles
  • Thread the reed
  • Tie onto the front beam
Picture
​There are many ways of setting up a loom for back to front warping, but as far as I know they all involve inserting lease sticks into the crosses of the warps chains and spreading the warp chains into a raddle on the back of the loom.  I have used many methods over the years, but have settled on the method I describe below as the fastest, most efficient, and most comfortable method for me to warp my Baby Wolf loom by myself.
Note: It is easiest warp from back to front if there are 2 apron rods for the back beam: one that goes through your cloth apron or apron cords and a second that you will feed through your warp chains and is tied to the first one at intervals (every 4-6”).

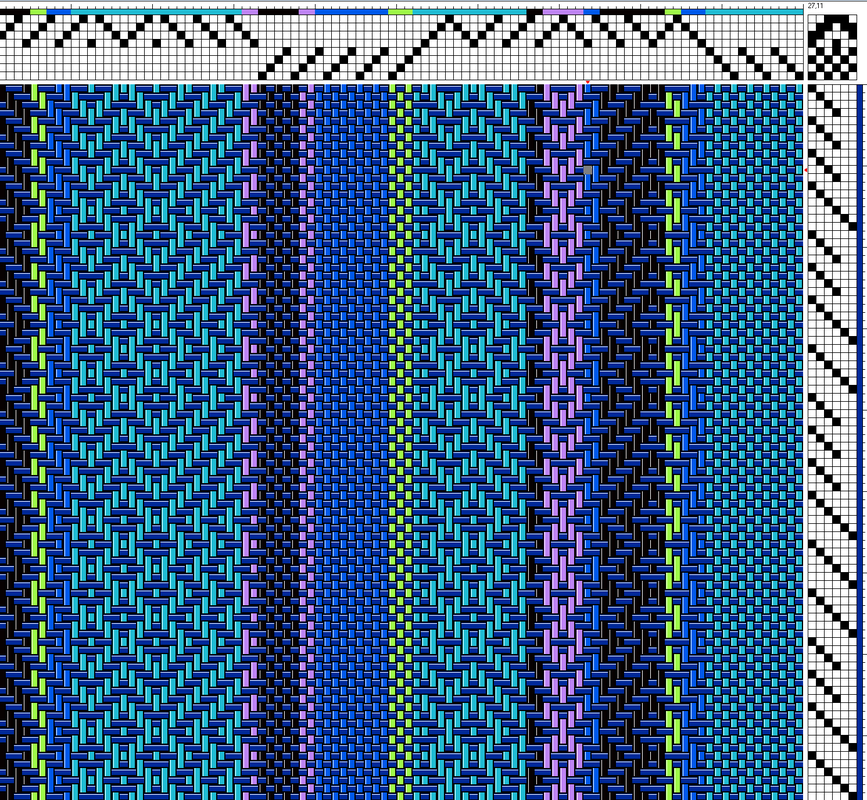
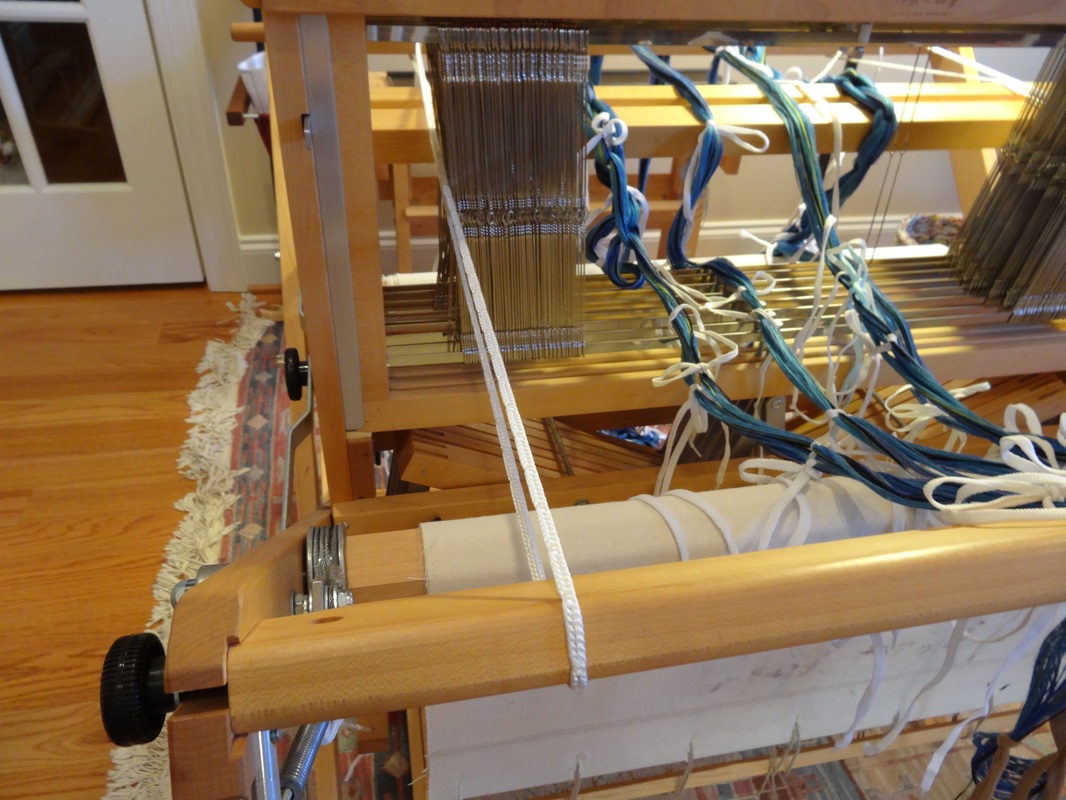
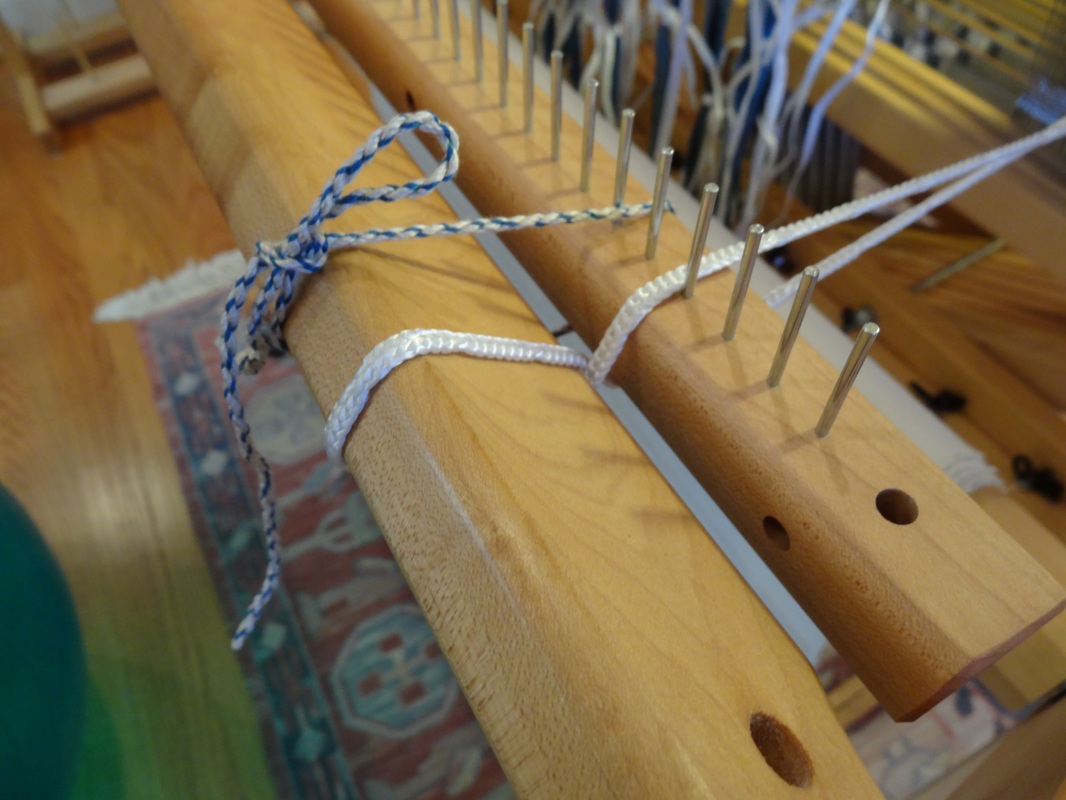
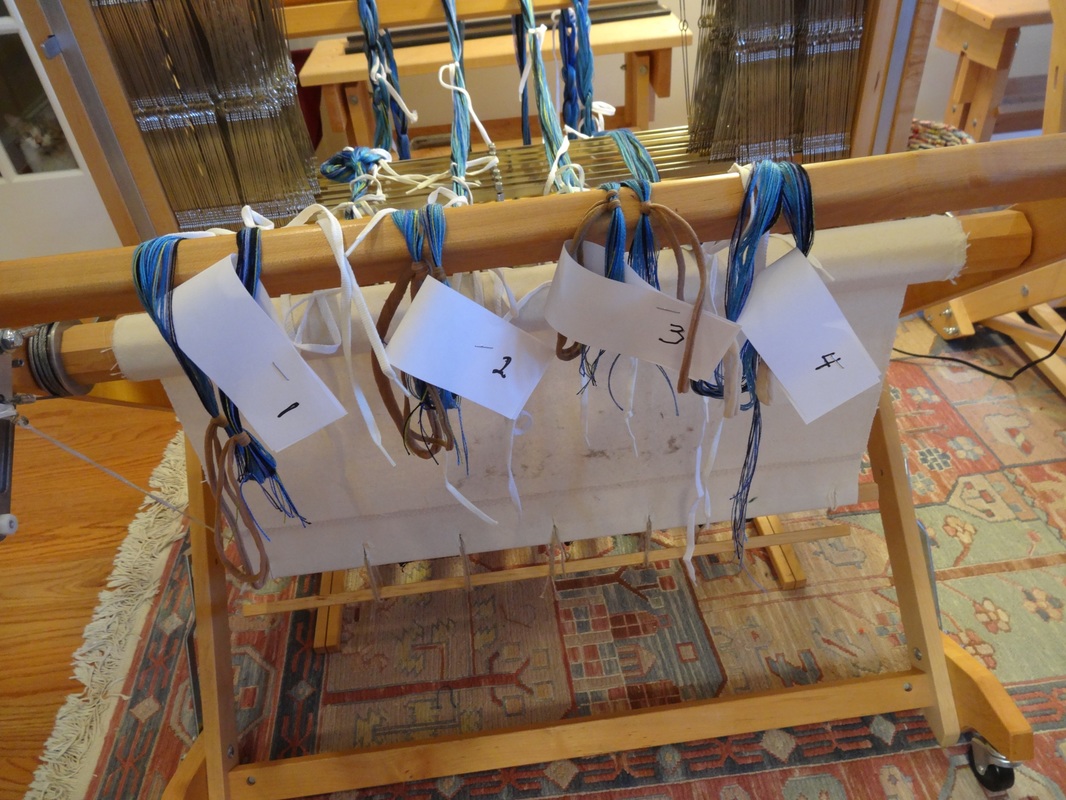
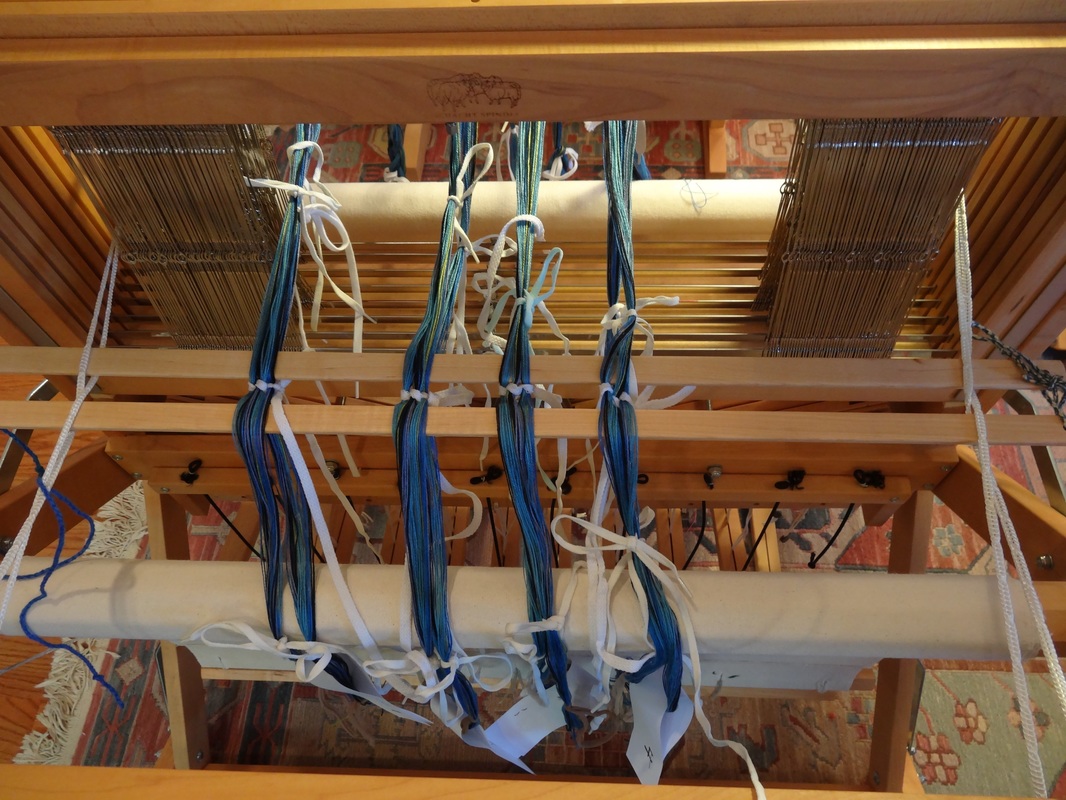
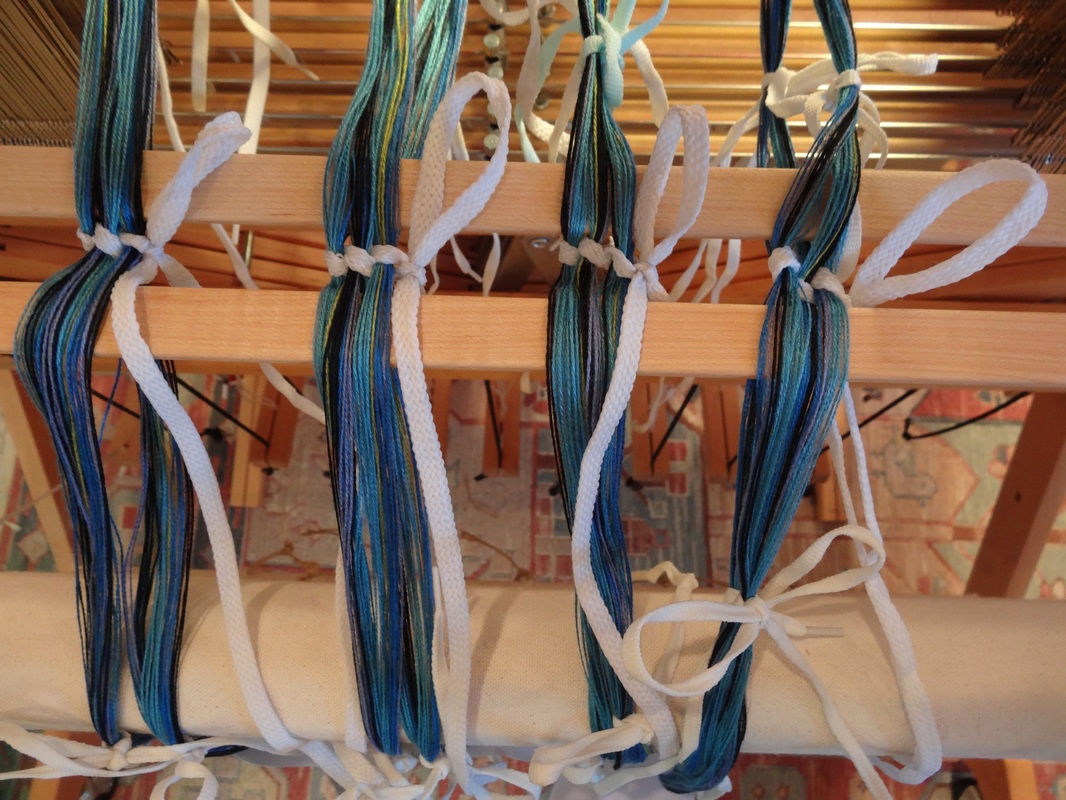
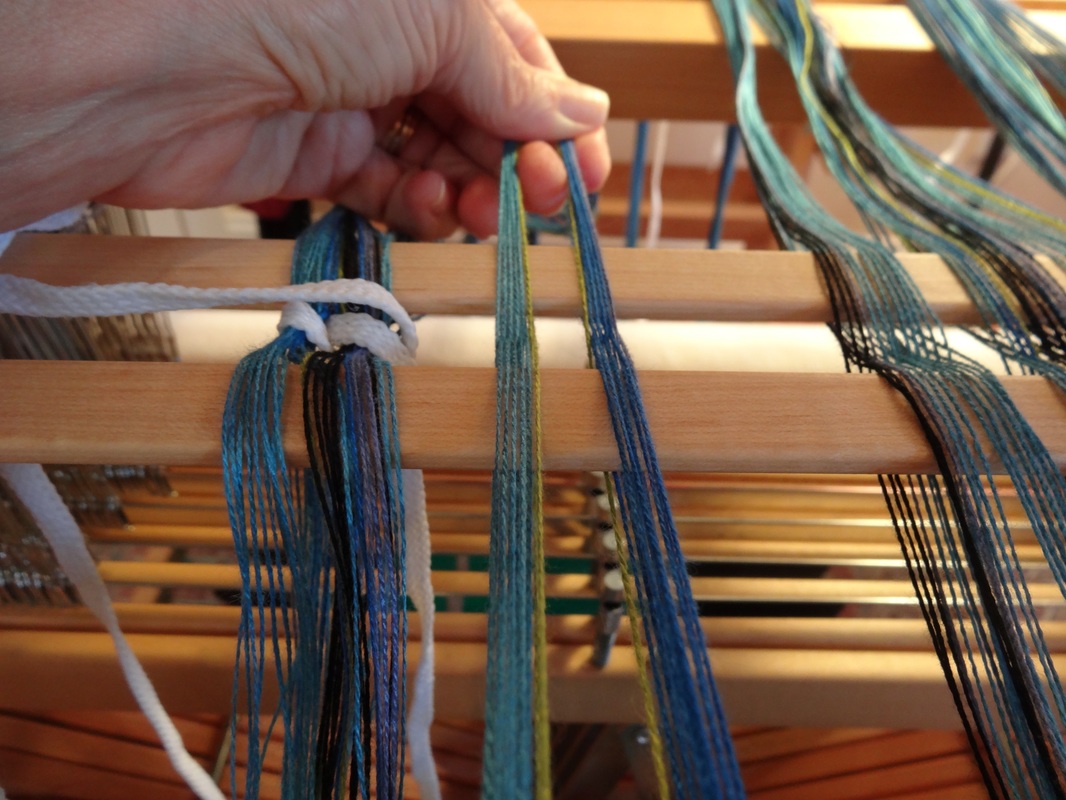
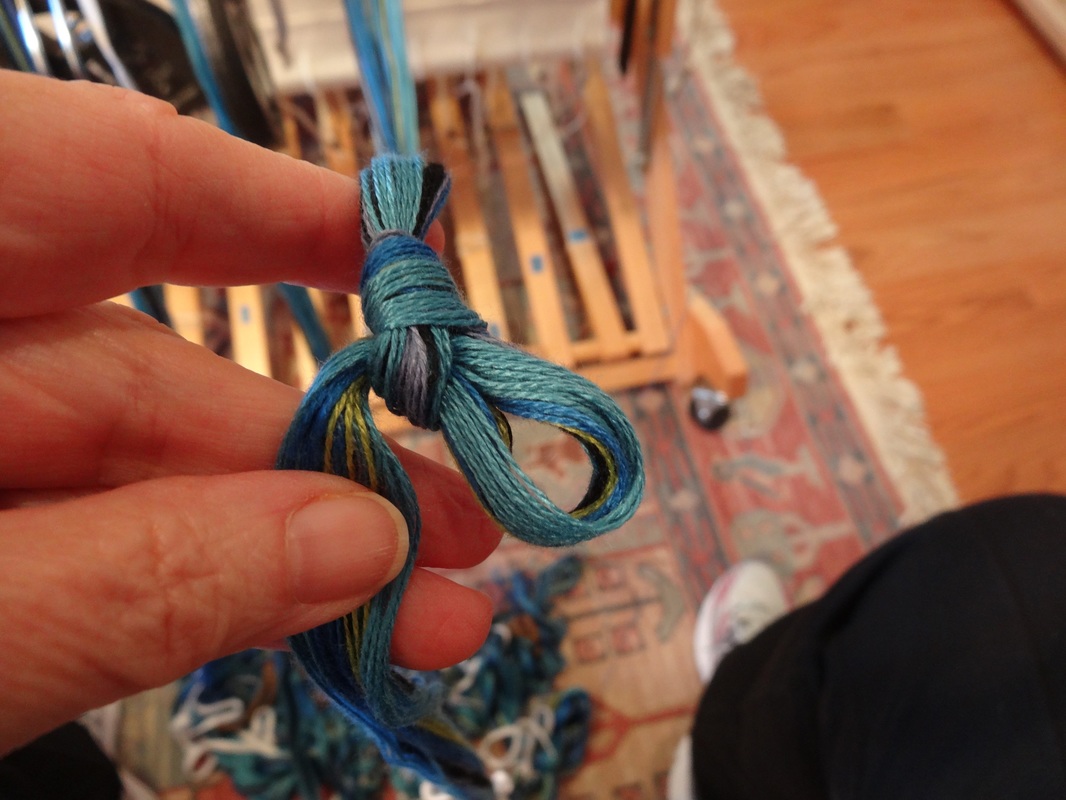
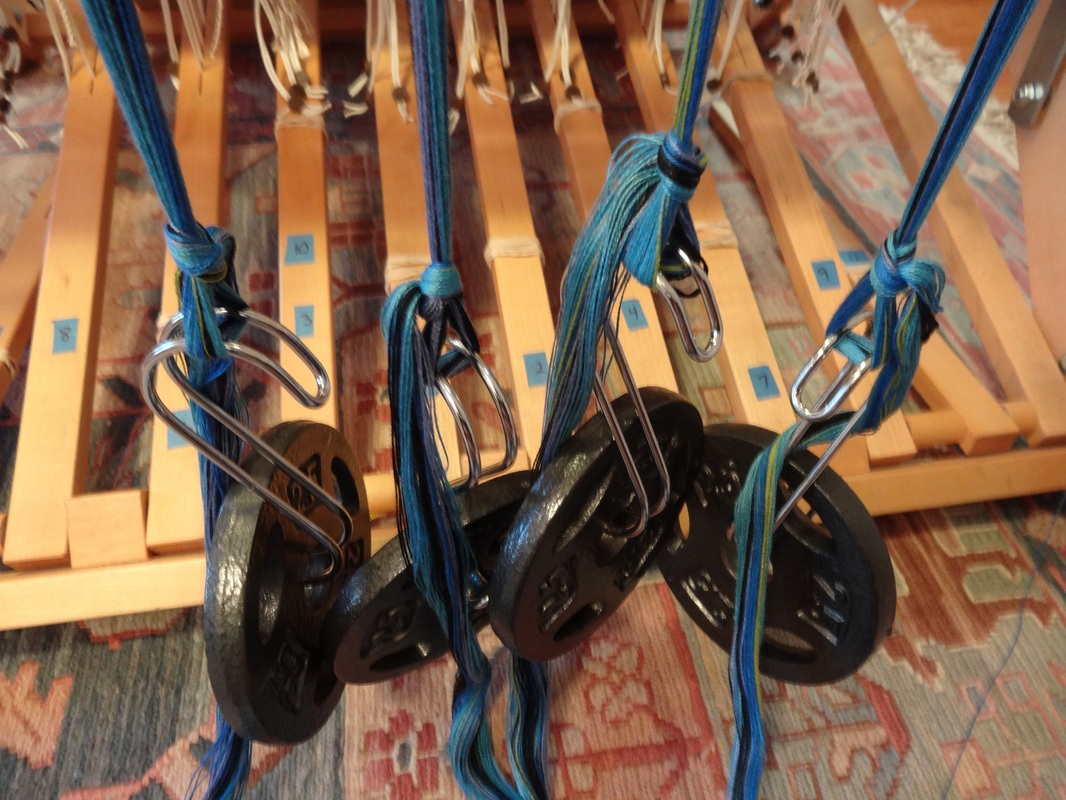
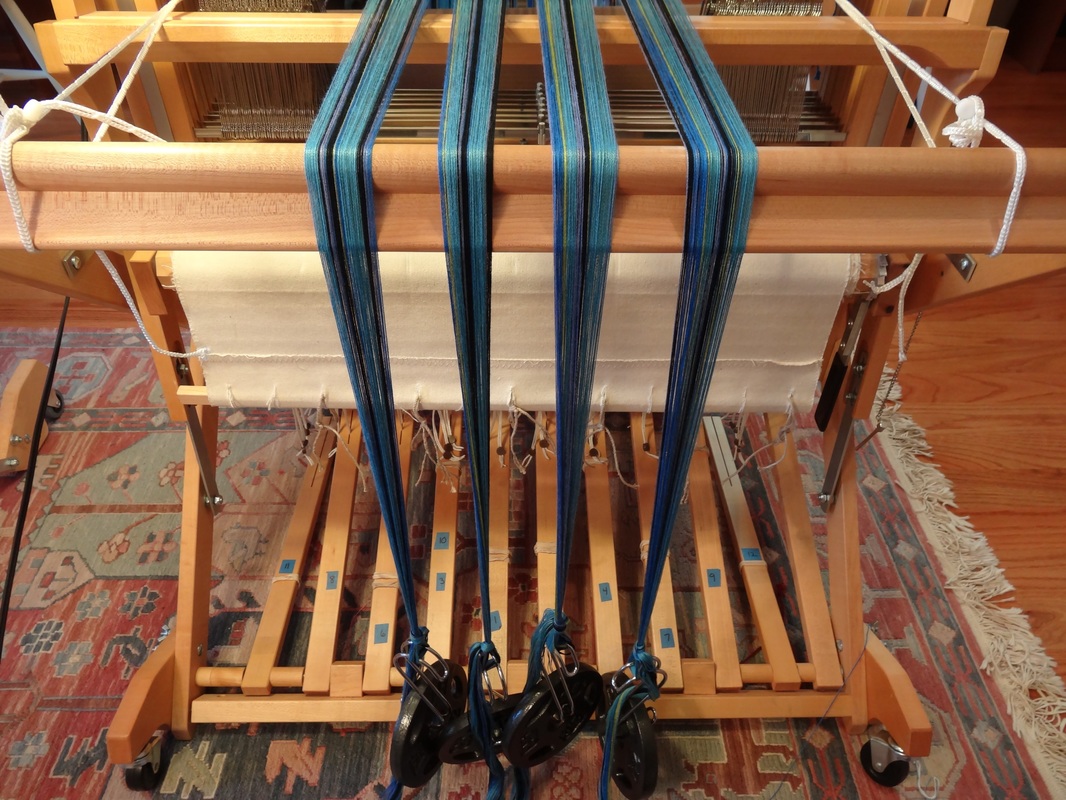
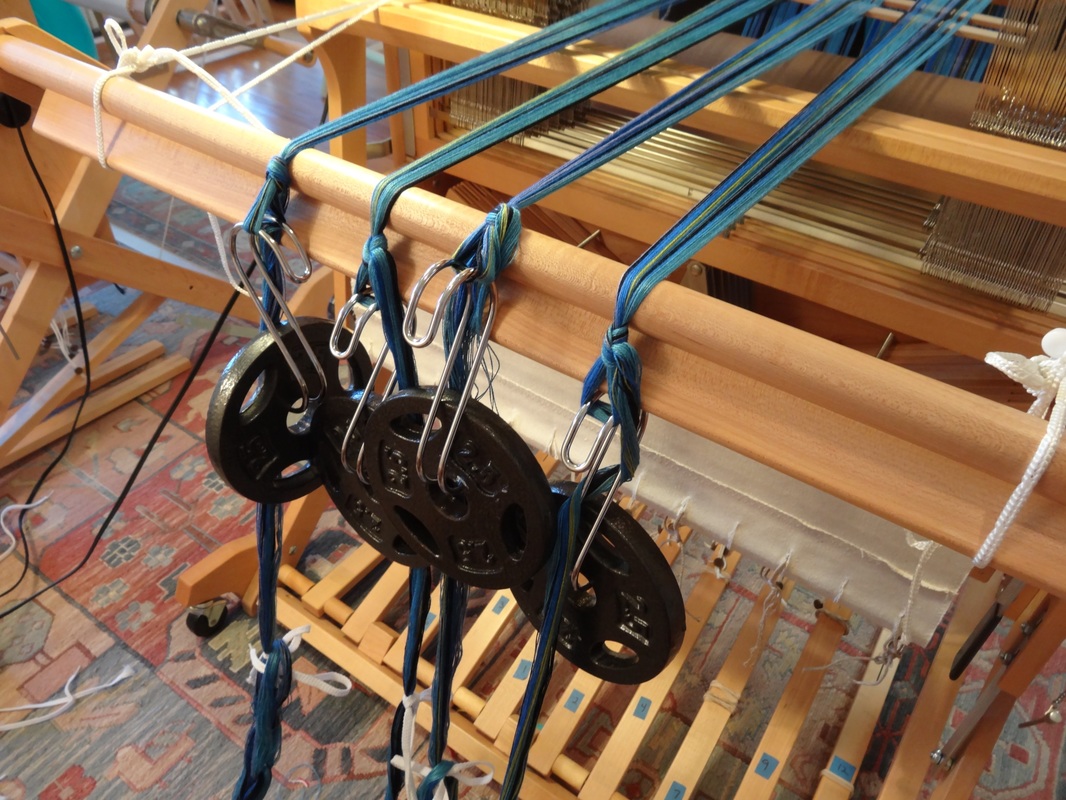
Spreading the warp in the raddle
  1. I tied texsolv cords around the front and back beams on either side of the loom – outside the heddles.  These cords will be used to support the raddle and the lease sticks during winding on.  The lease sticks will stay in the cords for threading through the heddles.  And later the cords will support the reed while I thread from heddles to reed.
  2.  I inserted the raddle into the cords next to the back beam and tied it snuggly to the back beam
  3. I passed the 4 warp chains through the castle of the loom and laid them over the raddle NOTE: As I stood at the back of the loom, Chain 4 is on the far right, Chain 1 on the left and all of the bows for the counting threads are facing to the right because I will unload the chains from the right in to the raddle.
  4. I intertwined the lease sticks through the cords on the right side of the loom, then through the cross of Chain #4, Chain #3, Chain #2, Chain #1, and finally through the cord on the far side.  I tied the lease sticks together on both sides so they couldn’t get dislodged from the cords or the chains.
  5. I inserted the second apron rod though the end loop of both chains and used rubber bands to temporarily secure it to the raddle
  6. Making sure to center the warp chains in the raddle, I unloaded the warp chains into the raddle, 1 inch at a time.  I place rubber bands across the top of the raddle pins to secure the warp ends, and made sure the 2 apron rods were tied to each other every 4”.
Click on any photo to zoom in:
Picture
Step 1 - Texsolv cords installed on the sides of the loom
Picture
Step 2 - Raddle inserted into the cords at the back beam and tied securely
Picture
Step 3 - All 4 chains in position at the back of the loom, #1 on the left, # 4 on the right
Picture
Step 4 - Lease sticks inserted into the cords and the warp chains and secured
Picture
Step 4 - Closeup of warp chains on lease sticks. All bows facing to the right, ready for "unloading"
Picture
Step 5 - Apron rod inserted through loops in warp chains.
Picture
Step 5 - Closeup - Rubber bands used to temporarily secure apron rod to raddle
Picture
Step 6 - Unloading the warp chain, 1 inch at a time. Tensioning the warp ends at the lease sticks.
Picture
Step 6 - Warp spread in the raddle and secured with rubber bands across the top. Apron rod ties inserted every 4".

​Winding onto the back beam
 
After years of drafting my husband into helping me wind onto the back beam when I had more than one warp chain, I have finally adopted a self-help method of winding on that involves weights and gives really nice tension
  1. At the front of the loom, I gently stretched the 4 chains out and made sure they were tidy in the raddle.
  2. For each warp chain, I put a slipknot in the chain and applied an S-hook and a 2.5 pound weight so that the weight would dangle just above the floor.  I removed all choke ties between the raddle and the weight.
  3. I wound onto the back beam with the weights in place adding corrugated cardboard around the back beam to pad between the warp layers.
  4. I watched the cross carefully as I wound on, and I would stop and “shake a jerk the warp chains if the warp was not winding on smoothly.
  5. When the slipknots reached the breast beam, I untied the knots and moved the weights further down the chains, untying choke ties as needed.
  6. I continued winding on and moving weights until the end loops reached the breast beam.
Tip:
I like to use rolled cardboard when winding onto the back beam.  If it is not available, you can use heavy craft paper available in rolls (doubled if desired for extra thickness) or sticks or slats cut to the width of your beam
 
Tip:  If you use paper to wind on with, keep the lengths of paper short - 1 yard long or less. Long lengths are very hard to wind on straight and invariably end up getting off kilter and getting gummed up in the gearing of the loom.

Picture
The S-hooks and weights. S-hooks can be found at a hardware store, weights at a sporting goods store. Milk jugs filled with 2-3 pounds of sand work too.
Picture
The slipknot in the warp chain
Picture
The warp chains weighted with S-hooks and weights
Picture
Slipknots and weights at the lowest point below the breast beam
Picture
The slipknots and weights have reached the breast beam. Time to move the slipknots and weights before winding further.

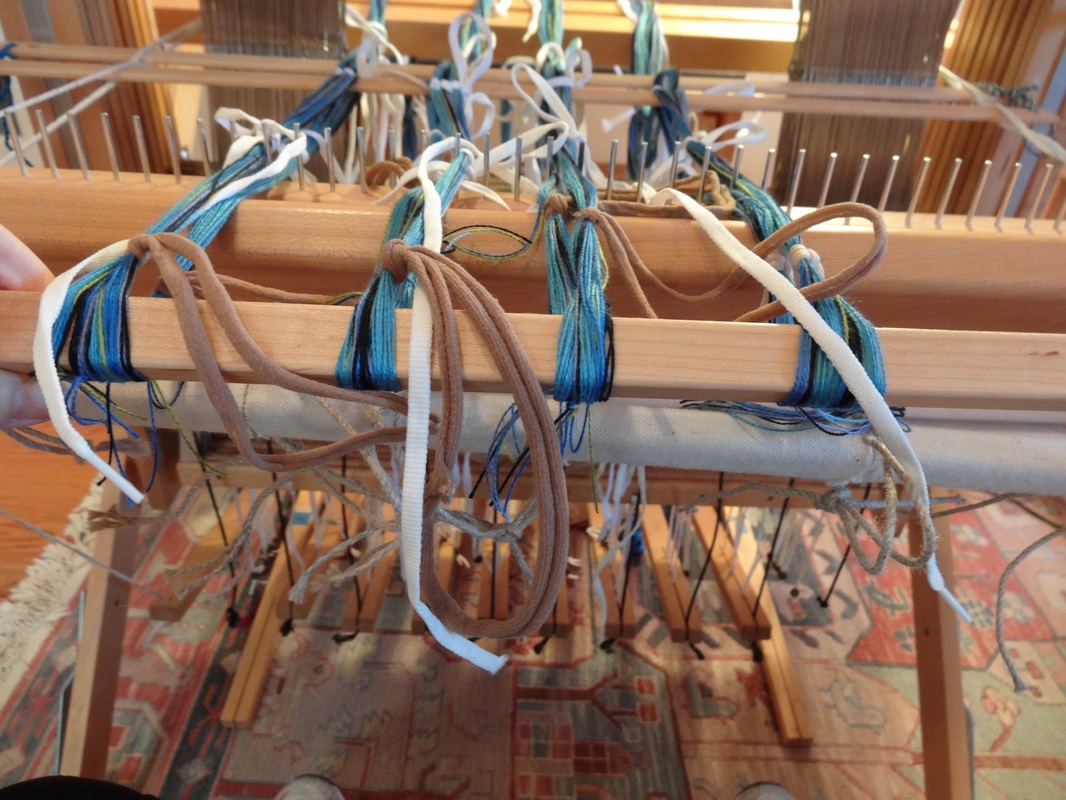
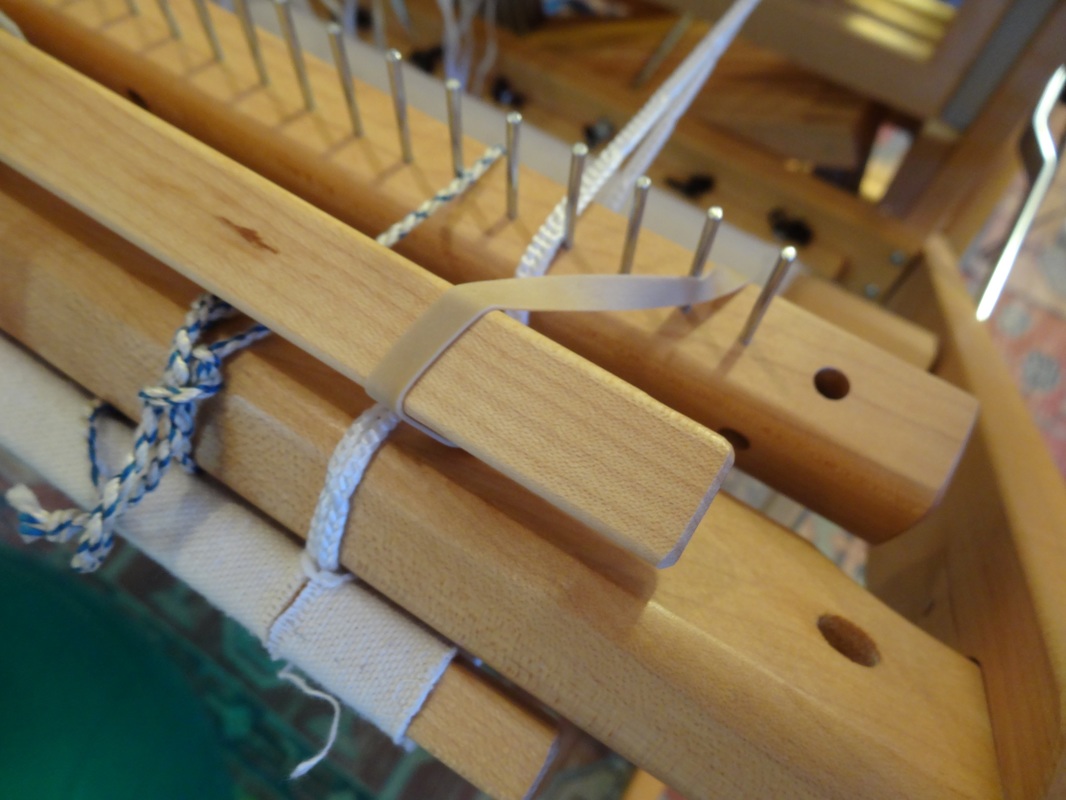
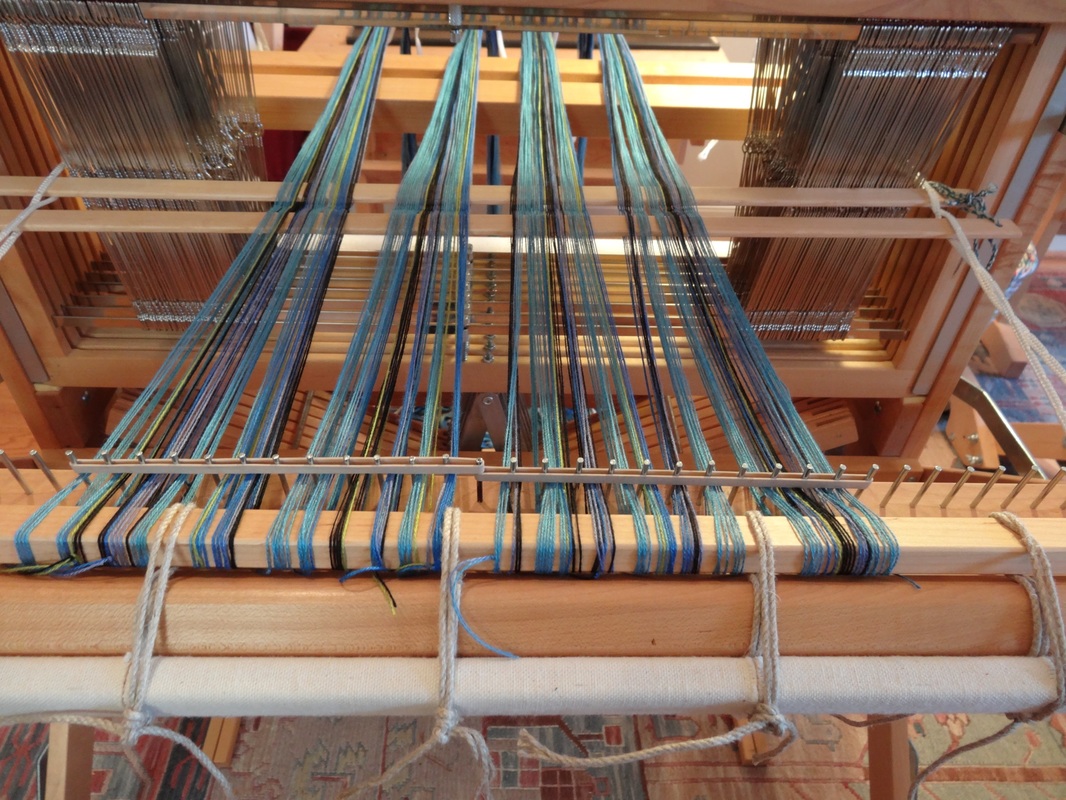
​I was now ready to thread the loom.  Go to Life History-Day 5
​
To review, go back to Life History-Day 3

4 Comments
Ellen Bowman
7/19/2016 12:02:32 pm

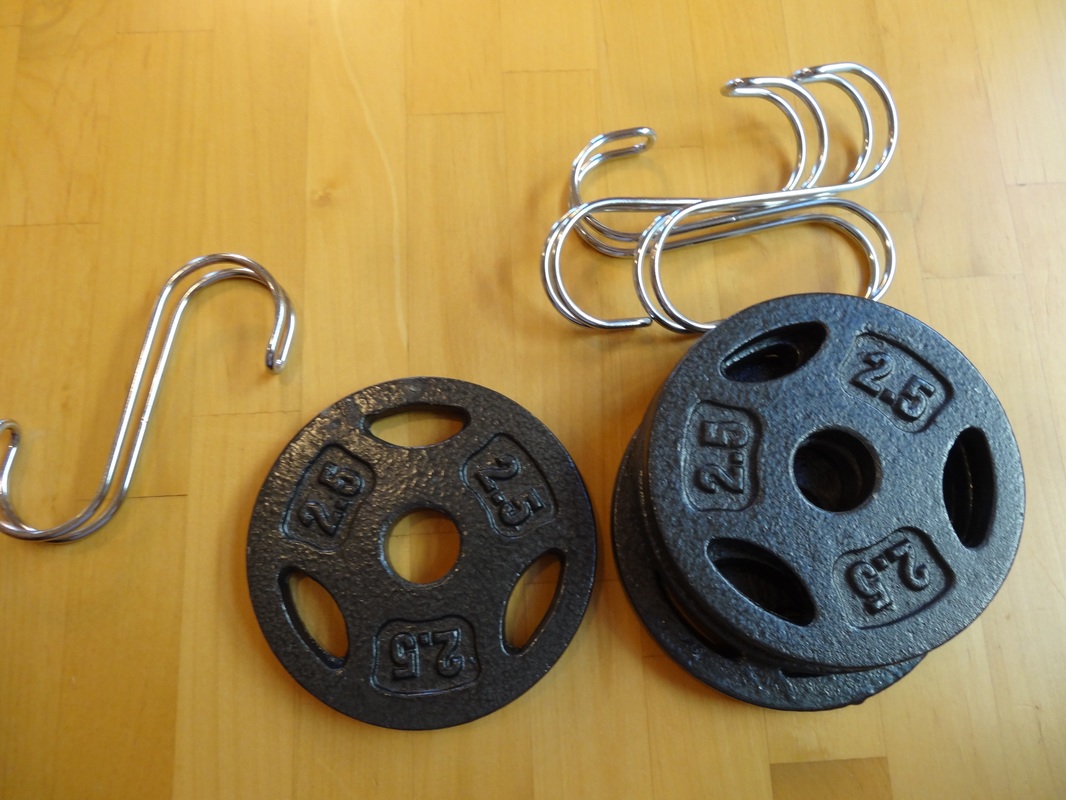
Hi, Pattie - you explain warp-weighted tensioning very well! I am going to try it. Thanks for your very interesting, and well-photographed, blog. Keep it up!

Reply
Pattie
7/19/2016 12:14:09 pm

Thanks, Ellen. I am glad it was helpful (and glad to know someone is reading the blog!!) :-)
Have a great day and happy weaving!

Reply
Sun Chasing link
12/4/2020 12:59:37 am

Loved reading tthis thanks

Reply
Pattie Lamb
12/4/2020 07:37:56 pm

I am glad you enjoyed it!

Reply

Your comment will be posted after it is approved.


Leave a Reply.

    Pattie Lamb

    I have been happily weaving since my son was born in 1988.

    All pictures on my blog are "zoomable" - just click on them to enlarge.

    Archives

    June 2023
    March 2023
    June 2022
    November 2020
    October 2020
    February 2020
    October 2019
    June 2019
    May 2019
    June 2018
    July 2017
    June 2017
    May 2017
    April 2017
    February 2017
    January 2017
    August 2016
    July 2016
    May 2016
    February 2016
    February 2015
    January 2015
    October 2014
    September 2014

    Categories

    All
    Artificial Intelligence
    Baby Wraps
    Blankets
    Block Twill
    Block Weave
    Block Weaves
    Cat's PJs
    Challenges
    Charity
    ChatGBT
    Classes
    Commissions
    Deflected Doubleweave
    Design
    Doubleweave
    Dyeing
    Facebook Challenge
    Felting
    Finishing
    Fringing
    Hemstitching
    John C Campbell
    Knitting
    Knots
    Lace Weaves
    Leftovers
    Life History-Day 1
    Life History-Day 2
    Life History-Day 3
    Life History-Day 4
    Life History-Day 5
    Life History-Day 6
    Life History-Day 7
    Life History-Day 8
    Life History-Day 9
    Life History-Final
    Life History Of A Scarf
    More Than Pink
    Paper Quills
    Plain Weave
    Ply Split
    Process
    Rugs
    Runners
    Scarves
    Selvedges
    Shawls
    Storyboard
    Study Group
    Tencel
    Tie-ups
    Tip Of The Month
    Tips
    Tools
    Towels
    Travel
    Treadling For Dummies
    Turned Twill
    Twill
    Videos
    Walking Pink
    Warping
    Weaving
    Weaving Pink
    Weaving Tips
    Wedding
    Yarn Wraps

    RSS Feed

         HOME        //      SHOP      //       BLOG       //        EVENTS       //       GALLERY     //      ABOUT       //      CONTACT

  • Home
  • SHOP
    • Scarves
    • Shawls & Wraps
    • Wool Scarves & Shawls
    • Blazing Shuttles
    • Throws & Baby Blankets
    • For the Home
    • Odds & Ends
    • Shop All Handwovens
    • Schacht Equipment
    • Gift Cards
  • Blog
  • Events
  • Gallery
    • Scarves & Shawls
    • Baby
    • For the Home
    • The Wedding
    • Komen
  • About
    • Storyboard