Lamb...on the Loom
  • Home
  • SHOP
    • Scarves
    • Shawls & Wraps
    • Baby
    • Bags & Purses
    • For the Home
    • Odds & Ends
    • Classes
    • Shop All Handwovens
    • Schacht Equipment
  • Blog
  • Events
  • Teaching
  • Gallery
    • Scarves
    • More Scarves
    • Shawls
    • Baby
    • For the Home
    • Just for Fun
    • The Wedding
    • Komen
    • Baby Wraps
  • About
  • Contact

Treadling for Dummies Part 2 / No Peeking Allowed

10/27/2019

0 Comments

 
No Peeking Allowed - Treadling Tips

Forgive me if I am repeating things I talked about in other posts, but some things bear repeating.
​
Everyone
handles their treadling differently, and that is just the way of weaving: everyone has their own way.
Personally I hate peeking at my feet while I weave. I feel it disrupts my rhythm and flow.
I do several thing to make sure I do not have to peek.

Walking the treadles:
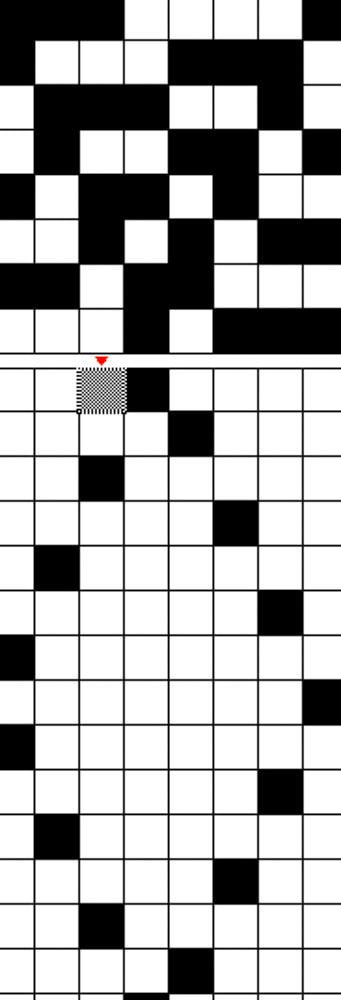
I almost always walk my treadles.  Inside to outside. I find it easy to walk left right left right as I treadle.  My shuttle is (almost) always moving toward the foot that is depressed.  This is ergonomically preferably to using one foot over and over.  And it is surprisingly easy to manage walking the treadles with most treadling patterns.  My treadles on a 10 treadle loom would be set up for walking as follows:
Picture
Notes:
  • The suggestions outlined below will work as well even if you are opposed to walking your treadles.
  • Not all patterns lend themselves to walking but I have found that those drafts are few and far between.
  • I use computer software that would allow me to rearrange the treadles in the draft.  I COULD rearrange the treadles in the draft to match the way I have tied up the treadles.  But in actuality I DO NOT because I find it much more confusing to follow a pattern with that type of treadling diagram.
Treadling on the LEFT shows a point twill, treadles numbered left to right: 12345678.
I find this easier to follow even though my treadles are actually arranged like the treadling shown on the right.

​Personal preference.
Picture
Picture
Treadling on the RIGHT shows the same point twill with shafts shuffled  to the position used for walking.  Treadles in the tie-up are numbered left to right: 75312468 as if for walking. 
I would have a much harder time following this layout so I do not use the shaft shuffler for this purpose.

​Root your feet:
I NEVER move my foot off of a treadle until I need to use that foot again.  That helps keep me and my feet oriented` as to what treadle comes next.
  • Left foot presses treadle 1 and stays there
  • Right foot presses treadle 2 and stays there
  • Left foot then presses treadle 3 (moving my foot from treadle 1) and stays there
  • Right foot presses treadle 4 (moving my foot from treadle 2) and stays there...
You get the idea.  Not all treadles are a straight draw, but very few treadlings skip around in random order.  Generally you will only have to move your foot to the neighboring treadle or perhaps skip a treadle and move over 2 treadles.  This is easy to do without peeking.
Tip!
Lunatic Fringe Jazz Bands (designed for Schacht Baby Wolf and Wolf Pup looms), work really well to add a little tension to the treadles.  This helps prevent you from accidentally lifting or slightly lifting a shaft you are not using - even if you leave your foot on that treadle.

​Hair bands & treadle divider:
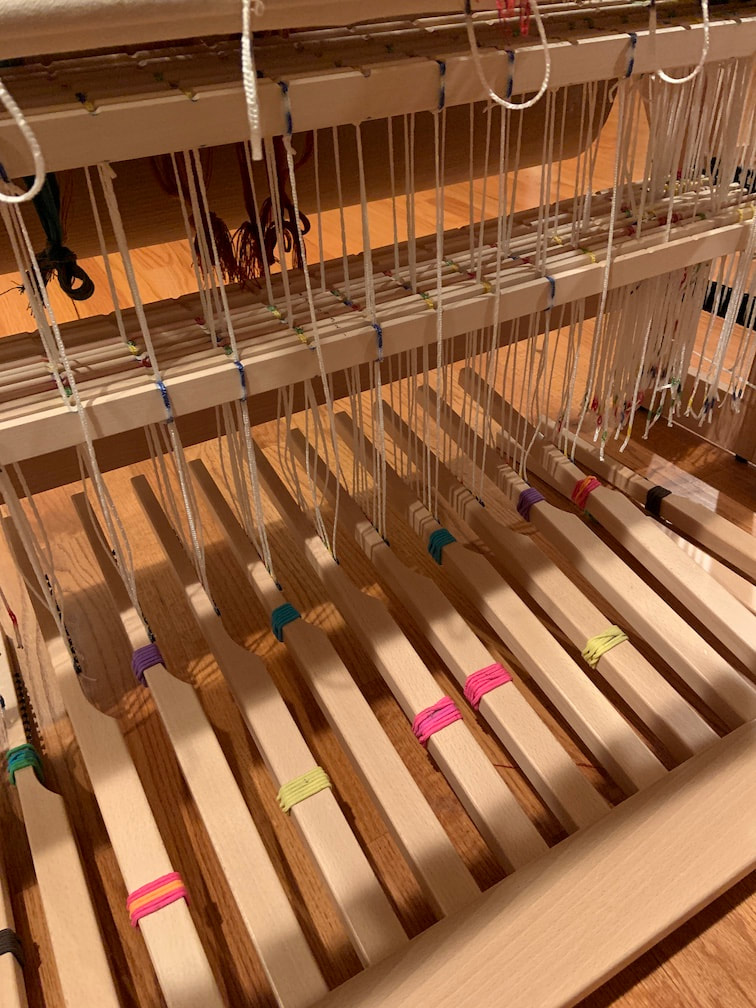
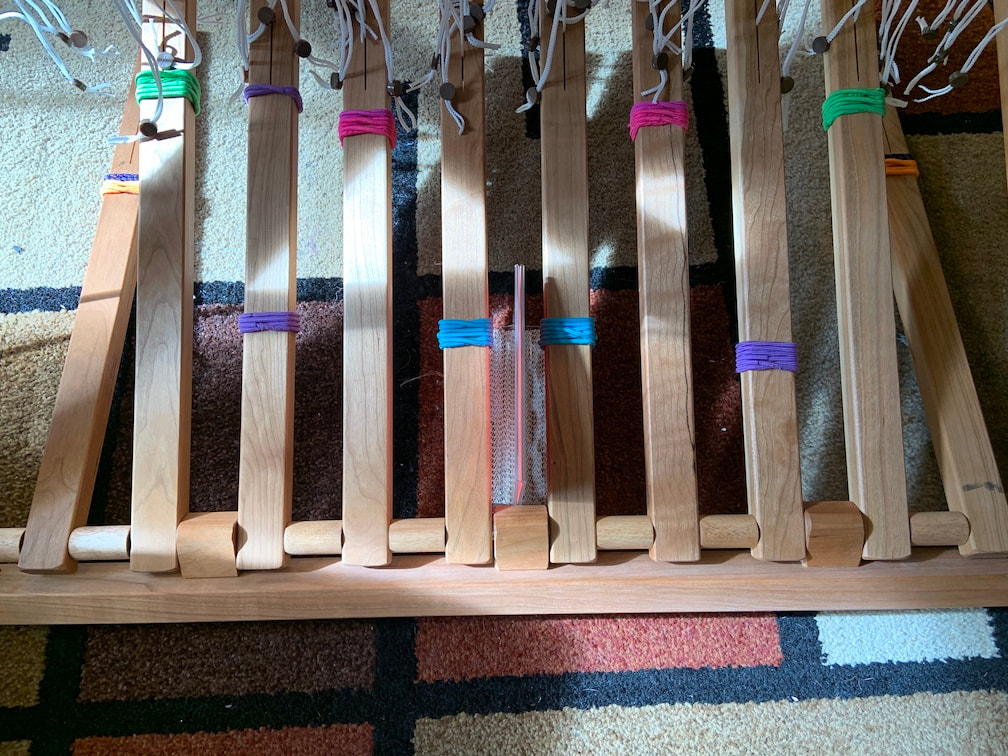
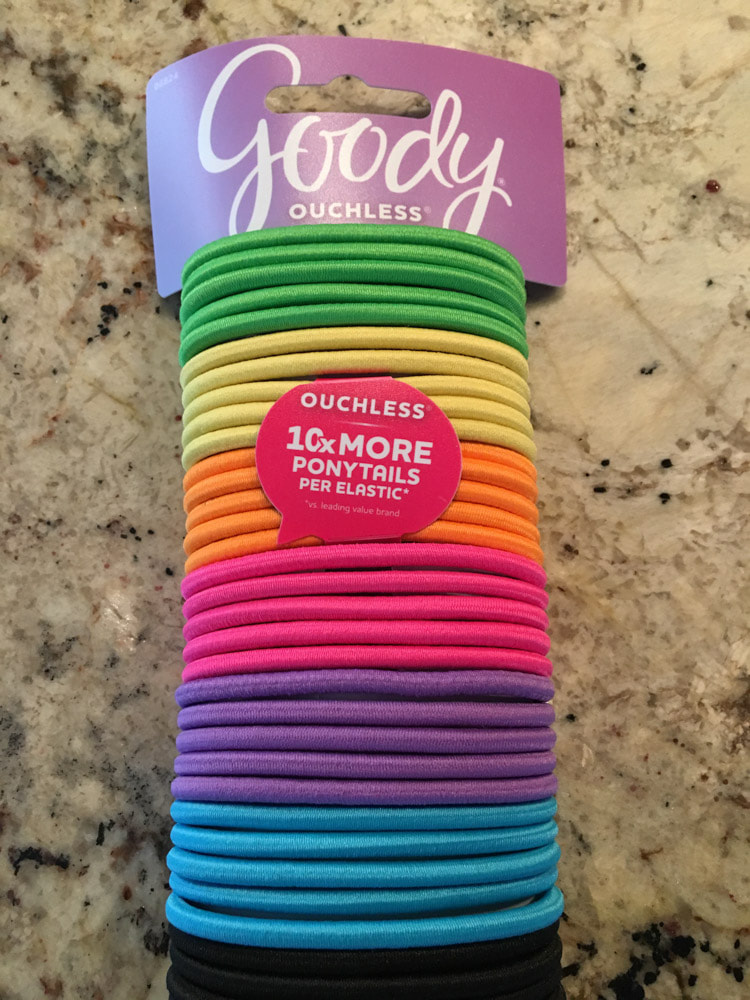
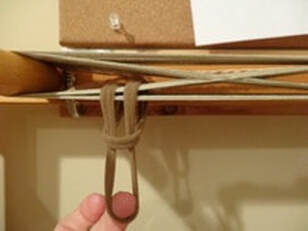
I have hair bands on each of my treadles.  In fact I put 3 hair bands on each treadle because I simply can feel them better with my feet. The purpose of the hair bands is to help my feet identify which treadle is which. Depending on my pattern, I slide the hair bands down where I can feel them or up out of the way.
Typically, I am walking my treadles from the center to the outside, so I might move hair bands down on the middle 2  treadles (treadles 1 & 2), I leave the next 2 treadles (3 & 4) in sequence “naked”, move bands down on the next 2 treadles and so forth.

No need to remove the hair bands between projects.  Just move them up or down on the treadle as needed.

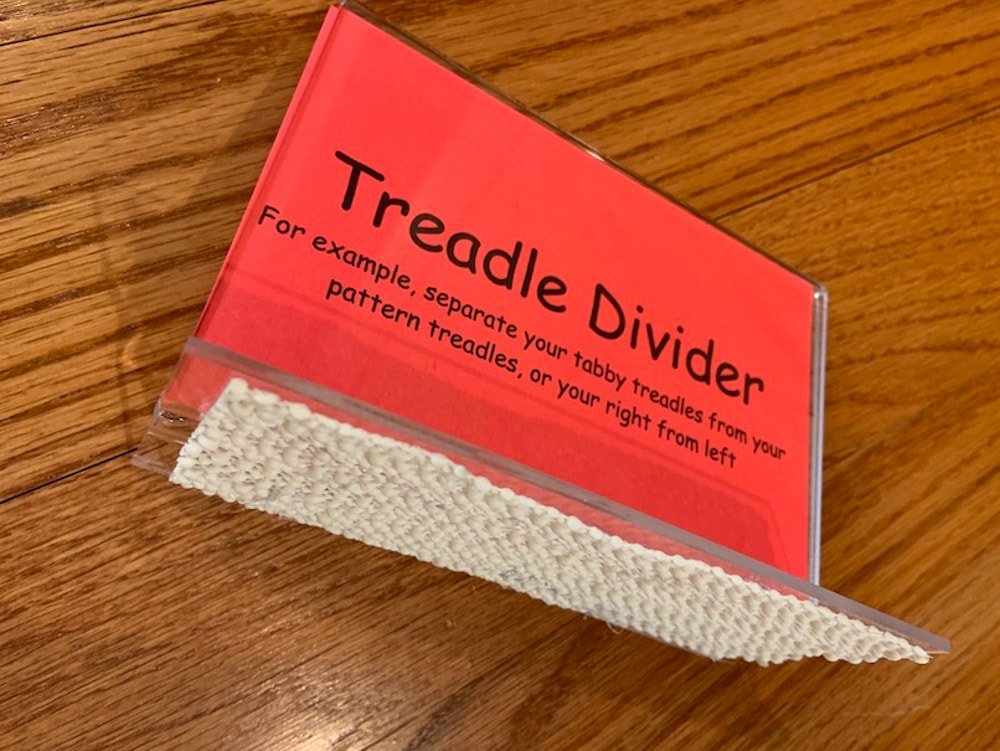
If desired you can put a divider between the center treadles to remind your feet not to cross the midline.
Tip!
Heavy rubber bands can be used instead of hair bands, but BEWARE: they dry rot fairly quickly and will have to be replaced.
Picture
The hair bands and divider for a typical draft would look like this: hair bands on the odd treadles, divider in the center.
Picture
Treadles tied up for walking a twill, treadle divider in the center.
Picture
Hair bands
Picture
Divider made from a picture frame


​Weaving tabby and pattern:
When I am weaving a pattern that requires tabby picks to alternate with pattern picks, I will put my 2 tabby treadles (a & b) on the left and the pattern treadles (1 - 8) on the right.  I will move a hair band down so my foot will feel it on ONE of the tabby treadles and on every other pattern treadle.

I definitely use a treadle divider in this situation because my left foot has a tendency to need a reminder to only travel between the far 2 left treadles
Picture
The hair bands and treadle divider for a draft that requires tabby would look like this
Tip!
If you are weaving a draft that requires tabby and pattern to alternate one for one, there is an added bonus.  For tabby a (left treadle), throw the tabby shuttle to the left, for tabby b (right treadle), throw the tabby shuttle to the right.  This will help you keep track of which tabby is next if your feet get confused.

​Note:
  Many people place their tabby treadles in the middle or on the outside, but this requires moving your foot off of a tabby treadle to find the next pattern treadle.  I personally cannot keep track of which pattern treadle comes next if I do that.  If I use my left foot for the tabby treadles and my right for the pattern treadles, I can follow my rule of never moving my foot until it is needed again.  I will treadle tabby A and leave my left foot there, treadle Pattern 1 and leave my right foot there.  This way when I go back to weave the next tabby, I know I have to use the other tabby treadle (in this case Tabby B).  When I go back to treadle pattern, the fact that my foot is already on Pattern 1 reminds me of where I was and makes it easier to find the next required pattern treadle.

Exception:  On my Spring loom there are 14 treadles and they are quite far apart.  Placing the tabby on one side is pretty uncomfortable, so on that loom, I will put them in the center.  When I am weaving left sided pattern treadles, I weave tabby with my right foot and pattern with my left. When I am weaving right sided pattern treadles, I weave tabby with my left and pattern with my right.

Cheat Sheets:
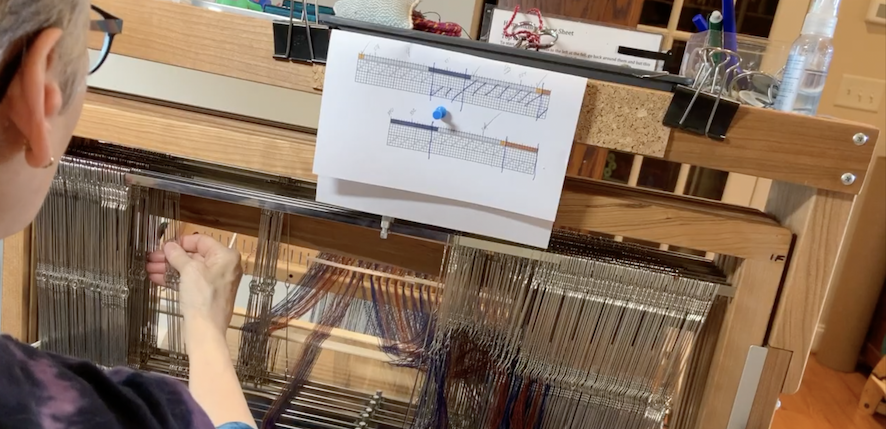
Any complex treadling warrants using a cheat sheet.
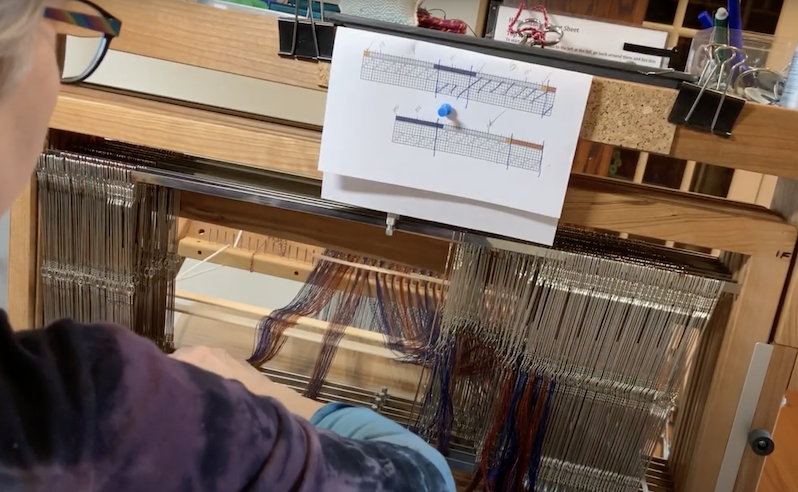
I attach the cheat sheet to my castle.  If your loom does not have a castle, tape it to one side of the beater.
My cheat sheet consist of a strip of card stock and a large paper clip.
I write the treadling sequence on the strip and use the paper clip to mark my place as needed.
I store the cheat sheet with the notes I keep on each project.
Tip!
When you are first learning to walk the treadles, you can create a second cheat sheet to remind you  which treadles are where and which treadles have hair bands on them.  Once you get used to this system, you will not need this second cheat sheet.

​Examples of my cheat sheets:
Picture
Cheat sheet for an irregular point twill. I created duplicate treadles 5 & 6 to deal with the turn in the draft. They are duplicates of 3 & 2. This allows me to walk treadles 123456 ,and that is easier for me to keep track of than treadling 123432
Picture
Treadling for a simple advancing twill
Picture
Treadling for a plaited twill. The top line of numbers refers to the picks woven with my left foot, the bottom line to picks woven with my right foot. The circles indicate which treadles have hair bands down where my feet can feel them.
Picture
Treadling for a block lace weave. In this case I treated treadles 1 & 2 as tabby and tied them up for my left foot. I treadled the pattern blocks with my right foot. So the treadles were arranged like this: 2 1 3 4. Block A is treadled 13132. Block B is treadled 14142. "2A" means repeat block A twice, "8B" means repeat block B 8 times. "8pw" refers to 8 plain weave picks. "END" refers to the final sequence at the end of the scarf.

No peeking:
With my hair bands are in place and the treadling recorded on my cheat sheet, I can walk my feet happily along my treadles, and I never have to peek at those treadles again.

Try it!  You will like it!
Added bonus: 
​I do not ever have to label my treadles with that dreaded tape!

0 Comments

Using Up Leftovers for my Fade

6/11/2019

1 Comment

 
Finding My Fade

​1 ½ years ago I made an impulse purchase of a shawl kit.  The kit contained 6 luscious colors of merino and a pattern for knitting a lace shawl.  Only one problem:  I am not much of a knitter, and I had never woven lace before.
 
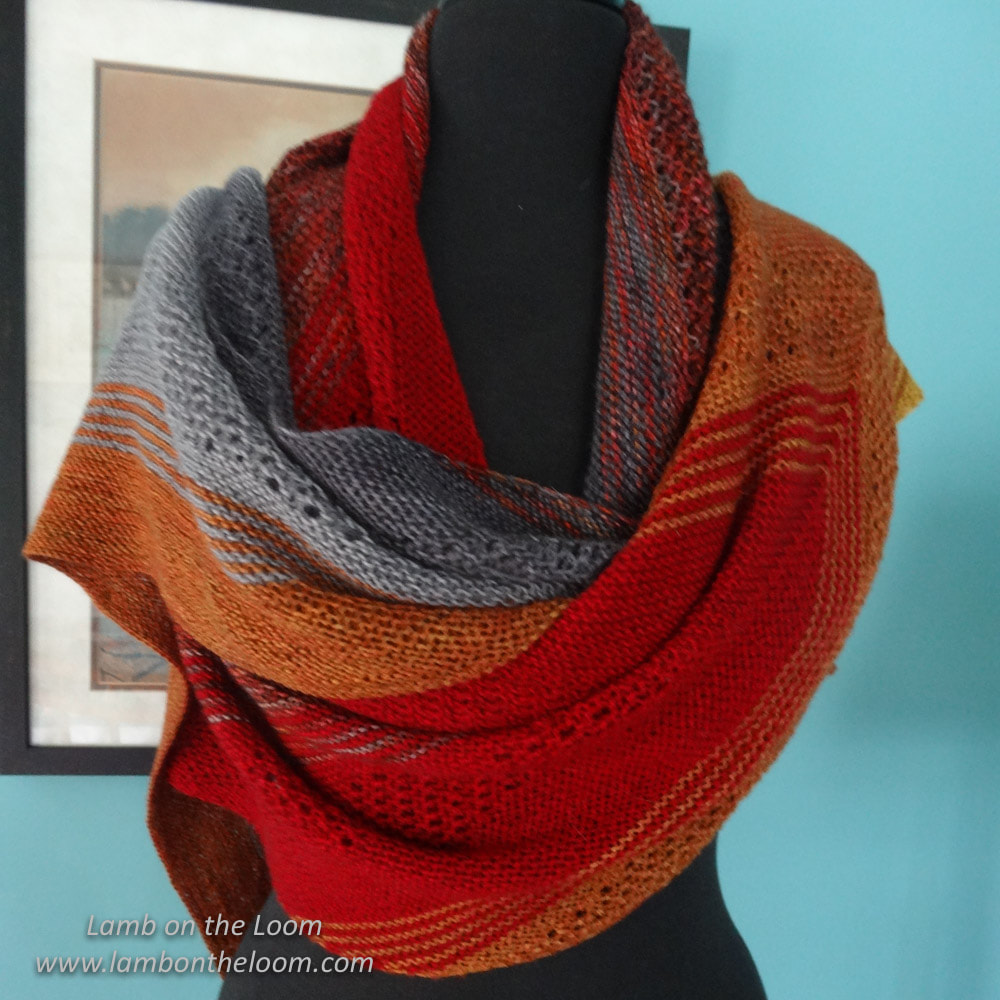
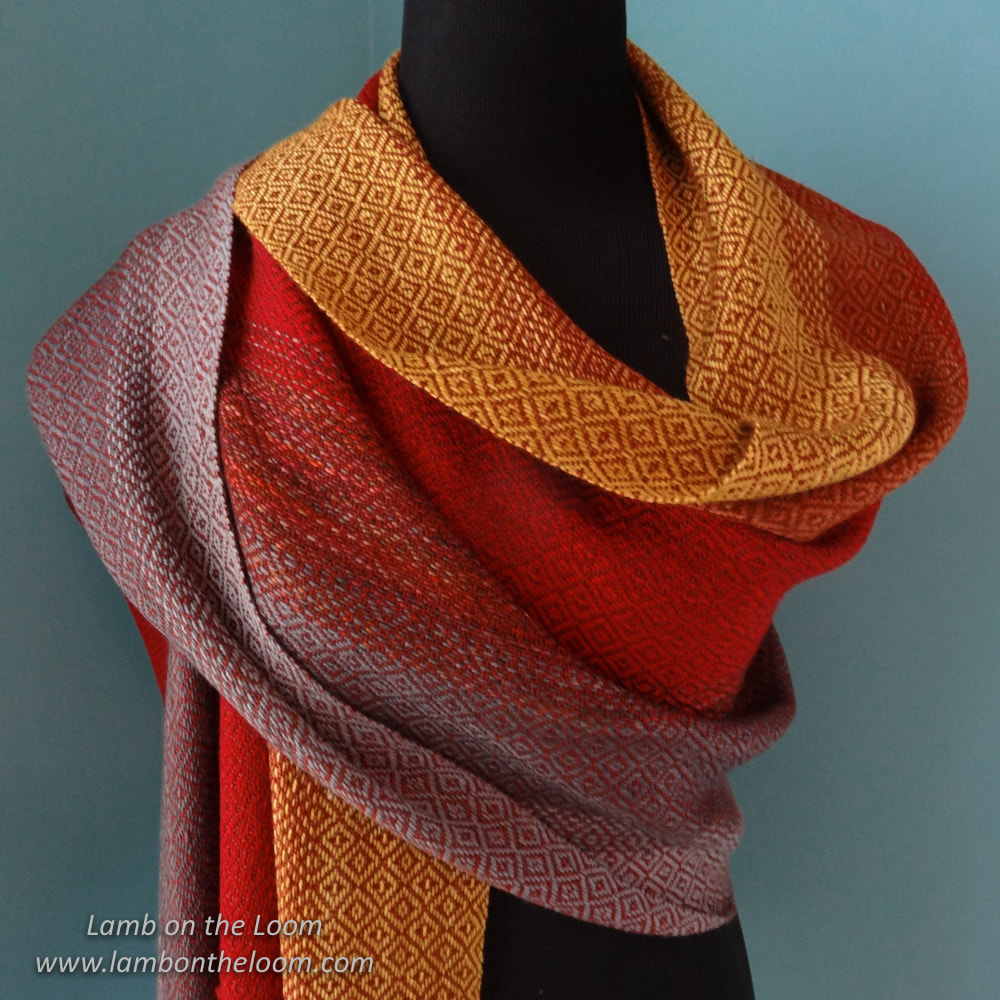
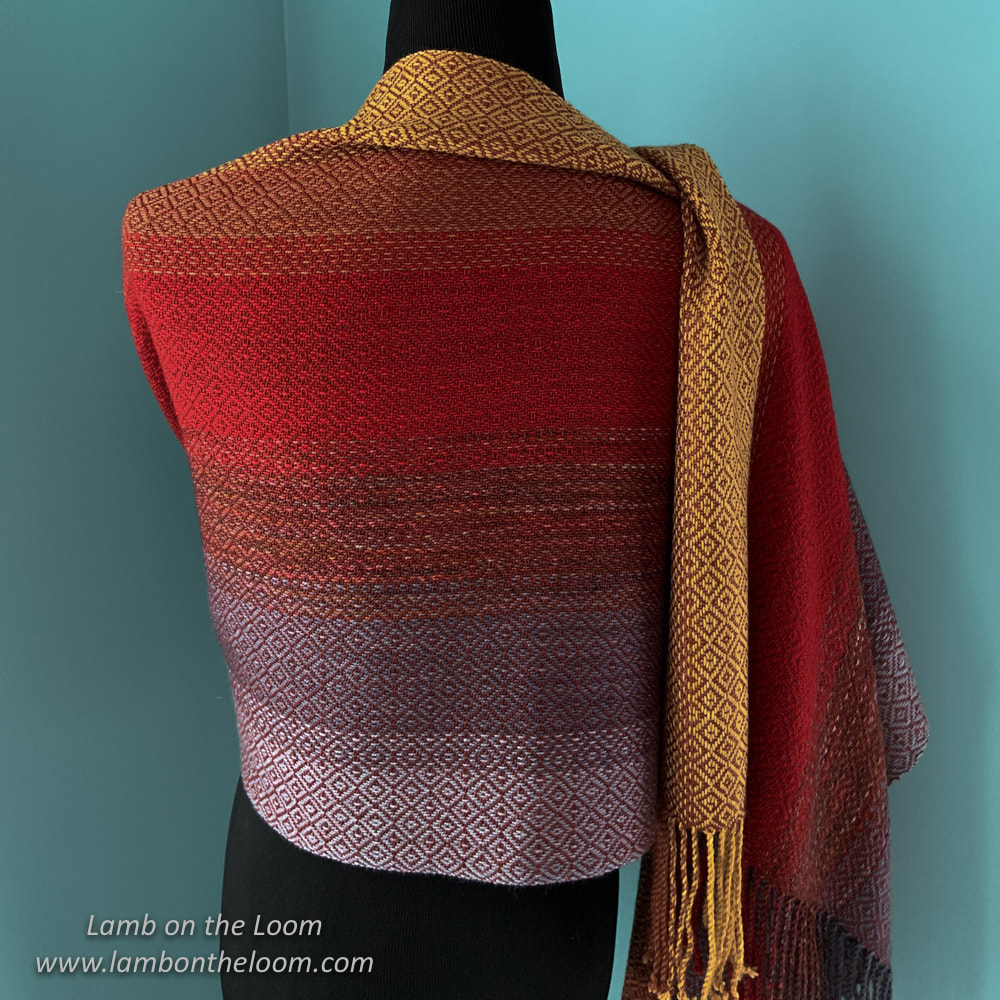
The shawl pattern was for “Find Your Fade” – a very popular shawl pattern developed by Andrea Mowry.  I arranged the colors from gold to rust to cranberry to a variegated blend to medium gray to  light gray and back to gold.
PictureFind My Fade


Within a week, I cast on a few stitches and began the ultimate knitting challenge.  Many a bad word escaped my lips before I had knitted up a square inch of the shawl, much to the amusement of my friend Suanne – who is both a weaver and a knitter.
 
I struggled mightily with this pattern, which, I believe by knitters’ standards, is probably not very difficult – just stunningly beautiful. I learned that I am not very good at counting stitches, not very patient, and that my hands do not tolerate knitting for more than an hour at a time.  And trust me I am a SLOW knitter. 
 
The GOOD news was that I quickly learned how to TINK.  Little did I know that there was actually a word that means unknitting.  I got pretty darned good at it.  And if I do say so myself, unknitting lace is not easy.  So allow me to pat myself on the back.

​Over the next 14 months, I knit, I tinked, I counted stitches over and over again, and chose to ignore a couple of mistakes that I knit right on past.  My husband threatened to wear ear plugs while I was working on the shawl.  I would put the shawl away for a month at a time, and then I would work hard at it for another couple of weeks.  It was slow going, but I did finally finish it.  I even like it a lot.  Ironically, I can’t wear wool, so what do I do with it now?
Picture
Find My Fade
Weaving My Fade

​I had finished my knitted shawl, but I had over half of the merino left over.  For a change, I decided I would try to use up the leftovers rather than hoarding it in my ever-growing stash.  I would weave a shawl inspired by the Find My Fade shawl.  Now weaving is something I am more comfortable with.

This would be EASY.

  • I decided to use the six colors grading from gold to light gray.
  • I would weave an 8-harness point twill because I wanted something simple to emphasize the color gradation. 
  • I worked up a plan for using each of the colors in sequence in an attempt to use up as much of each color as possible. 
  • I would wind a 3 ½ yard warp, 365 ends, sett at 16 epi
  • I decided (with a little help from my friend Sue) that rust would be the best color to use as weft.   I happened to have some 8/2 tencel in my ever-growing stash that would be perfect.

​OOPS, that didn’t quite work out. 
 
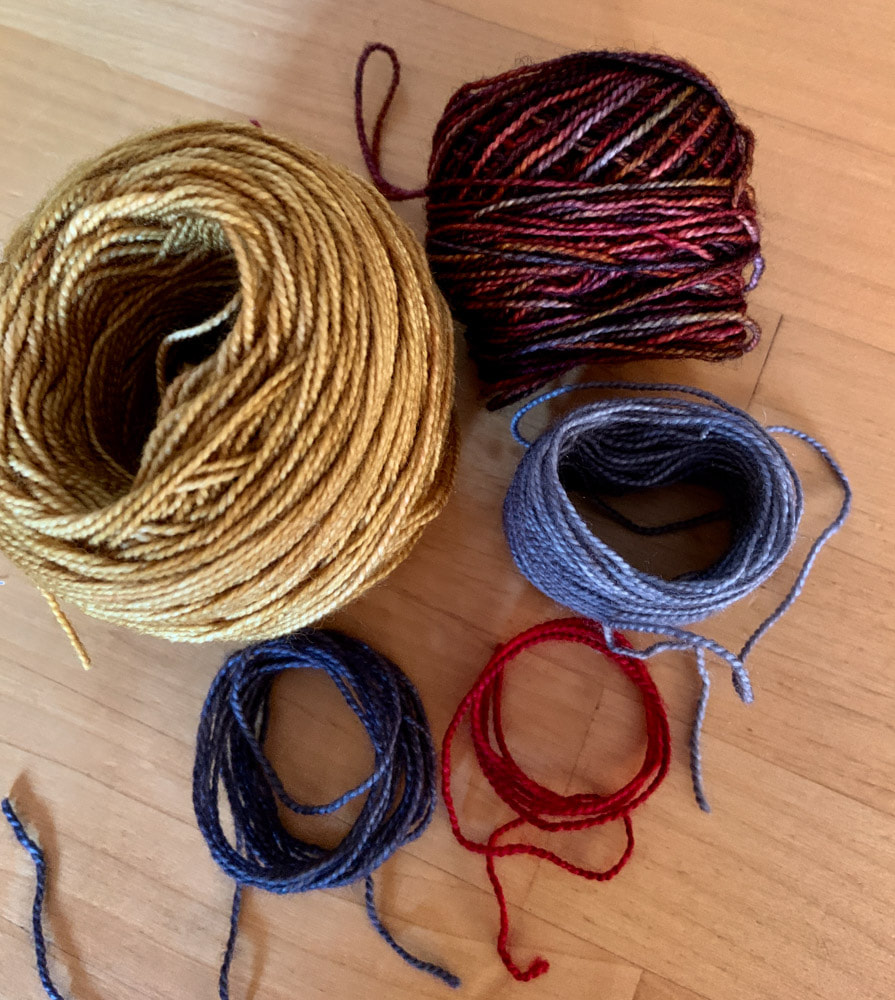
My calculations for how much of each color I needed didn’t exactly pan out as planned.  As I measured my warp, I came up shorter than expected in the rust and cranberry sections and had to adjust in the variegated and gray sections.  Fortunately, I was still able to eke out the 22 ½” width I wanted.  But I had very little left over of 4 of the colors and none of the rust.  Despite the trials of winding the warp, this was pretty easy. ​​
​
Picture
The leftovers
Picture
Weave My Fade
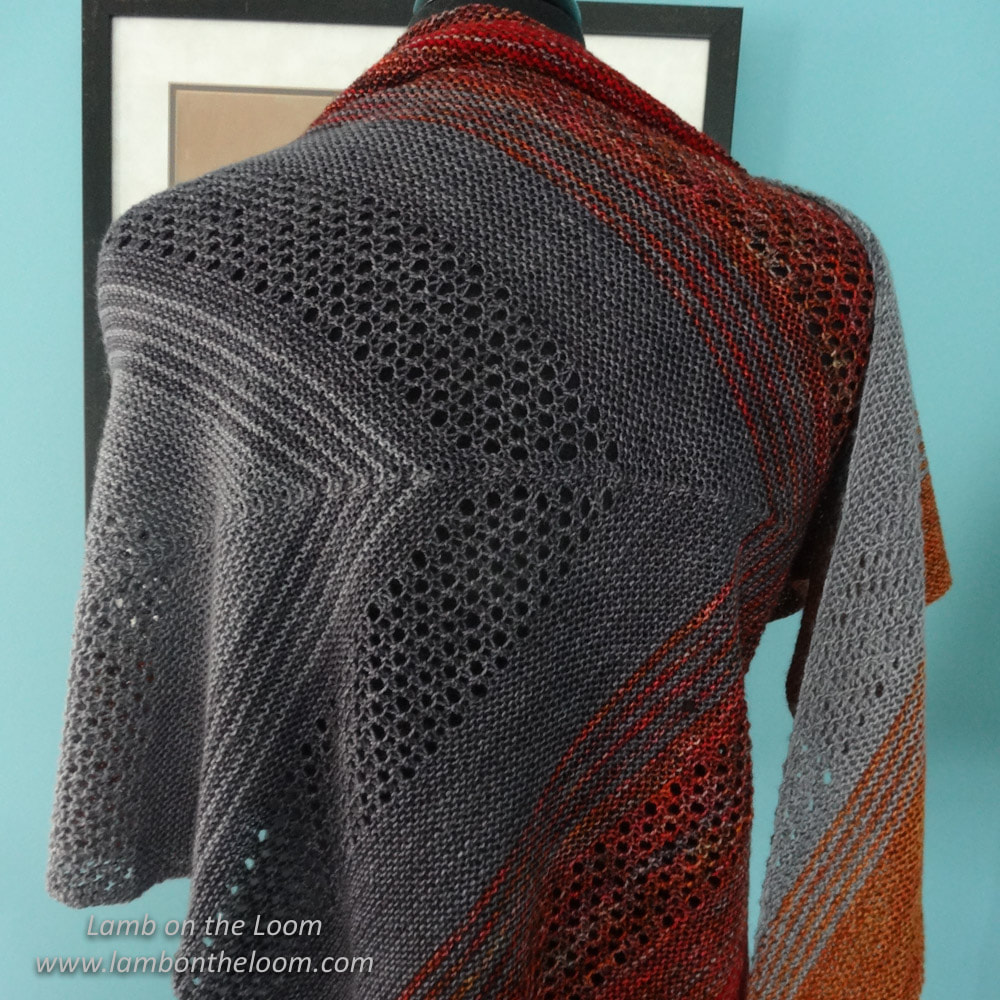
Picture
Weave My Fade

​The inspiration shawl and the woven shawl are different yet related.  Both use the same colorway, both are soft and warm, and both made me happy, although for different reasons.  But just between you and me, I would choose weaving over knitting any day.

RSS Feed


1 Comment

​Hemstitching Can Be (More) Fun

5/3/2019

4 Comments

 
Well, that is really questionable in my opinion.  I have never enjoyed hemstitching.  However, I have 2 really good tips to make it a little easier.


​Tip 1:
The first tip is outright stolen from Jane Stafford’s Online Guild episodes.  If you are not a member of her guild, I highly recommend it: https://janestaffordtextiles.com/online-guild/
 
I used to weave a header, begin my woven fabric by weaving 8-10 picks, and then hemstitch the leading edge of the piece.  There is a problem with that technique.  Isolating the 2, 3 or 4 picks and the warp ends you want to hemstitch around can be a real challenge, because you have weaving on both sides of the picks to be hemstitched.
 
I even tried weaving in a slippery yarn as a separator pick before I would start weaving the piece.  This slippery yarn, in theory, would be removed after weaving a few picks of the piece, thereby making the hemstitching a little easier.  Well,  the “slippery” yarn is not always so easy to remove.
 
Along comes Jane Stafford who showed me that you really only need to carefully lay in the picks you want to hemstitch around and begin hemstitching.  No header, no weaving extra picks before starting the hemstitching. 

This is SO much easier that I cannot believe it never occurred to me.   Simply hemstitch around those picks and then proceed to weave you piece as usual.
Picture
  • Lay in the picks you want to hemstitch around.
  • Be careful to wrap the weft cleanly at the selvedges.
  • Begin hemstitching as usual
Picture
After hemstitching simply continue weaving your piece, being careful to beat the first couple of picks in well.

Tip 2:
The second tip improves your visibility for hemstitching.  Depending on the color of my warp, I find that seeing t​he warp ends and counting them correctly can be challenging.  I place a contrasting sheet of paper UNDER the warp, and voila: visibility improves dramatically.
Picture
BEFORE...
Picture
And AFTER adding white paper under the warp.

4 Comments

​Dabbling with Turned Twill: Finding my Cat’s Pajamas

6/16/2018

26 Comments

 
It all started with a beautiful skein of variegated yarn - a gift from my friend Sue - and a memory of seeing a scarf that had  weft-wise stripes on one side of the scarf that magically disappeared on the other.

The yarn I wanted to use was a 10/2 mercerized cotton called "Boot Camp", handpainted by Claudia Yarns.

The magically striped scarf remained a complete mystery until recently when Jane Stafford dropped a hint on one of her early videos that unlocked the key for me: the scarf can be woven in a turned twill and the trick to the disappearing stripes lies in the tie-up.
Picture
"Boot Camp" by Claudia Yarns

​My favorite weave structure happens to be turned twill (also known as block twill).  I love this structure because there are an endless number of ways to vary the threading, tie-up and treadling, and the structure lends itself very easily to color changes in both threading and treadling.  A veritable weaver’s wonderland! 
​
Here is the draft for a 2 block twill that I use frequently for scarves (click on the draft to zoom in):
Picture
Picture
The Tie-up for a traditional 2 block turned twill
Block A in the above draft is threaded on harnesses 1-4 and Block B is threaded on harnesses 5-8.  
With this tie-up, when treadles 1-4 are weaving the following happens:
  • 1/3 weft-faced twill (blue) is created in the Block A sections on harnesses 1-4 while
  • 3/1 warp-faced twill (green) is created in the Block B sections on harnesses 5-8
When treadles 5-8 are weaving the following happens:
  • 3/1 warp-faced twill (gray) is created in the Block A sections on harnesses 1-4 while
  • 1/3 weft-faced twill (blue) is created in the Block B sections on harnesses 5-8

Picture
This is a tencel scarf that uses a very similar draft with several colors in the warp, including one variegated yarn.
Picture

​Now, for my magical scarf.
​I wanted my scarf to have just 2 warp-wise stripes, so I changed the threading so I had only one Block A and one Block B, like this:​
Picture
Nice, but there are two things here I wanted to change:
  1. The twill lines are going in opposite directions on the two sides of the cloth
  2. The stripes appear on both sides of the scarf

Next I changed the tie-up so I had the continuous twill line that I wanted across the whole scarf:
Picture
Picture
Angle of the twill line changed in both warp-faced tie-up quadrants

Finally I changed the tie-up to make the horizontal stripe disappear on the right side.  In the above draft,
  • Treadles 1-4 are creating exactly the kind of cloth I wanted (warp-faced in Block B and weft-faced in Block A) so I did not change the tie-up for those treadles (left upper and lower quadrants)
  • Treadles 5-8 are creating the stripe I want in Block B on the left side of the scarf, so I did not change the tie-up for that section (upper right quadrant)
  • The only area of the tie-up that I needed to change was the lower right quadrant which was creating the stripe on the right side of the scarf
Picture
Picture
Changed the face of the lower right quadrant (Block A) tie-up
By changing the face of the right lower quadrant of the tie-up from warp-faced to weft-faced, Block A (harnesses 1-4) will weave the same way whether it is being woven with treadles 1-4 or with treadles 5-8.  The stripe in Block A has disappeared!

The Cats' Pajamas Scarf
This scarf is the result of these experiments.  The warp is 10/2 cotton - One side is the "Boot Camp" handpainted  yarn by Claudia Yarns, the other is a solid green.  The weft was a turquoise 30/2 silk.  I wove regularly placed stripes on one side of the scarf for the first half of the scarf and then wove the most of the remainder of the scarf with just a few scattered stripes
Picture
Picture
Available in my SHOP

Now I wanted to weave a second scarf with stripes on the other side.
Further modifications to the tie-up allowed me to weaves stripes on the variegated side of my warp (in Block A on harnesses 1-4) while keeping the solid green side of the warp consistently weft-faced.
Picture
Picture
The first half of the scarf was woven with treadles 1-8.  Then treadles 5-8 were RETIED and the second half of the scarf was woven with only  treadles 5-8.​
Remember Block A = Harnesses 1-4 = Right side of this scarf
                        Block B = Harnesses 5-8 = Left side of this scarf
For the first half of the scarf
  • Treadles 1-4 weave weft faced cloth  on the left side of the scarf and warp-faced cloth on the right side 
  • Treadles 5-8 weave weft-faced cloth on the left  side of the scarf and weft-faced cloth on the right side 
  • This results in continuous weft-faced cloth on the left and stripes of alternating weft and warp faced cloth on the right.  Note in the tie-up that only the lower right quadrant is tied up for warp-faced cloth.  That quadrant control treadles 1-4 and harnesses 1-4.
For the second half of the scarf the ONLY tie-up that is needed is the new tie-up for harnesses 5-8, shown in blue above;
  • This tie-up now produces warp-faced cloth on the left side of the scarf and weft-faced cloth on the right side
  • Note that the angle of the twill line has remained the same throughout the cloth

Mossy Stones Scarf
This scarf was woven on the same warp as "The Cat's Pajamas".  The warp is 10/2 cotton - one side is the "Boot Camp" handpainted  yarn by Claudia Yarns, the other is a solid green.  The weft was slightly variegated gray 30/2 silk.  I wove regularly placed stripes on the variegated side of the scarf for the first half of the scarf and then wove no stripes for the remainder of the scarf.
Picture
Picture
Available in my SHOP

These experiments with the tie-ups for turned twill have taught me a lot and opened up a world of possibilities for more experiments with shapes and colors.  I have another color block experiment going on to the loom now.  I will shared the results in the near future!

-- Pattie Lamb

26 Comments

Some of my Favorite Tools (and where you can find them)

6/4/2018

2 Comments

 
Over the years I have gathered many tools that have become indispensable to me in my studio.  Here are a few that are easy to find online.

Picture
Heddle Bar Clips
​Officemate OIC Slide On Plastic Clips, Assorted Translucent Colors, Tub of 60
Amazon $4.29 as of 6/2018

​I use these on my heddle bars to keep the extra, unused heddles back away from the weaving - a vast improvement over tying them back with string and MUCH easier to use than those little binder clips


Shoelaces!
​These are "DIY White Shoelaces"
Oriental Trading Company $5.99 for 12 pairs as of 6/2018

I use shoelaces for tying off my warp chains, among other things in the studio.   These are great because they last forever.  I have shoelaces in my studio that are 25 years old!
These are 48” long.  I cut them in half, so 12 pairs gives me 48 shoelaces!
Picture
Picture
Picture

Treadle Bands
Goody Girls Ouchless Elastics, 2 mm, No metal
Target or Amazon, various counts and prices

I use these on my treadles so I can treadle without peaking:  “Braille” for my feet.  I put them on all of my treadles and slide certain ones down so my feet can feel them and others up out of the way so I cannot.  I like to put 3 on each treadle so they are "bulkier" and easier to feel with my feet.
Picture
Picture

Pick Counter
UltraOptix Linen Tester-Loupe Magnifier
Amazon, $9.52 as of 6/2018

This is an inexpensive magnifier that helps you count picks per inch (or examine your cloth for errors).  The window is exactly 1” square.  You place the window on the cloth and look through the magnifier while you count.
Picture

Picture
Curved Scissors
Beadalon Squeeze Scissors, Curved
Amazon, $7.79 as of 6/2018
​
I use these for trimming threads close to the surface of my finished cloth. The curved blades let you get close to the cloth without cutting the cloth.

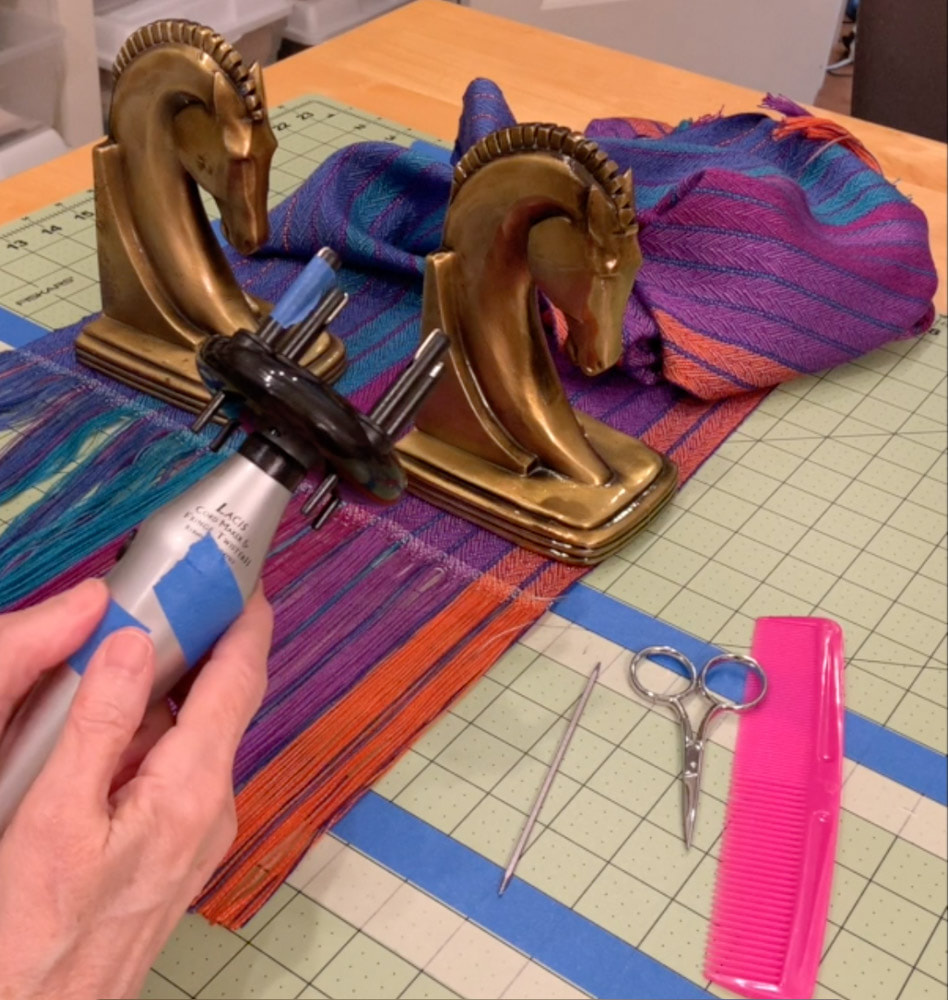
Fringe Twister
This one is the Lacis Fringe Twister
A newer version is on Amazon, $21.96 as of 6/2018
​
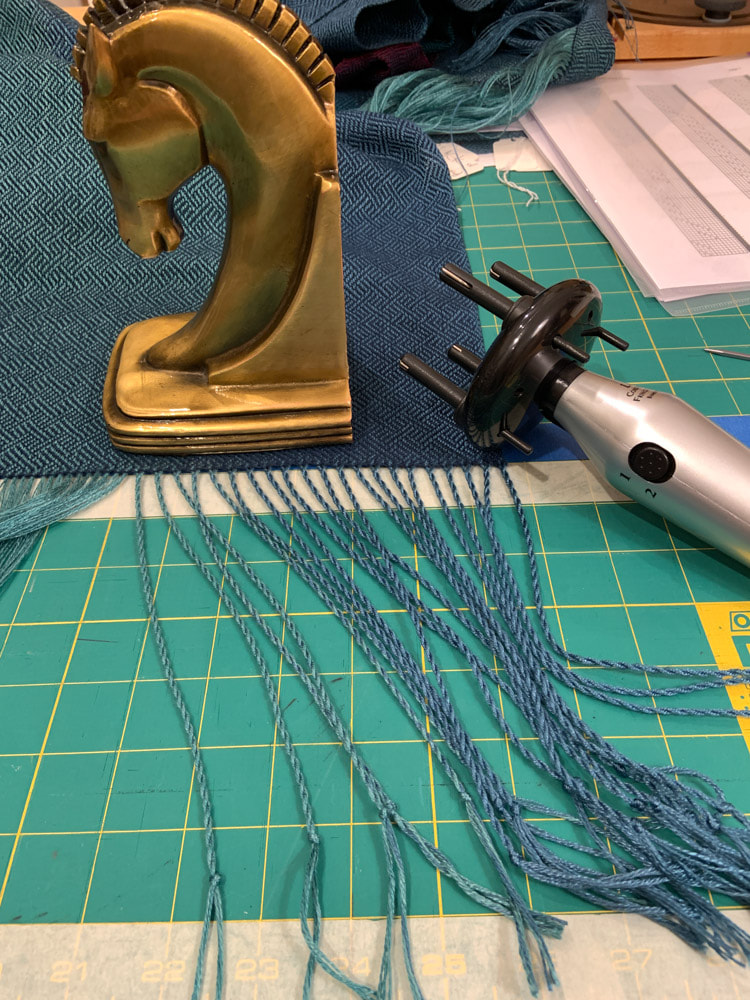
I use this for twisting all of my fringe (I only use 2 of the prongs).  It is battery powered and has been a life saver.  There are other versions of this on the market.  Shop around.
Picture

2 Comments

Out Out Damned Cat: Repairing Yet Another Rug

7/19/2017

4 Comments

 
Picture
Lizzie, the culprit

​​She looks really innocent, doesn't she?
She is a very sweet cat.  
Her name is Lizzie.  
She is two now,
​Lizzie narrowly escaped death by weaver at age one. 
​
​I have (had) a handwoven wool rug at my front doorway.  I wove the rug over a decade ago when we lived in Buffalo.  So about a year ago I bent over to pick up what I thought was a dead moth on the rug. Much to my horror, I discovered it was a severed knot from one of the fringe bouts.  On further inspection I realized that the knots had been chewed off of no fewer than THIRTY FIVE fringe bouts!
Picture
1 of 35 severed fringe bouts
​There were only three possibilities (all cats):
  1. Pressy who was 21 years old and could hardly walk
  2. Dexter who was 16 years old and literally has no teeth
  3. Lizzie the baby in the family, full of vim and vigor and still teething and about to be murdered by her loving mother

So Lizzie was found guilty by a process of elimination.  I pulled the rug up and growled and fumed for a few days while I debated what to do.

Fully a year later, I finally got around to repairing this debacle.  Fortunately, I still had some of the linen I used for the warp for the rug.  And the structure of the rug was a simple plain weave.
 

​Tools needed:
  • Heavy duty needle with a sharp point for undoing linen knots
  • Linen Warp
  • Tapestry needle for weaving in new fringe
  • Scissors
  • Fringe twister
Picture
The tools
A photo journal of the steps for replacing the fringe follows.  The basic steps are:
  1. I untwisted the fringe of the severed bout (for this rug the fringe bouts consisted of only 2 warp ends)
  2. I untied the knot at the fell of the cloth (using the sharp needle to help pick out the knot)
  3. With the tapestry needle, I wove the loose ends 3/4-1" back up into the rug alongside the warp thread NEXT to the thread I was weaving in
  4. I trimmed the ends close to the surface of the rug
  5. I cut a piece of rug warp that was about 14" long and wove it 1 1/4" - 2" up into the rug along one warp end, turned and wove down along the other warp end back to the fell of the cloth
  6. I knotted the 2 ends together at the fell (like the original 2 warp ends were knotted) 
  7. I twisted the fringe (the 2 new warp ends) and knotted at 3" and clipped close to the knot
  8. I repeated this for 23 bouts on one end of the rug and 12 on the other end of the rug, until my fingers were raw and the rug was almost back to new!
 
Picture
The fringe has been untwisted
Picture
The knot at the fell has been untied
Picture
Weaving the right warp end up alongside the left warp end
Picture
Weaving the left warp end up alongside the right warp end
Picture
Both warp ends woven back into the rug
Picture
Old warp ends trimmed close to the rug surface
Picture
New warp ends woven up 2" into the rug and back down to the fell
Picture
New warp ends pulled snuggly into the cloth
Picture
New warp ends ready to knot at the fell
Picture
Warp ends knotted at the fell, twisted, knotted at 3" and ready to trim
Picture
The finished repair
What a relief to finally have this little project done and the rug repaired.  I have missed having it at my front door.  ​

​But unfortunately now it will probably go back into storage for another two years because....

​Piper has arrived.
Piper is 2 months old.
She is a good kitten.
She has teeth.

Picture
Piper, the new kitten
Picture
Truth be told, the rug would probably have stayed in the closet waiting to be repaired if I had not been inspired and shamed into doing this simple repair after watching this incredible post on Facebook.  Watch and be amazed:  Oriental Rug Rebuild

4 Comments

Tip of the Month: Braille for the Feet

7/2/2017

0 Comments

 
​
​I have long used rubber bands on my treadles to mark my path and help me treadle without peeking.  It is a great tip.  But I go through rubber bands like they are water because they dry rot very quickly.  And they are hard to roll up and down the treadles between projects.
​
​Enter my student Jane Hunt.  She told me she liked my idea so much, she went to Target and bought a handful of ponytail holders!  She found that they slide up and down the treadles easily, and they are bulkier than the rubber bands. Bonus: I am sure they will hold up much longer too!  Thank you, Jane!  Why didn't I think of that??

As it turns out there are dozens of kinds of ponytail holders.  I picked the ones that I could double up and would fit well over my treadles.  Hence my unabashed ad for Goody.  These are nice because they have no metal joins on them that could scratch the wood.
 
Picture
Picture
BEFORE: Rubber bands on the treadles, ready to walk the treadles for a point twill
Picture
AFTER: Ponytail holders in place. The blue and green ones have been pulled down where my feet can feel them. I will walk this pattern from the center out, just as I did in the photo to the left.

​Walking the treadles:

I tend to walk my treadles from the center out whenever my pattern allows me to do so.  When I do that, I will put bands on the two center treadles so I can find my way back to center without peeking.  I also place bands on every other treadle going out from the center.
Picture
​
​Treadling straight across:
On the rare occasion that I tie up my treadles straight across, I simply put bands on the odd treadles and leave the even numbered treadles naked.
Picture
​
​Treadling pattern with tabby
If I have 2 tabby treadles and a group of pattern treadles, my personal preference is to have the tabby treadles on one side and the pattern treadles on the other.  If the tabby treadles are on the left, I will put a band on tabby a and leave tabby b naked.  I will then put bands on all of the odd numbered pattern treadles and leave the even numbered pattern treadles naked.
Picture

0 Comments

New Life for a Little Rug

6/18/2017

0 Comments

 
Picture
This is what the fringe USED to look like.
​Years ago I wove a little Rag Rug to use in front of my kitchen sink.  I finished the rug with twisted fringe and left the fringe about 4" long - probably too long.  Over the years I have had to periodically retie some of the fringe bouts,  but slowly but surely more and more of the bouts had become untied, frayed and I could no longer re-twist them and knot them back to their original length. In addition, some of the warp threads in the body of the rug had broken and the rug was really looking shabby and worn.
Remember: You can click on any picture to zoom in!

​Step 1:
I first decided to re-twist the fringe bouts that had come undone and to shorten all of the bouts to the shortest common denominator.  It seemed that I could get away with shortening them all to about 1 1/2". There are a couple of bouts where the ends were so frayed that I do not have high hopes for them holding up for much longer, but at least they are shorter now..
Picture
The newly shortened fringe
Picture
This shows a broken warp thread and a row of rag weft floats above it. These need to be repaired.
Picture
These are the only tools I need: a tapestry needle and the matching rug warp

​Step 2: 
​I gathered the tools I would need for repairing the broken warp threads The warp used in this rug was 8/4 cotton rug warp used double, and luckily I still had some on hand (this will not surprise anyone who knows me and has seen my yarn stash).  

So now all I need was a tapestry needle threaded with a doubled strand of the warp thread and a little patience. The weaving should be easy because the rug was woven in plain weave.

​Step 3 - Fixing the Broken Threads
  • I started about 2-3" below the broken warp thread (photo 1)
  • I wove along the same warp thread with the repair thread for the 2" until I got to the break (photo 2)
  • At that point I have to weave over and under the rags in the same way the missing warp thread used to.  It helped to hold the needle in my right hand and put my left hand underneath the rug for support (photo 3)
  • When I reached the end of the damaged area, I continued to weave along the same warp thread for another 2-3 inches.  When I finished with the weaving I checked the weaving on both sides of the rug.  
  • When I was satisfied, I pulled on the ends of the repair threads where it entered and exited the weaving to "seat it" in the cloth.  
  • Then I trimmed the tails of the repair thread and the broken warp thread from the surface of the rug.​
Picture
Photo 1: Starting 2-3" below the break. Broken warp thread can be seen at the top of the photo.
Picture
Photo 2: Weaving up to and just beyond the break in the warp thread.
Picture
Photo 3: Weaving continues above the break - over and under the weft floats.
Picture
My supervisor
Picture
Weaving is finished. The tails have not been trimmed yet. Lizzie is checking my work.
Picture
The finished rug. Hopefully with a few more years of life in it.

​All done!  
And I think the rug looks better with short fringe anyway.

0 Comments

Walking More Than Pink

5/7/2017

0 Comments

 
Picture
May 6, 2017.  Triangle Race for the Cure. 

​8000 walkers, runners, and volunteers converged to support each other and raise money for the Susan G. Komen Foundation.  Some survivors of breast cancer, some friends and family who have been touched by breast cancer, some who simply wanted to help in any way they could.
Picture
​I was prepared for the 5K walk. 
​
My husband John and I had actually "trained" for the walk for several weeks by walking regularly and getting our mileage up to close to the 3 miles we would need to do for the walk.  As an aside, as a not-so-long-ago long-distance bicyclist, I thought it was pretty sad that I needed to train to be able to walk 3 miles, but walking is harder that I thought it would be.
I was NOT prepared  for many things that I saw and felt that day.

​The crowd was huge.  And we saw people of all possible descriptions, young and old, male and female, big and little.  It was a virtual sea of pink.  Pink is beautiful!  Crazy costumes were everywhere - most notably men and women sporting pink tutus, layers of Hawaiian leis or humorous or inspirational t-shirts.  Breast cancer survivors proudly wore pink t-shirts.
 
I was there with my husband and fellow members of my weaving study group, The Warpsters - Janice Kohl, Charlotte Carroll, and Sharon Grubb.  Other Warpsters were there in spirit but could not join us that day. We met Janice's sister, Pam Kohl, for whom we were walking at the Pam's Parade tent.  And we were joined there by two more of Janice's friends, Barbara and Alan.

Picture
The Warpsters study Group, wearing our handwoven scarves
Picture
tutus :-)
Picture
Charlotte
Picture
Janice and Sharon
Picture
John and Oswald
Picture
Charlotte, Pattie, and Sharon
I was NOT prepared for how emotional the whole day would be.
​
Picture
Survivor procession
There were tears during the survivor ceremony.  The breast cancer survivors walked together in a procession down to the stage, lead by those who had survived for 1-4 years, followed by those who had survived for 5-9 years, followed by the 10-14 year survivors, and so forth.  At the end of the parade were the Multiple Survivors, the Forever Fighters and the 25-29 Year survivors.  I think every one of them had smiles on their faces. Those of us watching them had a harder time controlling our emotions.

​Janice Kohl who walked with us said "​My sister Pam Kohl is the woman on the right. It was a very emotional day today to see her walking in the survivor ceremony with the Forever Fighters."
 
Picture
Pam Kohl, on the far right
​Pam Kohl says "The second time is so much harder. It shakes you to the core in many ways because now suddenly you know in a whole new way that this maybe was not just one small detour…that maybe it has become a road with unknown minefields and that is very scary. You begin to lose trust in your own body. It sometimes feels like it is fighting me, and I wonder what it is I am supposed to be learning from all of this. One thing is for sure, cancer is very, very smart, and it is very personal in that it works differently in different people. It takes a truckload of strategies to find the ones that will work for you
I was NOT prepared for the walk.
​

We had a blast!  And we were thankful that it was very cool. But it was hard work.  I was surprised that we actually walked about 10K that day  by the time we got to the start of the walk, walked the 5K, and got back to the car after the walk, because well it added up.  I wouldn't have had it any other way.  Let's just say I had a very nice nap when I got home that afternoon.
Picture
At the halfway point in the walk: Alan, Barbara, Pattie, John, Janice, Charlotte, Sharon (and of course flamingos Oswald and Esmerelda)
Picture
Barbara, Janice , and Sharon just off screen
Picture
The crowd en route
Our team raised a lot of money for Pam's Parade and the Susan G. Komen Foundation, and I think we would all do it again in a second.  

​It is not too late to make a donation.  So far $800,000 of their $1 million  goal has been raised. Fundraising will continue through early June, 2017.  To donate now, just click on this link http://www.info-komen.org/site/TR?fr_id=6796&pg=team&team_id=376896.  Thank you!

​-- Pattie Lamb
0 Comments

Weaving More Than Pink

4/28/2017

2 Comments

 
Picture
Janice and Pam
It all began with Pam.
 ​Guild member, Janice Kohl's sister, Pam, is the executive director of Triangle Susan G. Komen and is currently fighting her own battle with metastatic breast cancer.  You can see a little of her inspirational story here:
http://www.wral.com/komen-director-learns-new-normal-after-cancer-spreads-/16527083/
​
​So we would walk.
​The Warpsters Study Group decided we wanted to take action and be More Than Pink.  We would be part of the team "Pam's Parade", and we would be raising money and walking in the Race for the Cure on May 6th in the Research Triangle Park.  My husband and our family mascots, Oswald, Jr. and Esmerelda would join us.
​
Picture
Oswald and Esmerelda
​But first we wove.
 ​We decided that scarves were in order for a bunch of weavers walking in a More Than Pink event. Some of these scarves would be worn by the walkers. Some would be sold and proceeds donated to the cause. 
I put on 3 pink and white warps for 5 scarves each:
  • A warp of white 40/2 linen and 16/1 flamingo pink linen to be woven in plain weave
  • A warp of 16/2 cotton in primarily bright pink with white stripes in a point twill threading
  • A warp of 16/2 cotton in primarily white with bright pink stripes in a point twill threading​

​The Linen Scarves
  • Warp: white 40/2 linen and pink 16/1 linen, 200 ends, sett at 24 epi
  • Threading: 4321
  • Weft: 16/1 linen (white for 3 scarves, hot pink for 1 scarf, dusty pink for 1 scarf) woven at 22 ppi
  • Treadling: plain weave
Picture
Threading & tieup for the linen scarves
Picture
Picture
Picture
​
​The Pink Scarves with White Stripes
  • Warp: 16/2 cotton: predominantly pink with white stripes, 253 ends + 2fs, sett at 30 epi
  • Threading: 12345678765432 (point twill)
  • Weft: 16/2 cotton (white for 4 scarves, pink for 1 scarf), woven at  approx. 28 ppi
  • Treadling: Differed for each scarf, but all were variations of a block treadling with varying repeats of block A (treadles 1-4) alternating with block B (treadles 5-8)
  • Warpster Jane Patterson wove her own scarf to wear in the Race for the Cure using a white cotton weft
Picture
Threading for the pink scarves with white stripes
Picture
The tieup
Picture
Picture
Pink scarf with white stripes / white weft
Picture
Pink scarf with white stripes / pink weft
​
The White Scarves with Pink Stripes
  • Warp: 16/2 cotton: predominantly white with pink stripes, 253 ends + 2fs, sett at 30 epi
  • Threading: 12345678765432 (point twill)
  • Weft: pink 16/2 cotton for 4 scarves, white 16/2 bamboo for 1 scarf, woven at  approx. 28 ppi
  • Treadling: Differed for each scarf, but all were either a point treadling OR variations of a block treadling with varying repeats of block A (treadles 1-4) alternating with block B (treadles 5-8)  
  • Warpster Janice Kohl wove her own scarf using the first tieup, a pink cotton warp  and a point twill treadling
Picture
Threading for the white scarves with pink stripes
Picture
Tieup #1 used for Janice's scarf
Picture
Tieup #2 used for the remaining 4 scarves
Picture
Picture
Janice's scarf using tieup #1
Picture
Another scarf with Tieup #2 and a pink cotton weft
​
The Walk
​We will walk on May 6th, and I will post photos of the event in the next blog post: Walking More Than Pink.  Check back after the event!
 
In the meantime, if you would like to make a donation to my fundraising team and the Susan G. Komen Foundation, click here
 
​-- Pattie Lamb
2 Comments
<<Previous

    Pattie Lamb

    I have been happily weaving since my son was born in 1988.

    All pictures on my blog are "zoomable" - just click on them to enlarge.

    Archives

    October 2019
    June 2019
    May 2019
    June 2018
    July 2017
    June 2017
    May 2017
    April 2017
    February 2017
    January 2017
    August 2016
    July 2016
    May 2016
    February 2016
    February 2015
    January 2015
    October 2014
    September 2014

    Categories

    All
    Baby Wraps
    Blankets
    Block Twill
    Block Weave
    Block Weaves
    Cat's PJs
    Challenges
    Charity
    Classes
    Deflected Doubleweave
    Doubleweave
    Dyeing
    Facebook Challenge
    Felting
    Hemstitching
    John C Campbell
    Knitting
    Lace Weaves
    Leftovers
    Life History-Day 1
    Life History-Day 2
    Life History-Day 3
    Life History-Day 4
    Life History-Day 5
    Life History-Day 6
    Life History-Day 7
    Life History-Day 8
    Life History-Day 9
    Life History-Final
    Life History Of A Scarf
    More Than Pink
    Paper Quills
    Plain Weave
    Ply Split
    Rugs
    Runners
    Scarves
    Selvedges
    Shawls
    Study Group
    Tencel
    Tie-ups
    Tip Of The Month
    Tips
    Tools
    Towels
    Travel
    Treadling For Dummies
    Turned Twill
    Twill
    Walking Pink
    Weaving
    Weaving Pink
    Wedding

    RSS Feed

         HOME       //     SHOP     //      GALLERY      //      EVENTS      //      TEACHING      //      BLOG      //      ABOUT      //      CONTACT

  • Home
  • SHOP
    • Scarves
    • Shawls & Wraps
    • Baby
    • Bags & Purses
    • For the Home
    • Odds & Ends
    • Classes
    • Shop All Handwovens
    • Schacht Equipment
  • Blog
  • Events
  • Teaching
  • Gallery
    • Scarves
    • More Scarves
    • Shawls
    • Baby
    • For the Home
    • Just for Fun
    • The Wedding
    • Komen
    • Baby Wraps
  • About
  • Contact