
|
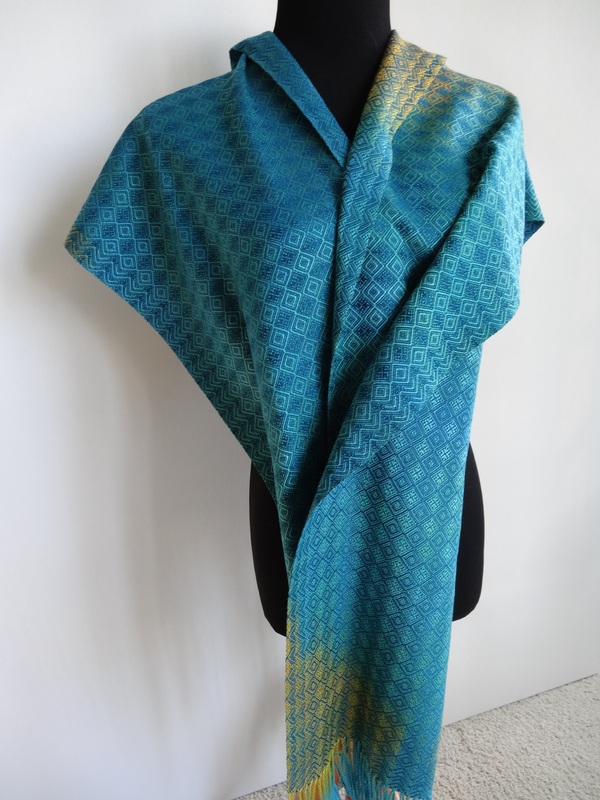
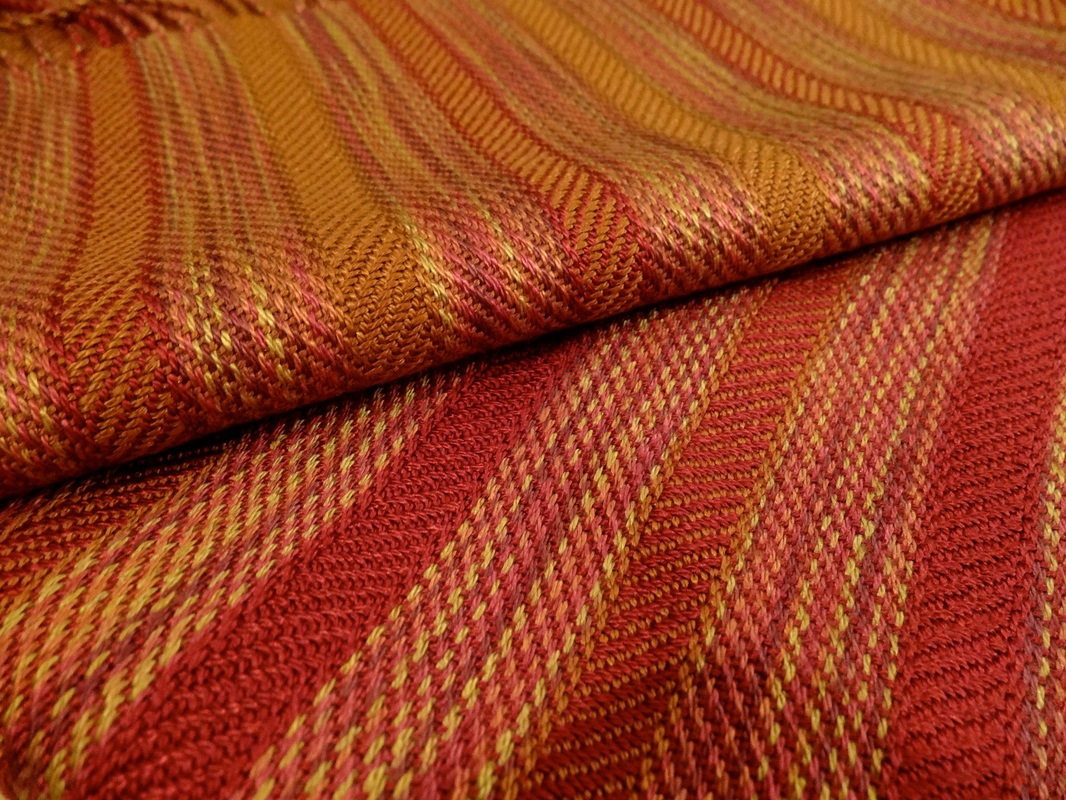
Today I am posting 3 shawls. The first is a Bronson Lace shawl woven in turquoise and light gray tencel. The second is a silk shawl woven on 16 harnesses on one of the rare warps that I dyed myself. The third picture is a pair of tencel shawls woven in cinnamon and rust tencel in a block twill. 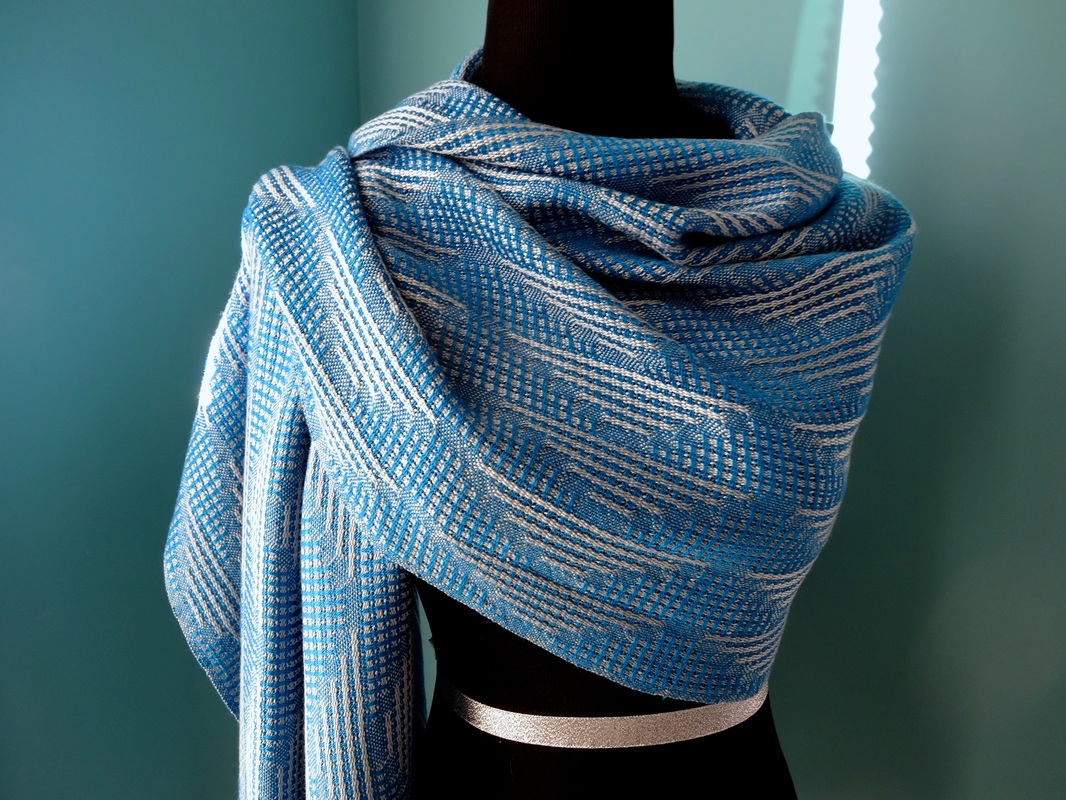 Bronson Lace Tencel Shawl
1 Comment
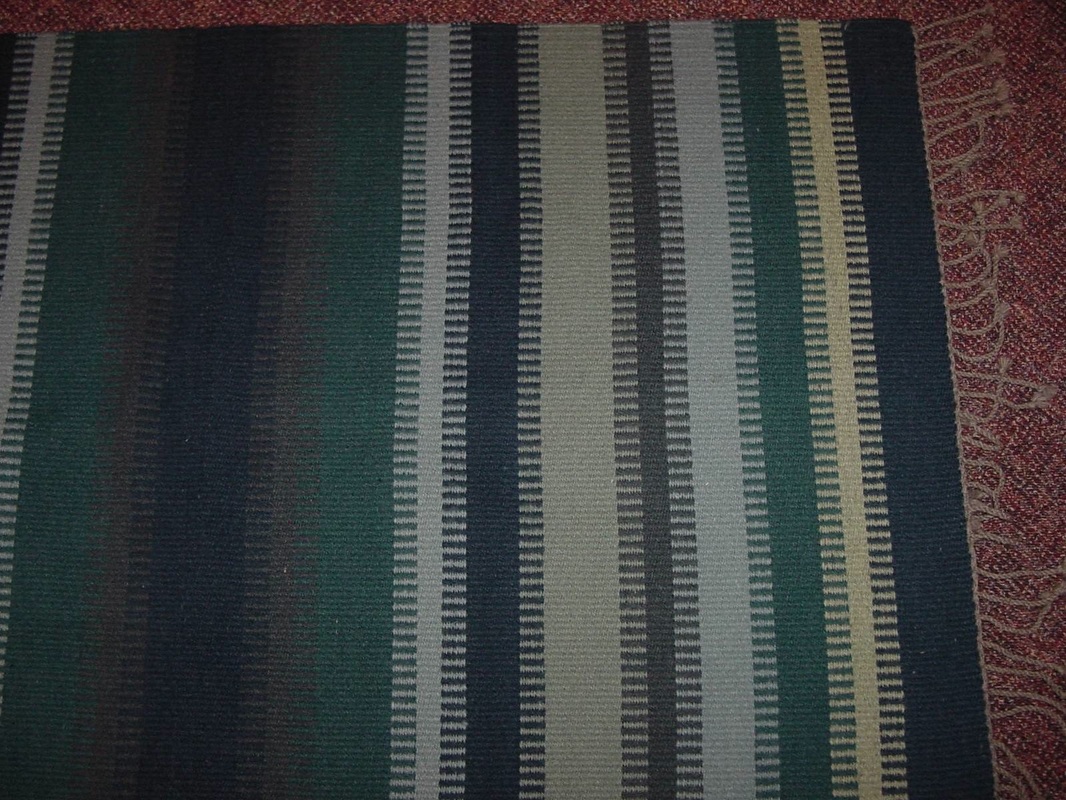
The challenge was to post 3 items I have made each day for 5 days on Facebook. I will post them here too. So I begin with rugs. The first rug was woven for my mother, a wool Krokbragd rug. The second rug is actually a wool saddle blanket (I learned too late that horses don't actually like fringe - ha ha). And the third rug is my "ratio rug" so called because it was made in the proportions allowed from the leftover yarn from the before mentioned saddle blanket (I had all of 3 yards of yarn left over when I was done). The second part of this challenge is to challenge some else to do this each day, but instead I think I will challenge my Triangle Weavers Guild Facebook group to participate. So the challenge is ON!
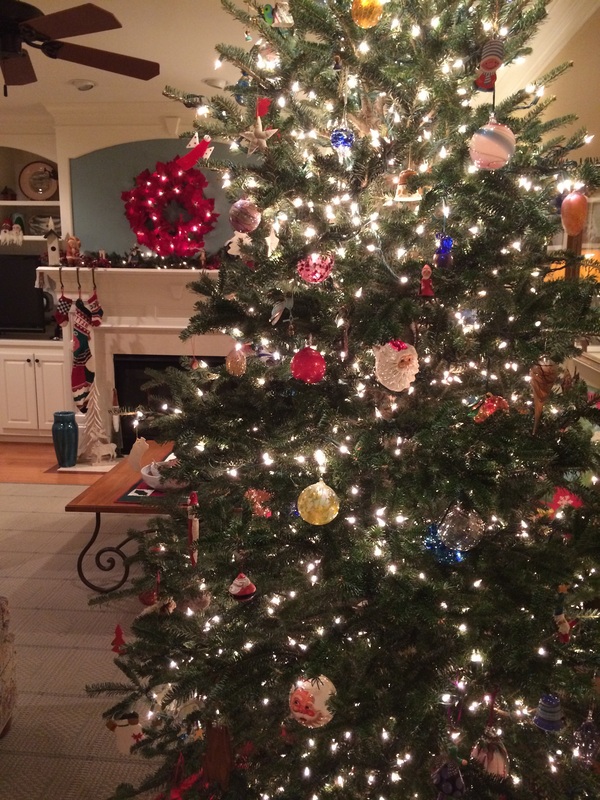
Dyeing warps falls into the same category for me as putting Christmas lights on the tree: I usually like the results, but I look forward to it with dread.
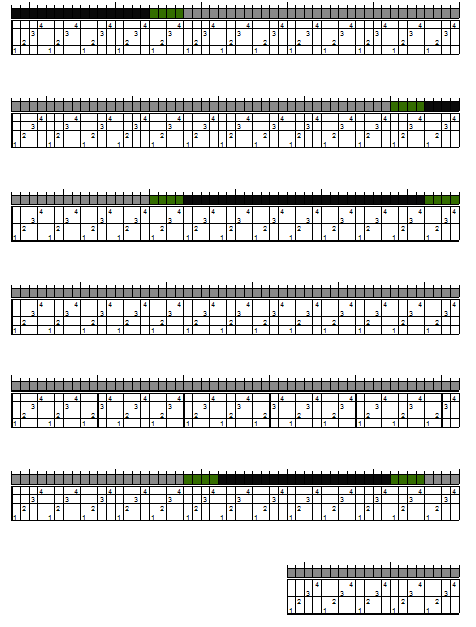
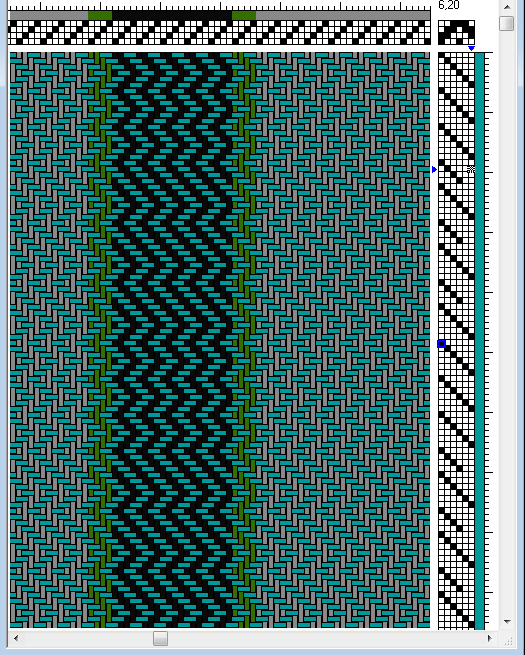
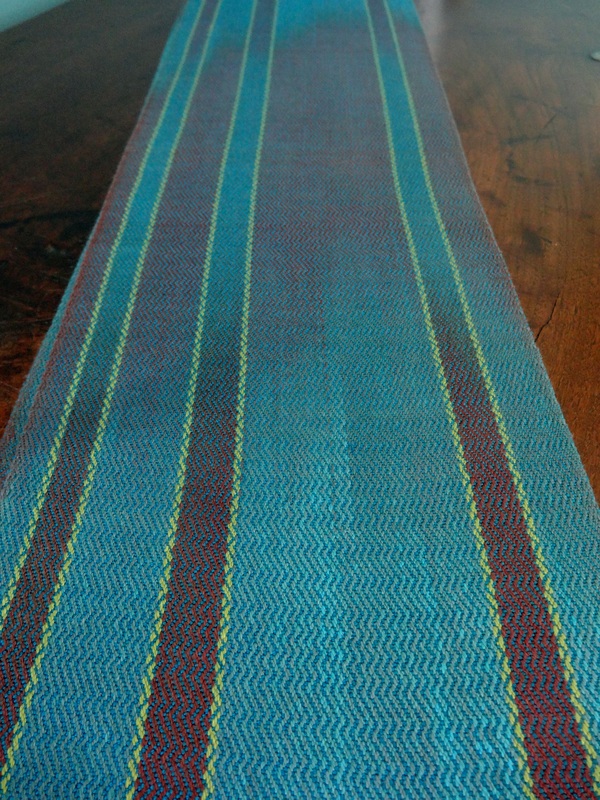
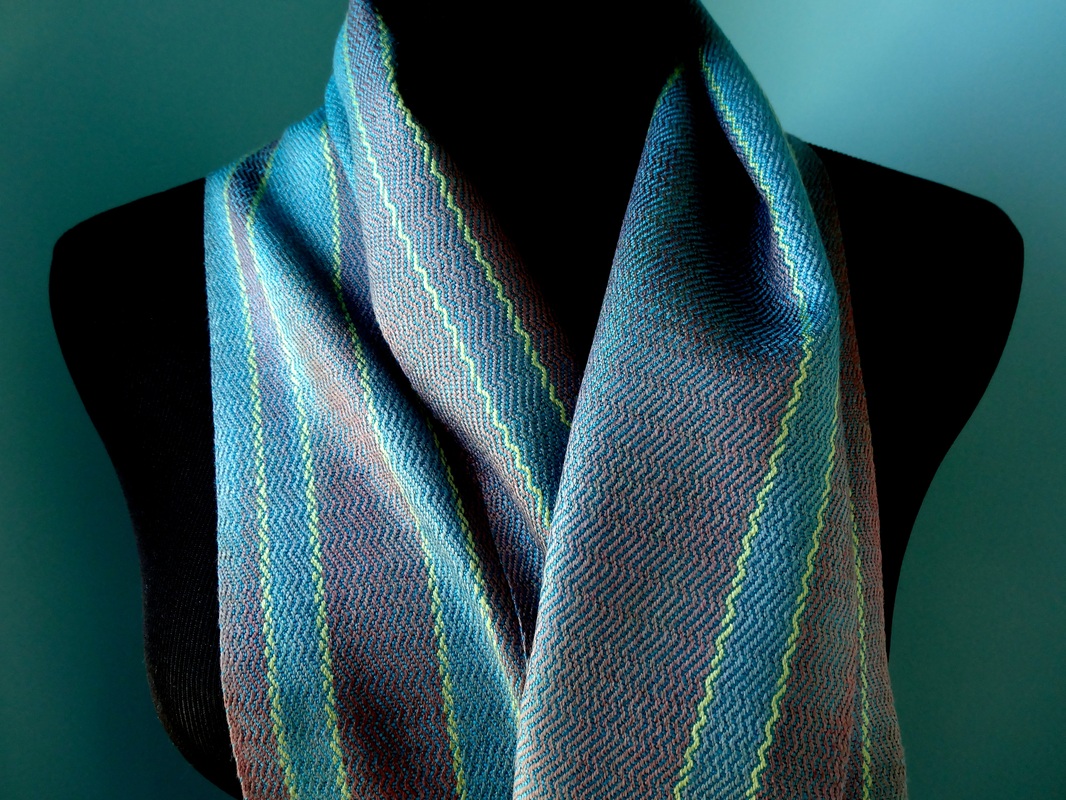
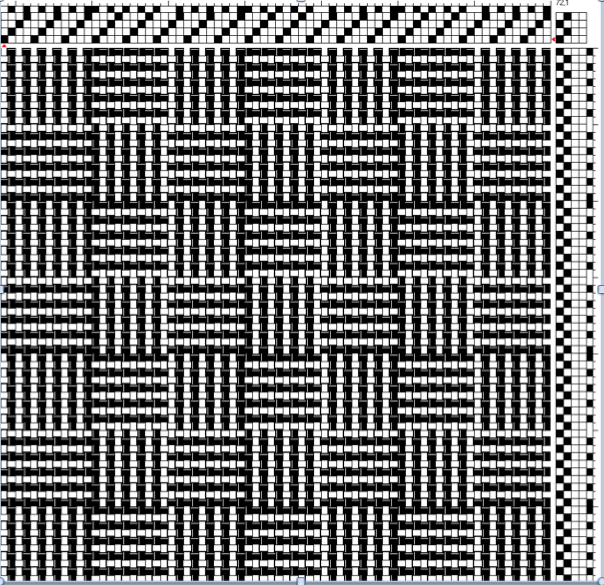
So I dye warps rarely. Usually at the annual guild Fall Dye Workshop. The latest was this fall under the supervision of Mary Kircher who is very kind and understanding. I chose to dye a 20/2 silk warp which was divided into 2 chains - one large chain of 240 ends and a small chains of 68 ends. I dyed them both with only 2 colors - a teal and a rich brown. I tried to dye them so that the teal sections in the large chain would line up with the brown areas in the small chain and vice versa when the warps went on the loom. I wound a tiny chain of 24 ends of chartreuse silk to separate the stripes of the 2 chains from each other. The draft is shown below. The gray ends represent the larger dyed chain, the black ends represent the smaller dyed chain, and the green ends represent the chartreuse silk. Click on the pictures to zoom in.
I sett the warp at 36 epi so it was quite warp prominent. I wove the scarf with a deep teal 20/2 silk weft (deeper than the teal in the warp) and it wove up at about 24-26 ppi.. I have to confess that I hated this scarf until after it was washed and ironed. It looked drab. It was stiff. And I did not like the pattern either. One it was washed and dried and pressed (I pressed it while it was still damp), it softened beautifully, the ironing brought out the sheen, and instead of looking drab it just looked soft. I like it a lot now.
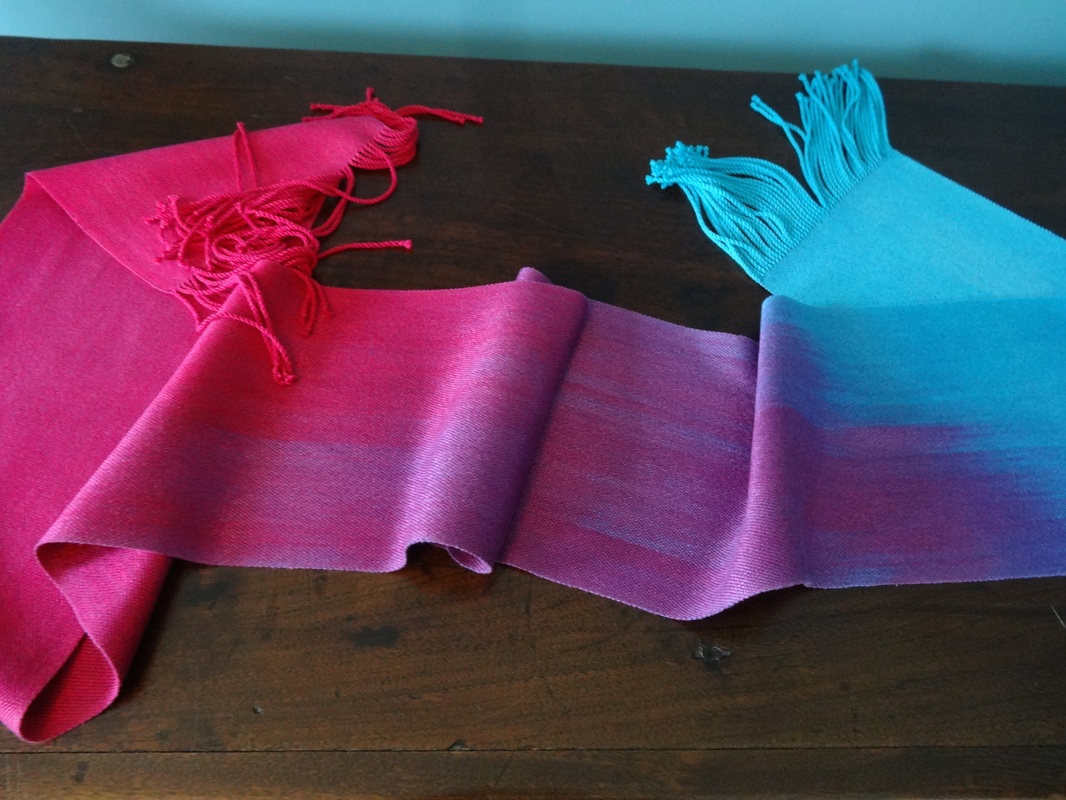
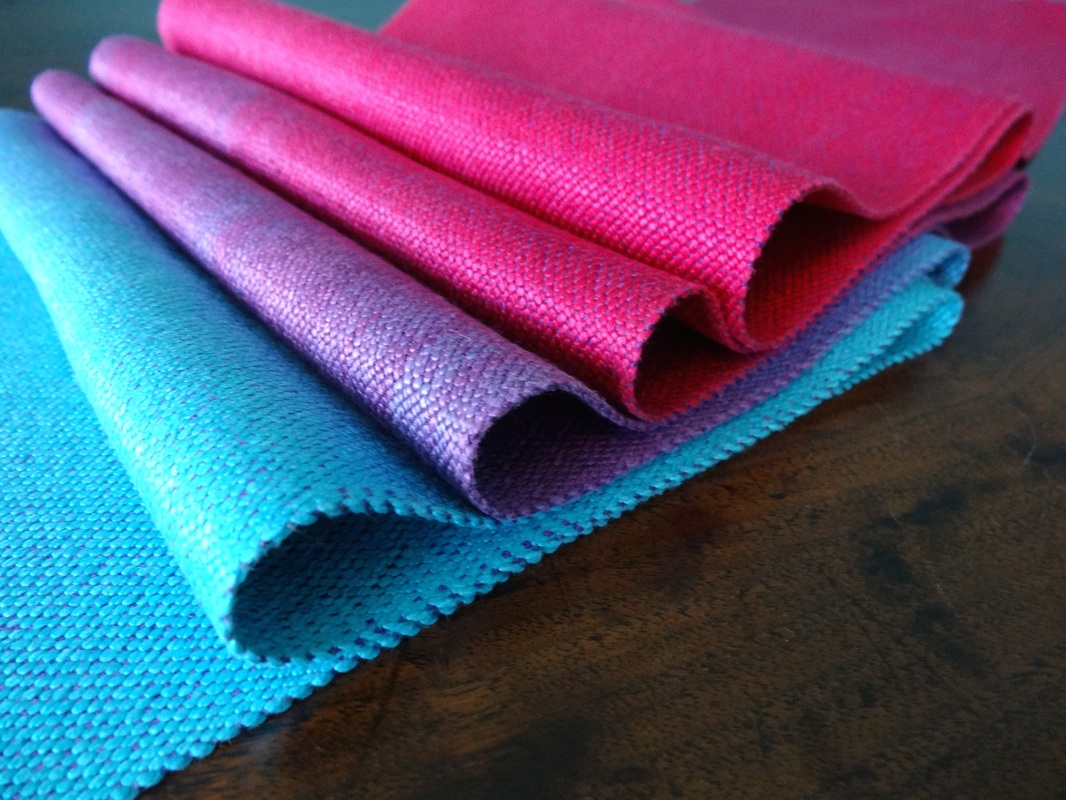
The second warp I dyed was actually left over from last year. It was 208 ends of Cascade silk. This is a much heavier silk (2000 yds/lb - about the size of 3/2 cotton). I used 2 colors: Basic red and Turquoise. I painted one end of the warp with the red, the other end with the turquoise and mixed the 2 colors together to paint the middle of the warp. Nothing fancy. When I wove the scarf, I kept it simple too. I set the warp pretty close - 22 epi. I wove it with a very fine deep purple 30/2 silk weft.and wove the scarf in plain weave at about 15 ppi. I made twisted fringe (2 ends + 2 ends in each bout) across each end of the scarf and knotted them at 6". Washed in the machine on gentle. Dried until damp and pressed with a hot iron until dry. Done.
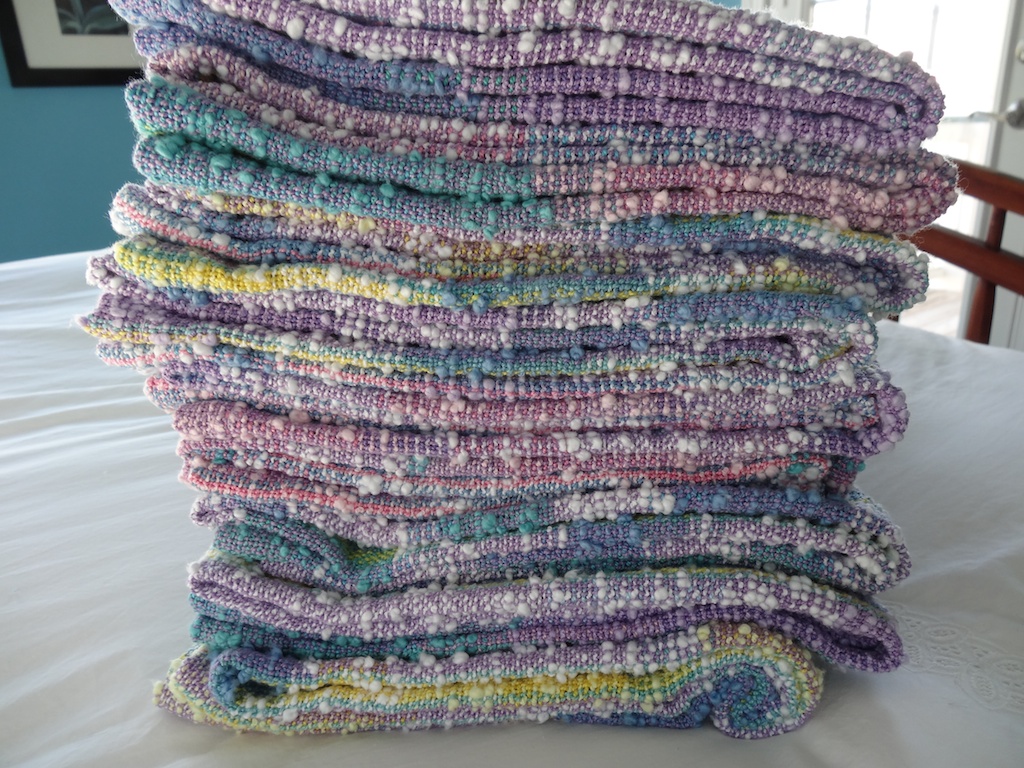
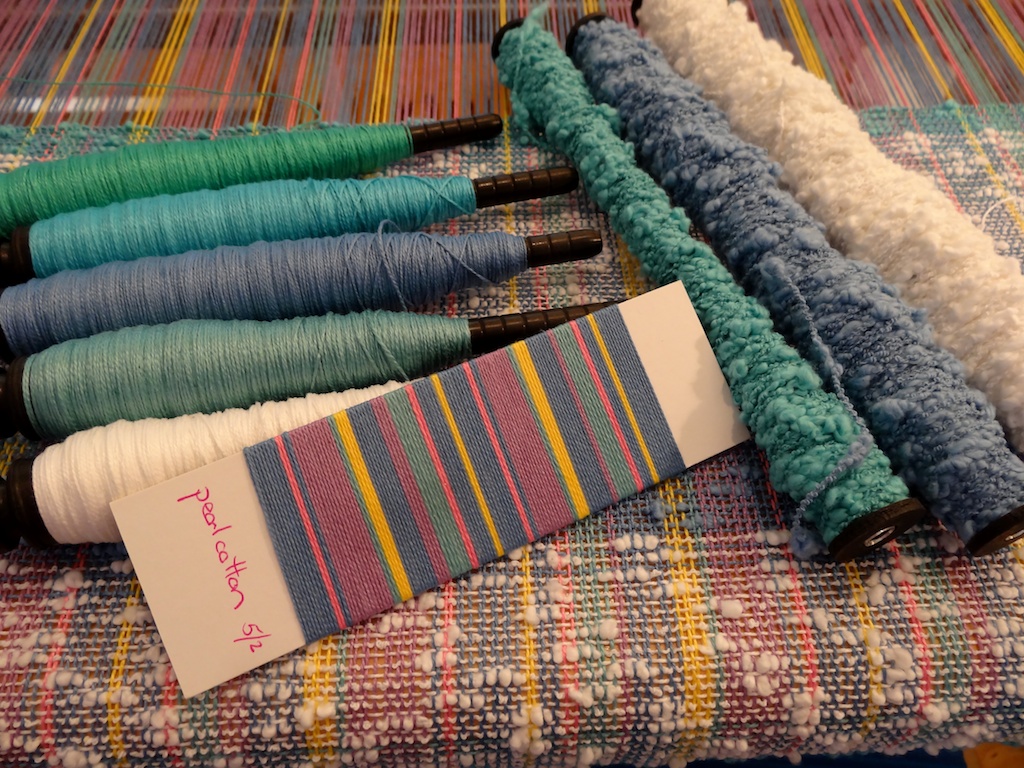
I few weeks ago I put on a multicolored pearl cotton warp for 9 baby blankets. These are blankets I have been weaving for years, and I always enjoy weaving them. They are kind of "design as I go" blankets, and for that reason it takes a little while for me to get going with them once they are on the loom. So... they stayed on the loom for about three weeks before the weaving began.
Tip # 2: Selvedge Control. When weaving plain weave with two shuttles it is important to interlock the weft yarns to get neat selvedges. Positioning the shuttles correctly is the key. Pay attention as your shuttle exits the shed. If the edge thread is up, place your shuttle near the fell of the cloth. If the edge thread is down, place your shuttle near your body. If you do this, the wefts will always interlock.
When the blankets are done, I will post pictures of them in the Gallery.
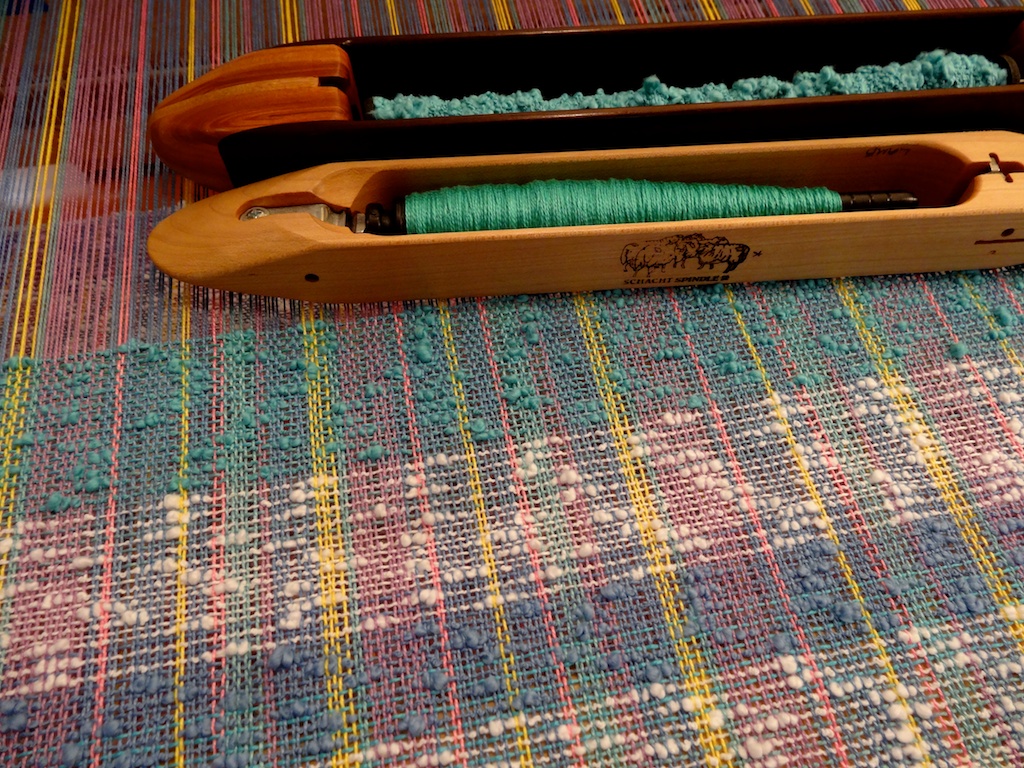
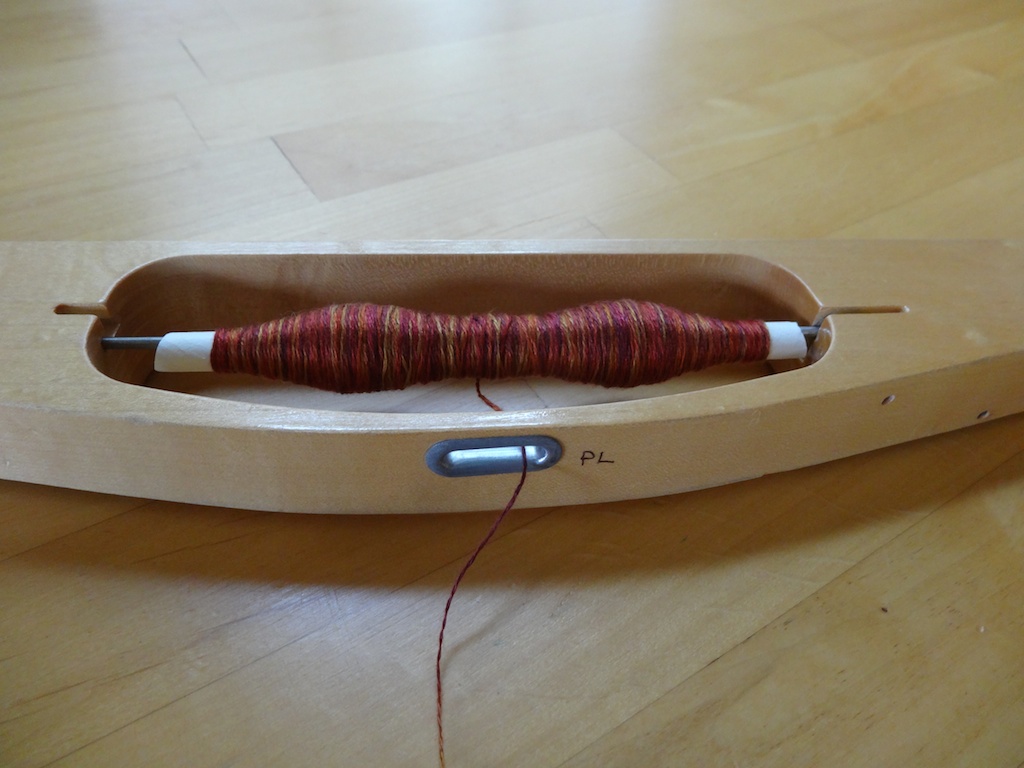
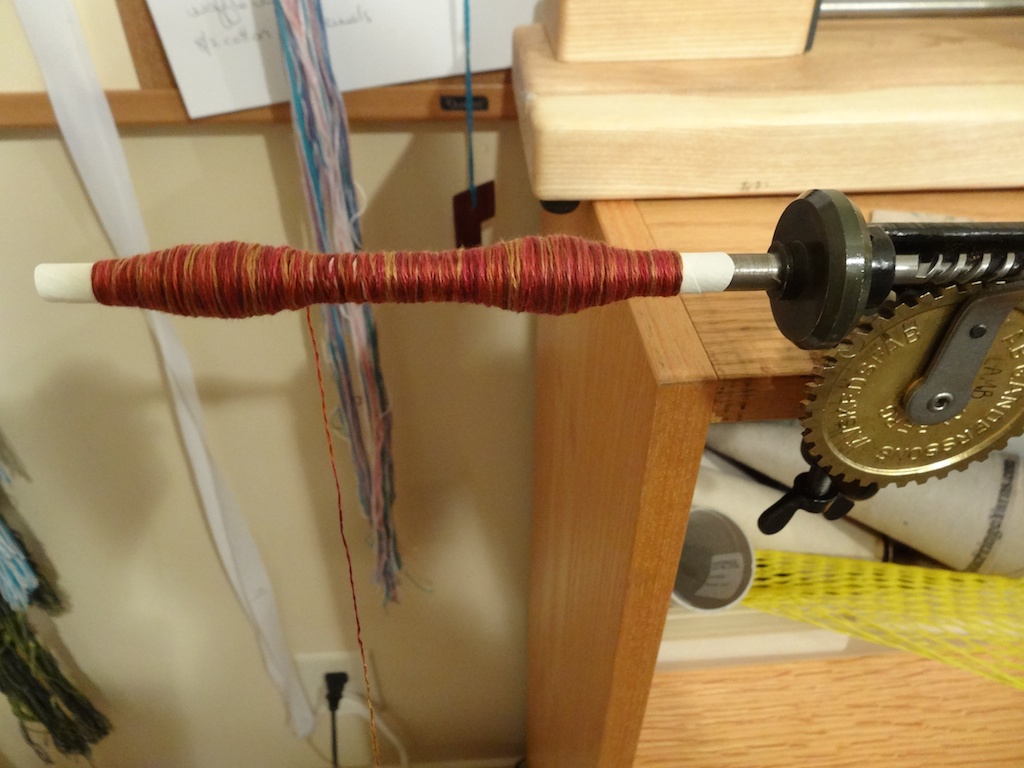
I tend to weave with fine yarns, and when I do, I weave with an end-feed shuttle and pirns. Yet I still find using paper quills invaluable.
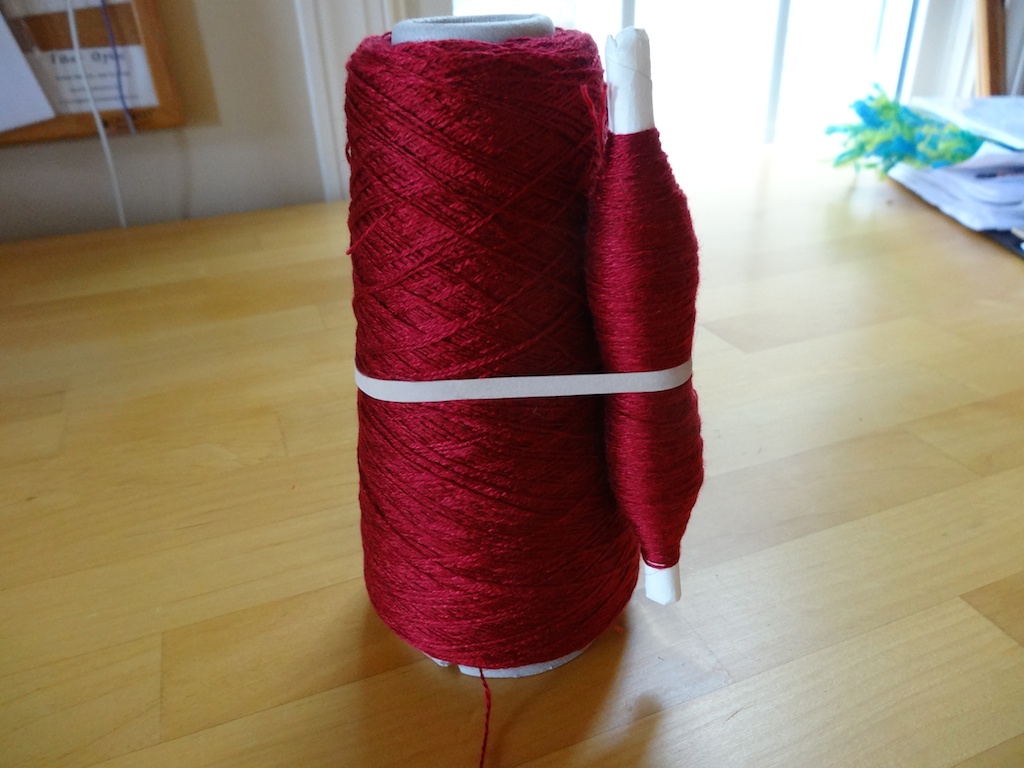
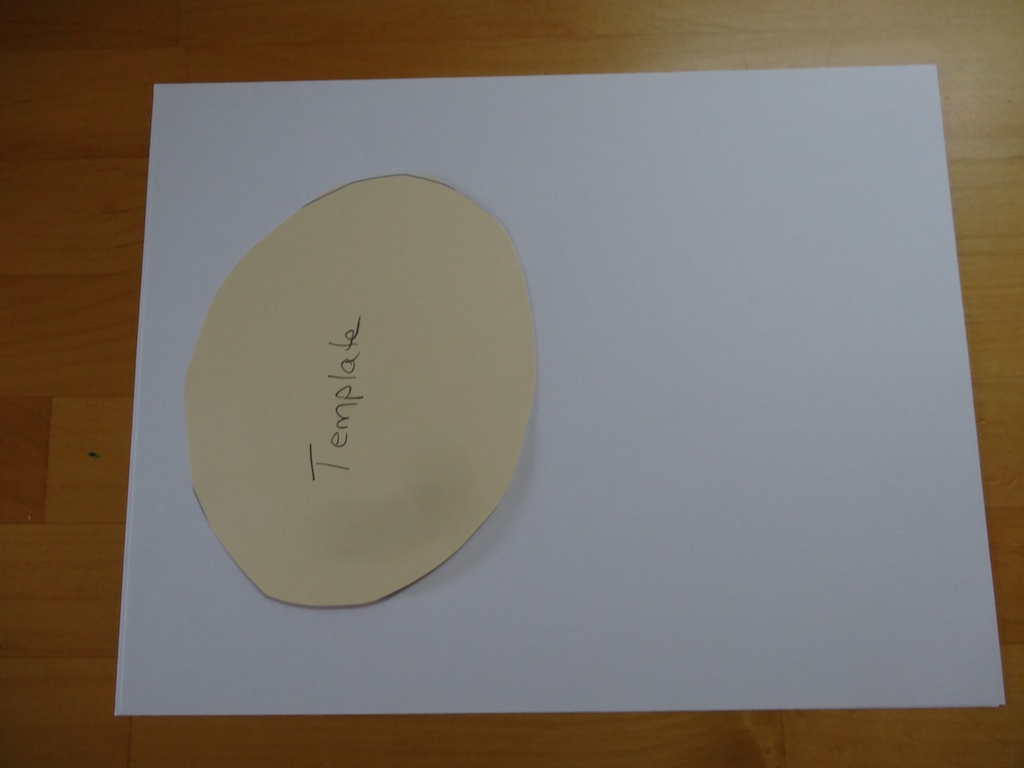
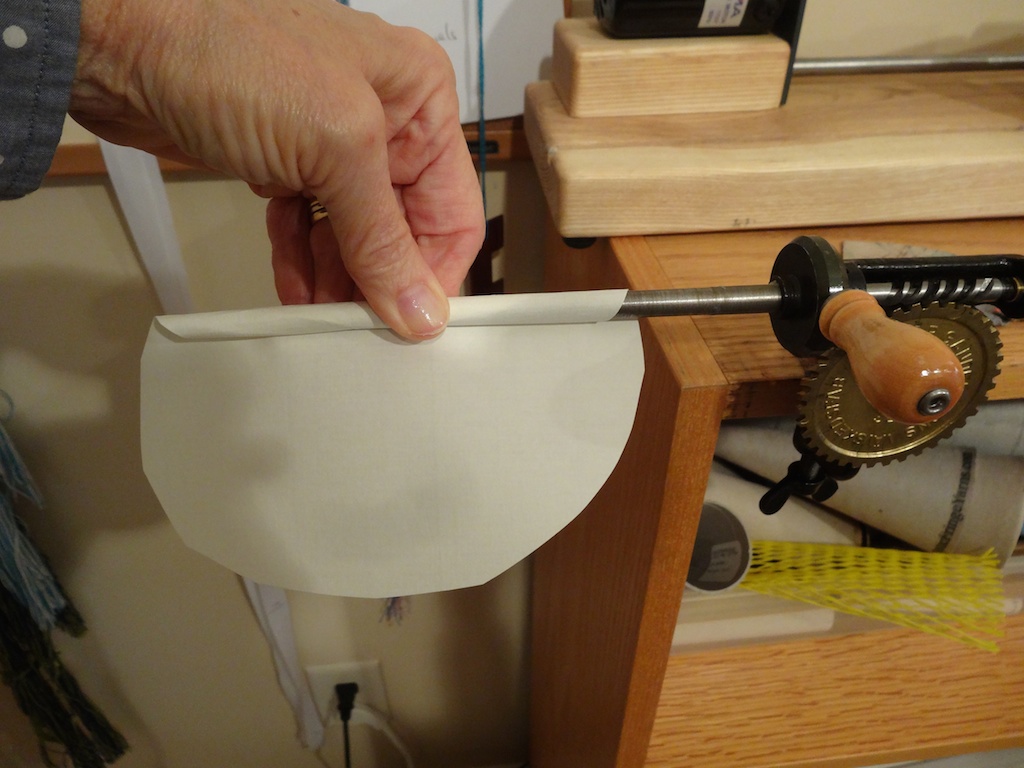
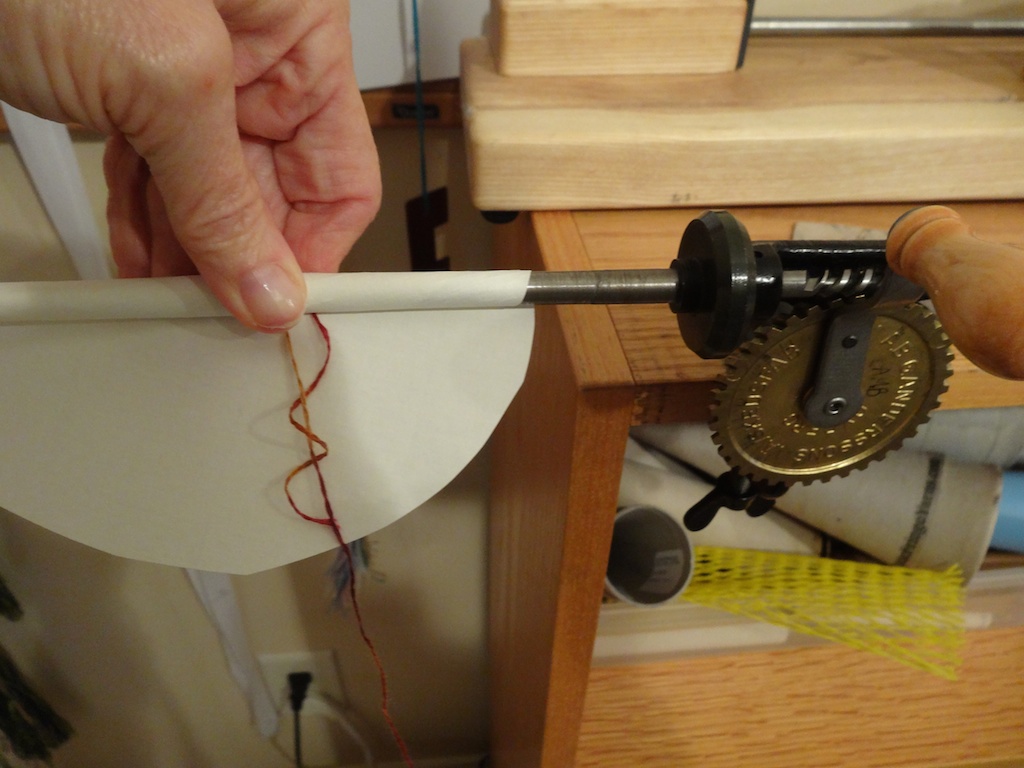
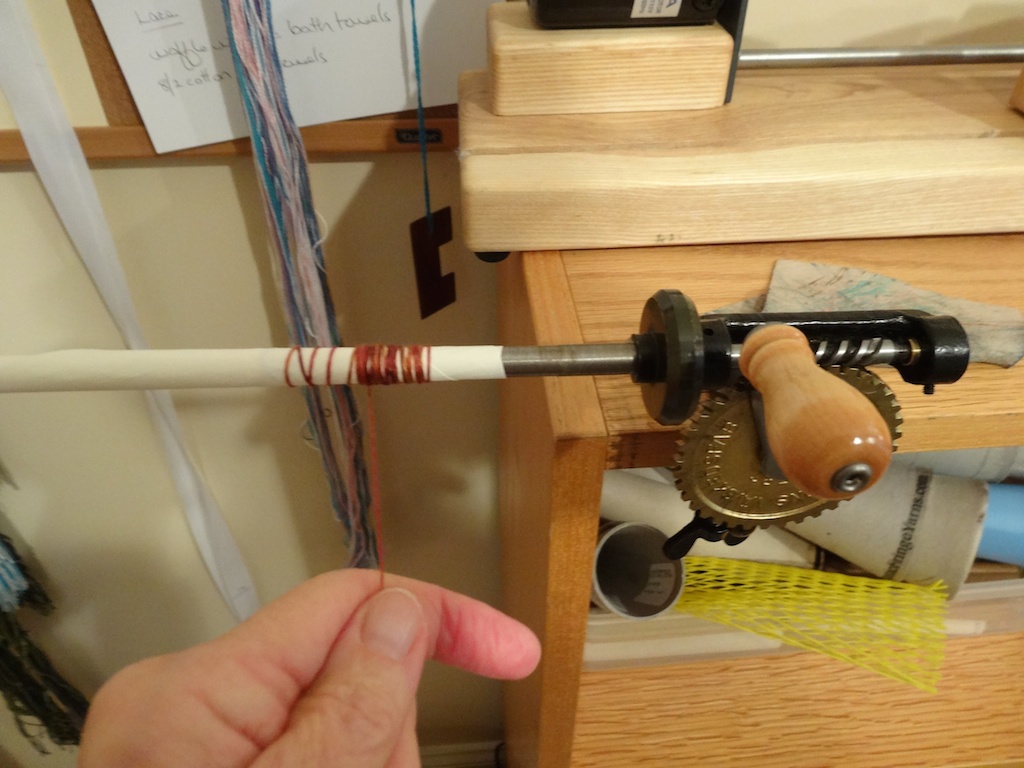
Winding a paper quill: I use a Swedish bobbin winder to wind the paper quills, but any winder should do. First wind the piece of paper tightly around the pirn of the bobbin winder (I start the paper behind the pirn and wind it towards me - see picture). After you get it wound on about half way, stick the end of the yarn in there and keep winding. Once the paper is fully wound on, Start cranking and wind with firm tension on the yarn, forming little bumps on each end and then filling in the middle.
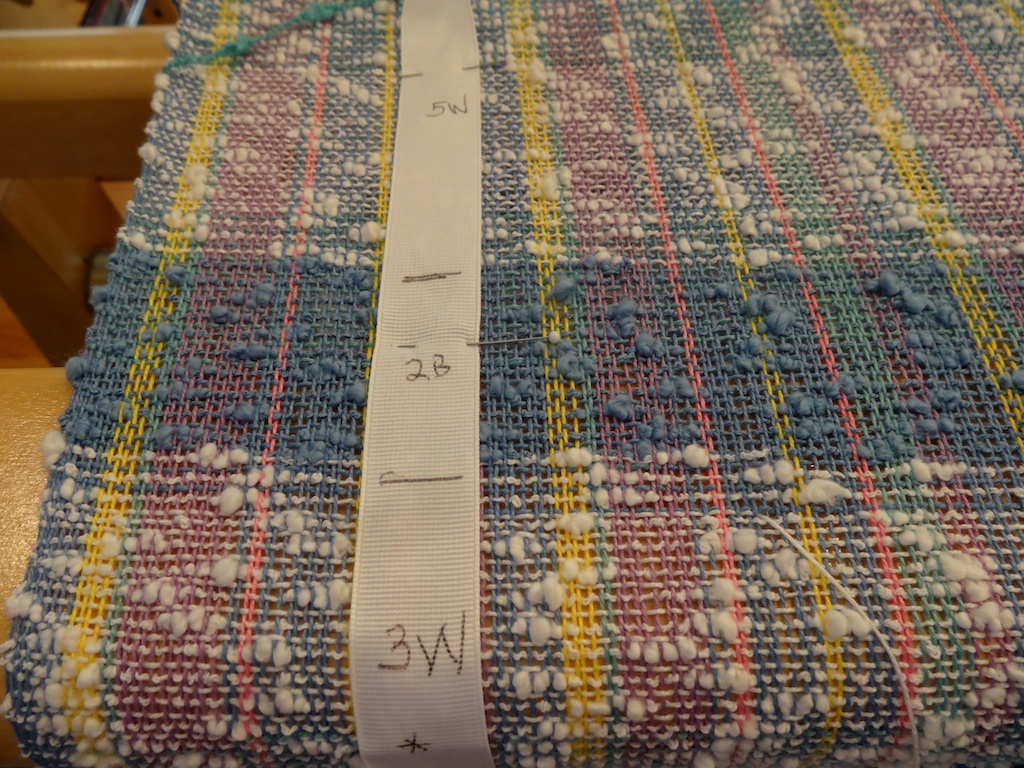
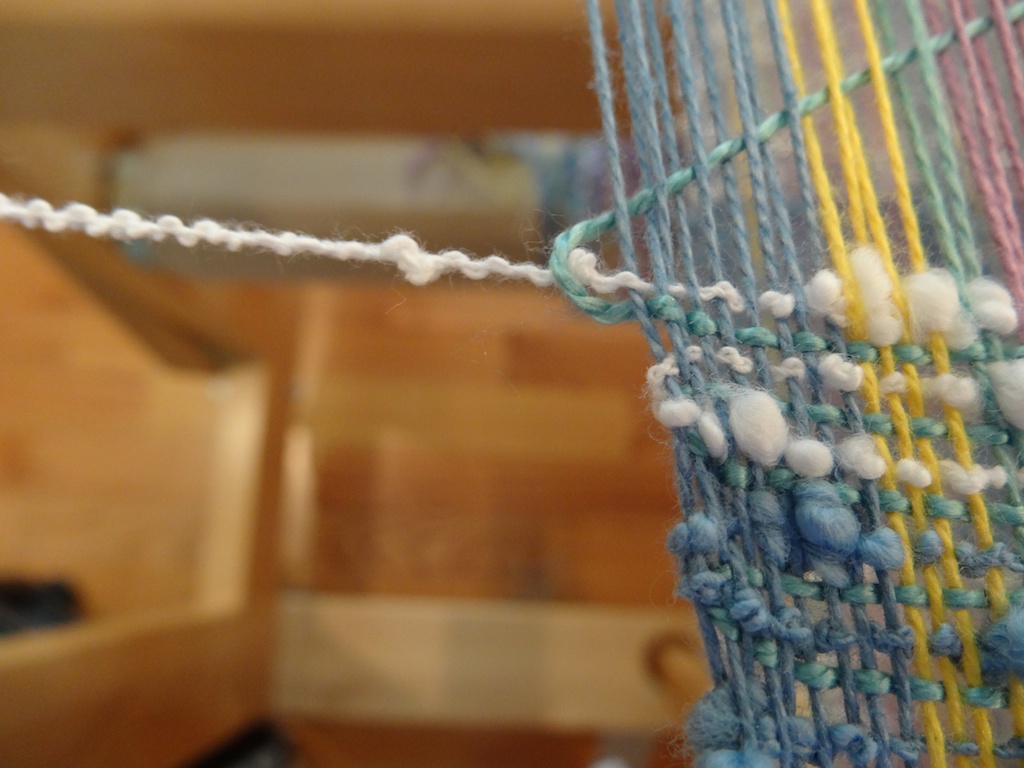
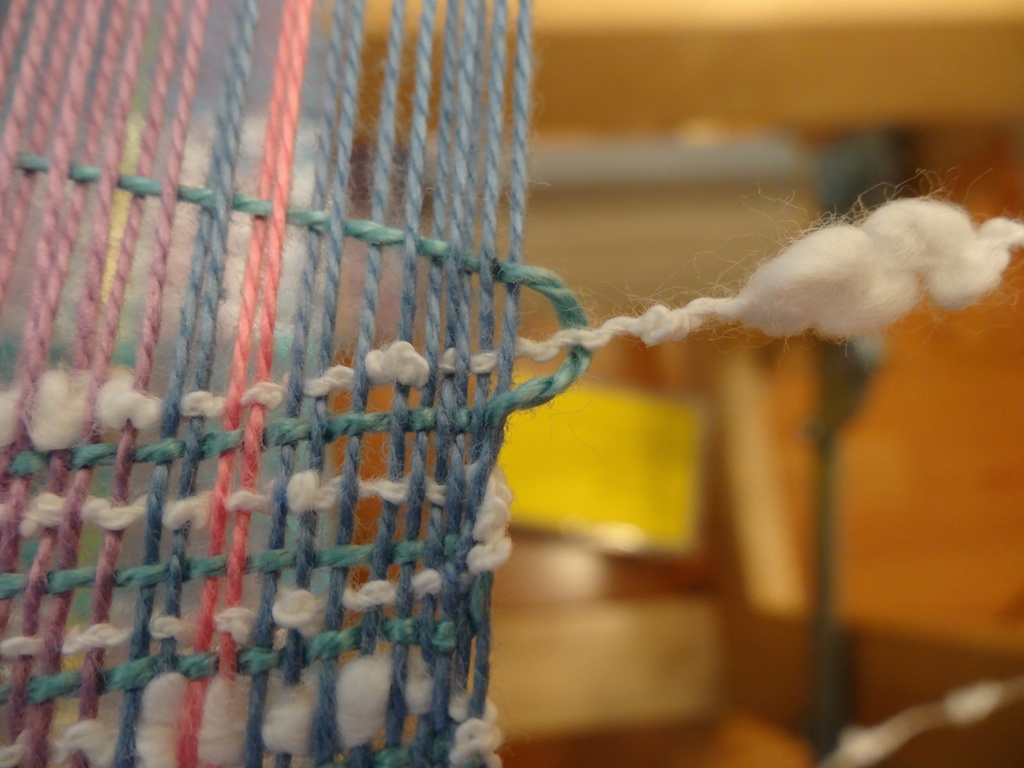
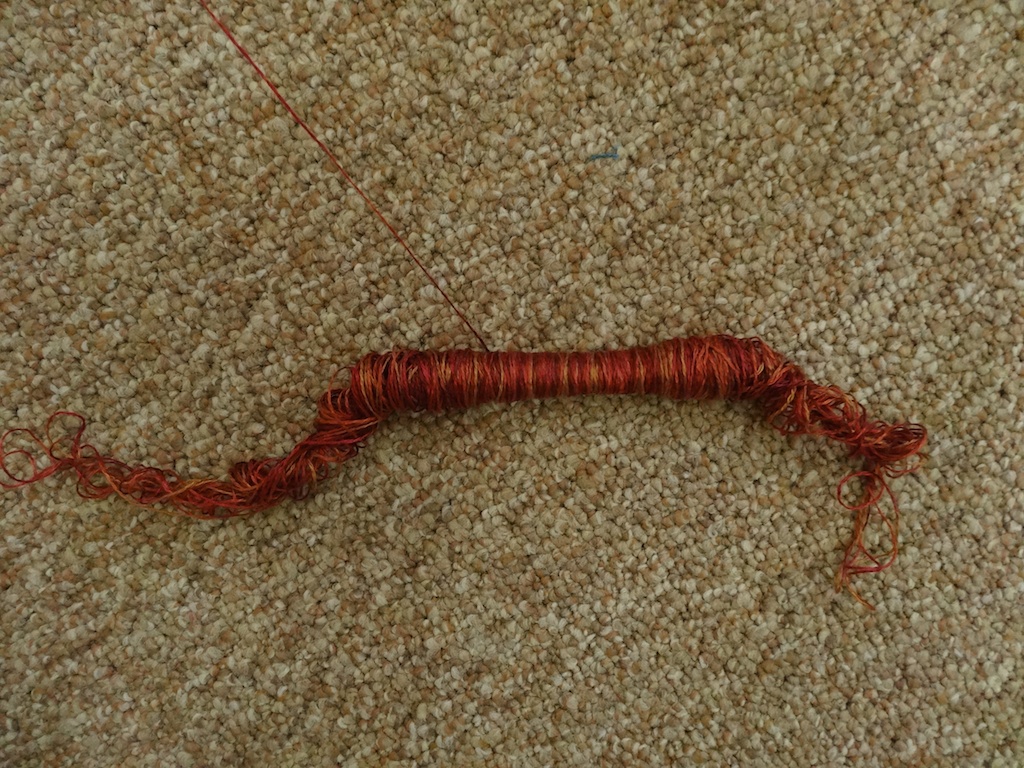
The Bad and the Really, Really Ugly: Okay, so it doesn't always work perfectly. Tip #3 is this: when you wind the paper quill, do NOT wind too close to the ends of the quill. It might look okay at first, but trust me, it will end up looking like this:
It seems fitting that my first blog post should be about a project that was very challenging for me. Every year my guild has a Weavers Challenge. Everyone that participates draws 4 cards that dictate the weave structure, the colors, the fibers, and the finishing techniques that you have to use in a project to be presented to the guild the following year. Last year I drew:
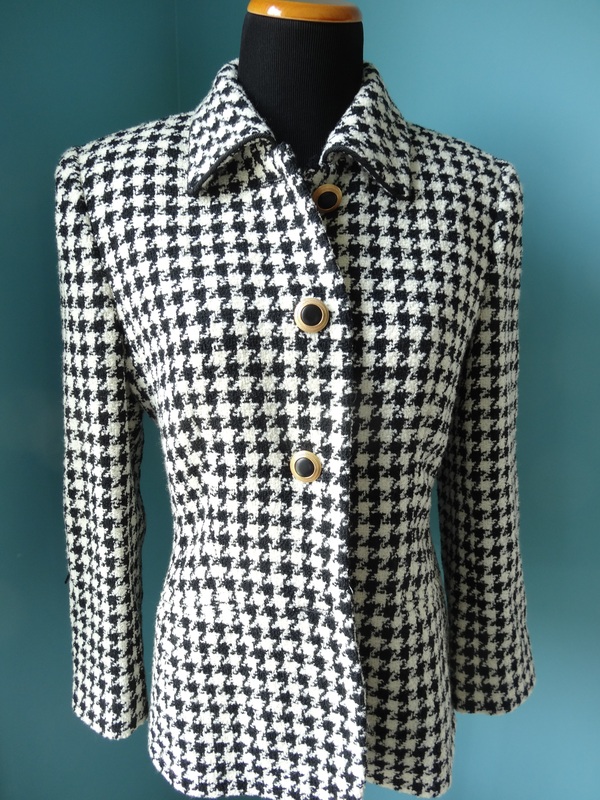
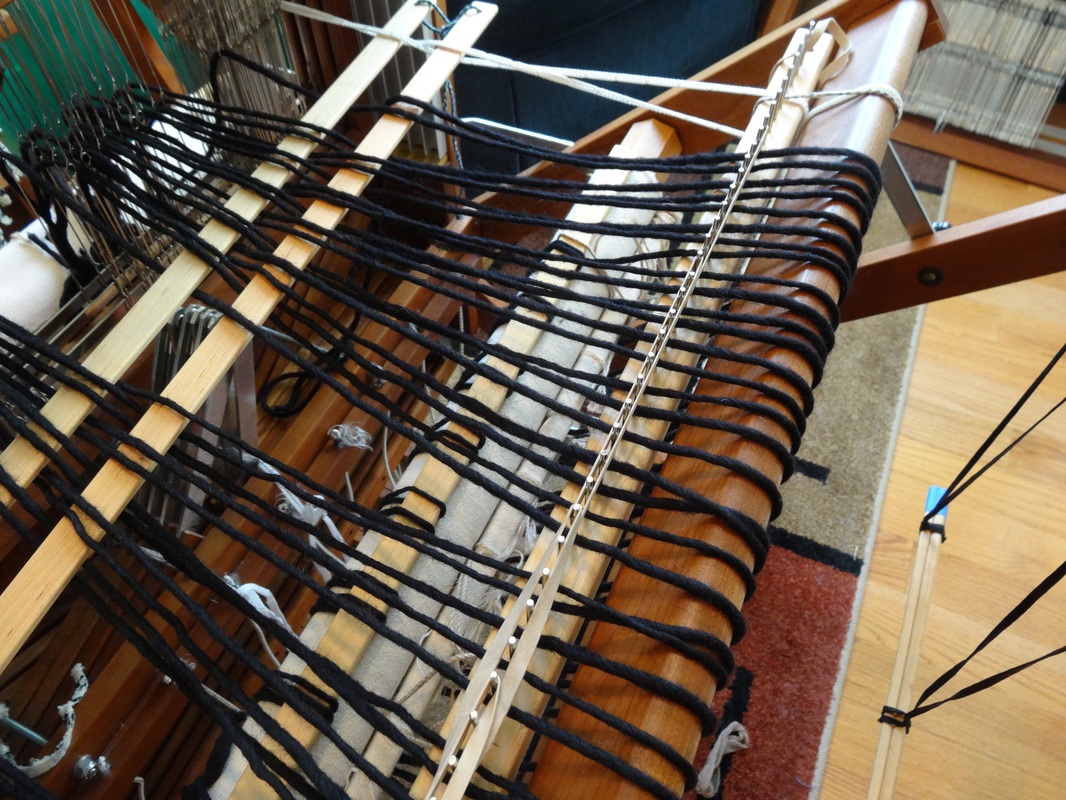
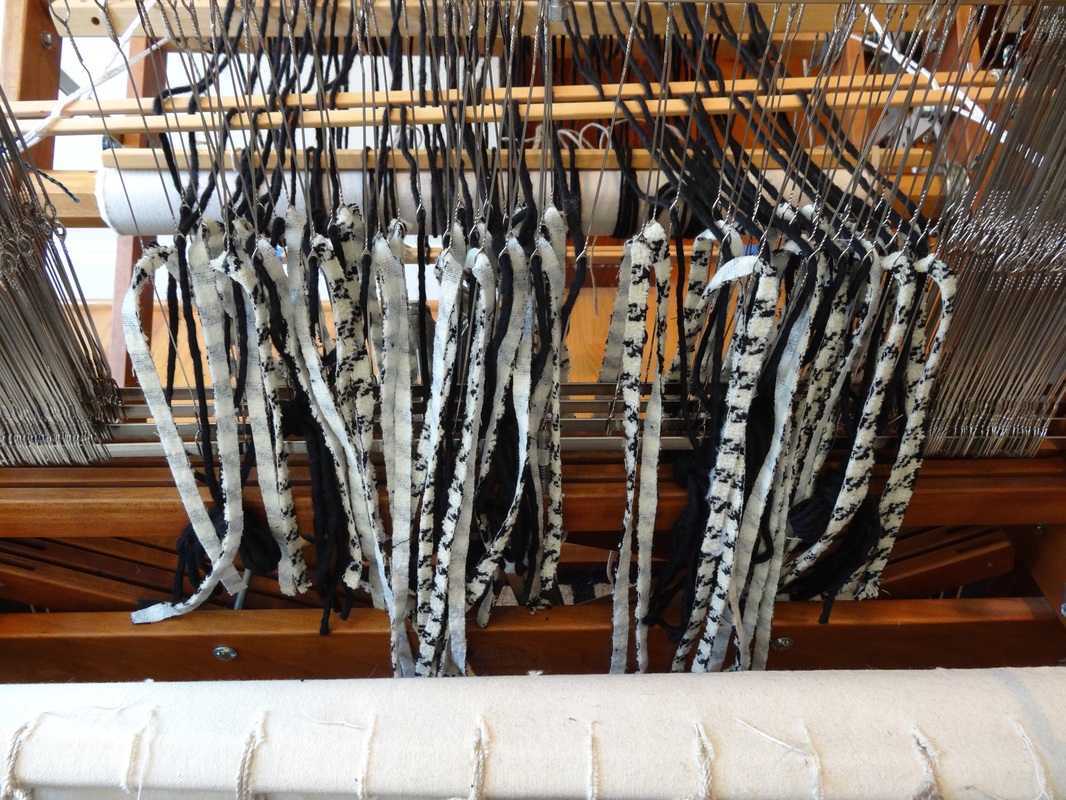
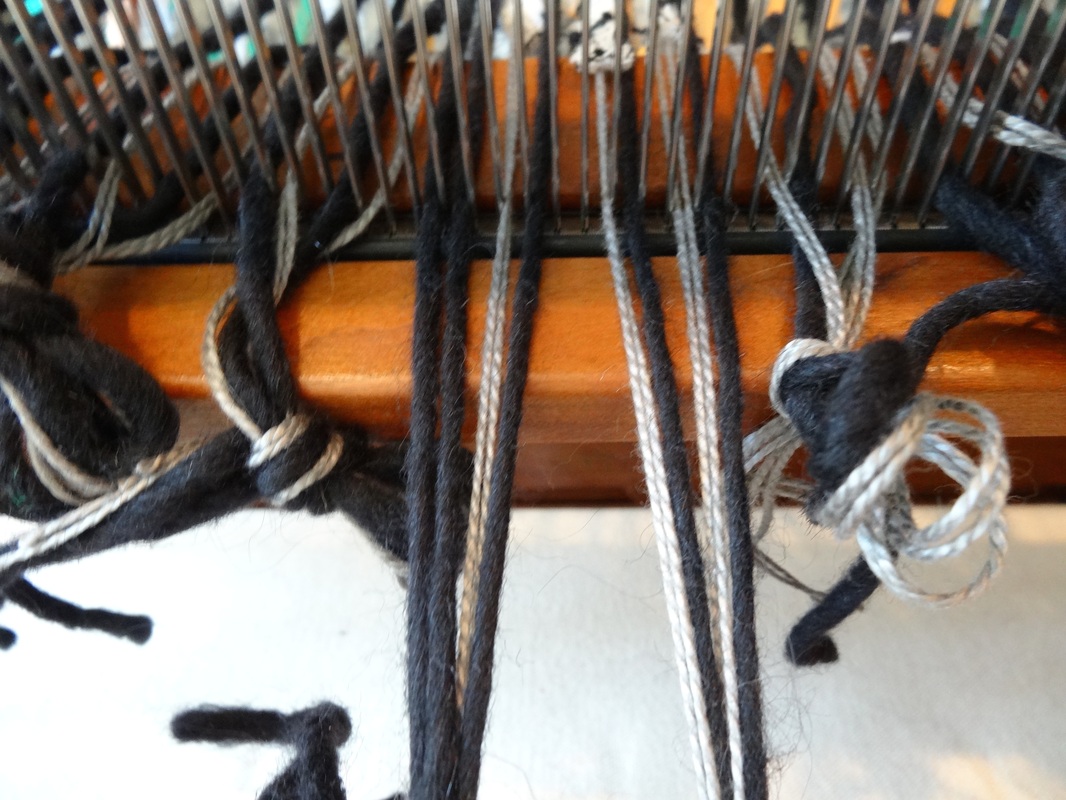
I wound on the bulky black wool warp onto the first back beam and threaded through the heddles, then I threaded each of the white strips through the heddles and let them hang.
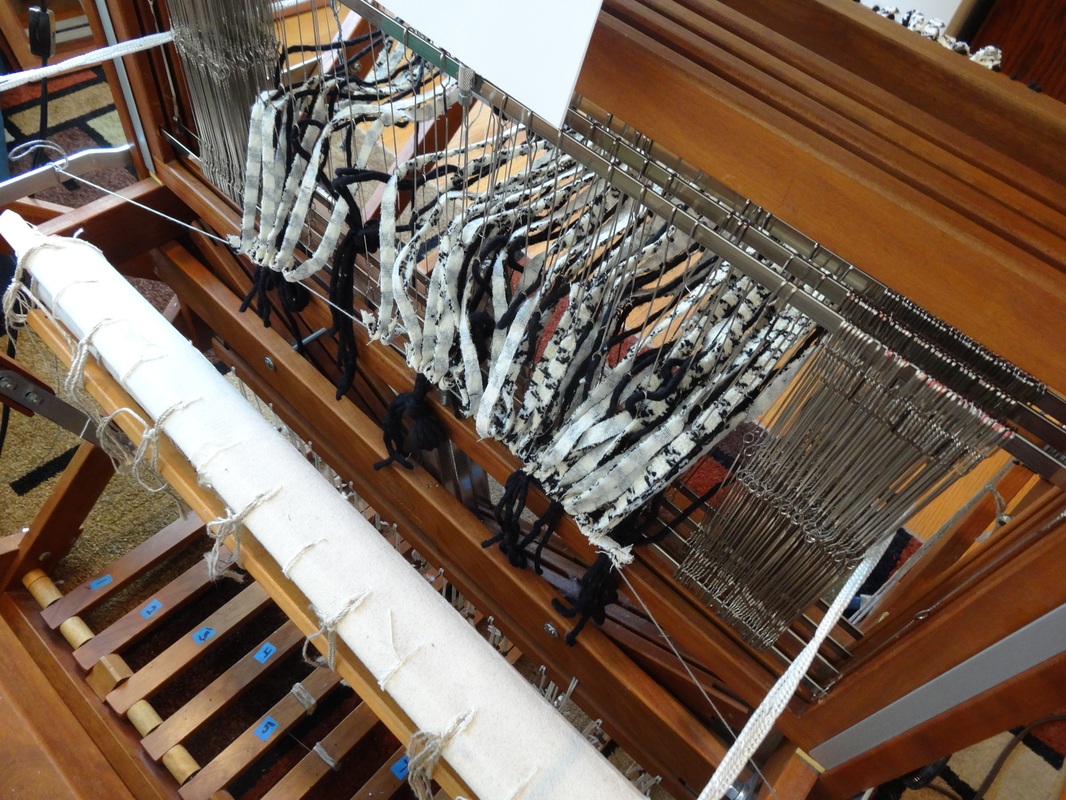
I now had a problem. None of the strips were longer than 15-20" long so I had to improvise to make them long enough to be warp. First I secured them with a length of pearl cotton in front of the castle so I could tension them later behind the castle. In order to wind them onto the second back beam, I had to "extend" each of them with a 2 yard length of pearl cotton which was sewn through the strip, wound around the apron rod and tied to itself to tension the strip.
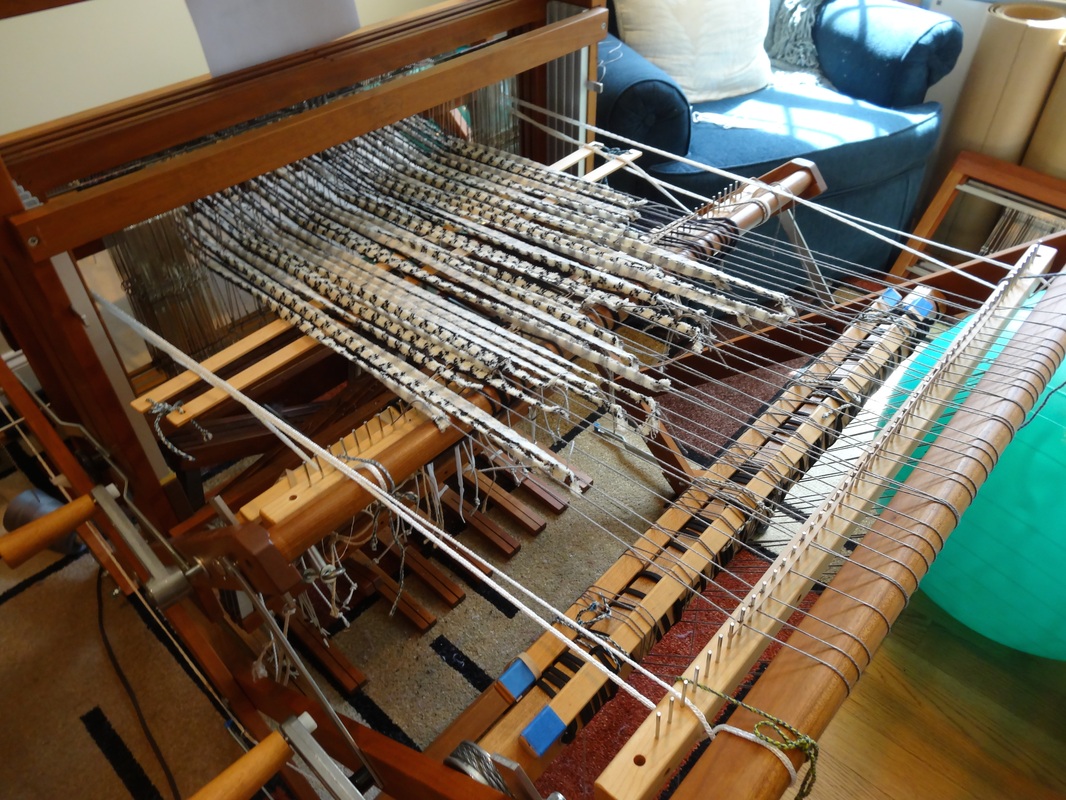
Now to the front of the loom. Same problem. The strips were too short and too thick to thread through the reed and tie on. So I measured a 24" length of pearl cotton to sew through each white strip that could then be dented and tied on to the apron rod with the bulky wool. I began weaving carefully with black knitting yarn until the ends of all of the white strips had made it through the reed. And FINALLY I could begin weaving in log cabin pattern with the white and black cloth strips from Mom's jacket. I had to be careful as I wove to make sure the right side of the warp strips faced up because the underside was interfaced. To help stabilize the cloth, I continued to throw the shuttle of black knitting yarn every time I laid in a black strip of cloth because none of the strips were wider than the warp. You can see the log cabin pattern in the photo below. When I ran out of strips, I cut the cloth from the loom (it measured about 15" x 15", and I quickly zigzagged around all 4 sides. I also ironed on a very lightweight interfacing to the back side to stabilize the cloth.
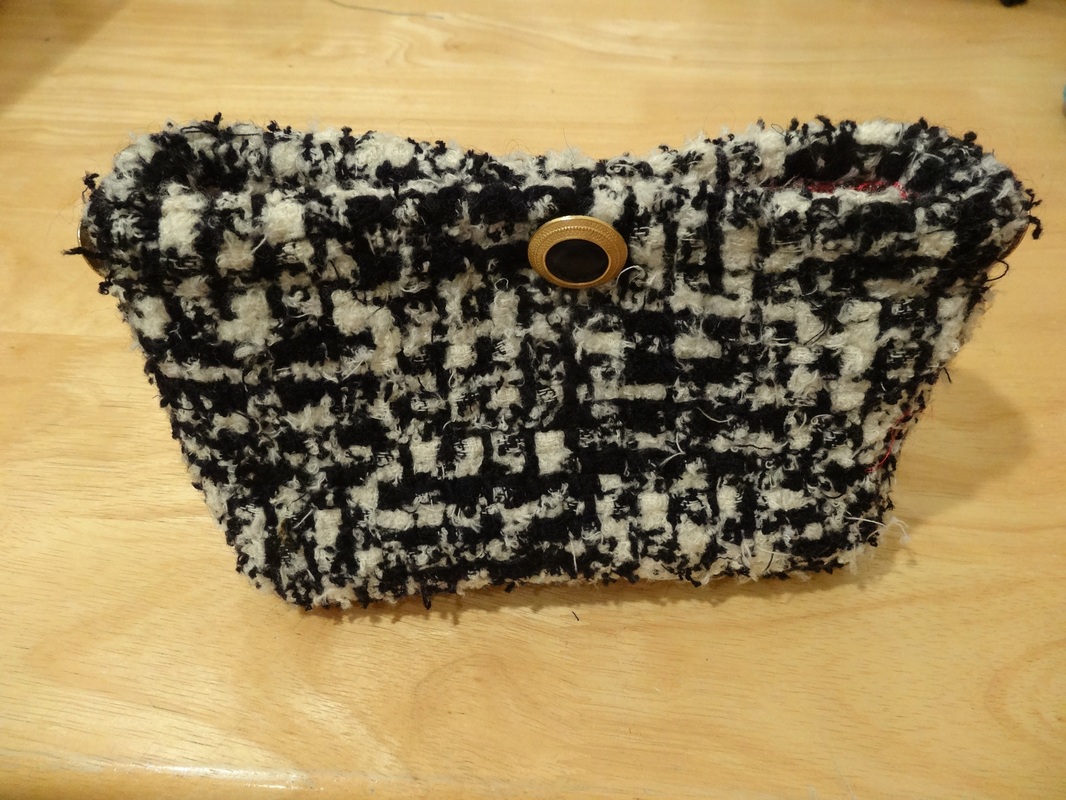
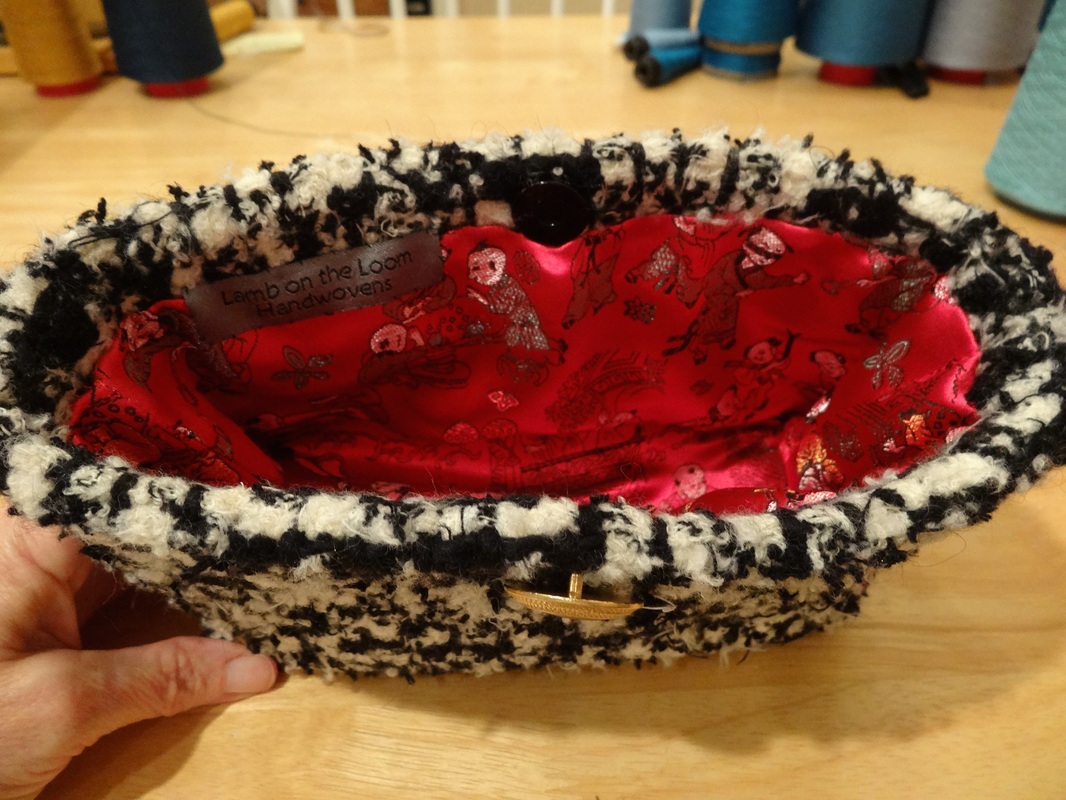
Not done yet. Now I had to make a bag. I am not much of a seamstress, and I fussed with this a lot. I picked out a red lining that reminded me of a block print that hung on my mother's kitchen wall for many years - it was her favorite. I made a little flat-bottomed clutch, and I sewed buttons from the jacket. I put in a magnetic closure and the lining TWICE because I did it wrong and had to do it all over again. But it is completed, and I think she would be pleased.
I did "fail" in my challenge in one regard: I did not brush the fabric on the bag. I know in my heart it would fall apart if I did, so I will brush the scraps to satisfy Ruth Ann, the challenge queen, and be done with it...
|
Pattie LambI have been happily weaving since my son was born in 1988. Archives
June 2023
Categories
All
|


 RSS Feed