Lamb...on the Loom
  • Home
  • SHOP
    • Scarves
    • Shawls & Wraps
    • Throws & Baby Blankets
    • Bags & Purses
    • For the Home
    • Odds & Ends
    • Shop All Handwovens
    • Schacht Equipment
  • Blog
  • Events
  • Gallery
    • Scarves
    • More Scarves
    • Shawls
    • Baby
    • For the Home
    • Just for Fun
    • The Wedding
    • Komen
    • Baby Wraps
  • About
    • Storyboard

paper quills: The Good, the bad, and the really, really ugly

9/26/2014

6 Comments

 
I tend to weave with fine yarns, and when I do, I weave with an end-feed shuttle and pirns.  Yet I still find using paper quills invaluable.  

They can be used instead of a bobbin in a boat shuttle, and I do use them that way when I have to fill lots and lots of paper quills for weaving demos, and I simply don't have enough plastic bobbins available.  I use them instead of plastic bobbins for heavier yarns when the end-feed shuttle won't work
Picture
Picture

In my studio, I use them for storing leftover yarn that comes off of bobbins and pirns.  When I am done with a project, I wind yarn off of my pirns onto paper quills and rubber band them to the cones they belong to.  That way a) I free up my pirns and plastic bobbins, and b) I keep the leftovers strapped to the parent cone so I don't get dye lots mixed up.

So how do you make a paper quill?  
First I make a template out of card stock.  This is oval shaped and about as long as my plastic bobbins and about 2/3 as wide.  I trace 2 of them onto a piece of 20-lb or 24-lb copy paper or brown paper bags and cut out the 2 quills.  I can usually stack 3 or 4 pieces of paper and cut several out at a time.
Picture

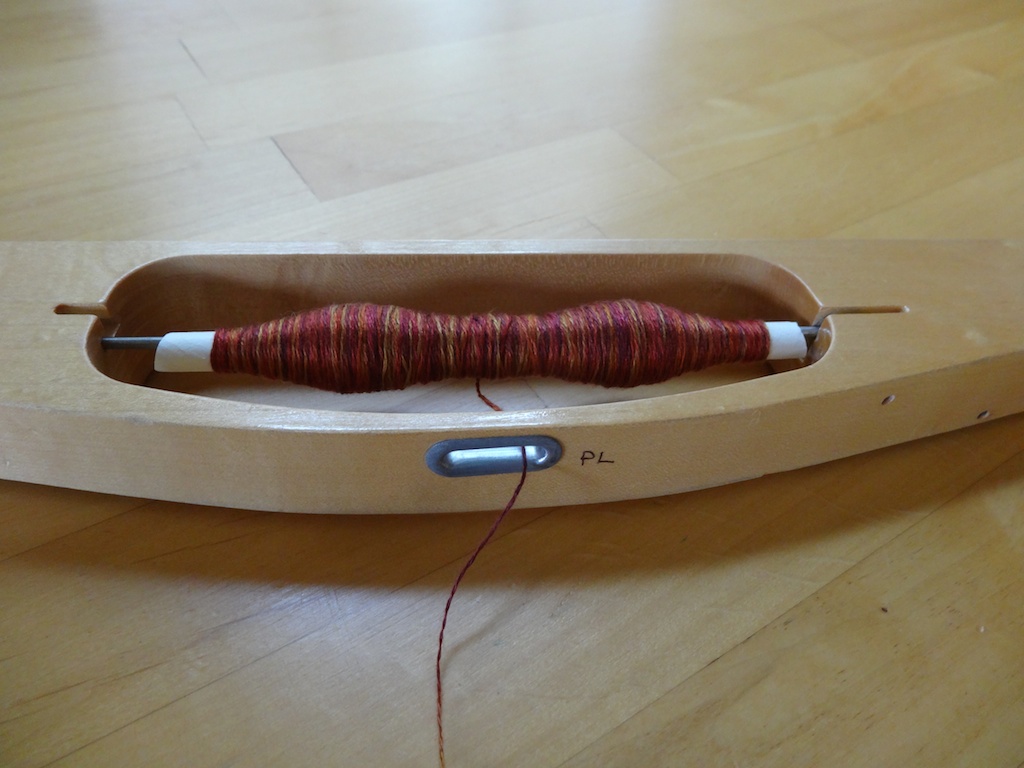
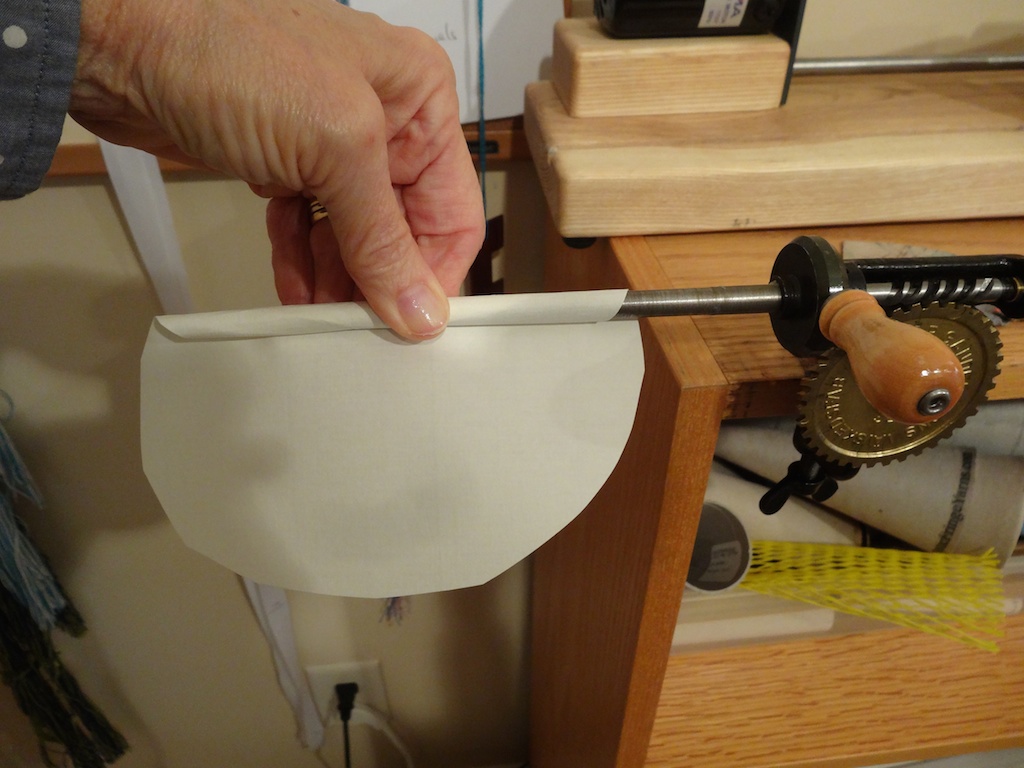
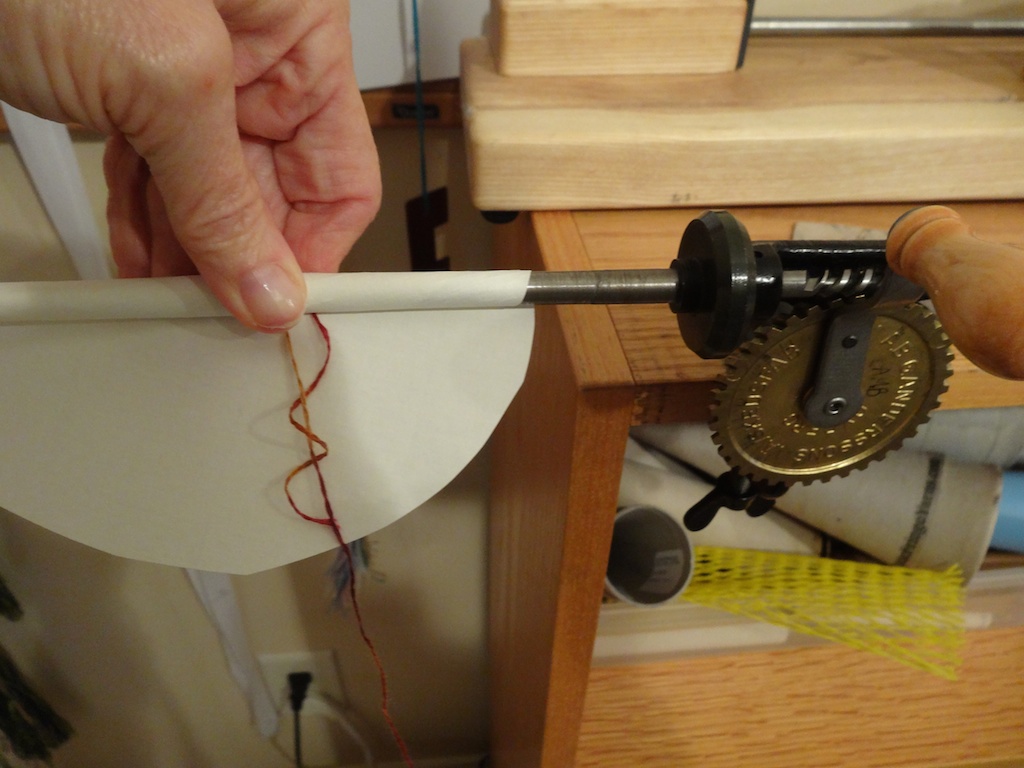
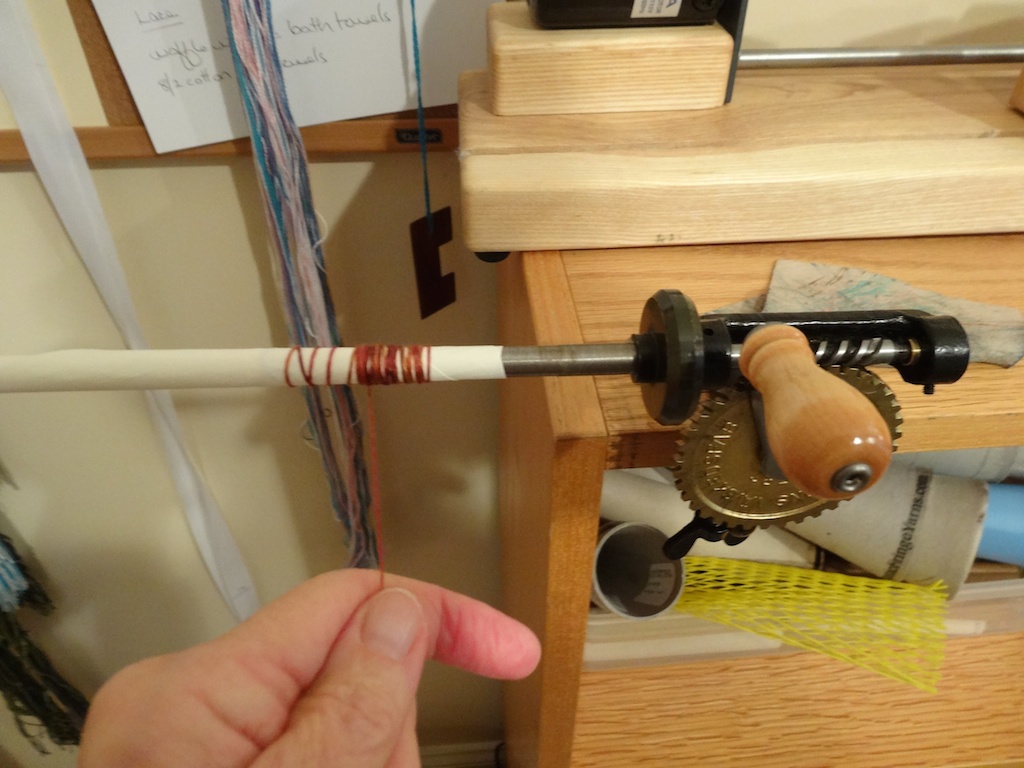
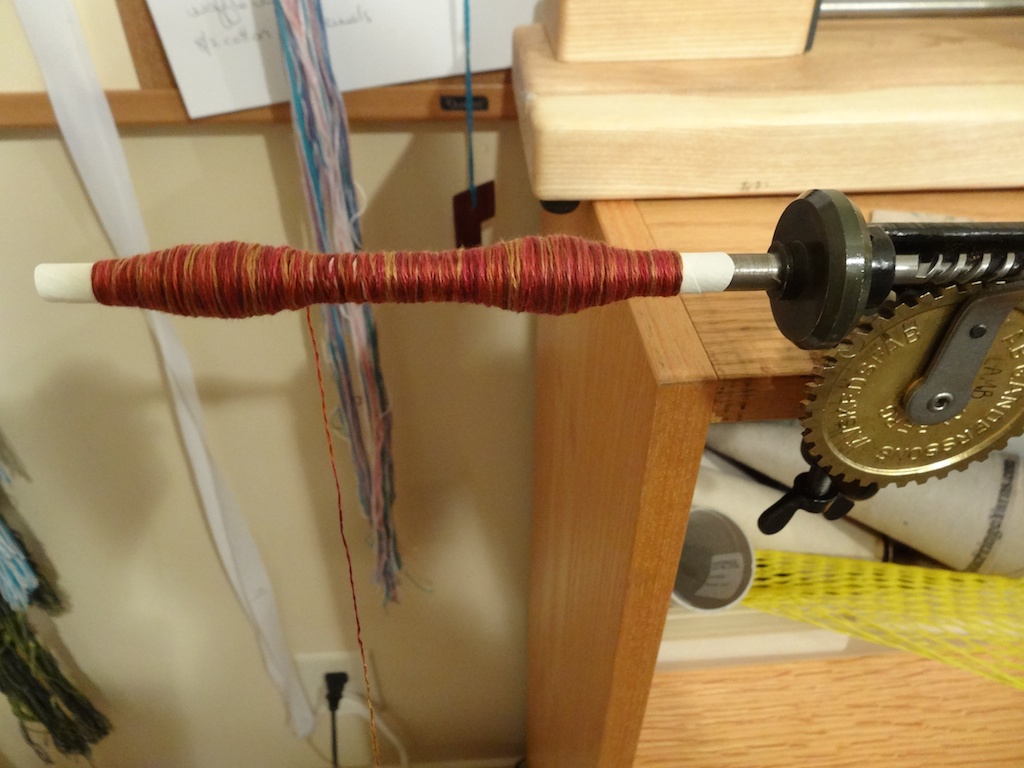
Winding a paper quill:
I use a Swedish bobbin winder to wind the paper quills, but any winder should do.  First wind the piece of paper tightly around the pirn of the bobbin winder (I start the paper behind the pirn and wind it towards me - see picture).  After you get it wound on about half way, stick the end of the yarn in there and keep winding.  Once the paper is fully wound on, Start cranking and wind with firm tension on the yarn, forming little bumps on each end and then filling in the middle.
Picture
Picture
Picture
Picture
TIP #1: To get that paper started winding on tightly, it sometimes helps to lick (yes, lick) the edge that you are wrapping onto the pirn.

TIP #2:  Use a little piece of thin leather around the yarn to help you get good tension of the yarn without getting "rope burn" on your fingers. 
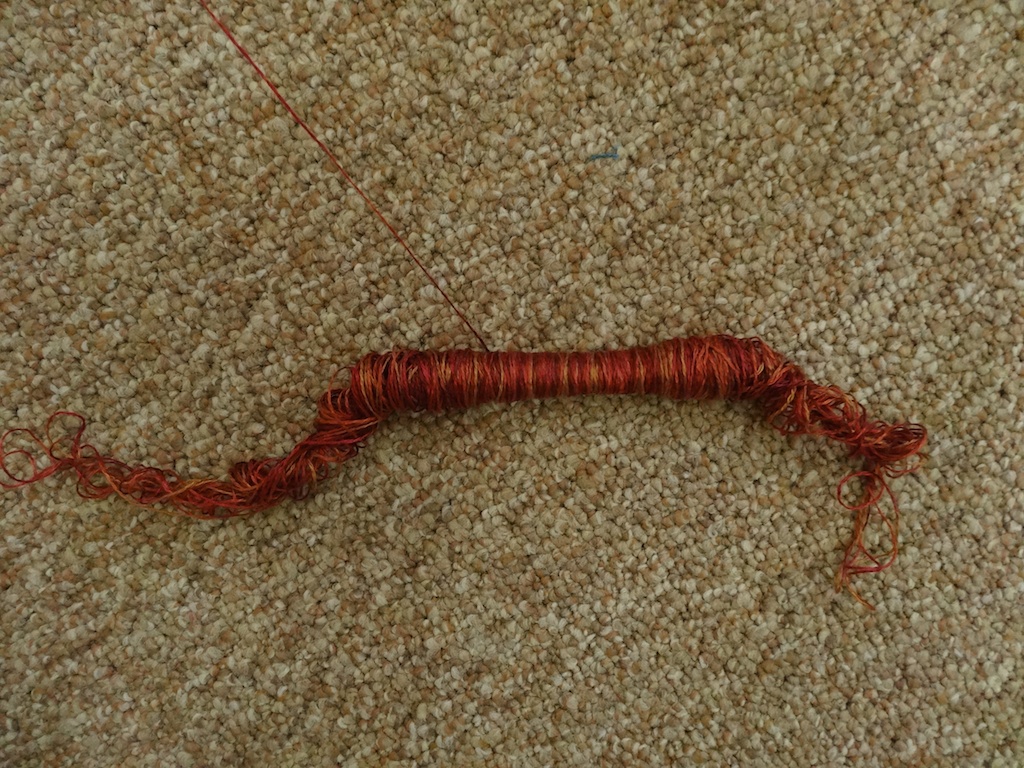
The Bad and the Really, Really Ugly:
Okay, so it doesn't always work perfectly.  Tip #3 is this: when you wind the paper quill, do NOT wind too close to the ends of the quill.  It might look okay at first, but trust me, it will end up looking like this:

Picture
And that is when you spend 30 minutes with the paper quill on the floor while you try to rewind it onto another paper quill.  NOT fun!

But all in all, paper quills can free you from the money pit of buying endless bobbins and save you the headache of not knowing which leftovers go with which cones of yarn.
Try it!
6 Comments
Jane Patterson
10/5/2014 01:05:09 am

I'm going to try this and thanks for tip #3 because I'm pretty sure I would have that happen! I may still have that happen but at least I will know why!

Reply
Janice Kohl
10/7/2014 10:37:24 am

Great instructions and great idea. I am going to free up a lot of bobbins tonight. Where do you put the bobbin that has the left over yarn while you are unwinding it onto the paper quills?

Reply
Pattie
10/7/2014 12:31:18 pm

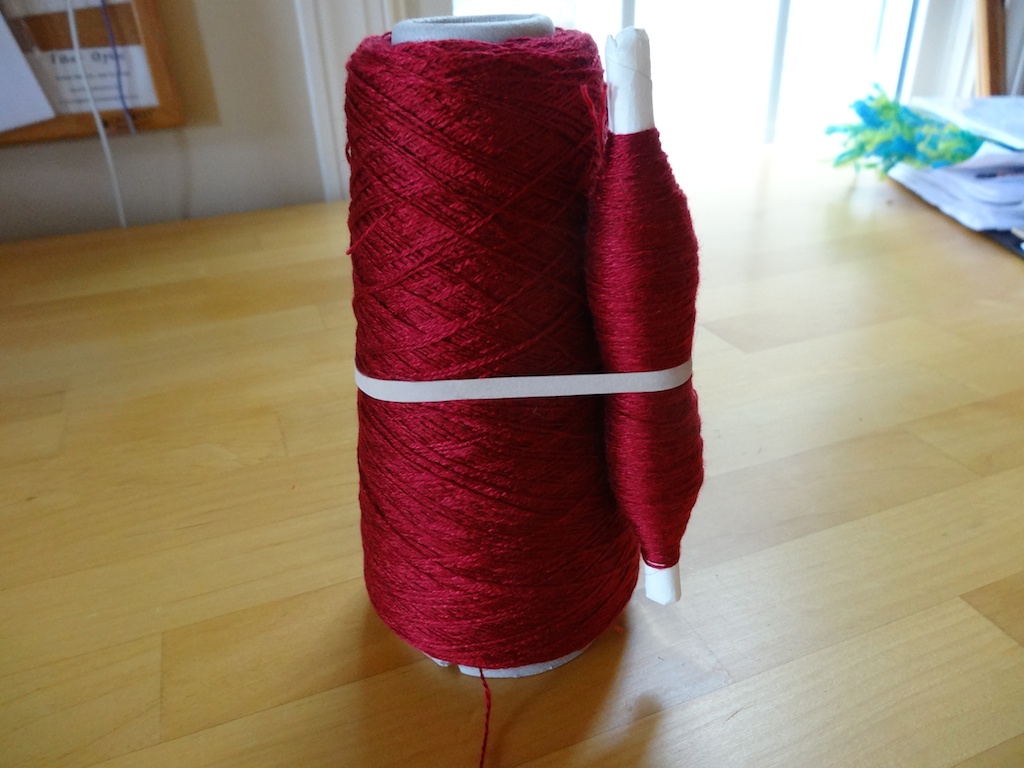
I stick my end-feed pirns on a metal dowel that is mounted vertically in a piece of wood on the floor so the yarn pulls of the top of the pirn. If you were unloading a bobbin, it would be better to stick a dowel through the bobbin and find a way to mount it so the yarn feeds off of it horizontally. That prevents any twist from being added or removed front he yarn.

Reply
Janice Kohl
10/7/2014 01:05:07 pm

Thanks. That makes sense. There are so many things to take into consideration and little tips, tricks and tools to acquire. That is why blogs like this are so invaluable.

Petra Weishaupt-Smith
4/9/2017 05:07:56 pm

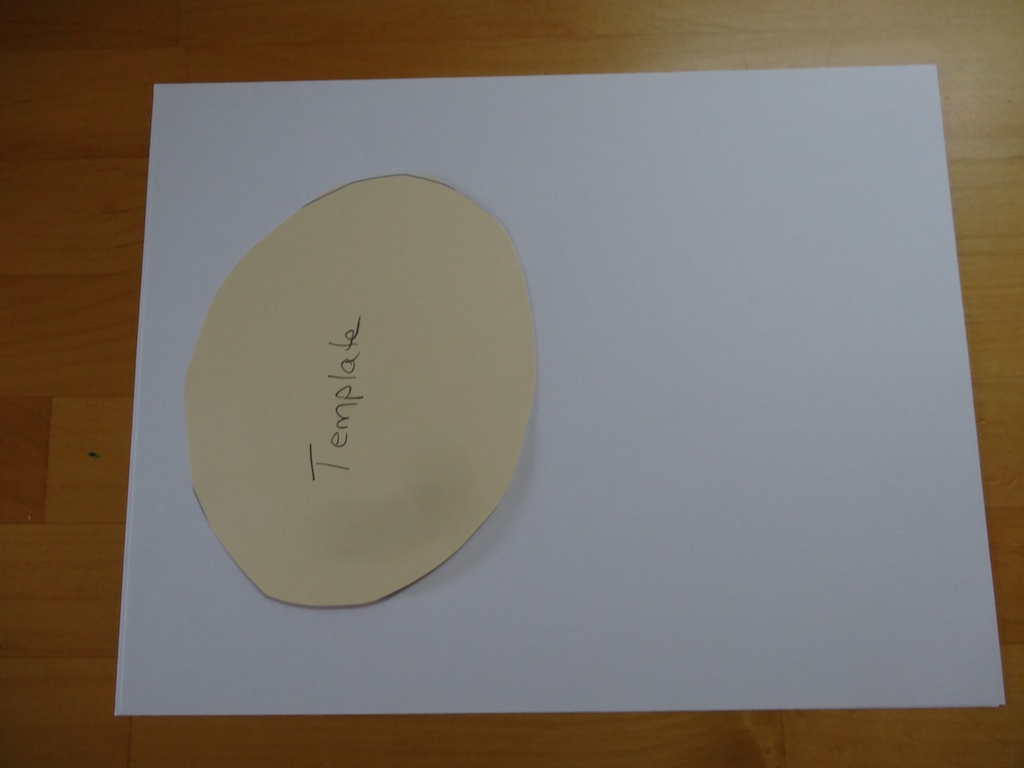
A great idea. I made my first set of paper pirns today with a 4" round plastic quilting template as my guide and some brown paper. It worked like a charm. Pattie, thanks for this great tip. With all of your tips and tricks you have revolutionized my weaving and now I am eagerly planning and weaving new projects each week.

Reply
Pattie
4/10/2017 02:24:49 pm

I am so glad the tips have been helpful, Petra, and so glad to see you weaving so much (and so beautifully!)

Reply

Your comment will be posted after it is approved.


Leave a Reply.

    Pattie Lamb

    I have been happily weaving since my son was born in 1988.

    All pictures on my blog are "zoomable" - just click on them to enlarge.

    Archives

    March 2023
    June 2022
    November 2020
    October 2020
    February 2020
    October 2019
    June 2019
    May 2019
    June 2018
    July 2017
    June 2017
    May 2017
    April 2017
    February 2017
    January 2017
    August 2016
    July 2016
    May 2016
    February 2016
    February 2015
    January 2015
    October 2014
    September 2014

    Categories

    All
    Artificial Intelligence
    Baby Wraps
    Blankets
    Block Twill
    Block Weave
    Block Weaves
    Cat's PJs
    Challenges
    Charity
    ChatGBT
    Classes
    Commissions
    Deflected Doubleweave
    Design
    Doubleweave
    Dyeing
    Facebook Challenge
    Felting
    Hemstitching
    John C Campbell
    Knitting
    Lace Weaves
    Leftovers
    Life History-Day 1
    Life History-Day 2
    Life History-Day 3
    Life History-Day 4
    Life History-Day 5
    Life History-Day 6
    Life History-Day 7
    Life History-Day 8
    Life History-Day 9
    Life History-Final
    Life History Of A Scarf
    More Than Pink
    Paper Quills
    Plain Weave
    Ply Split
    Process
    Rugs
    Runners
    Scarves
    Selvedges
    Shawls
    Storyboard
    Study Group
    Tencel
    Tie-ups
    Tip Of The Month
    Tips
    Tools
    Towels
    Travel
    Treadling For Dummies
    Turned Twill
    Twill
    Videos
    Walking Pink
    Warping
    Weaving
    Weaving Pink
    Weaving Tips
    Wedding
    Yarn Wraps

    RSS Feed

         HOME        //      SHOP      //       BLOG       //        EVENTS       //       GALLERY     //      ABOUT       //      CONTACT

  • Home
  • SHOP
    • Scarves
    • Shawls & Wraps
    • Throws & Baby Blankets
    • Bags & Purses
    • For the Home
    • Odds & Ends
    • Shop All Handwovens
    • Schacht Equipment
  • Blog
  • Events
  • Gallery
    • Scarves
    • More Scarves
    • Shawls
    • Baby
    • For the Home
    • Just for Fun
    • The Wedding
    • Komen
    • Baby Wraps
  • About
    • Storyboard